












The Dashboard is the landing screen of the Nexter SEO module — your SEO overview with score, issues, and module status at a glance. It tells you how healthy your site is, which issues to fix first, and lets you run an audit or schedule automatic scans.
Nexter → Content SEO → Dashboard.
How To Use The Nexter SEO Dashboard?
- Open Nexter → Content SEO. The Dashboard loads by default.
- Read your Site Health Score and check the Critical, Warnings, and Passed tiles.
- Work through the Top Fixes list — click Open on any issue to jump to it, or See all 6 → for the full list.
- Click Run Audit to refresh the score on demand, or Schedule to set up automatic scans.
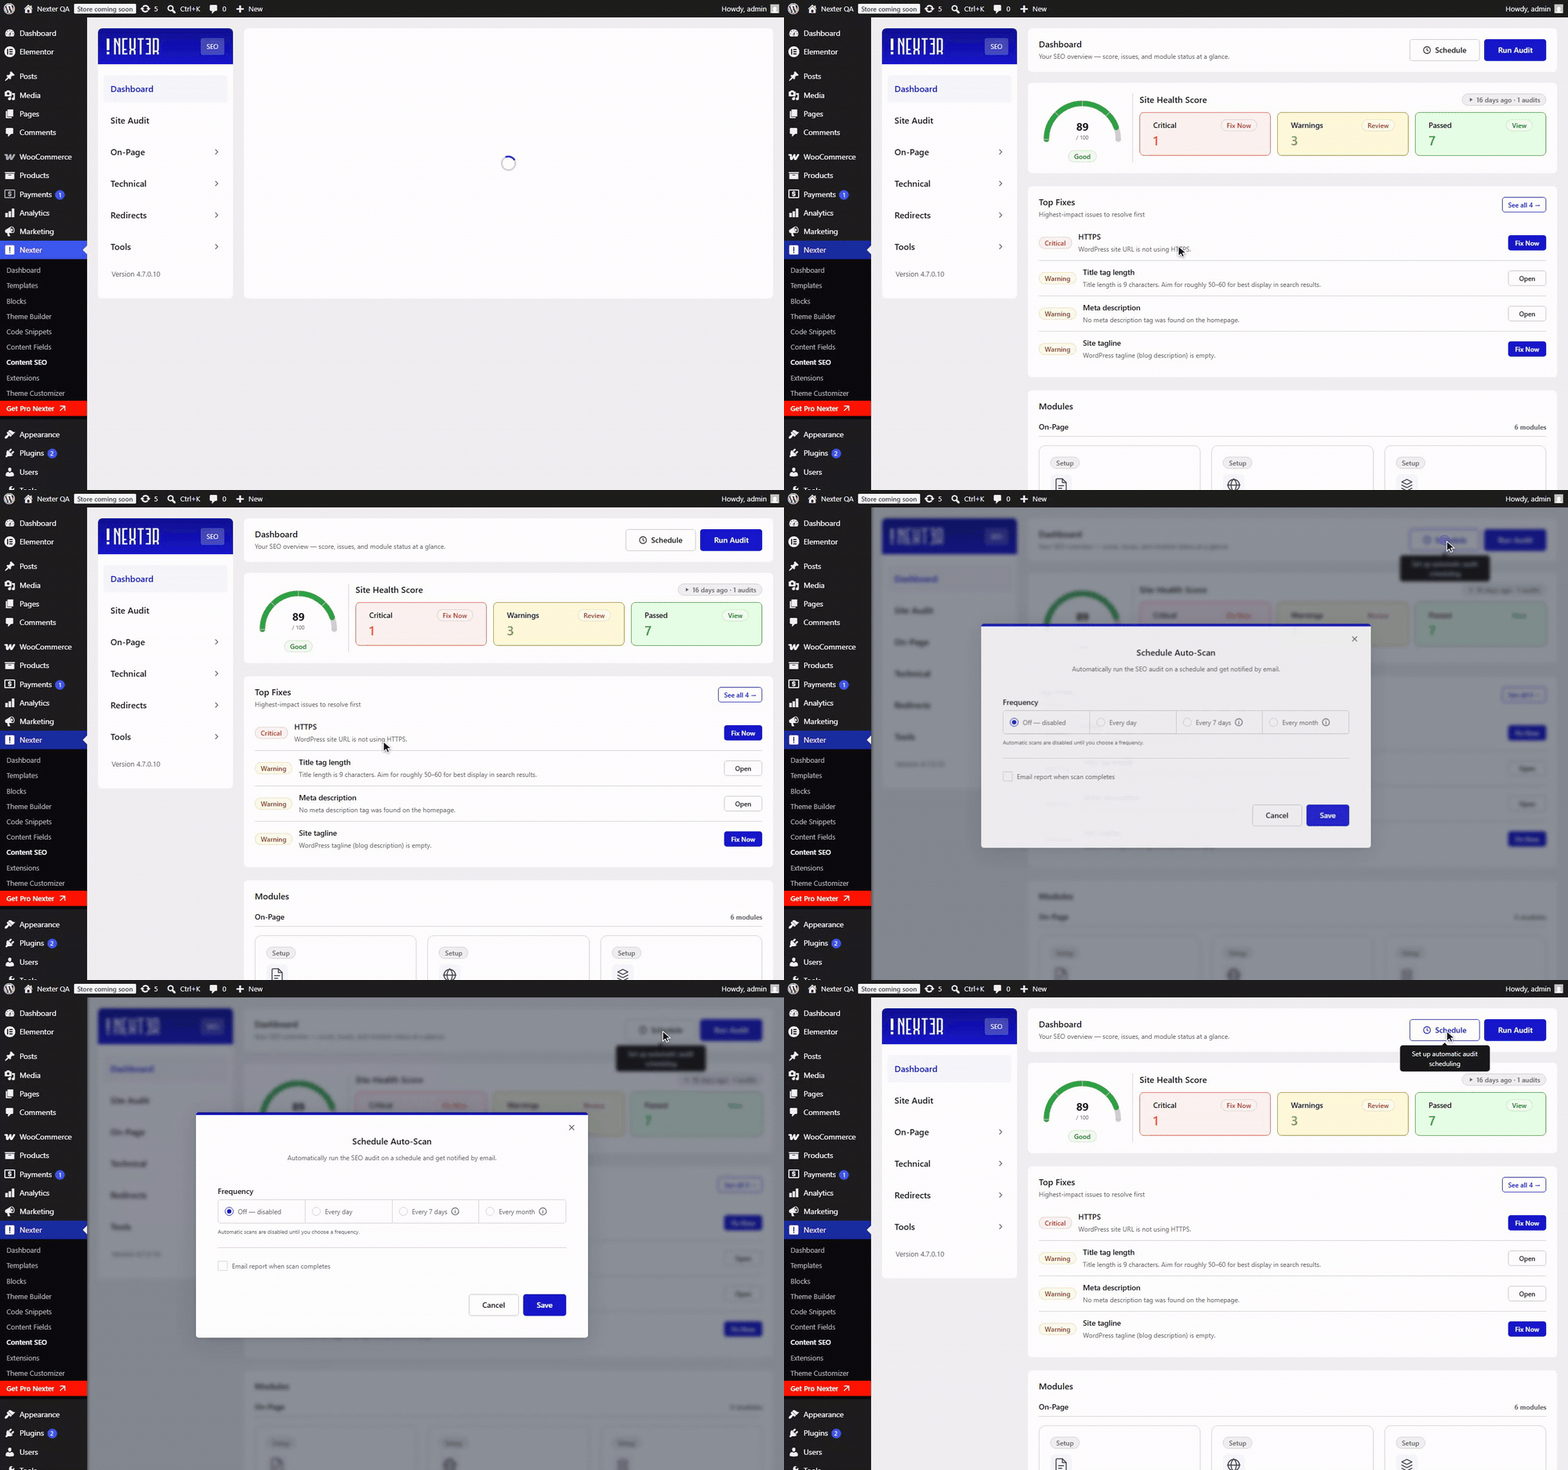
Header Actions
- Run Audit — triggers an on-demand scan and updates the Site Health Score and tiles.
- Schedule — opens the Schedule Auto-Scan modal (tooltip: "Set up automatic audit scheduling").
Site Health Score
- A 0–100 gauge with a band label — for example, 52/100 = "Needs work."
- Shows when the score was last calculated and how many audits have run, for example "5m ago · 3 audits."
Status Tiles
- Critical — count of critical issues (for example, 0 with "All clear").
- Warnings — count of warnings to review (for example, 6 with "Review").
- Passed — count of passed checks (for example, 9 with "View").
Top Fixes
"Highest-impact issues to resolve first." Each issue has an Open button that takes you to the relevant setting, plus a See all 6 → link for the complete list. Example issues surfaced here include Canonical tag, Title tag length, Meta description, and H1 heading count.
Modules
Shows the six Nexter SEO modules and their status (On-Page, Technical, and so on), so you can see at a glance what is configured.
Schedule Auto-Scan Modal
Open it with the Schedule button. Modal title: "Schedule Auto-Scan — Automatically run the SEO audit on a schedule and get notified by email."
- Frequency — choose one: – Off — disabled (default) – Every day – Every 7 days – Every month – Note shown in the modal: "Automatic scans are disabled until you choose a frequency."
- Email report when scan completes — checkbox. Turn it on to receive the audit result by email each time a scheduled scan finishes.
- Cancel / Save — save to activate the schedule.
Good To Know
- Automatic scans stay off until you pick a frequency other than Off. If you scheduled a scan but nothing runs, check that Frequency is set.
- Enable Email report when scan completes so you hear about new issues without opening the panel.
- The Site Health Score reflects your most recent audit. Run an audit after making SEO changes to see the score update.
Troubleshooting
- The score hasn't changed after I fixed something. Click Run Audit — the Dashboard shows the last completed audit, not live results.
- No scheduled scans are running. Open the Schedule Auto-Scan modal and confirm Frequency is set to a value other than Off, then click Save.
Related: Running A Site Audit · Getting Started With Nexter SEO
This is how you can track your site health from the Nexter SEO Dashboard.
