












A clear notification email for every submission means you never miss a lead or a support request.
The free Form block in Nexter Blocks emails each submission to the addresses you choose, with your own subject and heading.
For every Form setting in one place, see the Form block guide.
Before You Start
- Edition: Free — works in Nexter Blocks (free) and with Nexter Blocks Pro.
- Block to enable: Form, switched on under Nexter > Blocks in your WordPress dashboard.
- Working email on your site: use an SMTP plugin so notifications do not land in spam.
Steps
- Add the Form block to your page, click Design from Scratch and choose Simple Contact Form or Newsletter Form.
- Select the Form block (not a field inside it). In Action After Submit, open Options and choose Email. You can keep Email selected as well.
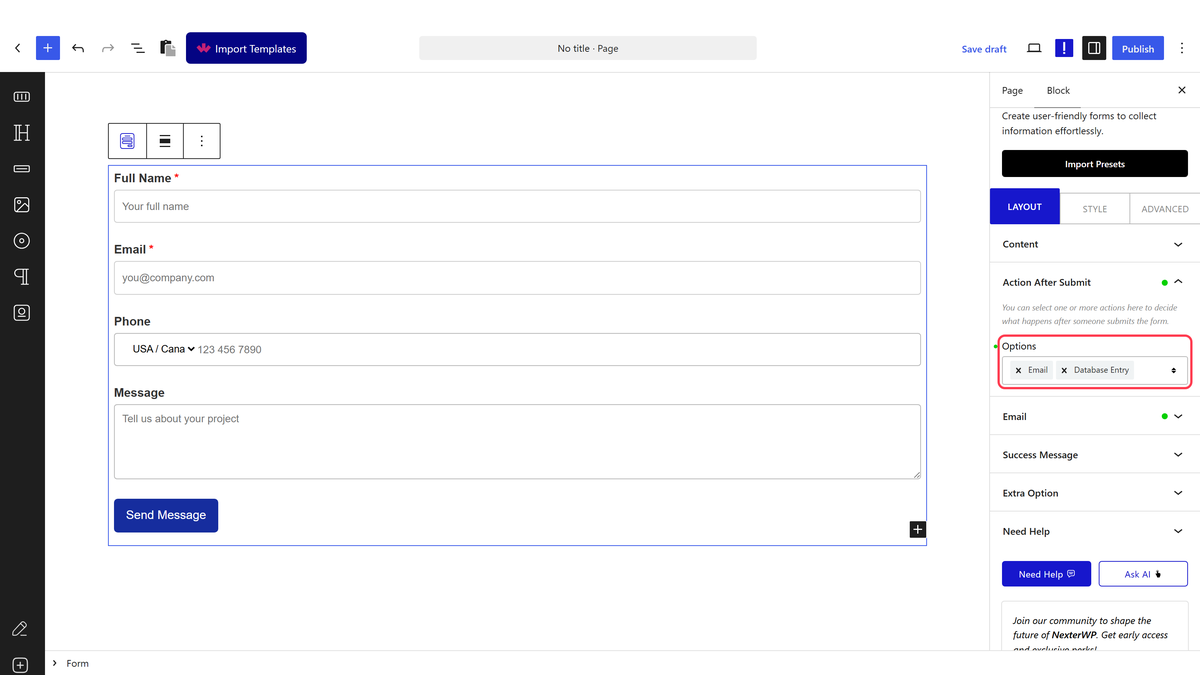
- Open the Email panel that appears and set where and how the email is sent.
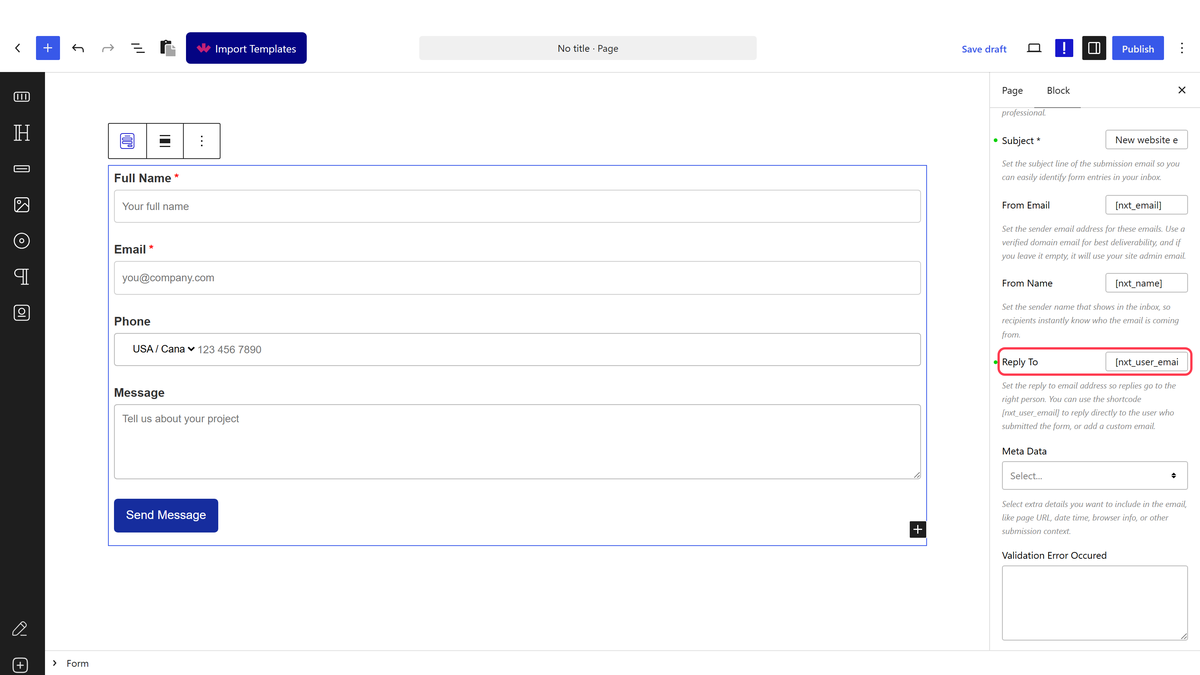
- Enter one or more addresses in To, separated by commas, and add a Subject.
- Optional: set Email Heading, From Email, From Name and Reply To, and pick extra details in Meta Data.
- Save the page, then submit the form once on the front end to test the connection.
Email Settings
| Setting | What it does |
|---|---|
| To | Who receives the email. It starts with your site’s admin email; separate several addresses with commas |
| CC and BCC tabs | Extra recipients who get a copy. BCC addresses are hidden from the other recipients |
| Email Heading | The heading at the top of the email. Default: You have received a new form submission: |
| Subject | The email subject. Default: New Form Submission |
| From Email | Sender address. The default [nxt_email] uses your site’s admin email |
| From Name | Sender name. The default [nxt_name] uses your site title |
| Reply To | Where replies go. Enter [nxt_user_email] to reply straight to the visitor |
| Meta Data | Adds Date, Time, Page URL, User Agent or Remote IP below the fields |
| Validation Error Occured / Sender’s Message Send To Failed | Messages shown to the visitor when the data is invalid or the email cannot be sent |
How It Behaves
- The email lists every filled field by its label, then the Meta Data you picked.
- Date and Time in Meta Data use UTC, not your site’s time zone.
- In the free plugin the email ends with a short “Powered by Nexter Form” line.
Limitations
- Delivery depends on your site’s email setup. Without SMTP, messages can be blocked or marked as spam.
- Use a From Email on your own domain for the best delivery.
Troubleshooting
No email arrives
Check the To address and your spam folder, then install an SMTP plugin and send a test email from it.
Replies go to the site admin instead of the visitor
Enter [nxt_user_email] in Reply To. The form must have an Email Address field.
