Creating a custom header template in WordPress allows users to add unique and creative elements to their website, such as navigation menus, logos, search bars, and more. Creating a custom header template in WordPress can be a challenging task, but with the Nexter Builder, you can easily create a unique and customised header template for your website.
Requirement – This is a feature of Nexter theme and Nexter Extension (Free) plugin, make sure its installed & activated to enjoy all its powers.
To create a header template using the Nexter Builder, from the Dashboard, go to Nexter Builder > Add New.
On the next page, give a name to your template.
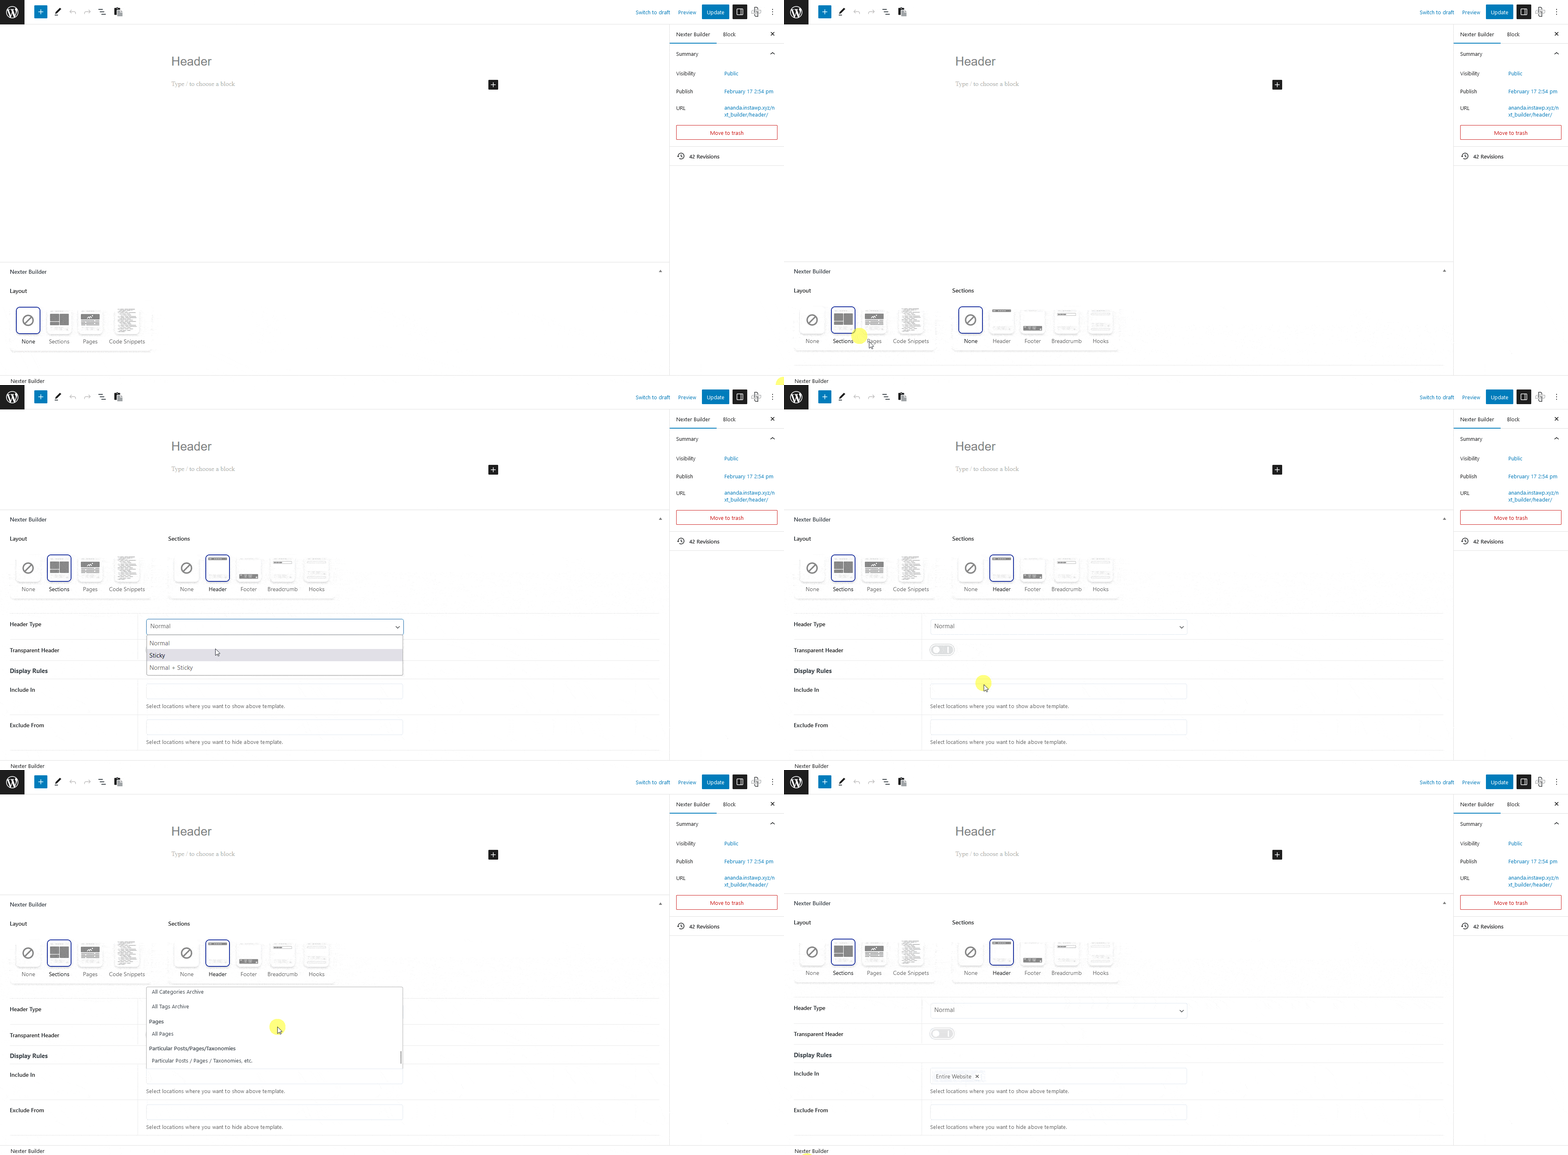
Now scroll down to the Nexter Builder section. From the Layout, select Sections, and from Sections options, select Header.

From the Header Type dropdown, you can select the header type. Here you’ll find three options –
Normal – This is to create a normal header.
Sticky – This will make the header sticky at the top. The header will be visible only when users start to scroll down, and it will stay at the top.
Normal + Sticky – If you want the sticky header to be visible from the start, then select this option. This will make the header stick at the top from the beginning.
Select the header type that fits your need.
If you turn on the Transparent Header toggle, it will make the header slightly overlap the first section of the page.
Now, from the Display Rules section, you have to set where this header will show or won’t show. Here you’ll find two sections –
Include In – Whichever location you select here, the template will be visible only there.
Exclude From – Whichever location you select here, the template will not show there.
In both sections, you’ll see common location options.
Entire Website – This will apply the display rules on the entire website.
All Singulars – This will apply the display rules on all the single pages of the website. Like single page, single post etc.
All Archives – This will apply the display rules on all the archive pages of the website. Like date archive, search archive etc.
Front Page – This will apply the display rules on the home page of the website.
Blog / Posts Page – This will apply the display rules on the blog page.
Date Archive – This will apply the display rules on the date archive template.
Author Archive – This will apply the display rules on the author archive template.
Search Page – This will apply the display rules on the search archive template.
404 Page – This will apply the display rules on the 404 page template.
Day of Week – With this, you can set the display rule for specific days of the week. You have to use this option with other display options to set the location of the template.
Operating System – With this, you can set the display rule based on the user operating system. You have to use this option with other display options to set the location of the template.
Browser – With this, you can set the display rule for different browsers. You have to use this option with other display options to set the location of the template.
Login Status – With this, you can set the display rule based on the user’s login status. You have to use this option with other display options to set the location of the template.
User Roles – With this, you can set the display rule based on the user’s role. You have to use this option with other display options to set the location of the template.
All Posts – This will apply the display rules on all the blog posts.
All Posts Archive – This will apply the display rules on all posts archive, like all taxonomy pages, author pages etc..
All Categories Archive – This will apply the display rules on all categories archive pages.
All Tags Archive – This will apply the display rules on all tags archive pages.
All Pages – This will apply the display rules on all the pages.
Particular Posts / Pages / Taxonomies, etc.- With this option, you can set display rules for specific posts, pages, taxonomies etc.
Note: You’ll get additional plugin specific display options for Elementor, Woocommerec and Custom Post Type plugins.
Note: In both sections, you can add multiple locations.
Once you set the appropriate display rule for your template, publish the template.
After that, you can use the WordPress blocks or Elementor to create the actual content and layout of the template. To enhance your design process, you can use The Plus Addons for Block Editor blocks for WordPress block editor or The Plus Addons for Elementor widgets for Elementor.
Also, check How to Create Footer Template in WordPress for Free.


