


Here you’ll find some general settings which will affect the entire website. Here you’ll find settings for the container, header, footer, sidebar, body style, selection text colour and maintenance mode.
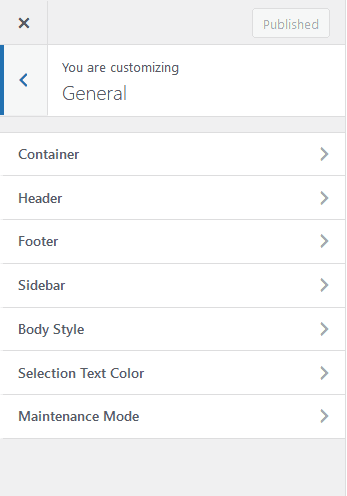
Container
Container is the area that contains all the content of a specific section. In Nexter, you’ll find multiple containers for different sections like header, footer, body, page, single post and archive post. From here you can manage all those containers.
For each container you’ll find three options –
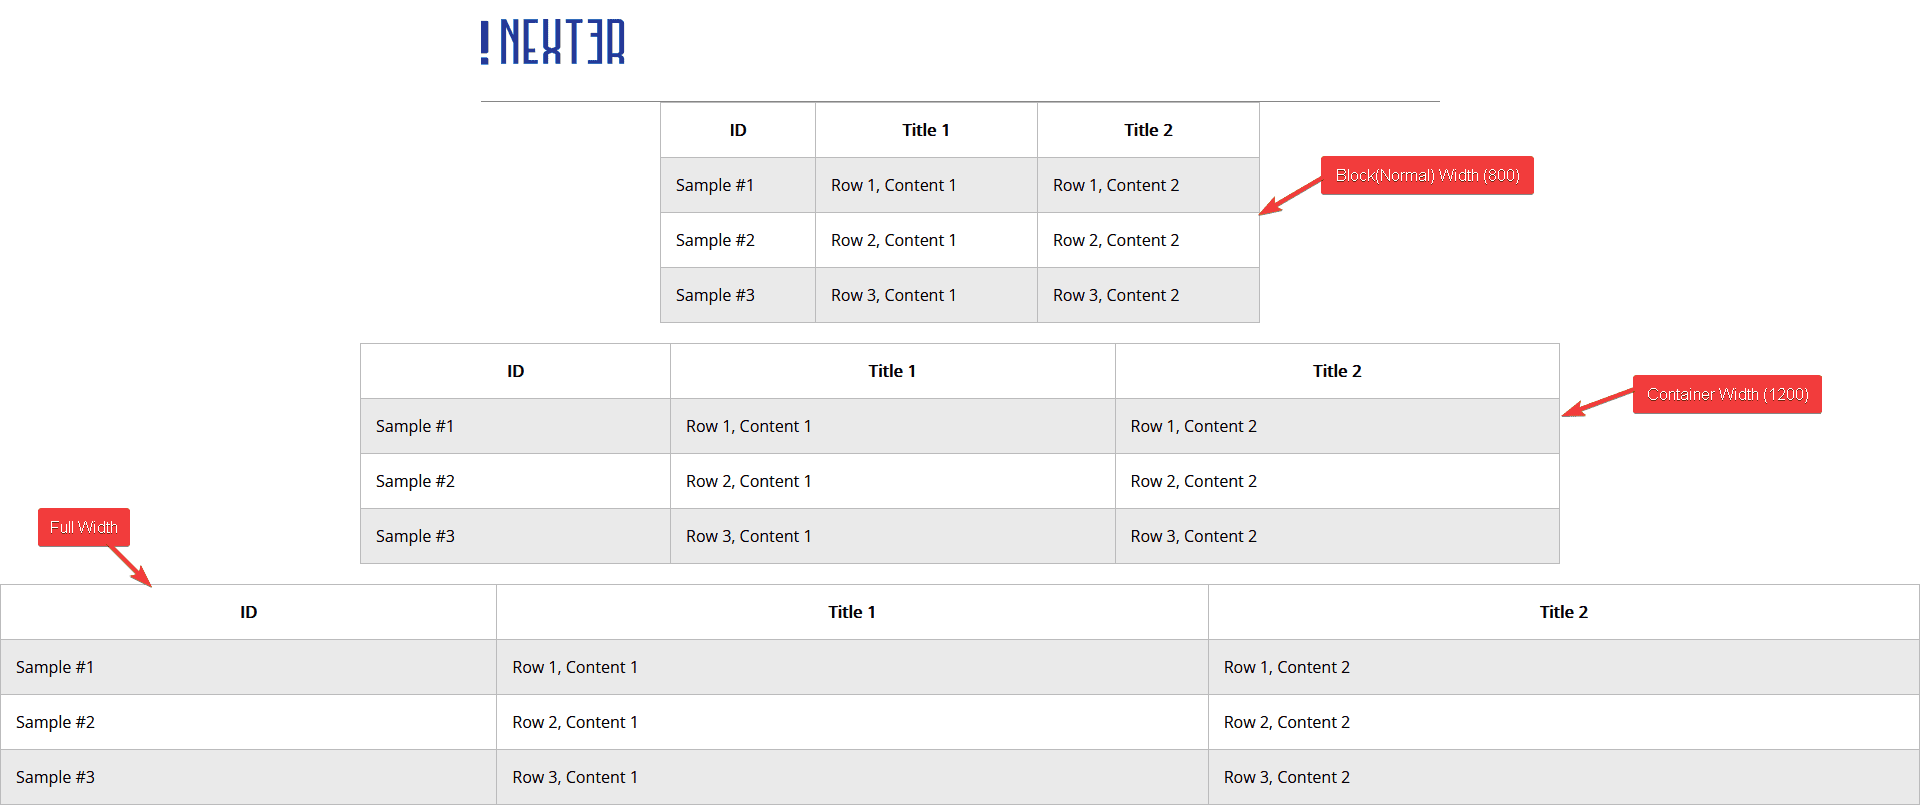
Block Editor – If you are using WordPress block editor where you have different types of width for your content, you can use this option. With this, you’ll find two options Block(Normal) Width and Container Width.
When you use any block from The Plus Addons for Block Editor, you’ll get three width options None, Wide width and Full width for that specific block.
If you use these different types of widths on a single page the Block Editor option will be the ideal container option.
For example, we have three blocks with None, Wide width and Full width, width options on a page.
Now in the Page Container section under the Container option in the customiser. We have selected Block Editor from the dropdown and set Block(Normal) Width to 800 and Container Width to 1200.

This will set the width of the block with the None option to 800 and the block with the Wide width option to 1200.
It will keep the block with the Full width width option to full width of the page.
Container – With this option, you can set a uniform width for your content. For example, we’ve set 1200 width in the Content/Body section, this will set the body container to 1200 and will make all the blocks to the same width irrespective of whatever width is selected for the block.
This is ideal for using with page builders like Elementor or even WordPress block editor where you want to have the same width for all containers.
Full Width – With this option, you can set the container width to full width of the page. Once you select this option you can add left and right padding to the container in px or em unit.
This will set all the blocks to full width irrespective of the width set on individual blocks.
Header
From here you can hide the default theme header from the entire website.
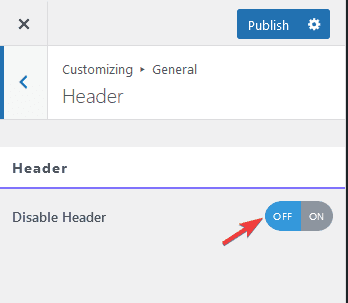
Instead you can use the Nexter Theme builder to create custom header with The Plus Addons for Block Editor blocks.
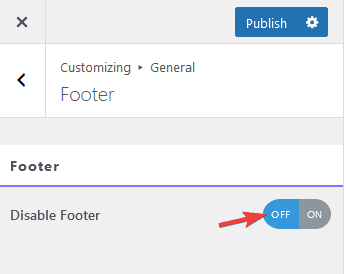
Footer
Similar to the header, from here you can hide the default theme footer from the entire website and use the Nexter builder to create custom footer.
Sidebar
From here, you can set a sidebar for the entire website and individually for pages, blog posts and archive pages. Once you select a sidebar from the dropdown you’ll get an additional dropdown to select a specific sidebar from a list.
The option selected in the Site Sidebar Layout dropdown will become the Default option for Pages, Blog Posts and Archives.
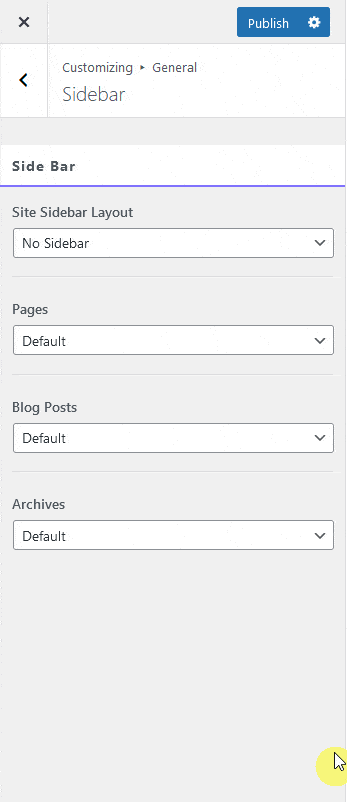
For example, if you’ve selected Left Sidebar from the Site Sidebar Layout dropdown, then Pages, Blog Posts and Archives with the Default option will show the Left Sidebar.
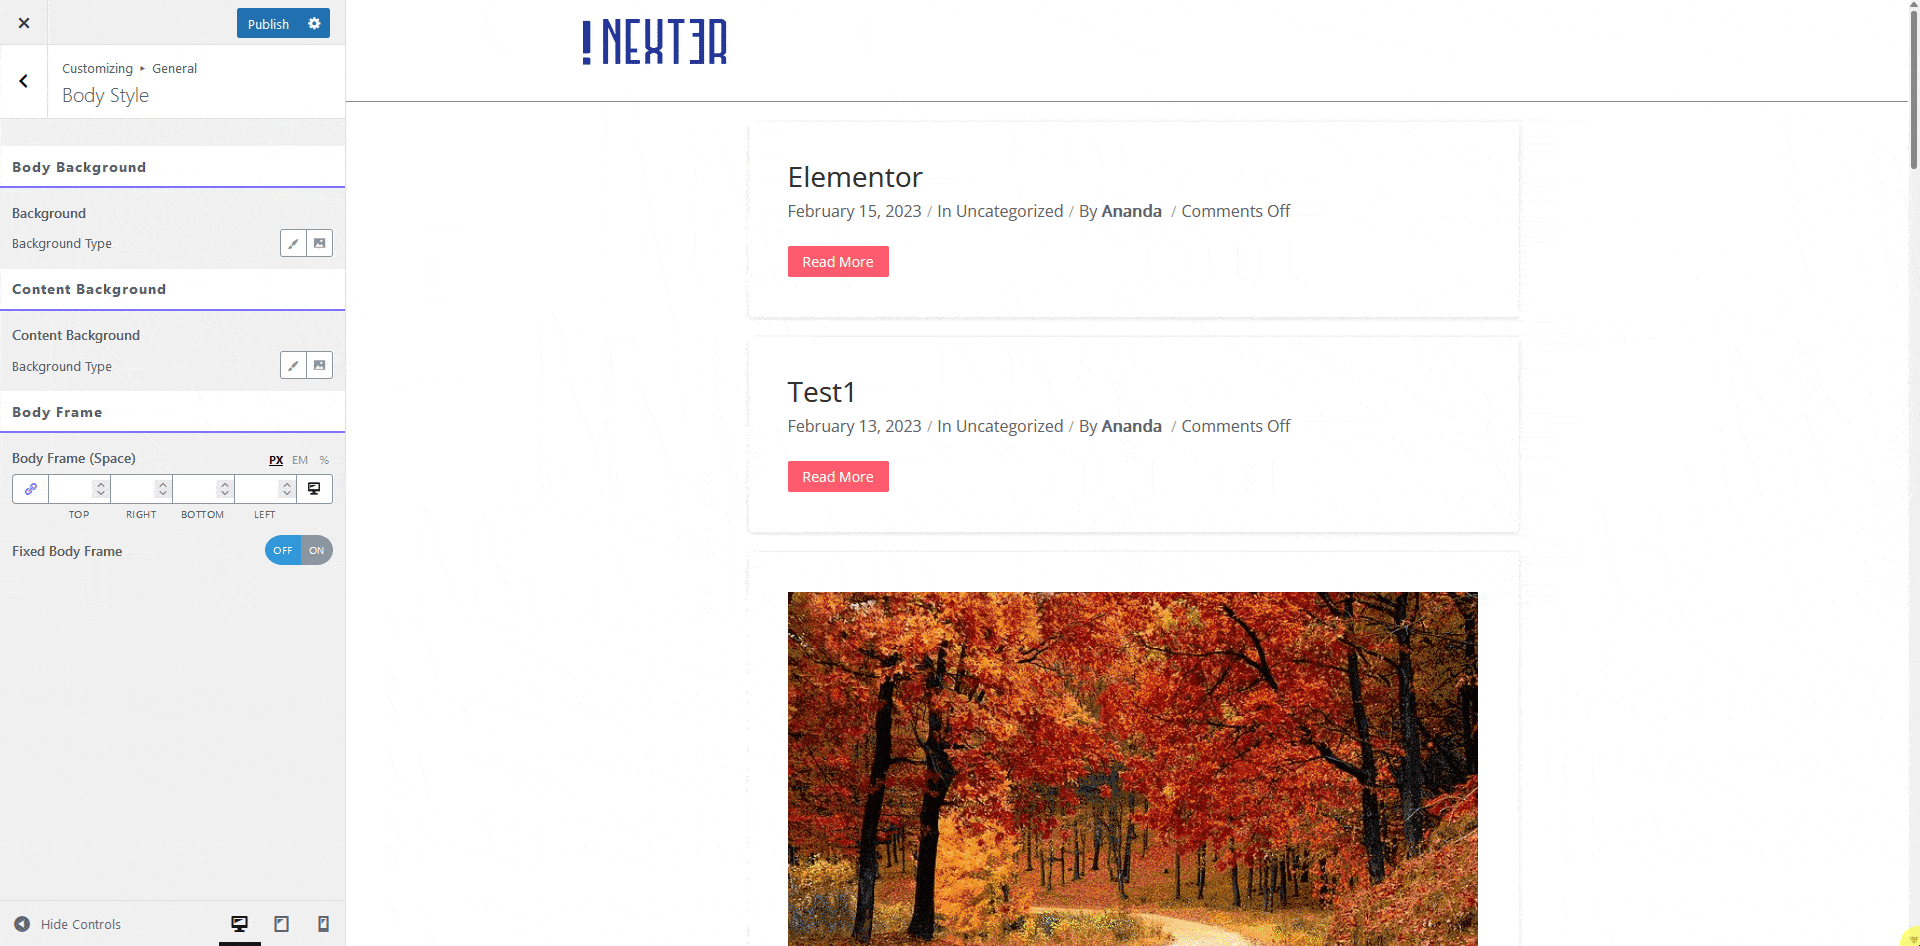
Body Style
From this option, you can add background colour or image for body and container separately. You can also add space around the entire body from the Body Frame section.
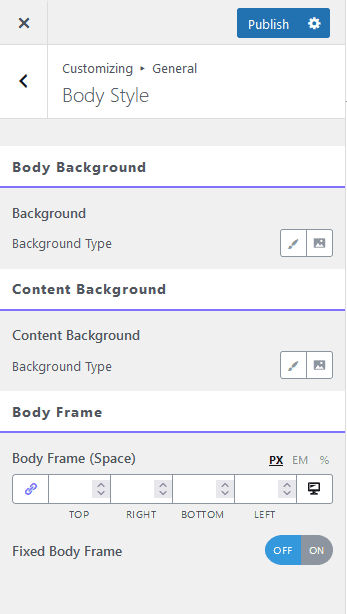
The Fixed Body Frame toggle will make the website scroll inside a container based on the value set in the Body Frame section, you can also add colour to that space as well.
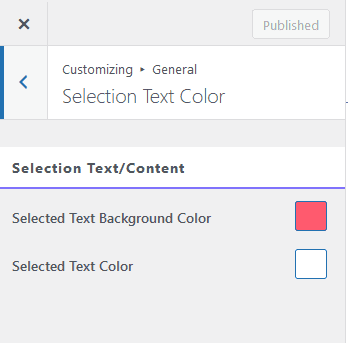
Select Text Color
From here you can style the text selection colour and the text colour when it is selected.
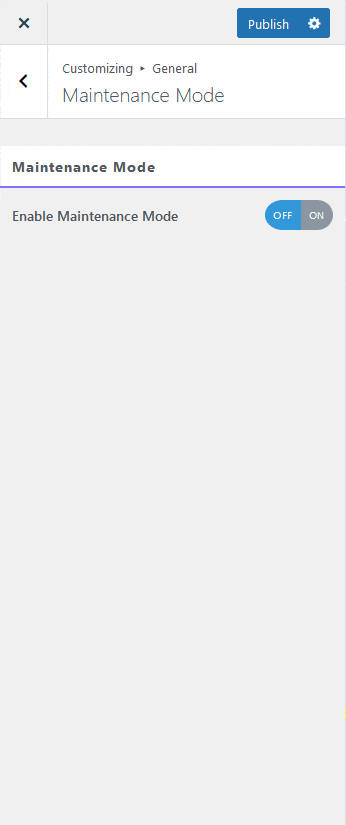
Maintenance Mode
From here, you can enable the maintenance or coming soon mode on your website. This is a great feature if you are building a new website or upgrading your existing website, as it allows you to display a temporary page while you work on your website. Normally, you would need to install an extra plugin for this, but with the Nexter theme, you can enable this feature directly from the General Settings.
To enable the maintenance mode turn on the Enable Maintenance Mode toggle. Once turned on in the Mode dropdown you’ll find two options Maintenance Mode and Coming Soon, select the option based on your requirement.
Note: There is no major difference between the two options. Only the message on the front end will change, if you don’t select a custom template.
In the Who Can Access dropdown, you have the option to select who can access your website while it’s in maintenance or coming soon mode. You can choose between two options:
Logged In – This option restricts access to only logged-in users.
Custom – With this option, you can exclude users based on their user role, such as Administrator, Editor, Subscriber, etc. Selected user roles will not be able to access the website.
Additionally, you can choose a custom template for the maintenance mode or coming soon message from the Select Template dropdown. Using the Nexter Builder, you can create a custom template that fits your needs.
If you do not select a custom template, a default message with an image will be displayed.