Hooks are an essential part of WordPress development as they provide a way to modify the functionality of a theme or plugin without editing the original code. It allows users to add custom code or content to a specific location within WordPress, such as adding a social sharing button to a blog post or displaying custom content in the header section.
Requirement – This is a feature of Nexter theme and Nexter Extension (Free) plugin, make sure its installed & activated to enjoy all its powers.
You need to have knowledge of custom coding to utilise the power of hooks, but the Nexter Builder has many predefined hooks that you can use to add content in various locations of your website. This feature makes it for you to add custom code or content without the need for extensive coding knowledge.
To add content through hooks with the Nexter Builder, from the Dashboard, go to Nexter Builder > Add New.
On the next page, give a name to your template.
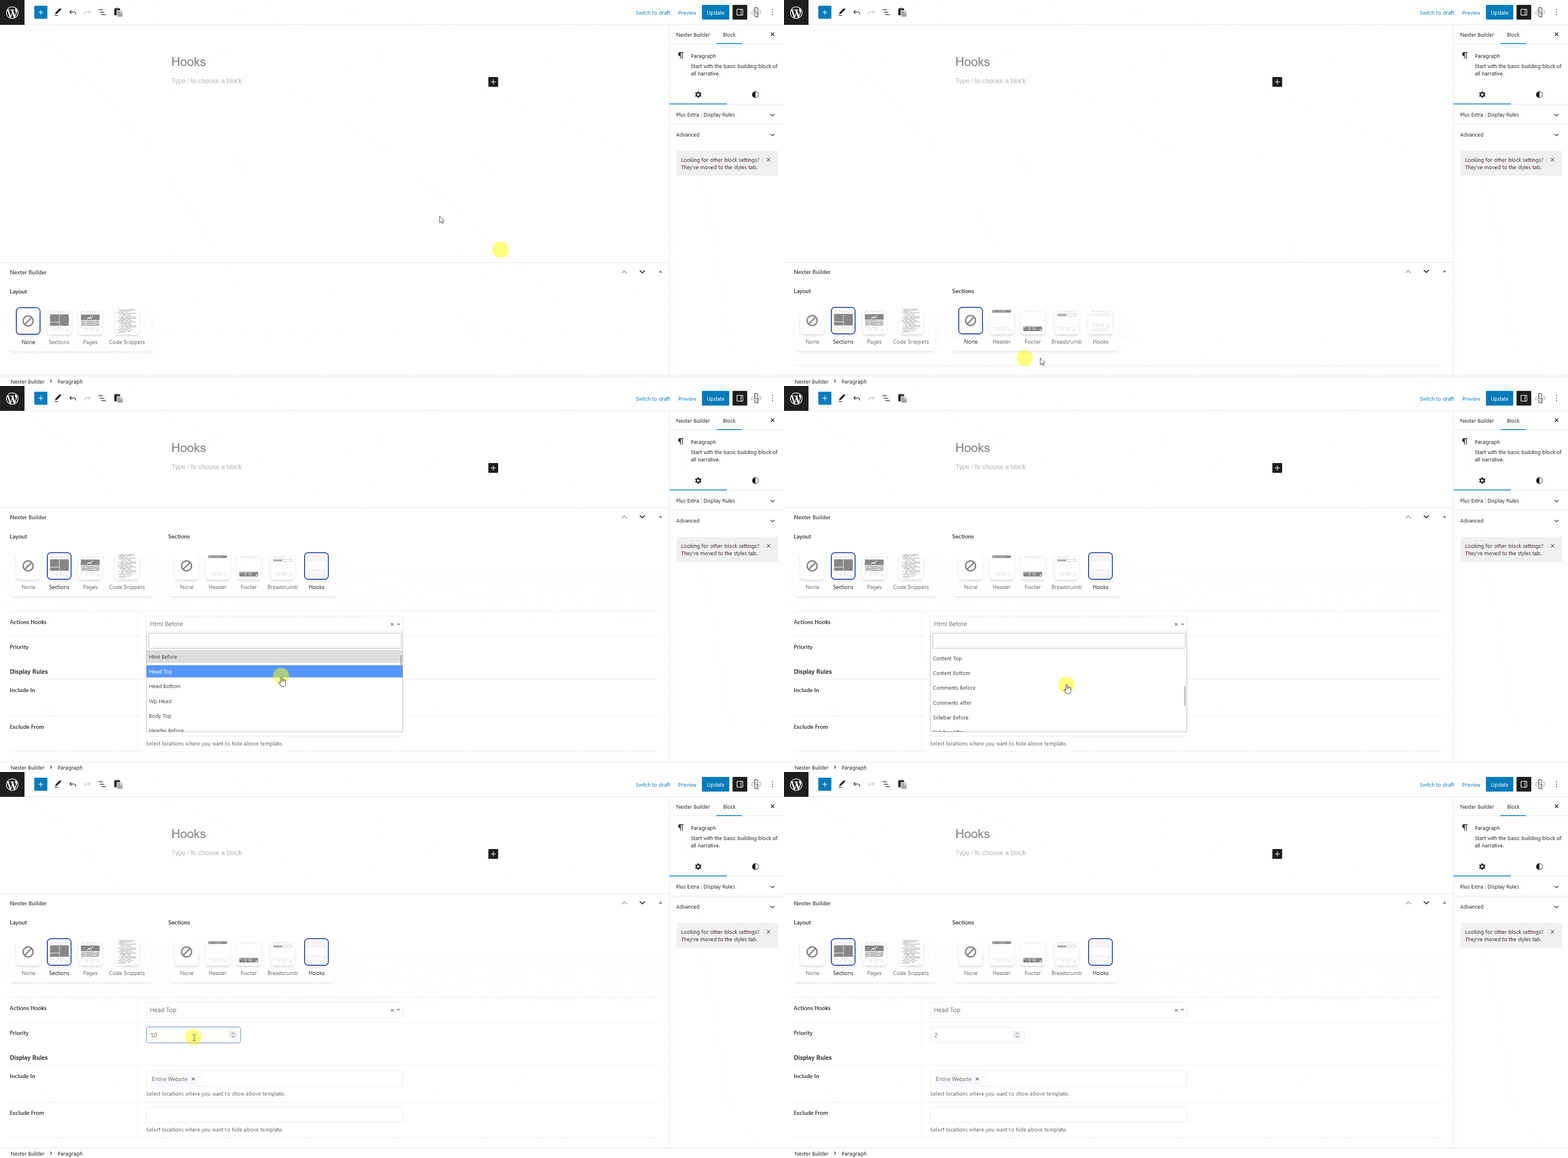
Now scroll down to the Nexter Builder section, from the Layout, select Sections, and from Sections options, select Hooks.

In the Actions Hooks dropdown, you’ll find various hooks.
Html Before – This will place the content right at the top of the HTML page. It will be placed before the <html> code begins.
Head Top – This will place the content right after the <head> tag. It is ideal for adding some meta tags.
Head Bottom – This will place the content right before the </head> tag on the HTML page. This can be used to add some additional CSS or js on the site.
Wp Head – This will place the content before the <title> tag.
Body Top – This will place the content after the <body> tag starts.
Header Before – This will place the content before the page header i.e. before <header> tag. This can be useful to show some messages like sales or discount offers before the page header.
Header After – This will place the content after the page header i.e. after </header> tag. Using this, you can show some content in between the header and body content.
Content Top – This will place the content right after the page container starts.
Content Bottom – This will place the content right before the page container ends.
Comments Before – This will place the content before the page or post comments start.
Comments After – This will place the content after the page or post comment form ends.
Sidebar Before – This will place the content at the start of the sidebar.
Sidebar After – This will place the content at the bottom of the sidebar.
Footer Before – This will place the content before the footer starts.
Footer After – This will place the content after the footer ends.
Body Bottom – This will place the content right before the </body> tag.
Wp Footer – This will place the content between </footer> and </body> tags.
After selecting the appropriate hook, you’ll see the Priority field, here, you need to set the priority of the specific hook.
Lower the number earlier will be the execution of the hook.
Now from the Display Rules section, you have to set where the hook will show or won’t show. Here you’ll find two sections –
Include In – Whichever location you select here, the template will be visible only there.
Exclude From – Whichever location you select here, the template will not show there.
In both sections, you will find the same location options that are available in the header template.
Once you set the appropriate display rule for your template, publish the template.
Then you have to add your content for the hook with WordPress blocks or Elementor widgets.
Also, read How to add Code Snippets for FREE in WordPress.


