












Every “how to grow your email list” guide eventually lands on the same advice: put a signup form somewhere people will actually see it. The part those guides skip is what happens next, wiring that form to an email tool so the addresses go somewhere useful instead of sitting in a plugin’s database nobody checks. Nexter Blocks ships a Mailchimp Form block that handles both halves at once, a real form your visitor sees and a live connection to your Mailchimp audience, without installing a separate email plugin. Here is how to set it up.

What the Mailchimp Form Block Actually Does
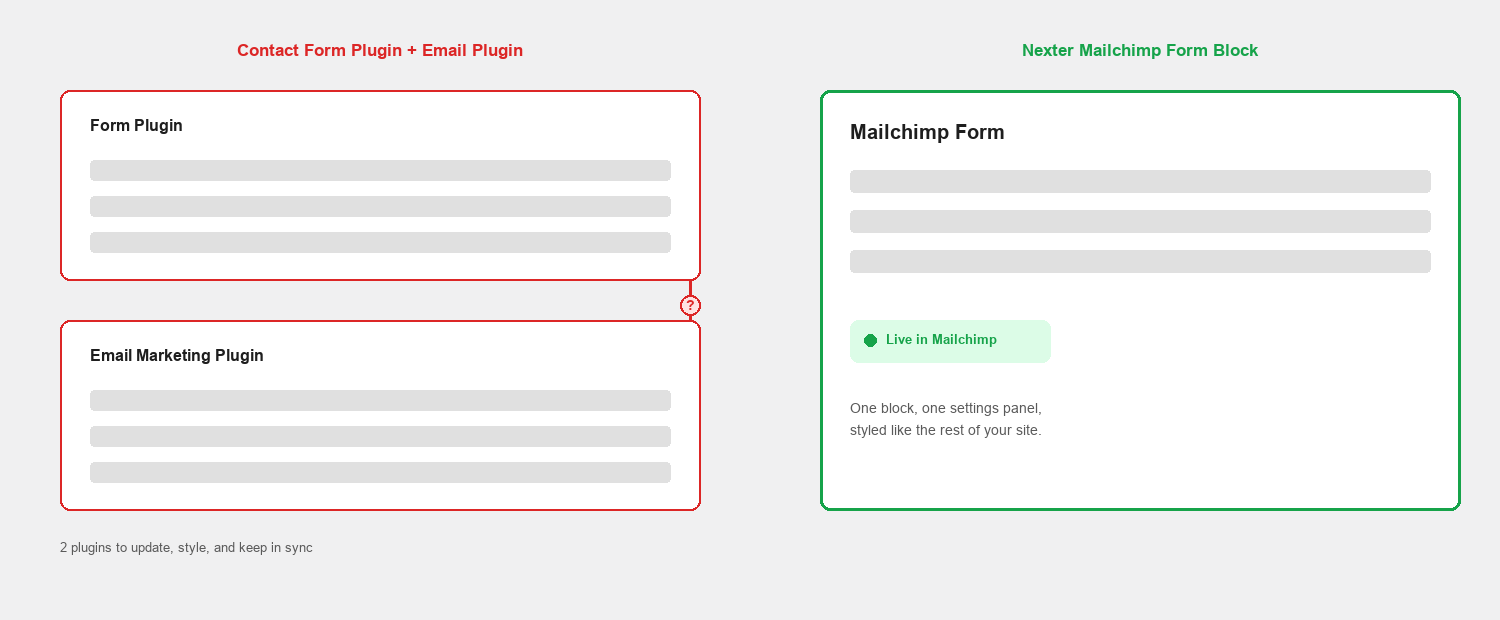
Most WordPress sites add email capture one of two ways: a generic contact form plugin repurposed for signups, or a dedicated email marketing plugin installed on top of the page builder. Both work, but both add a plugin you now have to keep updated, and neither one is actually built into your design system. Nexter’s Mailchimp Form block is a native Gutenberg block, styled with the same design controls as every other Nexter block, that talks directly to the Mailchimp API.
Practically, that means three things happen automatically once it is set up: the form fields you configure map to the audience fields in your Mailchimp account, a new signup lands in that audience within seconds, and the visual styling, button color, corner radius, spacing, inherits from your site instead of looking like an embedded widget from somewhere else.
There is also a maintenance argument worth making explicitly. Every extra plugin on a WordPress site is one more thing that can conflict with a theme update, one more settings screen to remember exists, and one more line item when something breaks and you are trying to figure out which of twelve active plugins caused it. A block that lives inside the page builder you are already using removes an entire plugin from that list, which matters more the longer a site has been running.
Connecting Nexter to Your Mailchimp Account
Before the block can send anyone to an audience, Nexter needs your Mailchimp API key. Log into Mailchimp, open Account, then Extras, then API keys, and generate a new key if you do not already have one. Copy it, then in WordPress open Nexter’s settings and paste the key into the Mailchimp integration field.
Also Read: the full Nexter Blocks Builder feature list for every block available alongside Mailchimp Form.
Once the key validates, Nexter pulls in your existing audiences automatically, so you pick one from a dropdown instead of typing an audience ID by hand. If you manage more than one Mailchimp audience, for example a general newsletter and a separate product waitlist, you can point different forms on the same site at different audiences, since the audience selection lives on the block itself, not in a single global setting.
Treat the API key the way you would a password. Anyone with access to it can read and export your entire audience, so generate it under an account you control, not a shared login, and regenerate it in Mailchimp immediately if you ever hand off a site to a new developer or agency. Mailchimp keeps a log of API key activity under Account, Extras, API keys, worth a glance every so often to confirm nothing unfamiliar is using it.

Adding and Designing the Mailchimp Form Block
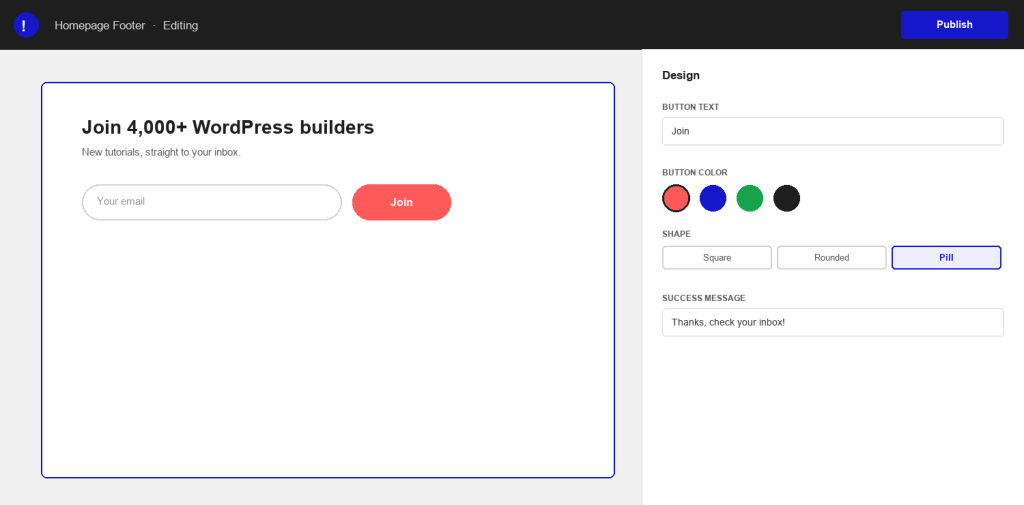
With the connection in place, insert the Mailchimp Form block anywhere in the editor, a page, a post, or a template part like the footer. The block’s content settings let you write your own heading and supporting line, choose which fields to collect beyond email, name is the common one, and pick the audience from the dropdown you just connected.
The design tab is where it stops looking like a bolted-on widget. Button text, button color, corner shape, and the success message a visitor sees after submitting are all editable, and all inherit your site’s font and spacing defaults unless you override them. Keep the button text specific rather than generic, “Join” or “Get the newsletter” converts better than a plain “Submit,” since it tells the visitor exactly what happens next.
Check the form on an actual phone before calling it done, not just a resized browser window. The email field and button need enough vertical padding to be tapped accurately with a thumb, and if you added a name field alongside email, confirm the two stack cleanly on narrow screens instead of squeezing side by side into unreadable widths. A signup form that is annoying to fill out on mobile loses a meaningful share of a blog’s traffic, since most readers arrive from a phone.
Where to Place the Signup Form
The same block works in three very different spots, and each one earns a different kind of signup. Placed inline, partway through a long post, it catches a reader who is already convinced the content is worth following. Placed in the footer template part, it becomes a passive net that shows on every page without asking for attention. Placed in a popup or exit-intent trigger, it catches a visitor who is about to leave, which converts at a different rate than either of the other two and should be tested rather than assumed.
A reasonable starting setup is one inline form on your best-performing posts, plus a footer form site-wide, and to hold off on a popup until you have a baseline conversion rate from the other two to compare it against. Adding all three on day one makes it hard to tell which placement is actually doing the work.
Whichever placement you pick, resist the urge to show the same form twice on one page. An inline form partway through a post and an identical footer form directly below it just asks a visitor who already declined once to decline again, which quietly trains people to ignore both. If a page already has an inline form, either skip the footer form there or make it visibly different, a shorter version with no heading, so it reads as a second, lighter chance rather than a repeat of the same ask.

Testing the Form and Confirming Subscribers Land in Mailchimp
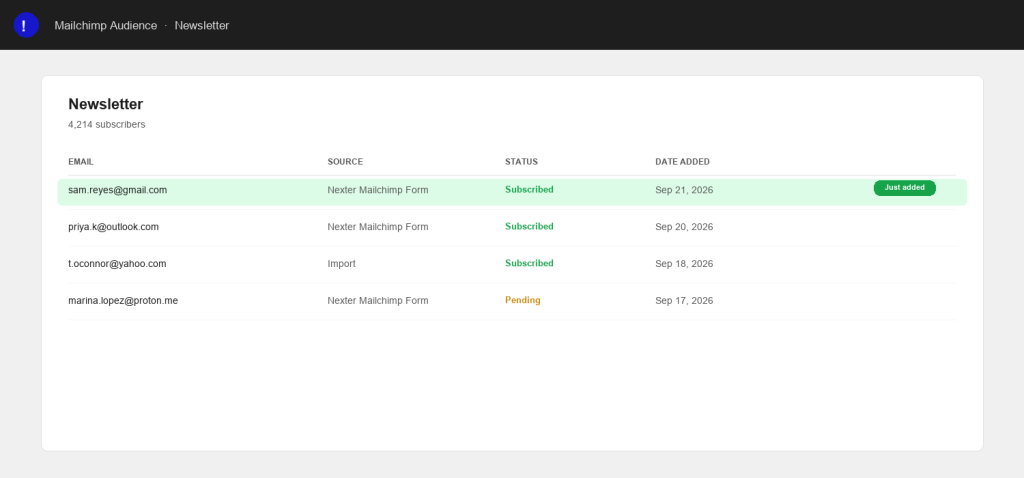
Before treating the form as live, submit a test entry with an email address you control. It should arrive in the audience you selected within a minute, tagged with whatever source label your setup uses, which makes it easy to filter “people who signed up through this form” from contacts imported some other way later.
If double opt-in is enabled, which it is by default on most Mailchimp accounts, the test address will show as pending until it confirms through the email Mailchimp sends automatically. That is expected behavior, not a bug, and it is worth leaving on for real signups too, since a confirmed subscriber has meaningfully better deliverability than one who was only ever added, never confirmed.
If the confirmation email does not arrive within a few minutes, check the spam or promotions folder before assuming the connection is broken. New sending domains and brand-new audiences sometimes get filtered aggressively for the first handful of sends until Mailchimp and the receiving mail providers build up a sending reputation. This settles down on its own within the first few dozen confirmed subscribers and is not something you need to configure manually.
Also Read: see the full Nexter Theme overview for how blocks like this one fit into the rest of the design system.
GDPR and Consent Checkbox Considerations
If any part of your audience is in the EU or UK, collecting an email address for marketing without explicit consent is a compliance problem, not just a best practice. The Mailchimp Form block includes a consent checkbox toggle, turning it on adds a required checkbox with editable text above the submit button, so nobody can subscribe without actively agreeing to receive email.
Write the consent text plainly, “I agree to receive marketing emails from this site” says exactly what someone is agreeing to, which holds up better than vague wording if you are ever asked to show how consent was collected. Combined with double opt-in, which adds a second, unambiguous confirmation step, this covers the two things most GDPR guidance on email signup actually asks for: clear consent at signup, and a verifiable record of it.
None of this replaces reading your own privacy policy against what the form actually collects, but a checked consent box plus a confirmed opt-in is the same baseline most established email tools ask for before they will let an account send at scale, so building it in from the first form rather than retrofitting it after a complaint is the cheaper order to do things in.

Frequently Asked Questions
Do I need a separate email plugin if I use the Mailchimp Form block?
No. The block connects directly to the Mailchimp API using your account’s API key, so there is no separate signup-form plugin to install, update, or style to match your theme.
Can I use more than one Mailchimp audience on the same site?
Yes. The audience selection is set per block, so a form in your footer can point at a general newsletter audience while a separate form on a product page points at a different one.
What happens if a test signup does not appear in Mailchimp?
Check the API key is still valid and that the correct audience is selected on the block first, those two settings cause most failed connections. If double opt-in is on, also check the confirmation email did not land in spam before assuming the submission failed.
Is the consent checkbox required for every site?
It is not enforced by WordPress or Nexter, but it is required in practice for visitors in the EU and UK under GDPR. Turning it on for every audience, regardless of where visitors are located, is simpler than trying to detect visitor location and show it conditionally.
Can I style the form to match a specific page instead of the whole site?
Yes. Design settings are set per block instance, not globally, so a form placed on a landing page can use different colors or button text than the one in your footer, even though both connect to the same Mailchimp account.
Suggested Reading
- How to Create a Magazine-Style Blog Layout in WordPress with Nexter Theme
- Testimonial & Review Carousel Block
- Nexter Theme SEO Settings: What to Configure Before You Publish
- Membership Website Build with Nexter Theme
- Code Snippets Manager: A Walkthrough
