












We get a version of the same question every few weeks from agency clients: “Can Nexter build me a membership site?” The honest answer is that Nexter builds the site around the membership, not the membership logic itself, and that distinction trips people up because a lot of marketing copy in this space blurs it on purpose. So before you spend a weekend hunting for a theme that claims to “do memberships,” here’s what actually needs to happen and which tool handles which part.
This guide walks through building a membership or online course site with Nexter Theme: picking the right model, designing the pages that matter (pricing, member dashboard, restricted content, lesson layout), and pairing the design with a real membership or LMS plugin for the parts Nexter deliberately doesn’t try to own.
What You Need Before You Start
Decide your pricing structure before you open the page editor: flat monthly fee, tiered plans, or a one-time payment for lifetime access. Changing this after members have already signed up is a support headache, so it’s worth locking down on paper first. You’ll also want your content inventory sorted into what’s free (for marketing and search visibility) and what’s gated, plus a rough outline of your course modules if you’re building an LMS rather than a flat membership library.
On the technical side, you’ll need Nexter Theme active, Nexter Blocks if you want the Pricing Table and layout blocks used below, and your chosen membership or LMS plugin installed. If you’re planning to take payments, have your payment processor (Stripe or PayPal, most commonly) set up and verified before you connect it to WooCommerce or your plugin’s checkout, since payment gateway approval can take longer than the rest of the build.
What a Membership or LMS Site Actually Needs
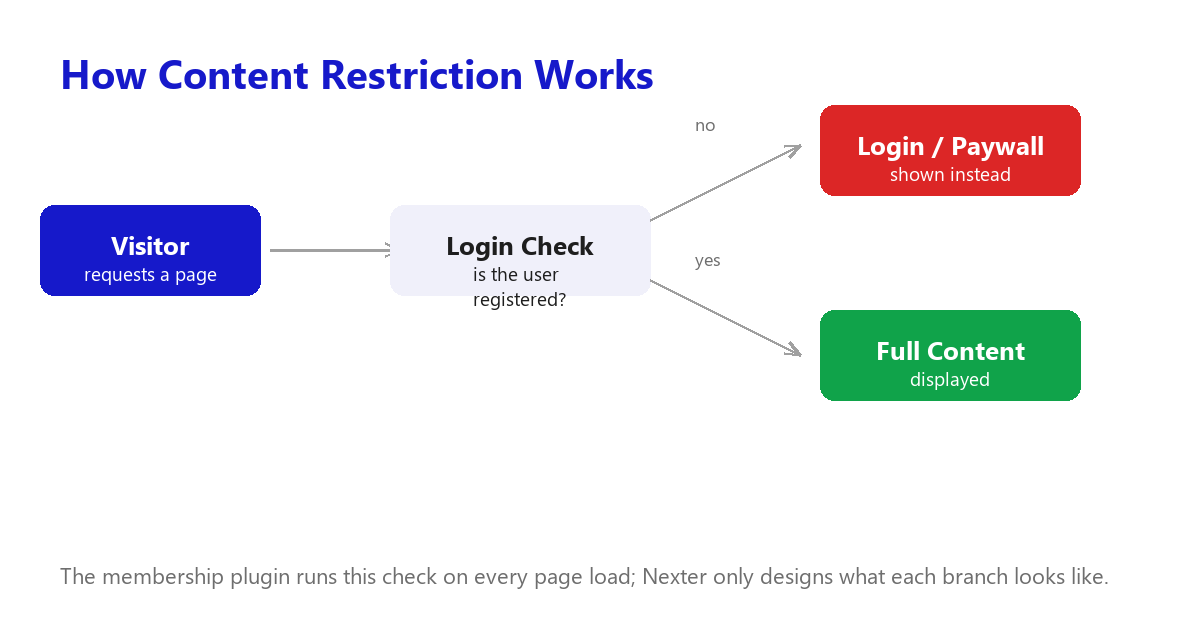
Strip away the marketing language and a membership or course site needs four things working together: a way to register and log in members, a way to restrict specific content to paying or logged-in users, a way to take payment on a recurring or one-time basis, and (if you’re running courses rather than a flat content library) a way to structure lessons, track progress, and issue completion. No WordPress theme handles all four of those on its own, and any theme that claims otherwise is usually leaning on a bundled plugin to do the actual work.
Nexter Theme and Nexter Blocks own the design layer of this: the pages, the layout, the branding. A dedicated membership or LMS plugin owns registration, content gating, and payments. Keeping that split clear from the start saves you from picking a “membership theme” that locks you into one gating mechanism you later want to replace.
Step 1: Pick Your Model: Membership, Course, or Both
A straight membership site gates a library of existing content (articles, downloads, community access) behind a login or a paid tier. A course or LMS site structures content into lessons with a defined order, often with quizzes and completion tracking. Some sites are genuinely both: a membership tier that includes access to a course as one of its perks.
For a pure membership model, a content-restriction and user-management plugin like Ultimate Member (200,000+ active installs, a 4.4-star rating from 1,445 reviews at the time of writing) covers registration, login, member profiles, and restricting posts or pages by role or membership level. For a course-first model, Tutor LMS (100,000+ active installs, 4.4 stars from 589 reviews) adds the lesson structure, quizzes, and progress tracking a flat content-restriction plugin doesn’t attempt. Picking the model before you start building pages avoids restructuring your content hierarchy halfway through.
Also Read: How to Restrict Content to Registered Users in WordPress (3 Methods) for the underlying gating mechanics a membership plugin builds on top of.
Step 2: Build the Foundation with Nexter Theme
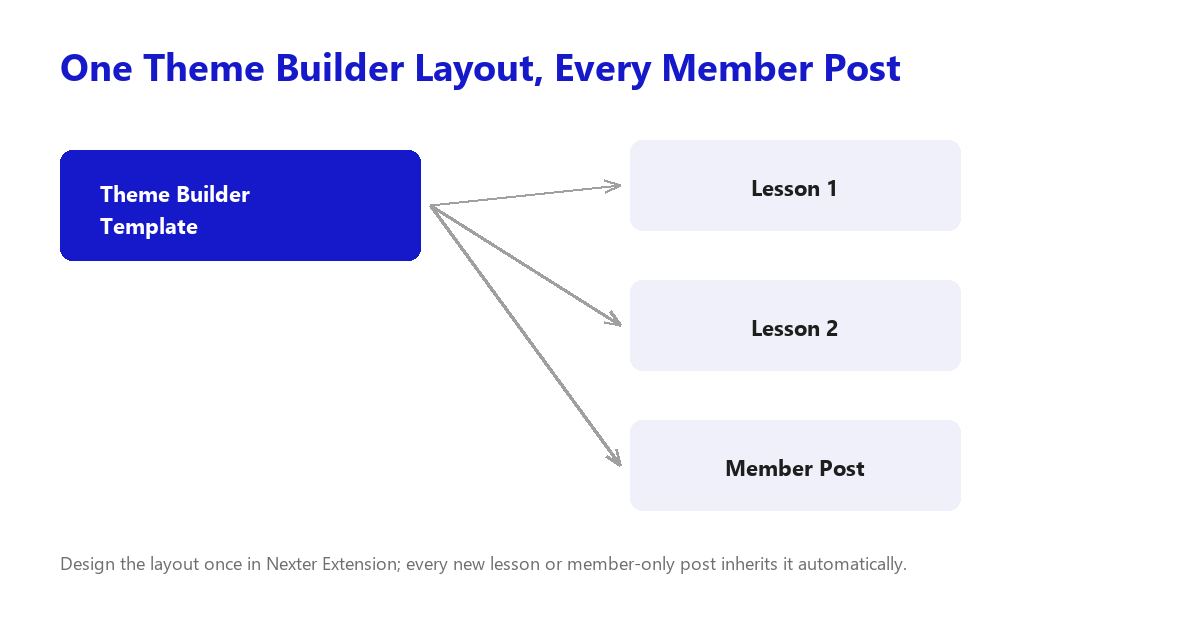
Once you’ve picked a plugin, the site foundation is standard Nexter Theme work: set your Global Colors and Global Fonts to match your brand, and pick a container width that reads comfortably for long-form lesson content rather than the wider layout you might use for a marketing homepage. If you’re using Nexter Extension, its Theme Builder lets you design a custom layout for archive and single-page templates once, then apply it across every lesson or member-only post automatically, instead of formatting each one by hand.
Step 3: Design the Pricing and Plans Page
Your pricing page is doing sales work, not just listing numbers, so it deserves more design attention than a plugin’s default shortcode output usually gets. Nexter Blocks’ Data Table and Pricing Table block lets you lay out tiers side by side, highlight a recommended plan, and list what’s included per tier in a scannable format, all as native Gutenberg blocks you style to match the rest of the site.
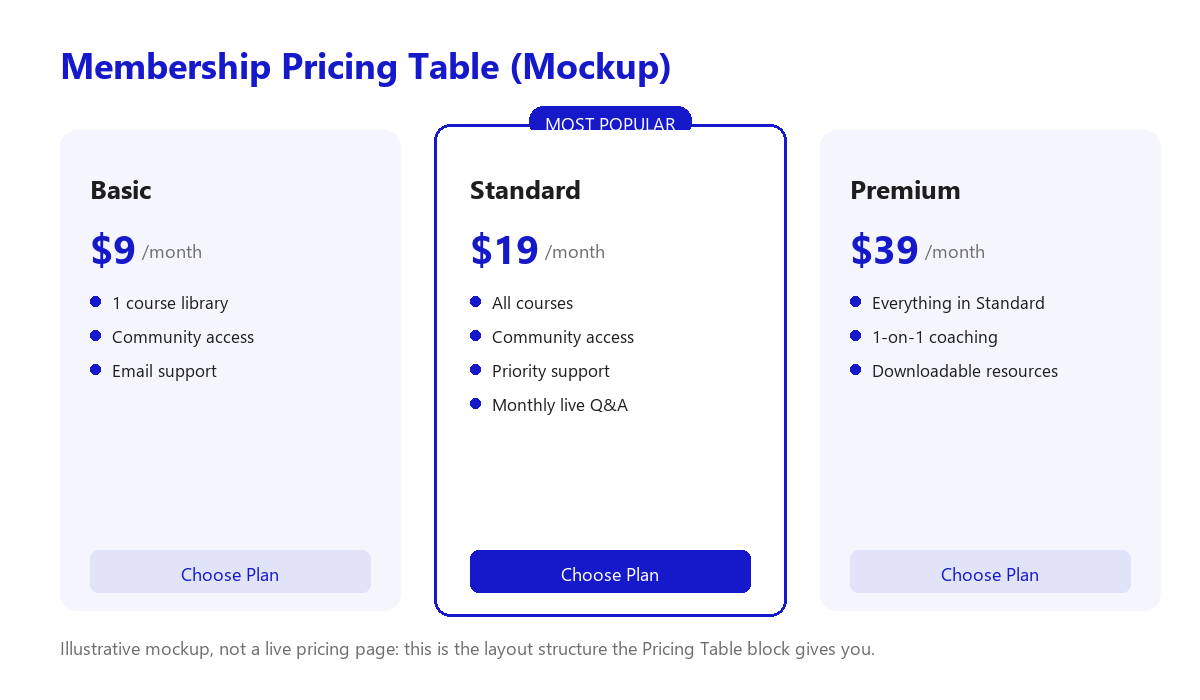
Design the table, then connect each plan’s button to the checkout or signup flow your membership plugin generates. The block handles how the plans look; the plugin still owns what happens after someone clicks.
Also Read: Nexter Blocks Data Table and Pricing Table: Building Comparison Tables Without Code for a full walkthrough of the block’s settings.
Step 4: Design the Members-Only Content Area
Your membership plugin decides which pages are restricted; Nexter Theme decides what those pages look like once someone’s logged in. Keep the restricted-area design deliberately simpler and more utilitarian than your public marketing pages: members already converted, so the job now is making content easy to find and read, not selling them again. A clean sidebar or top-level navigation listing available content categories, built with standard Nexter Blocks layout options, works better here than reusing your flashy homepage hero pattern.
Build a simple “what happens after you log in” page as part of your onboarding flow too. A one-page tour of where the content library lives, how to update billing, and how to contact support cuts down on support requests more than any amount of plugin configuration.
It’s also worth setting up a welcome email that fires the moment someone joins, pointing them straight at that onboarding page. Most membership plugins, including Ultimate Member, support this out of the box through their notification settings, and it’s a five-minute setup that prevents a new member’s first experience from being an empty dashboard with no explanation of where anything is.
Step 5: Lesson Layout, If You’re Running a Course
If you went the course route with a plugin like Tutor LMS, the lesson template matters more than any other page on the site, since it’s what a paying student sees repeatedly. Keep the video or lesson content itself unobstructed, put progress and navigation (next lesson, mark complete, back to course) in a consistent location on every template, and avoid burying the “next lesson” action below a long comment section or unrelated sidebar widgets. Nexter Extension’s Theme Builder is useful again here: build the lesson archive and single-lesson layout once, and it applies to every lesson the LMS plugin generates.
Step 6: Monetization and Checkout
Both Ultimate Member and Tutor LMS integrate with WooCommerce for payment processing rather than reinventing checkout, so if you’re already comfortable with WooCommerce, that’s the simplest path to recurring billing. Nexter’s own WooCommerce Store Builder blocks (shipped as part of Nexter Blocks) let you design product and checkout pages natively in Gutenberg if you want the payment pages to match the rest of the site’s design instead of using a generic WooCommerce default template.
Whichever payment path you pick, test a full transaction with a real card in a sandbox or low-value live charge before pointing traffic at the pricing page. A checkout that looks correct in the editor can still fail silently at the payment-gateway step, and that’s a far more expensive discovery to make from a customer complaint than from your own test run.
Step 7: Security for Gated Content
A site holding paid content and member accounts is a more attractive target than a brochure site, so tighten security before launch rather than after an incident. Nexter Extension’s security hardening covers login protection, reCAPTCHA on registration and login forms, and general hardening measures; pair that with strong password requirements from your membership plugin and you’ve covered the basics most gated-content sites skip until something goes wrong.
Common Mistakes on Membership and Course Sites
- Picking a “membership theme” instead of a membership plugin. The gating logic should live in a plugin you can swap later, not be baked into your theme choice.
- No onboarding page for new members. A confused new member who can’t find the content library generates a support ticket or a refund request, not a happy customer.
- Reusing the flashy marketing homepage design for the restricted area. Members need clarity and navigation, not another sales pitch.
- Underestimating the lesson template if running a course. It’s the page students see the most, and it’s usually the last one anyone bothers to design properly.
- Skipping security hardening because “it’s just a small membership site.” Sites with payment and account data are targeted regardless of size.
- Locking in a pricing structure too late. Switching from flat-fee to tiered pricing after members have signed up creates billing and grandfathering headaches that are far easier to avoid upfront.
- Gating too much for free content marketing. If every piece of content is behind the paywall, search engines and prospective members never see enough to decide the membership is worth joining.
Elementor or Gutenberg for a Membership Site?
The same choice applies here as on any other Nexter build: Nexter Theme works with both Elementor and Gutenberg, so the better option depends on your existing workflow rather than a hard technical limit. Membership and LMS plugins generally render their content (login forms, course listings, member dashboards) as shortcodes or blocks that work in either builder, so you’re not locked out of Elementor if that’s your default, and you’re not missing anything by staying in Gutenberg with Nexter Blocks either. If your site leans heavily on long-form lesson content, Gutenberg’s lighter output tends to keep individual lesson pages loading faster, which matters more here than on a handful of marketing pages since students load lesson pages repeatedly.
After Launch: What to Watch in the First Month
The first month after launch is when a membership or course site actually reveals whether the onboarding flow works, so treat it as a testing period rather than a finish line. Sign up for your own membership with a test account and walk through the full path a real member would take: registration, payment, the welcome email, and finding the first piece of gated content. Doing this yourself catches broken redirects and confusing copy that a checklist review from inside wp-admin never will, because you’re seeing exactly what a paying member sees.
Track where new members drop off, particularly between signup and their first login, since a gap there usually points to a confusing confirmation email or a payment step that adds unexpected friction. If you’re running a course, watch completion rates on the first lesson specifically. A steep drop-off after lesson one is almost always a lesson-template problem, not a content problem, since it means people can’t find their way back in rather than losing interest in what you’re teaching.
Suggested Reading
- How to Restrict Content to Registered Users in WordPress (3 Methods)
- Nexter Blocks Data Table and Pricing Table: Building Comparison Tables Without Code
- How to Build a Business Website with Nexter Theme in Under an Hour
