












A dark logo that looks right at the top of the page can disappear on a dark sticky bar. A sticky logo swaps in a version that fits once the header sticks.
The free Site Logo block in Nexter Blocks has a Sticky Logo setting for this.
For every Site Logo setting in one place, see the Site Logo block guide.
Before You Start
- Edition: Free — works in Nexter Blocks (free) and with Nexter Blocks Pro.
- Block to enable: Site Logo, switched on under Nexter > Blocks in your WordPress dashboard.
- A sticky header: a header template made with Nexter Builder (free) and set to a sticky header type.
- Two logo files: the normal logo and the sticky version.
Create a Sticky Header
- Go to Nexter > Theme Builder and click Add New Template. For the full walkthrough, see how to create a header template.
- Select Header and name the template.
- Click Additional Settings and select Normal + Sticky as the header type.
- Set the display conditions, for example Entire Website, and click Create.
Add the Sticky Logo
- Add the Site Logo block to the header template and keep Normal under Logo Normal/Dual.
- Upload the normal logo and set Image Size to Full.
- Turn on Sticky Logo and upload the sticky version in the Upload Image field that appears below it. Set its Image Size to Full and its Logo Max Width.
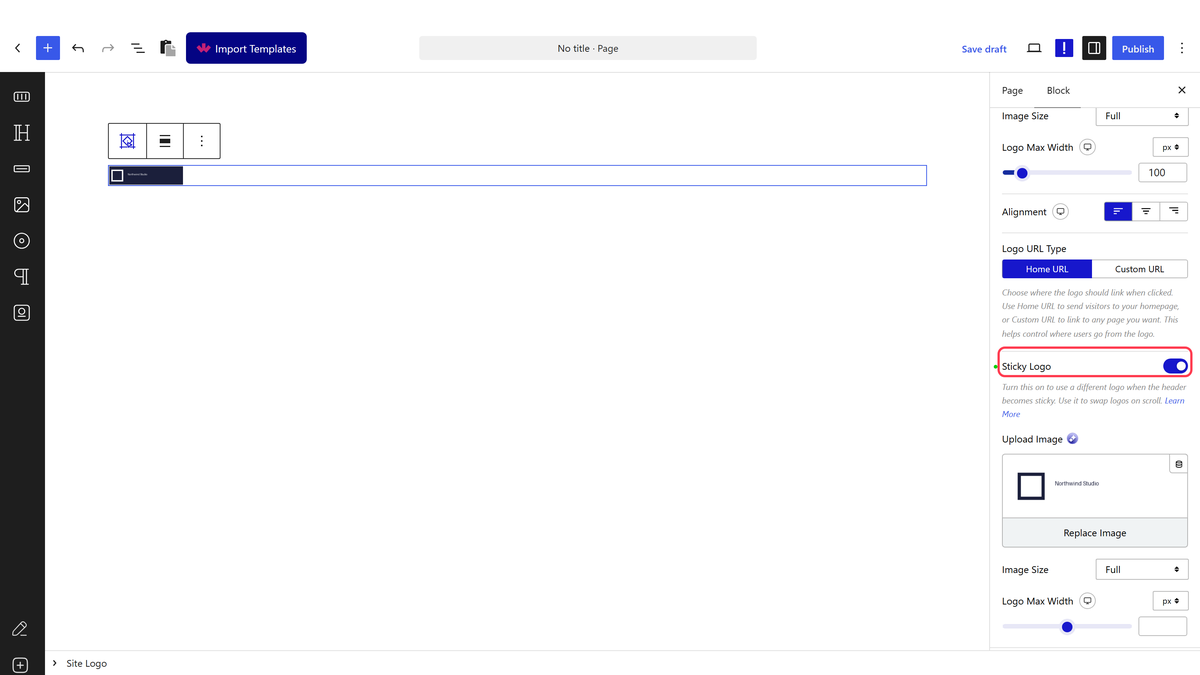
- Save the template, open your site and scroll down.
How It Behaves
- At the top of the page, the normal logo shows and the sticky logo stays hidden.
- When you scroll and the header sticks, the sticky logo replaces the normal one. Scroll back to the top and the normal logo returns.
- The sticky logo has its own Image Size and Logo Max Width, so it can be smaller than the normal logo.
Limitations
- Use the Normal + Sticky header type. With Normal or Sticky, the sticky logo never shows.
- Sticky Logo works with Normal mode. It is not meant to be combined with the Double hover logo.
- The sticky Image Size also defaults to Thumbnail, a 150×150 crop. Set it to Full.
Troubleshooting
The logo does not change when I scroll
Check that the header template uses Normal + Sticky under Additional Settings, and that Sticky Logo is on with an image uploaded.
The sticky logo is cropped
Set the sticky logo’s Image Size to Full.
