


A client once asked me to send over a page of draft copy without putting it anywhere public. I did not want to email a document back and forth, and I did not want the page turning up in search or in the site menu. WordPress has a built-in answer for exactly this: a password protected page. Anyone with the password sees the content, and everyone else hits a password prompt.
This guide covers how to password protect a single WordPress page or post two ways: with the built-in editor setting (no plugin needed), and with a plugin for when you need more control, like multiple passwords, role-based access, or an expiry date.
One thing to be clear on up front: this is page-level and post-level protection. If you want to lock down your whole site at once instead of a single page, that is a different setting, and there is a separate guide for it linked further down.
Why Password Protect a Page in WordPress?
Password protecting a page limits who can open that specific page. The content stays on your site and keeps working, but a visitor has to enter the password before they can read it. A few common reasons to do it:
- Protect sensitive information: Contracts, invoices, or internal documents that should only reach specific people. Password protection adds a layer of access control while keeping the page live.
- Share gated or premium content: Members-only resources, downloads, or early-access pages you want to hand out selectively rather than publish for everyone.
- Collaborate privately with clients: Freelancers, agencies, and photographers can share mockups, drafts, or reports with one client by sending a password instead of making the page public.
- Hide work in progress: Keep an unfinished page out of public view while you build it, without saving it as a draft you cannot preview in context.
- Keep it out of search: WordPress tells search engines not to index a password protected page, so drafts and private pages do not leak into Google results.
Also Read: protect your whole site from unauthorized access and hacking attempts with the 5 Best WordPress Security Plugins to Protect Your Site.
How to Password Protect a WordPress Page (Built-In, No Plugin)
Quick answer: To password protect a page in WordPress, open the page in the editor, click the visibility link in the Status panel, choose Password protected, enter a password, and update the page. Visitors then see a password prompt in place of your content.
WordPress has password protection built into the editor, so for a single page you do not need a plugin at all. Here is the full process in three steps.
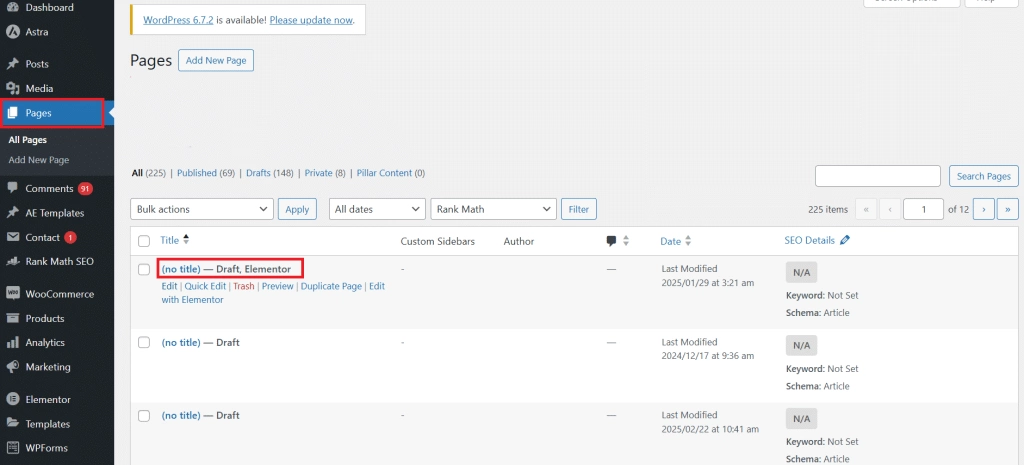
1. Open the page you want to protect
From your WordPress dashboard, go to Pages > All Pages to open an existing page or post, or go to Pages > Add New to create a new one.
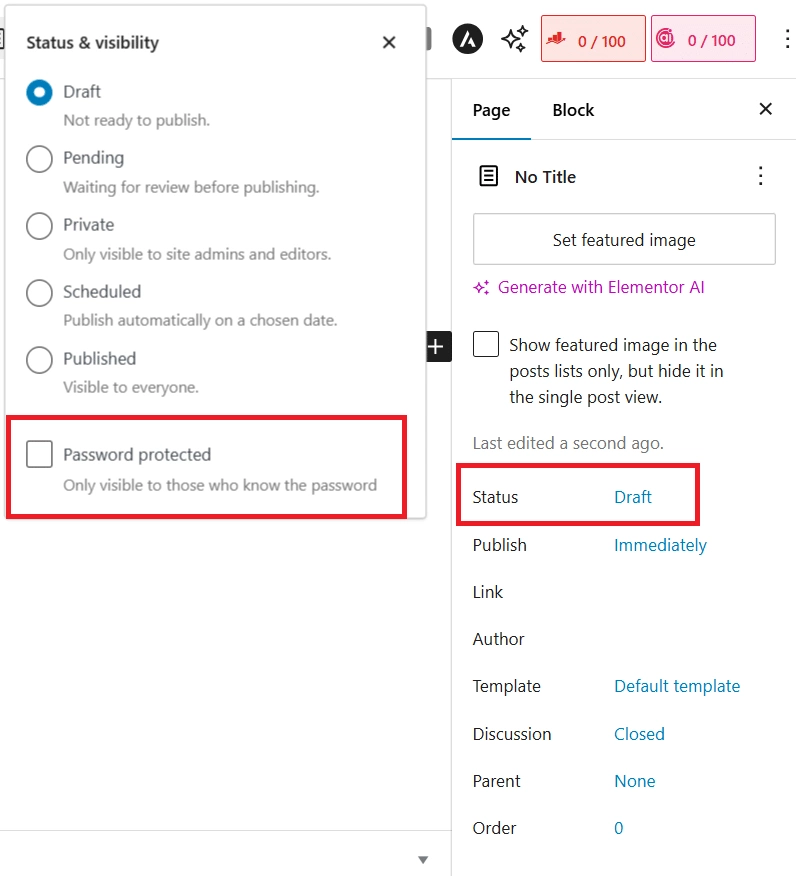
2. Open the status and visibility settings
In the editor, look at the Status panel in the post settings on the right. Click the visibility or status link next to it to open the status and visibility options.
3. Set the password and publish
Choose Password protected and type the password readers will need. Then publish or update the page.
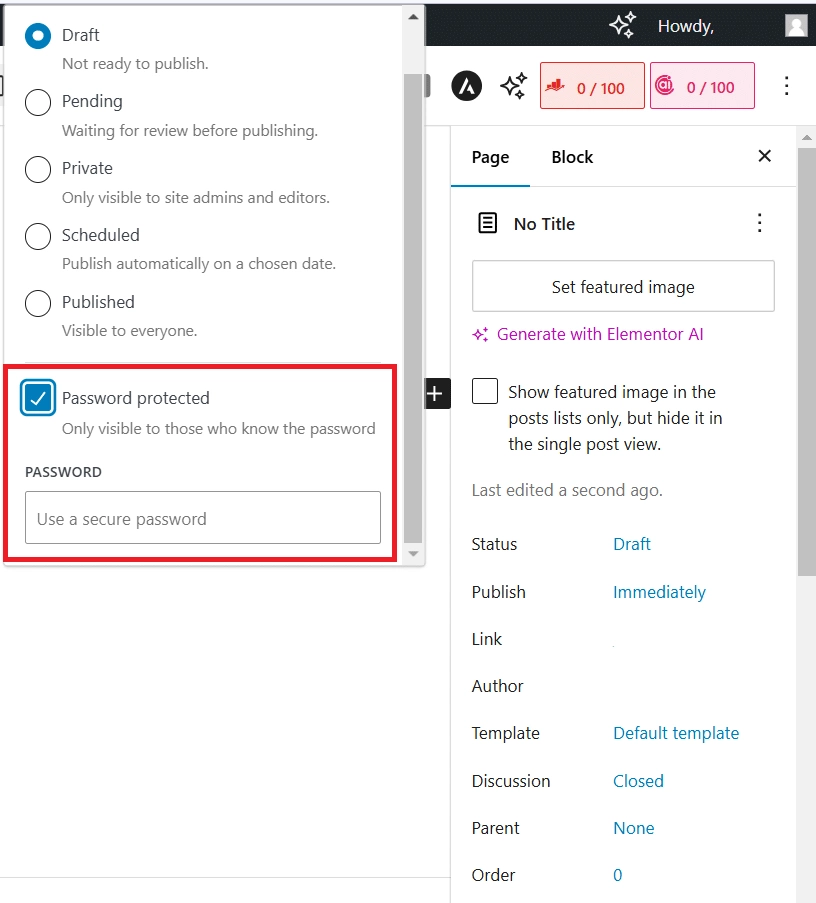
That is the whole process. Open the page in a private browser window and you should see a password prompt in place of the content.
What the Built-In Option Cannot Do (and When You Need a Plugin)
The built-in setting is quick, but it is deliberately basic. It gives you one password per page, with no way to:
- set different passwords for different people
- restrict access by user role
- expire a password after a date or a number of uses
- protect a whole category or a group of pages at once
- style the password form to match your brand
If you need any of that, a dedicated password protection plugin is the better route.
How to Password Protect a Page With a Plugin
Two well-supported options on the WordPress plugin directory cover most needs:
- Passster – Password Protect Pages and Content (10,000+ active installations, version 4.3.5, tested up to WordPress 7.0.1)
- PPWP – Password Protect Pages (30,000+ active installations, version 1.9.20, tested up to WordPress 7.0.1), which also protects posts, categories, and entire sites and supports master passwords and reCAPTCHA
Here is how protection works using Passster.
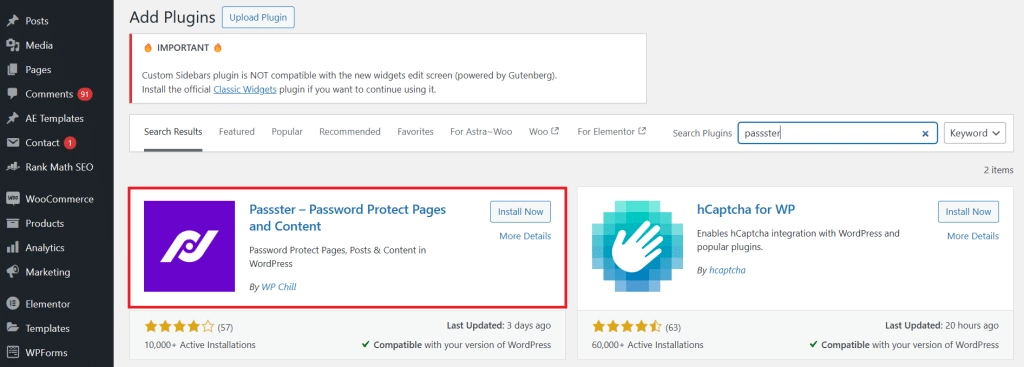
1. Install the plugin
Go to Plugins > Add New on your WordPress dashboard, search for Passster, then install and activate it.
2. Turn on protection for the page
Open the page you want to restrict. In the Page tab on the right, find the section labeled Passster, switch on the Activate Protection toggle, enter your password, and click Save.

3. Configure the password screen
Go to Passster > Settings > General to set what visitors see on the password screen. You can customize the headline, the message shown to the visitor, the placeholder text for the password field, the error message, and the button label.

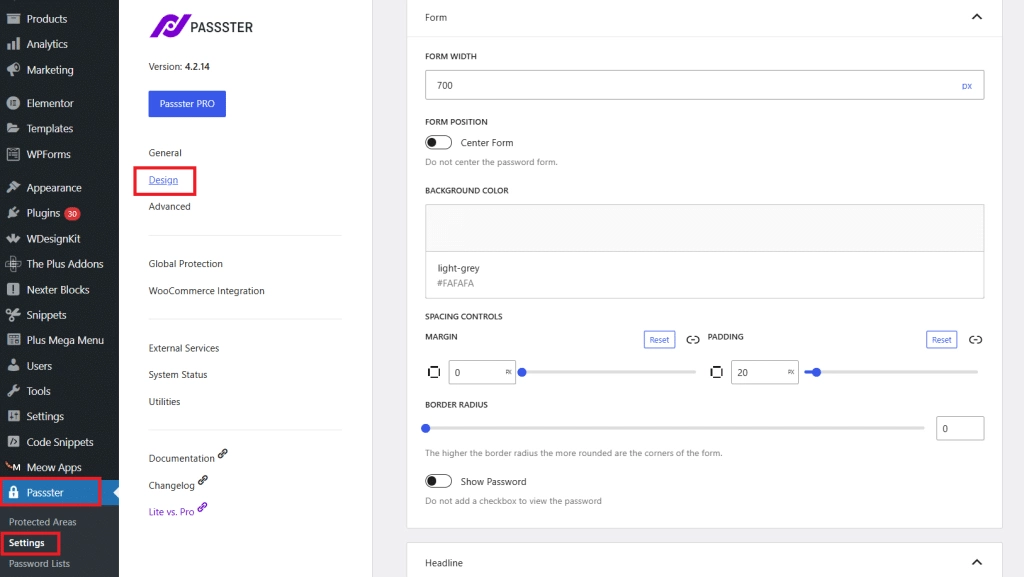
4. Match it to your design
For a password screen that matches your brand, go to Passster > Settings > Design and adjust the font, color, size, and margins.
Also Read: have too many users on your WordPress admin dashboard? Learn How to Disable the WordPress Admin Bar for All Users Except Administrators.
Private vs Password-Protected Pages in WordPress
WordPress gives you two built-in ways to restrict access to content: Private and Password protected. Both limit who can view a page, but they work differently.
1. Private page in WordPress
A private page is hidden from public view. It does not appear in search results, menus, or archives, and only logged-in users with the right permissions (Administrator or Editor by default) can see it. Anyone else who tries to open it gets a 404 error or is redirected.
2. Password-protected page in WordPress
A password-protected page is visible to anyone who has the password. The page can still appear in menus, but visitors have to enter the password before they can read the content.
Here is a quick comparison:
| Feature | Private page | Password protected page |
|---|---|---|
| Access | Only logged-in users with the right role (Admins, Editors) | Anyone who has the password |
| Search visibility | Not indexed; hidden from search | Not indexed; search engines skip protected pages |
| Best for | Internal pages, drafts, team-only content | Client pages, premium content, event pages |
Also Read: want to restrict the whole website rather than one page? See How to Make a WordPress Site Private.
Password Protection Not Working? Quick Fixes
If a protected page still shows its content, or the password is not being accepted, check these first:
- Clear your cache: A page cache or CDN can keep serving the unprotected version. Clear the site cache and the CDN after setting the password, then test again in a private window.
- Test while logged out: You can always see your own protected pages as an admin. Open the page in a private window or a different browser to see what visitors actually get.
- Check the scope: The built-in setting protects one page at a time. If you meant to protect the whole site, use a plugin like PPWP or the site-private route instead.
- Page builder content: Some builders render content in a way that ignores the built-in password. If that happens, protect the page with a plugin that works at the access level rather than the content level.
Wrapping Up
Password protecting a page in WordPress is one of the faster ways to control who sees what. For a single page, the built-in Password protected setting is all you need. When you want multiple passwords, role-based access, or an expiry date, reach for a plugin like Passster or PPWP.
Want your pages to look as good as they are secure? Nexter Blocks gives you 90+ Gutenberg blocks to design pages that stay lightweight and fast, so the pages worth protecting are also worth showing.
Suggested Reading
- How to Make a WordPress Site Private
- 5 Best WordPress Security Plugins to Protect Your Site
- How to Disable the WordPress Admin Bar for All Users Except Administrators
- What Is Gutenberg in WordPress?
- Gutenberg vs Elementor: Which Should You Use?
FAQs on Password Protecting a Page in WordPress
How secure is WordPress password protection?
WordPress password protection provides a good level of security as it stores passwords in an encrypted format within its database.
Will password-protecting a page affect SEO?
Yes, search engines usually don’t index password-protected pages, so they won’t appear in search results unless you specifically allow them.
Can I use multiple passwords to protect a page or post?
By default, WordPress allows only one password per page.
Can I make my WordPress site private?
Yes, you can make your entire WordPress site private using the password-protected plugin or by enabling “Private” mode for individual pages.
Is my site secure if I password-protect it?
Password protection is a basic security measure to restrict access to certain website pages. If you want enhanced security, consider using SSL, two-factor authentication, and security plugins for your website.
Can I remove the password from a page?
Yes. Simply edit the page, go to “Visibility” settings, change it back to “Public,” and update the page.
What do I do if I forget the password I set for a page?
If you forget the password, you can edit the page in WordPress admin and set a new password under “Visibility” settings.