---
title: "How to Customize Post Comments in WordPress Blog Post?"
url: https://nexterwp.com/docs/customize-post-comments-in-wordpress-blog-post/
date: 2024-12-17
modified: 2026-09-23
lang: en
author: "Aditya Sharma"
description: "Comments are usually bolted to the bottom of a theme's post template, styled like an afterthought. This block puts the comment list and form where you want them, and lets..."
image: https://nexterwp.com/wp-content/uploads/2024/12/How-to-Customize-Post-Comments-in-WordPress-Blog-Post_-1024x519.jpg
word_count: 539
---

# How to Customize Post Comments in WordPress Blog Post?

## Key Takeaways

- Nexter Blocks adds a Post Comments block that lets WordPress blog posts display a customizable comments section for readers to share thoughts, ask questions, and provide feedback.
- Nexter → Blocks requires the Post Comments block to be activated, and the post says the default WordPress Block editor must be active and the Nexter Blocks plugin installed and activated.
- Content tab settings include post comment title, form title, login text, logout text, cancel reply text, placeholder text, and button text, while the Style tab controls the post comment style.

Comments are usually bolted to the bottom of a theme's post template, styled like an afterthought.

This block puts the comment list and form where you want them, and lets you style them to match the rest of the page.

*For every Blog Builder setting in one place, see the [Blog Builder guide](https://nexterwp.com/docs/use-blog-builder-blocks-to-create-a-blog-post-page/).*

[LIVE BLOCK LINK](https://nexterwp.com/nexter-blocks/builder/wordpress-post-comment-form/)

## Before You Start

- **Edition:** Free. Measured with Nexter Blocks Pro deactivated, this block renders byte-for-byte the same output.- **Block to enable:** Post Comments, switched on under **Nexter > Blocks** in your WordPress dashboard.- **A single post template to build in.** These blocks belong in a template that renders one post, not on a standalone page.- **Comments enabled** in WordPress discussion settings and on the post itself.

## Steps

- Add the **Post Comments** block to your single post template.

![Adding the Post Comments block](https://nexterwp.com/wp-content/uploads/2024/12/post-comments-activation-new.png)

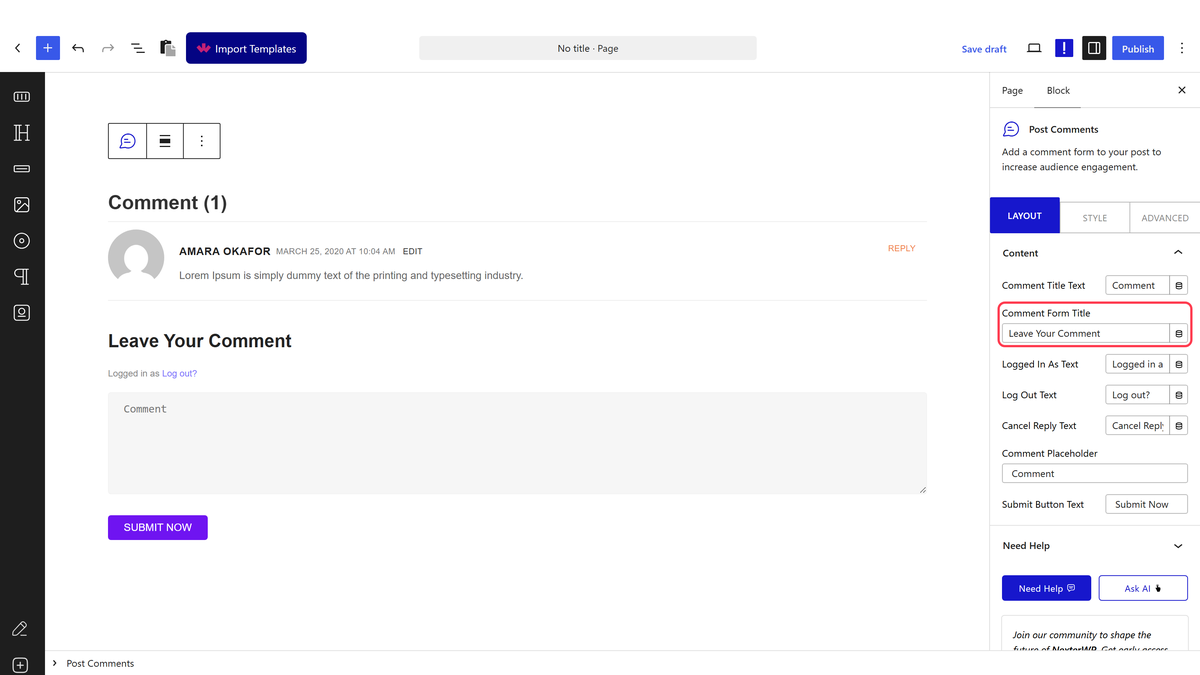
- Set the heading text and style the form fields.
![Comment section settings](https://nexterwp.com/wp-content/uploads/2024/12/post-comments-layout.png)

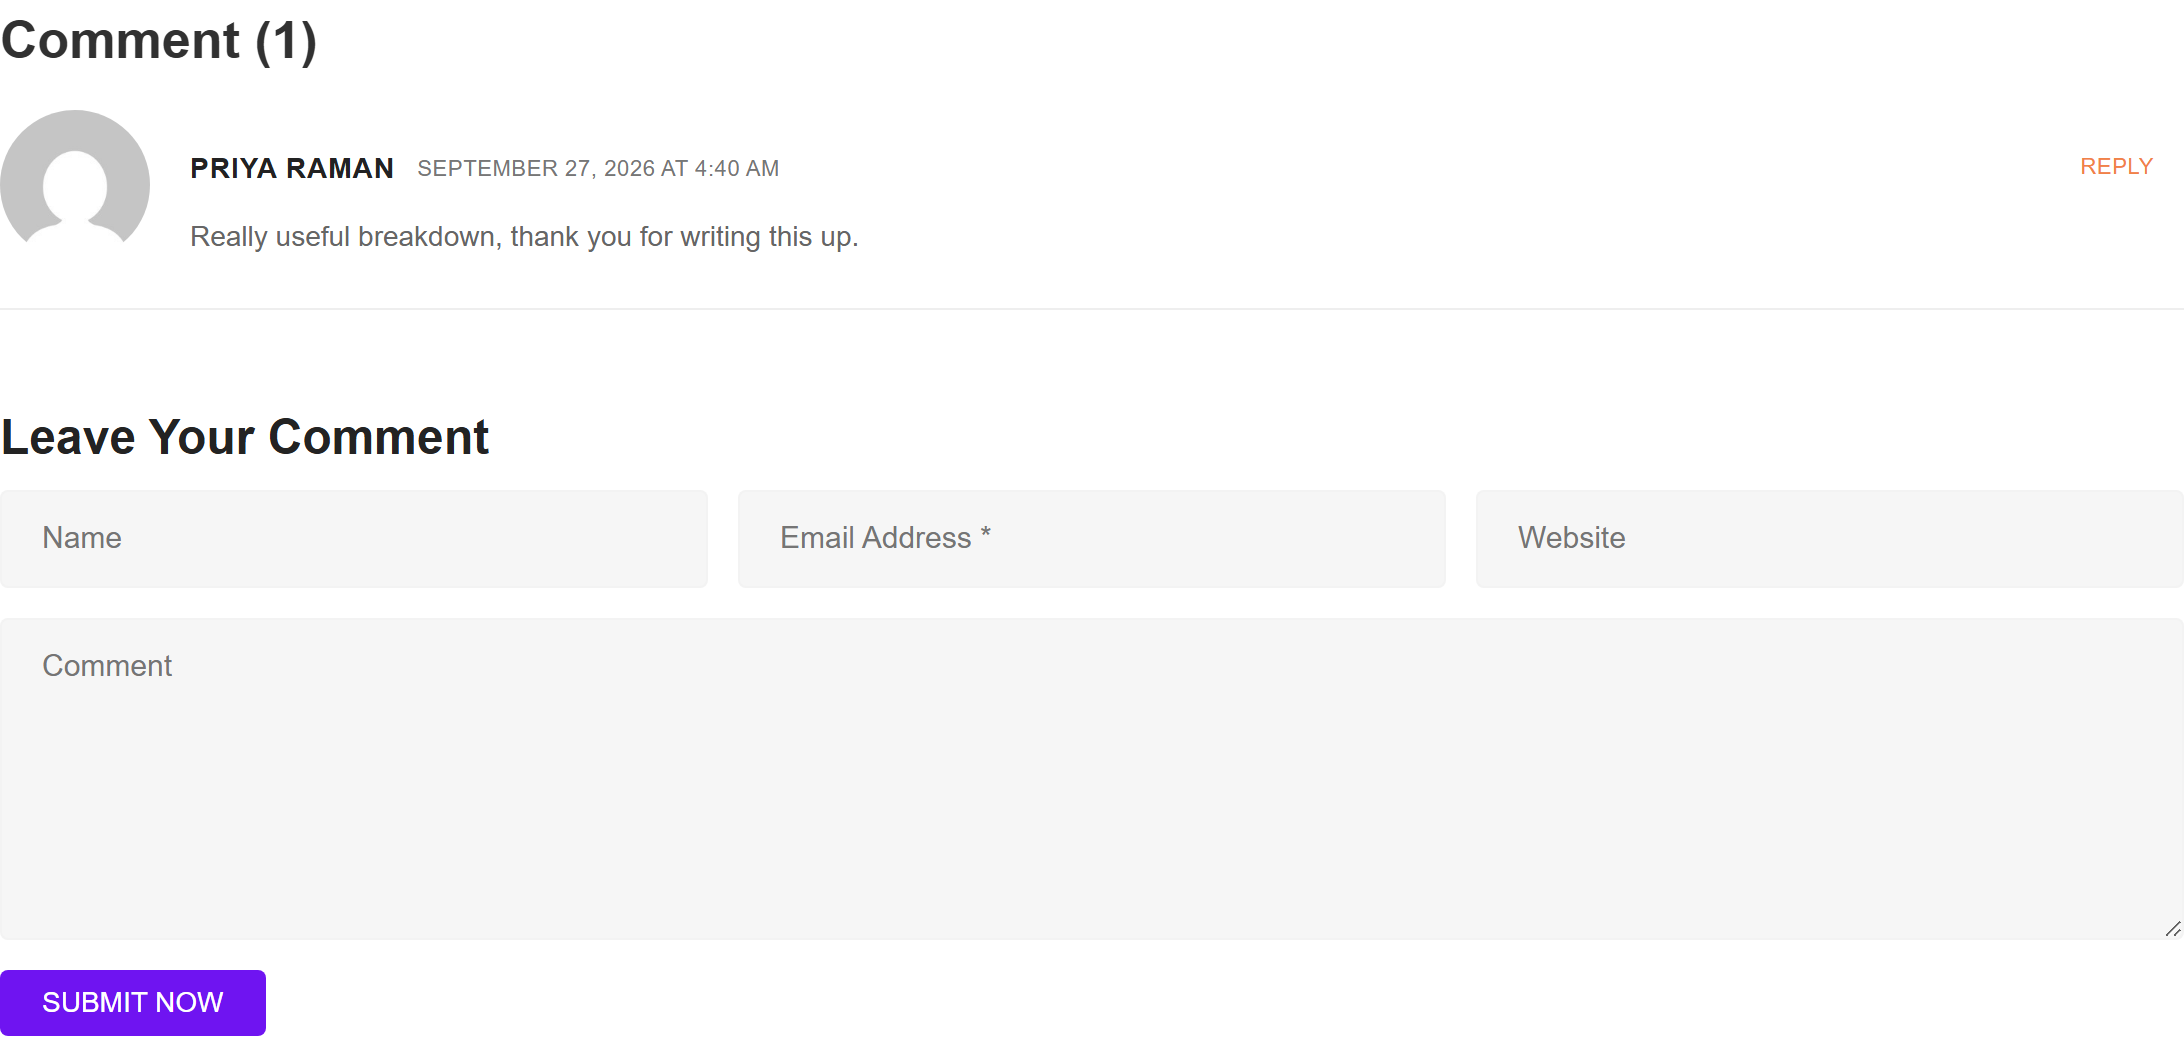
- Preview against a post that has comments.
![The comment section](https://nexterwp.com/wp-content/uploads/2024/12/post-comments-layout-demo.png)

## How It Behaves

- **Build this inside a single post template.** The block reads whichever post the page is showing — it has no setting for picking one. In a Blog Builder template that is the post being viewed, which is exactly what you want.- **It renders WordPress's real comment form.** Measured on a post with one approved comment: 2,986 bytes including a genuine `<form>`, so moderation, threading and spam filtering all keep working as normal.- **The heading shows the count.** Measured: *Comment (1)*.- **The count is of approved comments**, so anything awaiting moderation is not included.- **It respects WordPress's own settings.** If comments are closed on a post, there is nothing for the block to render.- **On an ordinary page it shows that page's data, not nothing.** Measured: a Post Title block dropped onto a normal page rendered the page's own title. The block does not check that it is on a post, so a mistake here shows the wrong thing rather than an error.- **With no post to read, it renders an empty shell rather than disappearing.** Measured outside any post: the markup is still there with nothing inside it. If you are seeing an unexplained gap in a template, this is usually why.

## Limitations

- **It renders WordPress's comment form, not its own.** That is the right choice for compatibility, but it means the field markup is core's and some of it is beyond this block's styling.- **Closed comments render nothing.** Check the post, not the block, when the section is missing.- **Threaded replies follow your discussion settings**, including the nesting depth, which is set in WordPress rather than here.- **A comment plugin that replaces the form** will replace it here too.- **Only approved comments are counted and shown.**

## Troubleshooting

### The comment section is not showing

Comments are probably closed on that post, or disabled site-wide in the discussion settings. The block renders nothing when there is nothing to render.

### The count looks wrong

Only approved comments are counted. Anything held for moderation is excluded.

### My styling is not applying to the form fields

The form comes from WordPress itself, so parts of it carry core markup this block does not wrap.

### Replies are not nesting

Threaded comments and their depth are WordPress discussion settings, not block settings.

## Related Docs

- [Use Blog Builder blocks to create a blog post page](https://nexterwp.com/docs/use-blog-builder-blocks-to-create-a-blog-post-page/)- [Add a post author box](https://nexterwp.com/docs/add-post-author-box-in-wordpress-blog-post/)- [Add post meta](https://nexterwp.com/docs/add-post-meta-in-wordpress-blog-post/)- [Add next and previous buttons](https://nexterwp.com/docs/add-post-next-previous-button-in-wordpress-blog-post/)- [Advanced tab settings](https://nexterwp.com/docs/use-advanced-tab-in-nexter-blocks/)

## Frequently Asked Questions

**Q: Why is the Post Comments block not showing in my WordPress blog post?**
A: The usual blocker is setup, not styling. Nexter Blocks only adds the Post Comments block when the default WordPress Block editor is active and the Nexter Blocks plugin is installed and activated. The block itself also has to be turned on under Nexter → Blocks by searching for Post Comments and enabling it. If any of those pieces are missing, the comments section will not appear in the blog post template.

**Q: What do I need before I can customize post comments in a WordPress blog post?**
A: The page calls out three basics: the default WordPress Block editor must be active, the Nexter Blocks plugin must be installed and activated, and the Post Comments block must be activated in Nexter → Blocks. That setup matters because the comments section is added as a block inside the blog post template, not as a standalone widget. If you are building the template from scratch, the page also points to using the free Nexter Builder.

**Q: Can I add a custom comments section to a WordPress blog post template without coding?**
A: The Post Comments block from Nexter Blocks is built for that exact use case. It lets you add the comments section to the blog post template and customize it from the Content tab and Style tab, so you are not editing theme files or writing code. The page also notes that you can create the blog post template with the free Nexter Builder, which keeps the setup inside WordPress.

**Q: What parts of the WordPress comment form can I change with this block?**
A: The Content tab covers the text users actually see: post comment title, form title, login text, logout text, cancel reply text, placeholder text, and button text. That matters because these labels shape how clear the form feels to readers before they submit anything. The Style tab handles how the section looks visually, so content changes and design changes stay separate instead of being mixed together.

**Q: What is the best way to set up post comments on a blog post template?**
A: The cleanest setup is to place the Post Comment widget in the right spot on the blog post template first, then tune text in Content and appearance in Style. That order helps because layout comes before polish. The page says this block belongs in a blog post template created with the free Nexter Builder, so it fits naturally into a structured post layout instead of being dropped into random content.

**Q: Where do advanced settings for Nexter blocks live if I need more control?**
A: Advanced options are shared across all Nexter blocks, so they are handled separately from the Post Comments content and style controls. The page points to a dedicated [View Advanced tab tutorial](https://nexterwp.com/docs/advanced-tab-settings-overview/) for that part. That separation is useful because it keeps comment text edits simple while leaving deeper block settings in one common place.