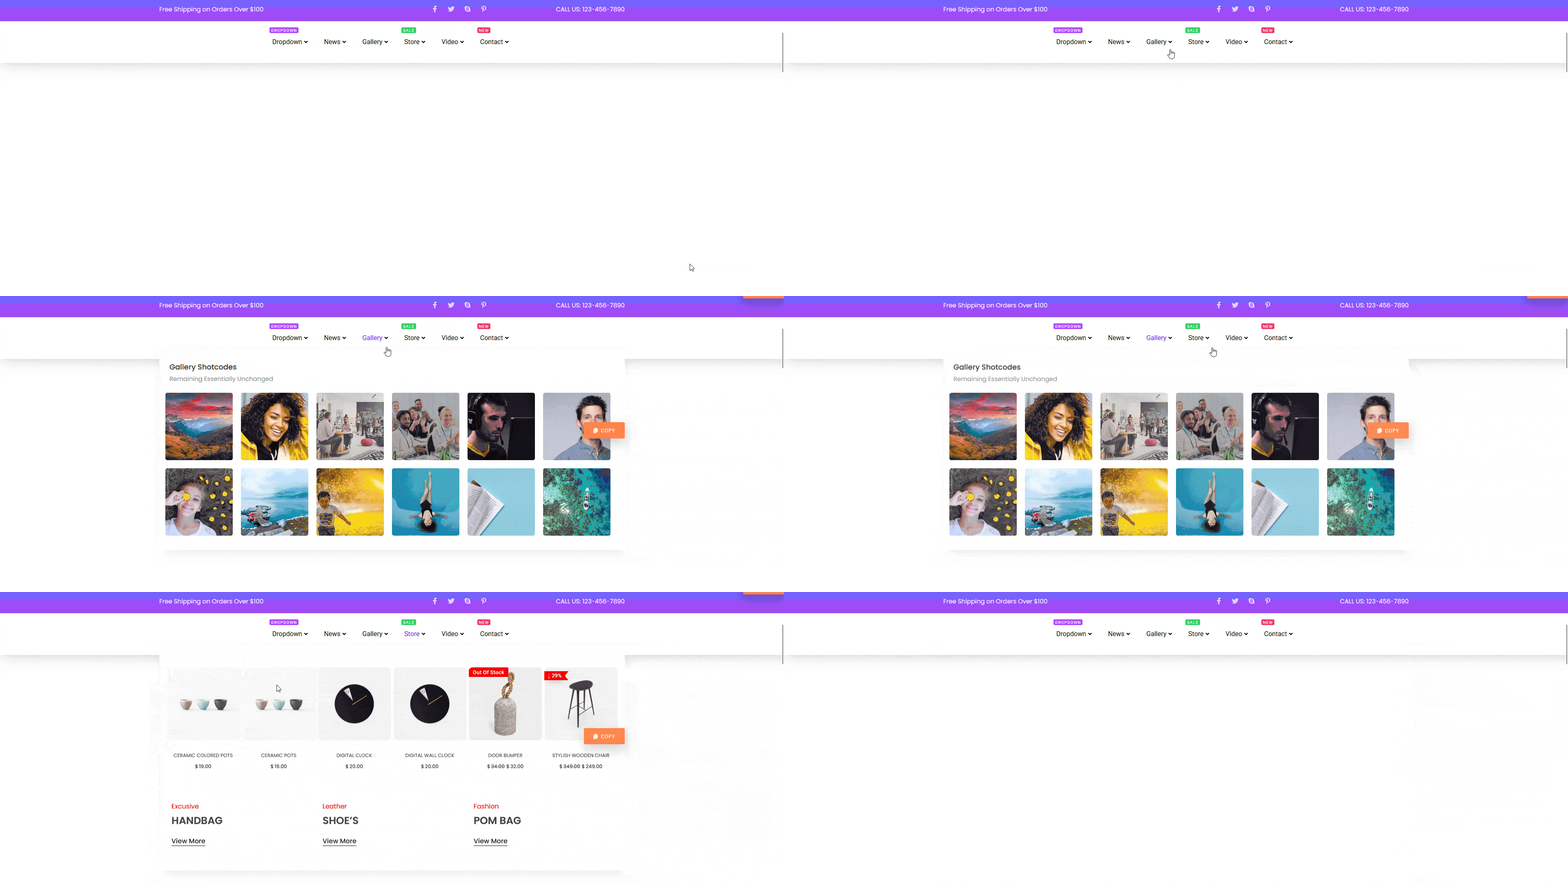
Do you want to create a WordPress mega menu? Mega menus are large, multi-column drop-down menus that display a wide range of options and subcategories in a single panel, providing a more efficient and organized way for visitors to navigate a website.
With the Navigation Menu block from the Nexter Blocks, you can easily create a WordPress mega menu.
To check the complete feature overview documentation of the Nexter Blocks Navigation Menu block, click here.
Requirement – This block is a part of the Nexter Blocks, make sure it’s installed & activated to enjoy all its powers.
Create Patterns for Mega Menu
To create the mega menu using the Navigation Menu block you have to create patterns for each mega menu item.
Then to create a mega menu item follow the steps –
1. From the Dashboard go to Appearance > Patterns > Add New Pattern.
2. Click On the Add New Pattern section, it will open a popup.
3. Then, add the Pattern name, keep the Synced toggle enabled, and click on the Add button.
4. On the next screen create the menu using any WordPress blocks and then publish it.
Following this process, you have to create all the mega menu items that you want in your mega menu.
Create the Mega Menu
To do this, add the Navigation Menu block to the header template and follow the steps –
Note: To create the header template, you can use the free Nexter Builder.
Add Top Level Menu
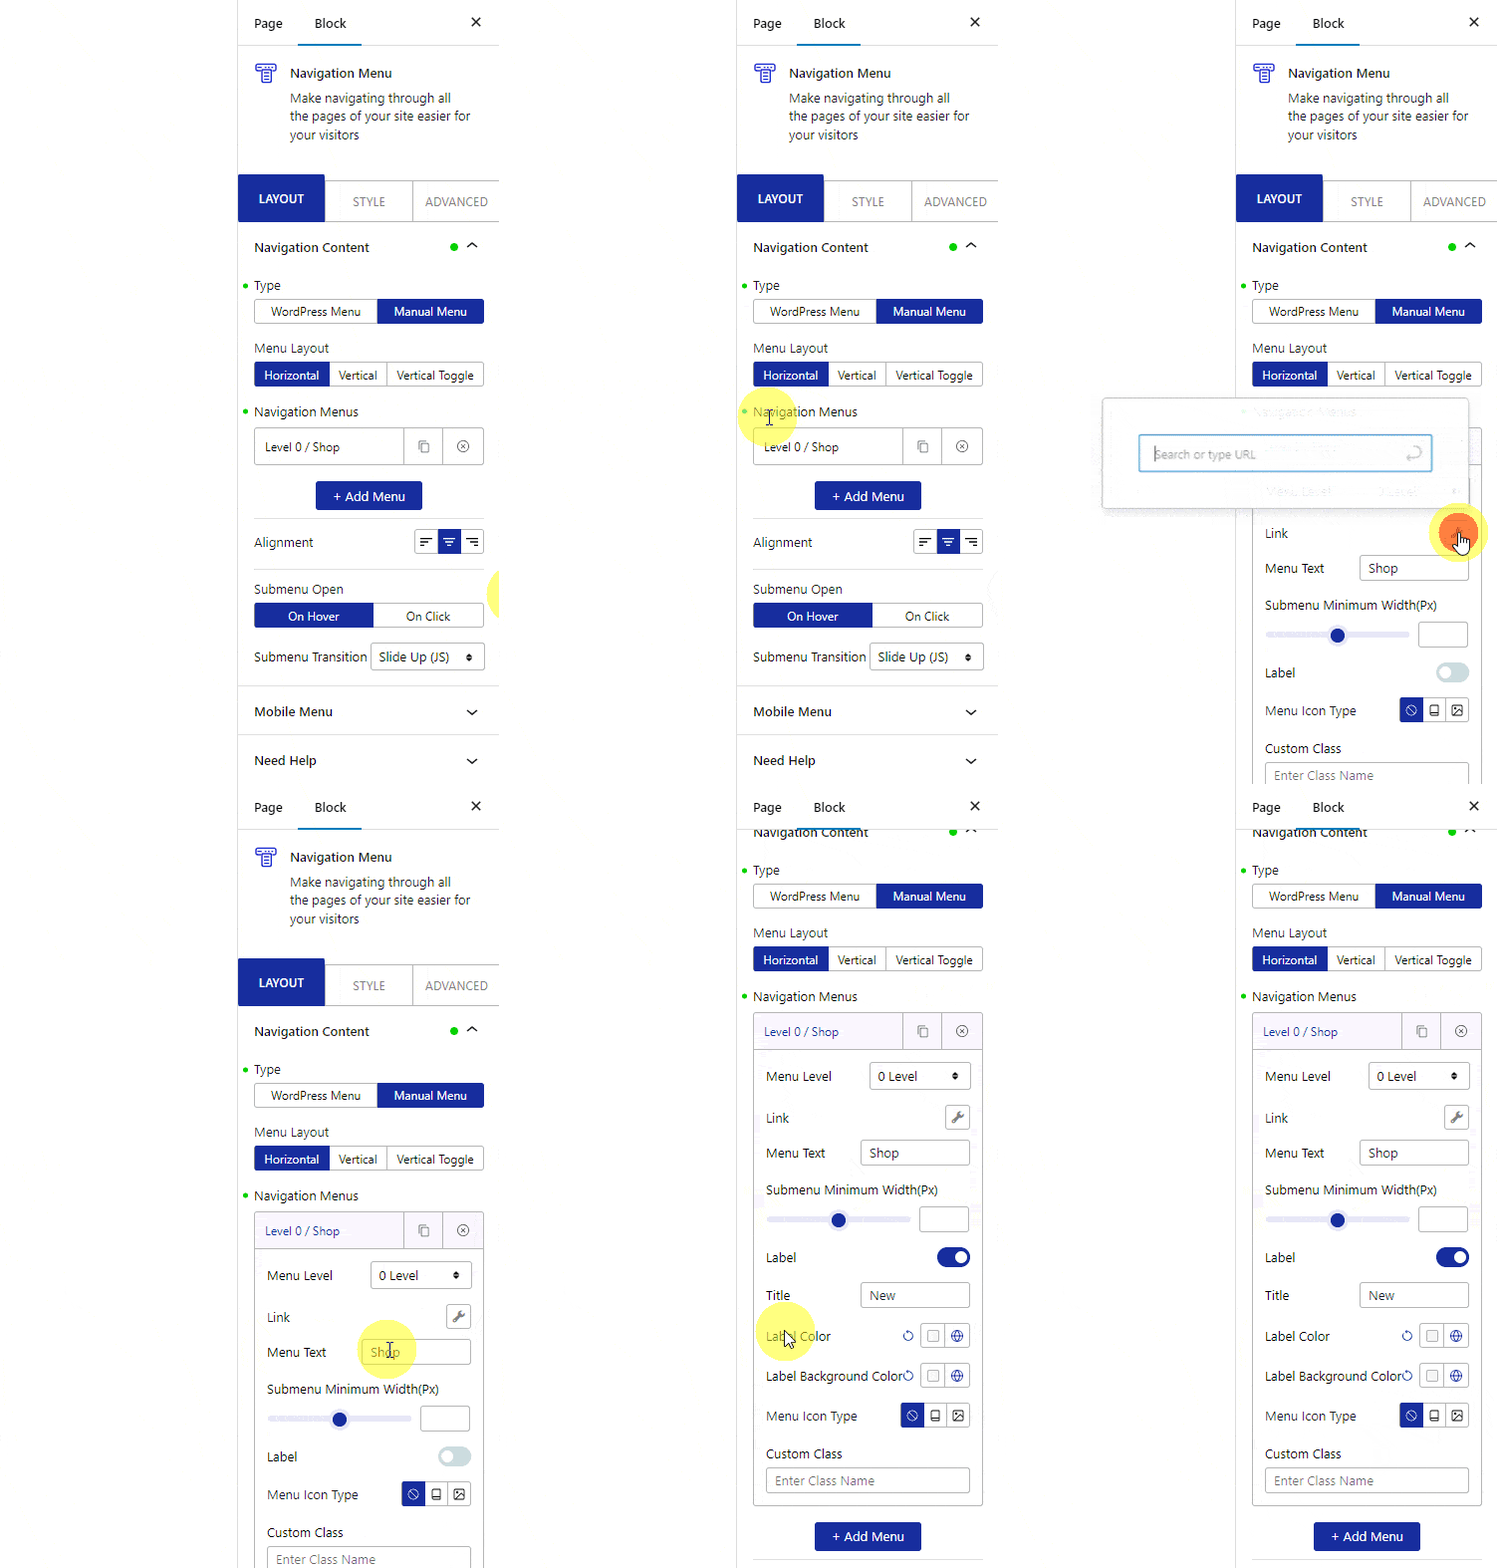
1. Select Manual Menu from the Type section.
2. Then select Horizontal from the Menu Layout section.
3. Now you’ll see an item under the Navigation Menus section. Open the item.

4. From the Menu Level dropdown, you have to select the menu level. Here you’ll find 0 Level to 6 Level, 0 Level being the top level menu subsequently followed by other levels.
So to create the top level menu, you have to set the Menu Level to 0 Level.
5. In the Link field, you can add the URL of the item.
6. In the Menu Text field, you have to add the label name of the menu item.
From the Submenu Minimum Width (Px) section, you can set the dropdown content width.
From the Label toggle, you can add an additional label to the menu item. You can also manage the label’s color and background from here.
You can add an icon or image to the menu item from the Menu Icon Type section.
In the Custom Class field, you can add a class name to target the menu item with custom CSS or JS.
7. Then click on the + Add Menu button to add more items.
Note: To make top level menu items, make sure you have set 0 Level in the Menu Level in each item.
Add Sub Menu (Mega Menu)
1. To add a submenu, click on the + Add Menu button to add an item.
2. Open the new item, and select 1 Level from the Menu Level.

Note: For sub menu, you have to put the sub menu items below its top level menu item to show them in the dropdown.
Note: Similarly, you can create a multi level dropdown menu by selecting subsequent levels and placement.
3. From the SubMenu Type, you have to select the sub menu type. Here you’ll find two options –
- Link – For creating a normal dropdown menu.
- Mega Menu – For creating a mega menu.
For the Link option, you’ll get the same options as in the top level menu, additionally you can add a description to the item.
Let’s select the Mega Menu option here.
4. From the Select Pattern dropdown, select your pattern.
Note: You can also create a Pattern from here by clicking on the Create Pattern button.
From the AJAX Load section, you can select the content load type. Here you’ll find two options –
- Standard AJAX – This will load the pattern in the viewport.
- Default – This will load the pattern normally.
Note: To make the Standard AJAX work, make sure to enable the Enable Ajax Templates toggle from Nexter Blocks > Extra Options > Settings.
From the Mega menu Type section, you can set the mega menu container width. You can set the width to default, container, or full width.
When you select the default width, you get options to set a custom width for the mega menu and content alignment.
By enabling the Mobile Mega Menu Link toggle, you can add a dynamic link and menu text for the sub menu item instead of the mega menu for mobile.
Note: For the Mobile Mega Menu Link to work make sure the Responsive Mobile Menu toggle is enabled in the Mobile Menu tab and Custom is selected in the Mobile Menu section.
From the Submenu Minimum Width (Px) you can set the width of the sub menu when SubMenu Type is set to Link.
The rest of the options are the same as you’ll find in the top level menu.
Similarly, you can add more sub menu items by clicking on the + Add Menu button.
That’s it now you’ll have a beautiful horizontal mega menu.


