Are you looking to harness the power of Facebook Pixel to track events on your WordPress website? Tracking Facebook Pixel events allows you to gain valuable insights into user behavior, optimize your marketing campaigns, and boost your conversion rates.
With the Event Tracking extension of Nexter Blocks, you can easily track your WordPress website events with Facebook pixel.
To check the complete feature overview documentation of Nexter Blocks Event Tracking extension, click here.
Requirement – This extension is a part of Nexter Blocks, make sure it’s installed & activated to enjoy all its powers.
To track your WordPress website events on Facebook, you must have Facebook pixels installed on your website.
Create Facebook Pixels
Log into your Facebook account and follow the steps –
1. Go to Events Manager.
2. Click on the + icon.
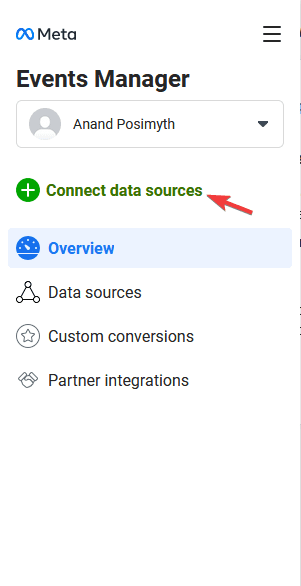
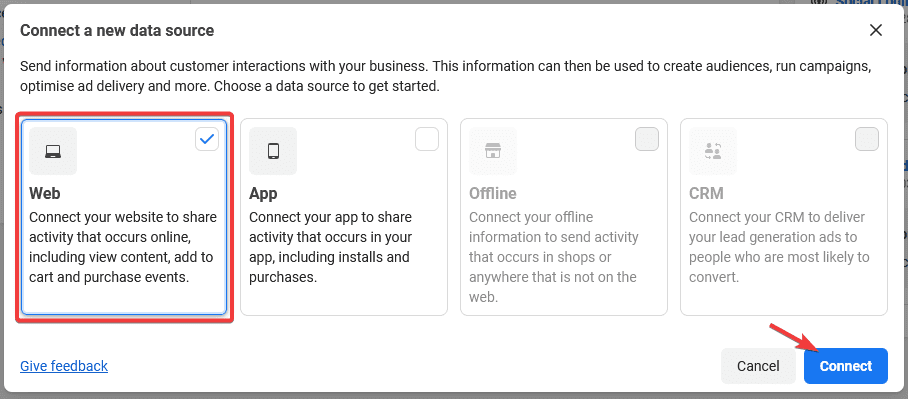
3. Select Web and click on Connect button.
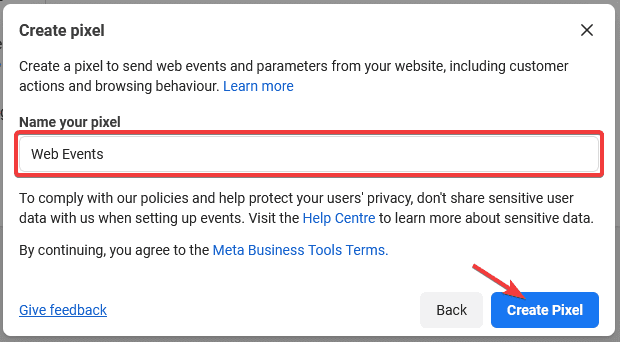
4. Add a name to your pixel and click the Create Pixel button.
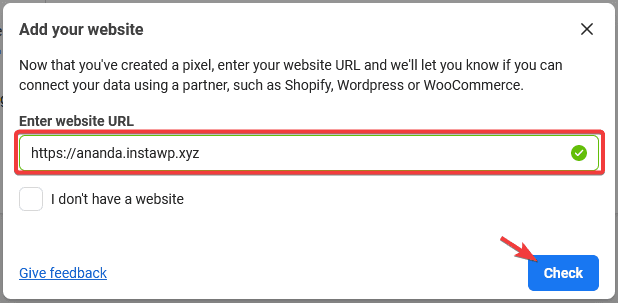
5. Add your website URL and click on the Check button then click on the Next button.
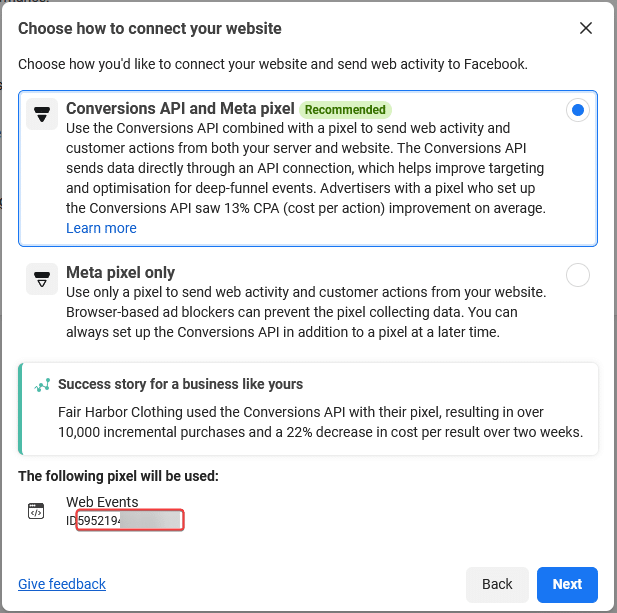
6. On the next screen you’ll get your Facebook pixel id. The number mentioned below (excluding ID) your Pixel name is the pixel id. Copy the id and save it in a notepad.
Install Facebook Pixel using Nexter Blocks
To install the Facebook pixel using Nexter Blocks follow the steps –
Note: If you’ve added Facebook pixels id on your website using any other method or plugin then you don’t need to follow this step.
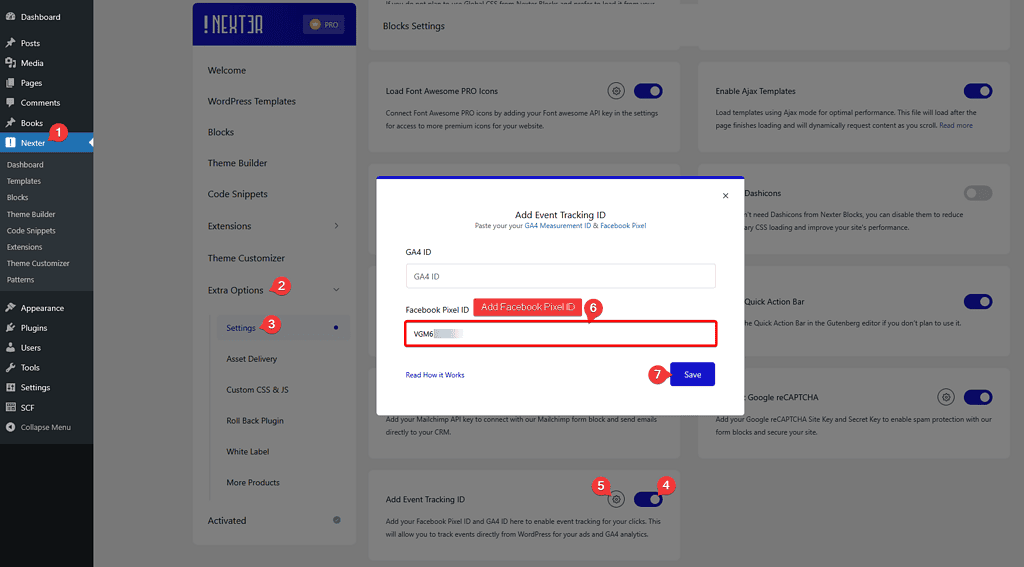
1. Go to Nexter → Extra Options → Settings.
2. Scroll down to the Add Event Tracking ID section, enable the toggle and click on the settings icon.
3. In the popup, add the Facebook pixel in the Facebook Pixel ID field and click on the Save button.
Once you’ve added your Facebook pixel id, you can use buttons, forms or any custom links on blocks from Nexter Blocks to track events. So, for instance, add the button block from Nexter Blocks on the page.
1. Go to Advanced > Event Tracking.
2. Turn on the Facebook Pixel toggle.
3. In the Event Type dropdown, you’ll find all the standard Facebook events and the option to create custom Facebook events.

Select the event you want to track. Suppose we want to track purchase events, so select Purchase from the dropdown.
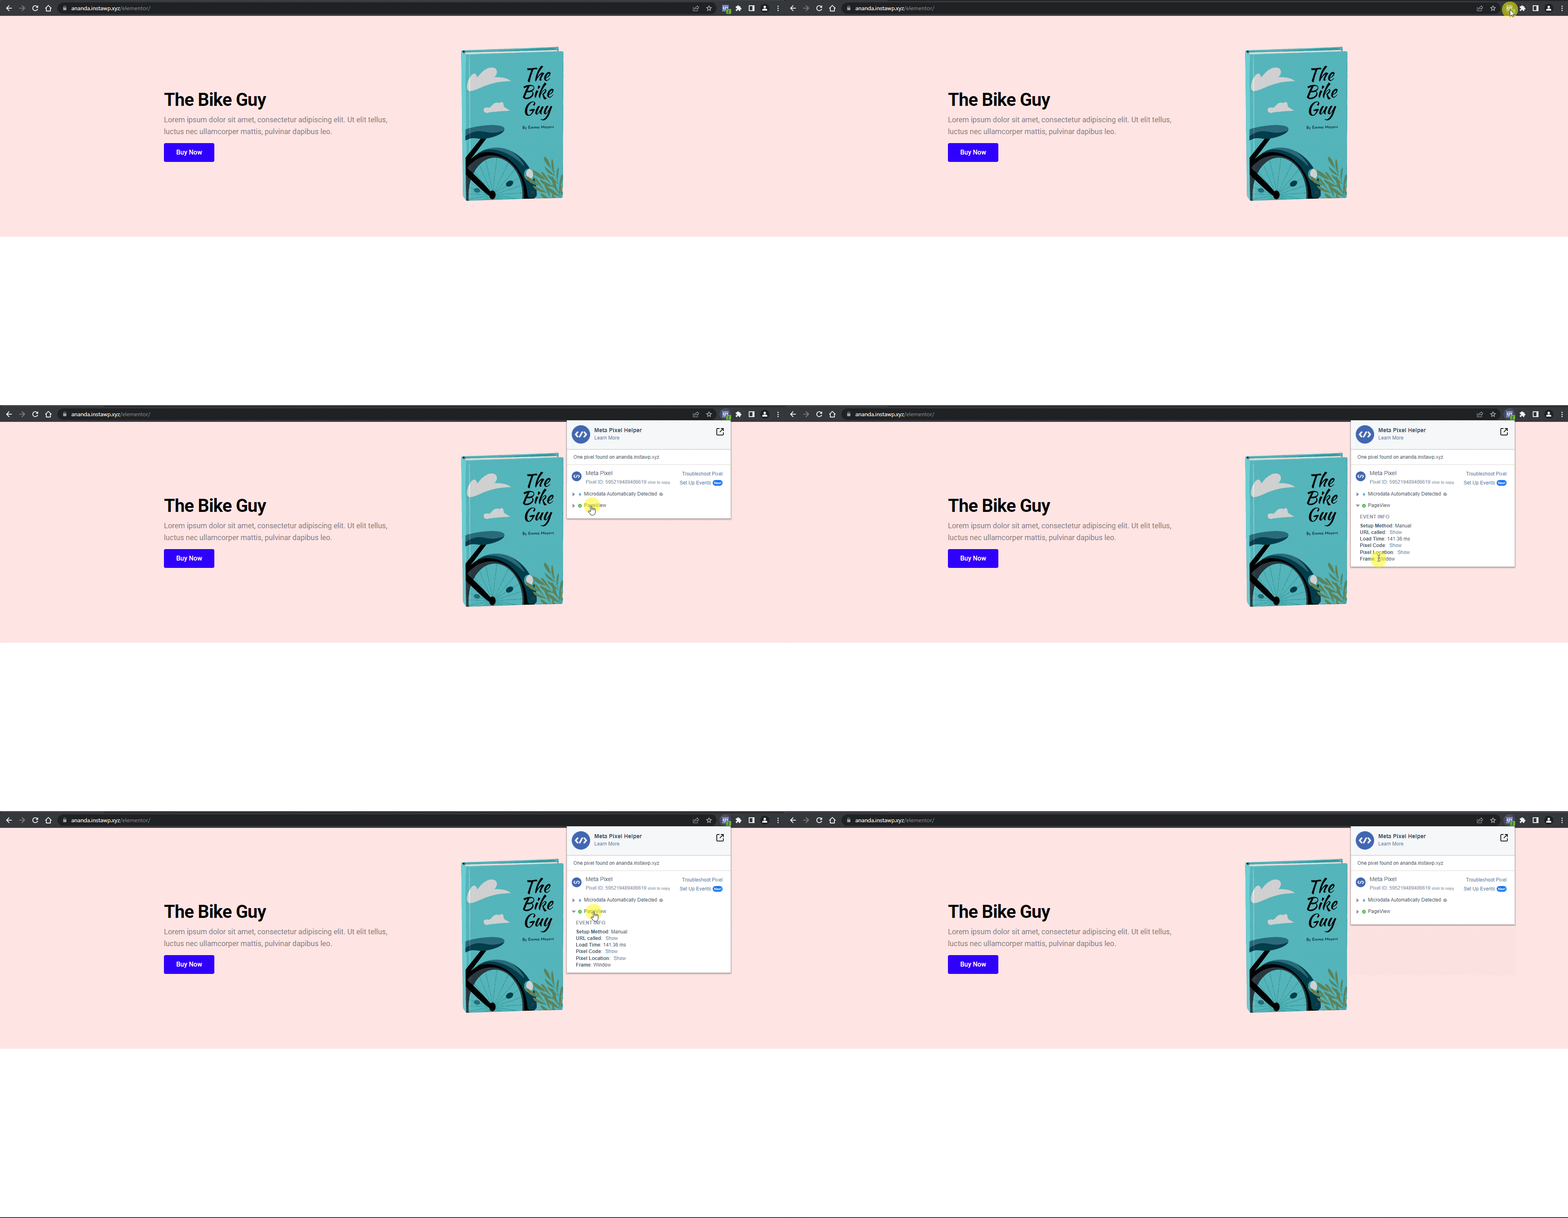
4. To check the event, install the Meta Pixel Helper Chrome extension.
5. Open the page in Chrome and then click the Meta Pixel Helper icon you’ll see the default PageView event.
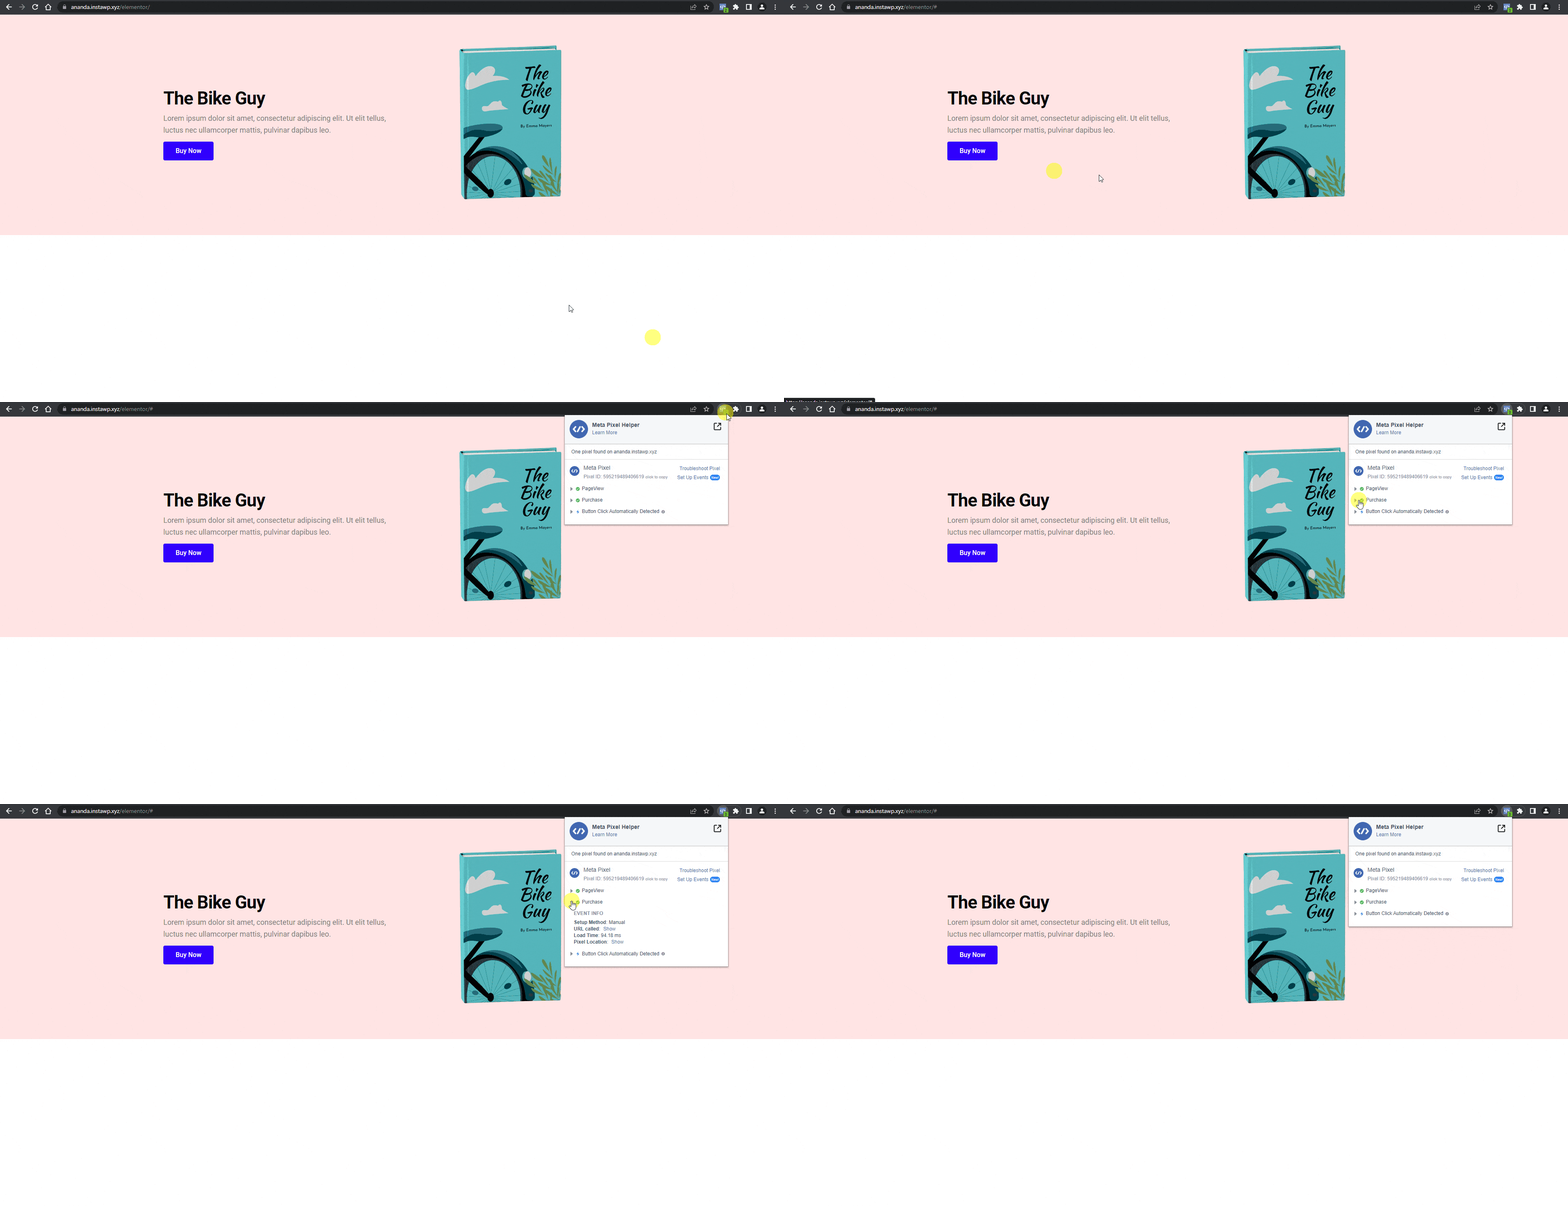
6. Then click the button and again click the Meta Pixel Helper icon. Now you’ll see the Purchase event along with the PageView event.
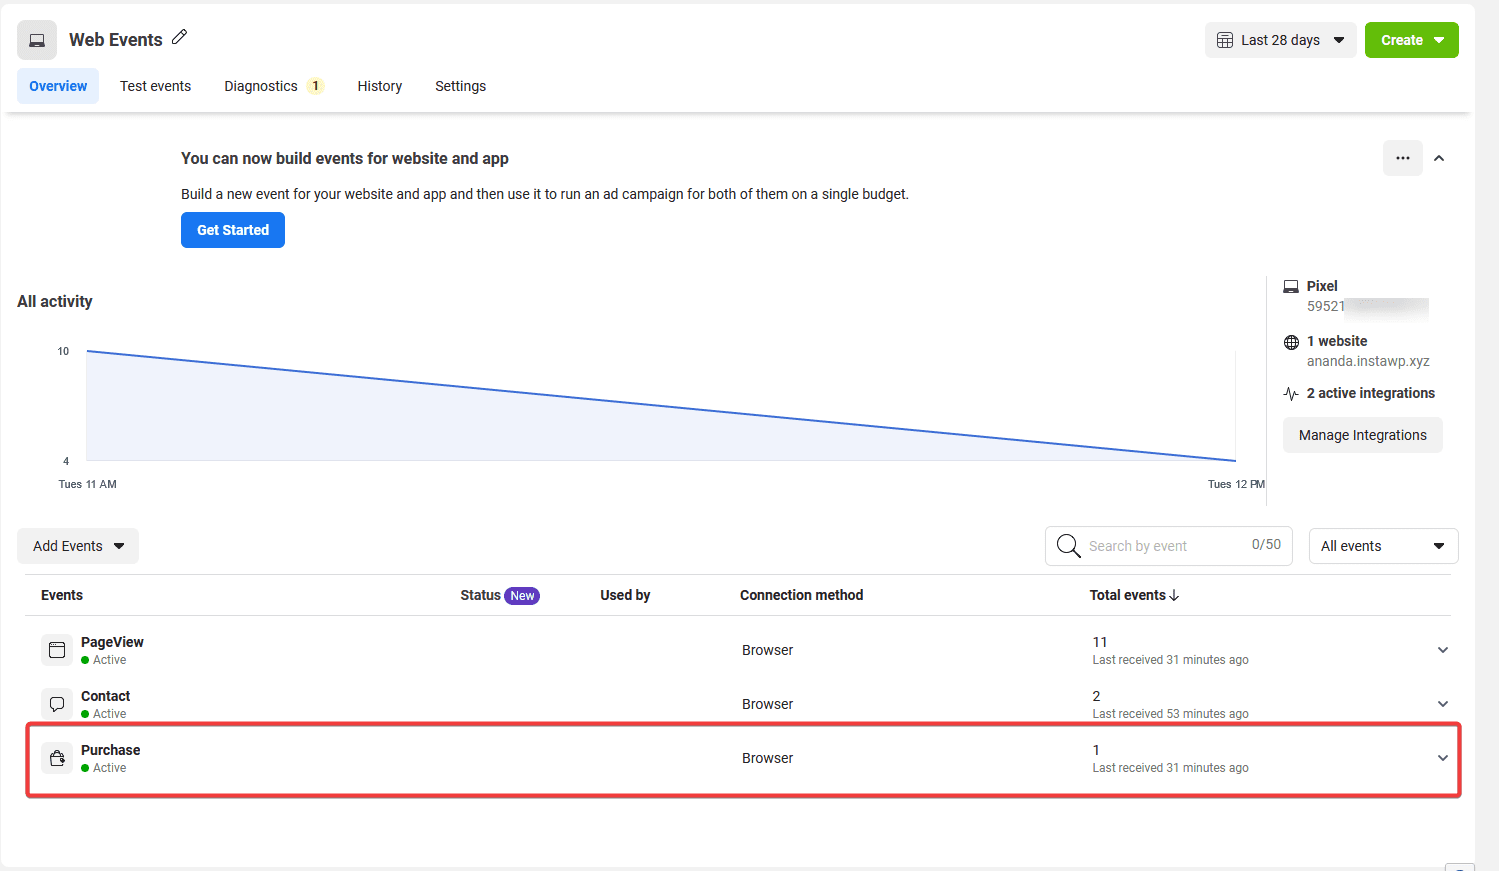
7. After a few minutes, you’ll be able to see the event showing up in the Events Manager section on Facebook.
Also, read How to Track Google Analytics 4 Events With WordPress.

