


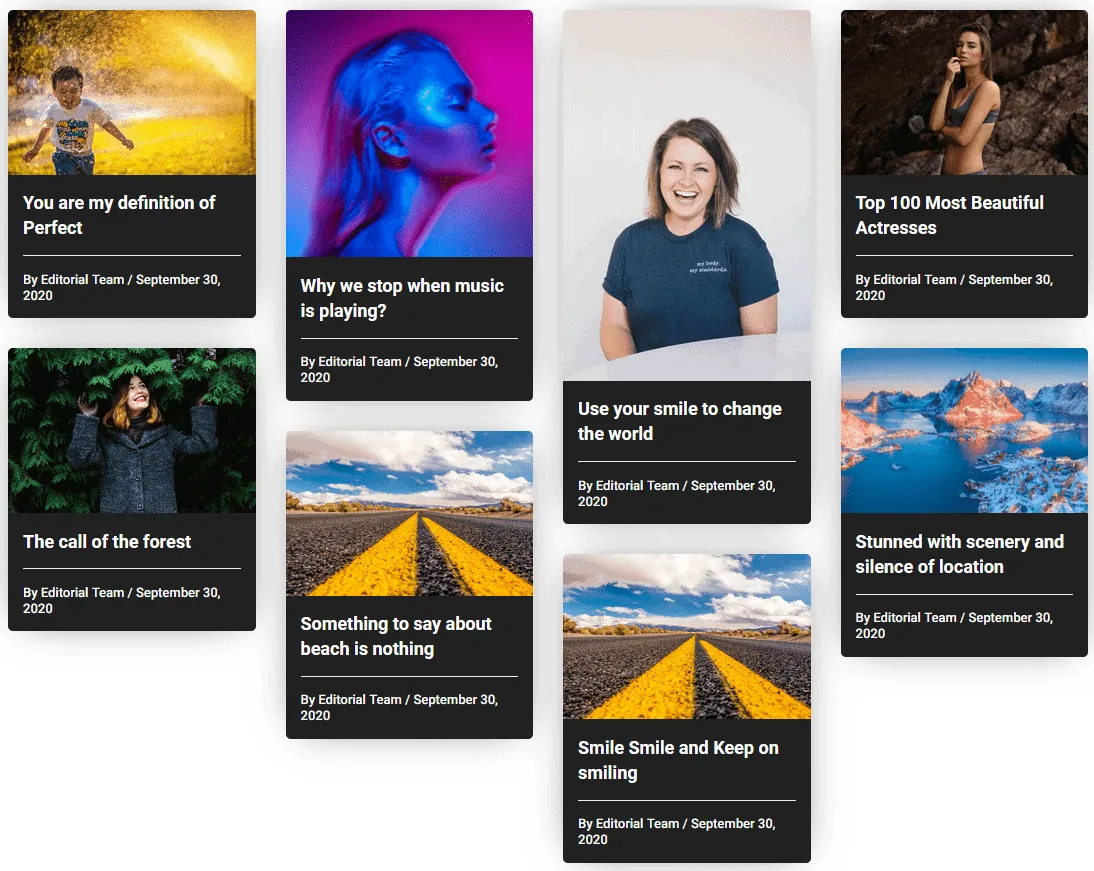
If you want to showcase your blog posts in a visually appealing layout on your WordPress website, a masonry grid is an excellent option. This layout presents your blog posts in a dynamic, fluid grid with varying column heights that creates an engaging display without uniform row sizes.
To achieve this layout, use the Post Listing block from Nexter Blocks, which offers a variety of options for customising the layout, style, and content of your blog post listings in the WordPress block editor.
To check the complete feature overview documentation of the Nexter Blocks Post Listing block, click here.
Requirement – This block is a part of Nexter Blocks, make sure it is installed and activated to enjoy all its features.
To do this, add the Post Listing block to the page. After selecting the appropriate options from the Post Listing Types and Select Post Type dropdowns and any other related settings, select Masonry from the Layout section. Use the Masonry layout when your posts have featured images of varying heights, since it eliminates the uneven whitespace you would see in a standard grid layout.
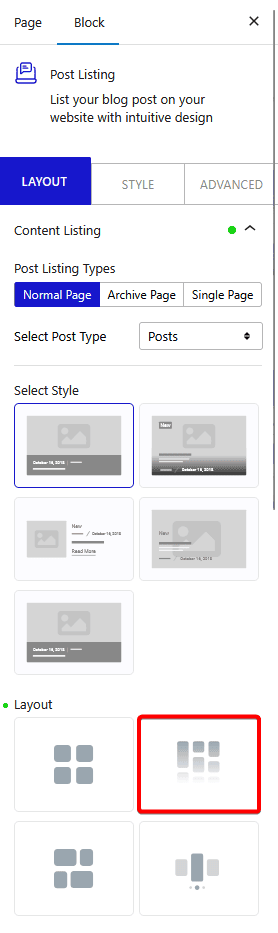
Your blog post listing will now display in a masonry layout. Manage the number of masonry columns from the Columns Manager tab. Set different column counts for desktop, tablet, and mobile to keep the layout responsive across all screen sizes.
Use the other settings and styling options to fine-tune the appearance of each post card, including spacing, typography, hover effects, and pagination.
Also, check How to Show Blog Posts in Grid Layout in WordPress.
Also, check the Spacer block for adding precise vertical or horizontal gaps between posts and other layout elements.