Do you want to create a multilingual site with the Nexter theme? The Nexter theme is 100% compatible with the WPML plugin, so you can easily create a multilingual WordPress site using the Nexter theme and WPML.
Let’s learn how to create a multilingual site using the Nexter theme and WPML.
As WPML is a premium plugin, please ensure that you have purchased a valid WPML license before proceeding.
Setup WPML
To translate your Nexter theme based website using WPML, you’ll need to install the OTGS plugin.
Install and Activate the OTGS Plugin
You have to install the OTGS plugin, which is a WPML plugin installer that will allow you to install other required WPML plugins easily.
To install the OTGS plugin, follow the steps –
1. Log in to your WPML account and download the OTGS plugin. It will download the plugin zip.

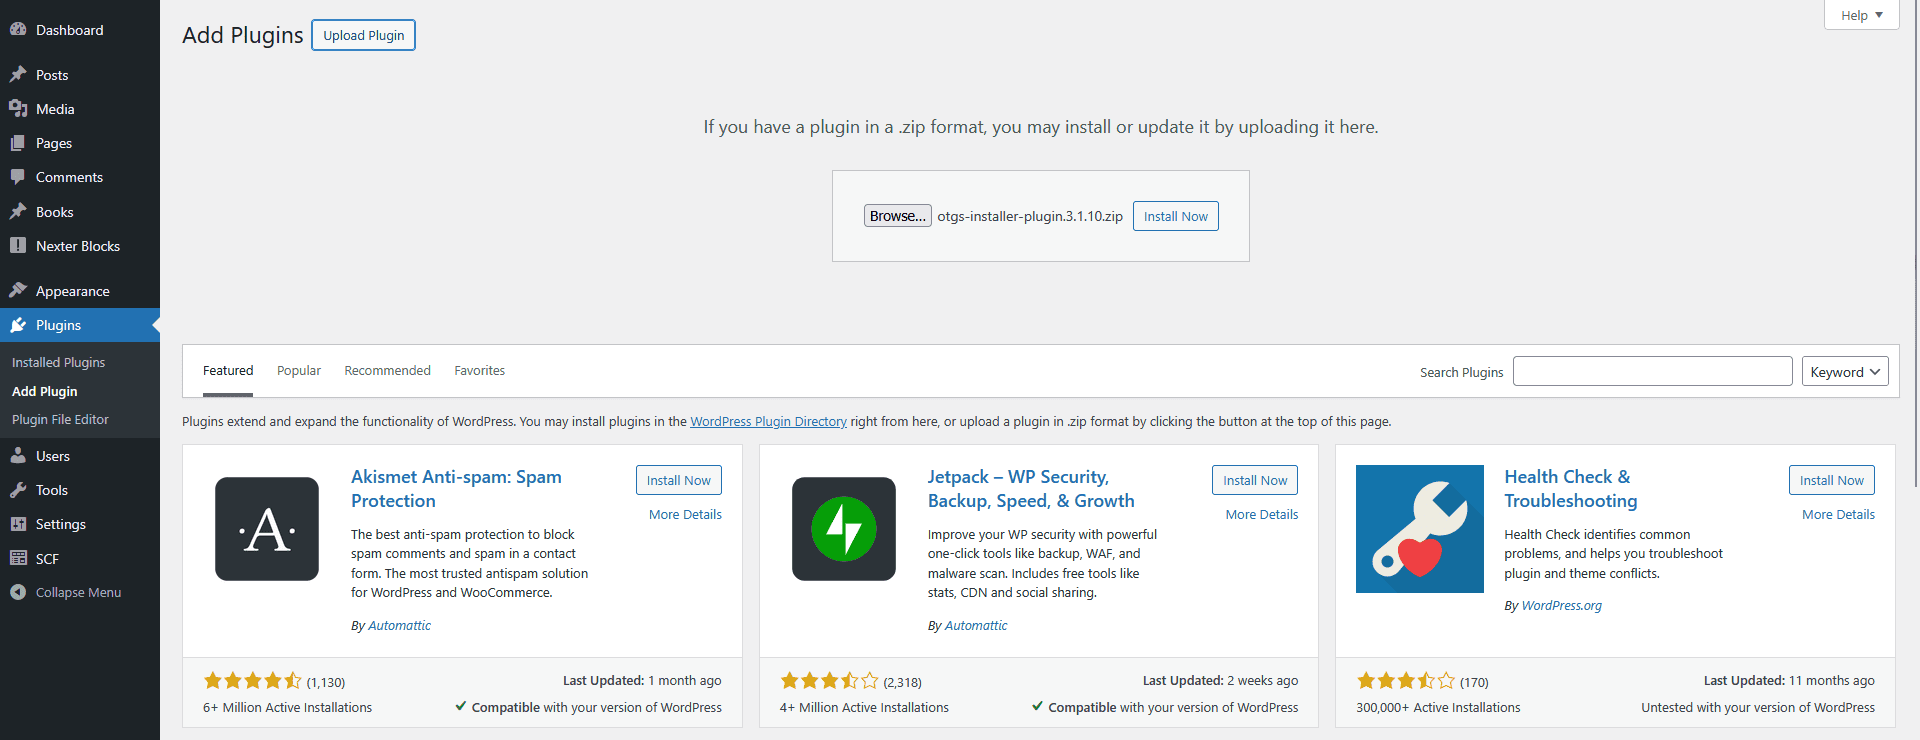
2. To install the plugin, from your WordPress dashboard, go to Plugins > Add New > Upload Plugin then click on the Browse button to select the downloaded OTGS plugin zip, after that click on the Install Now button.
3. After that, activate the plugin in the next screen.
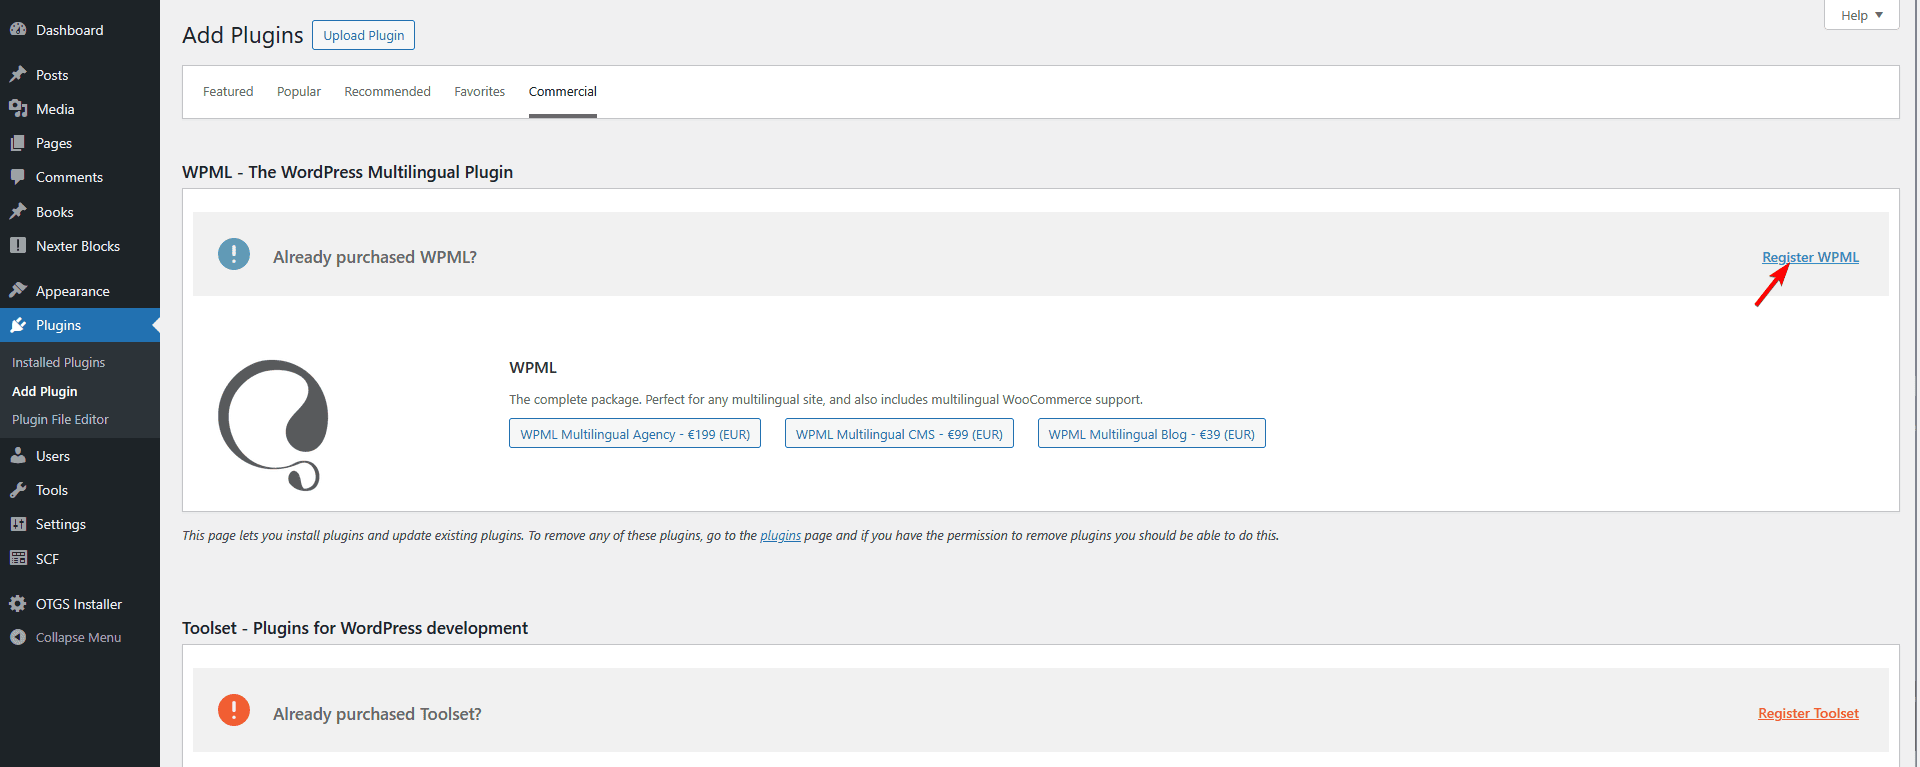
4. On the next screen, click on the Register WPML button. You may complete the registration process and get the site key.
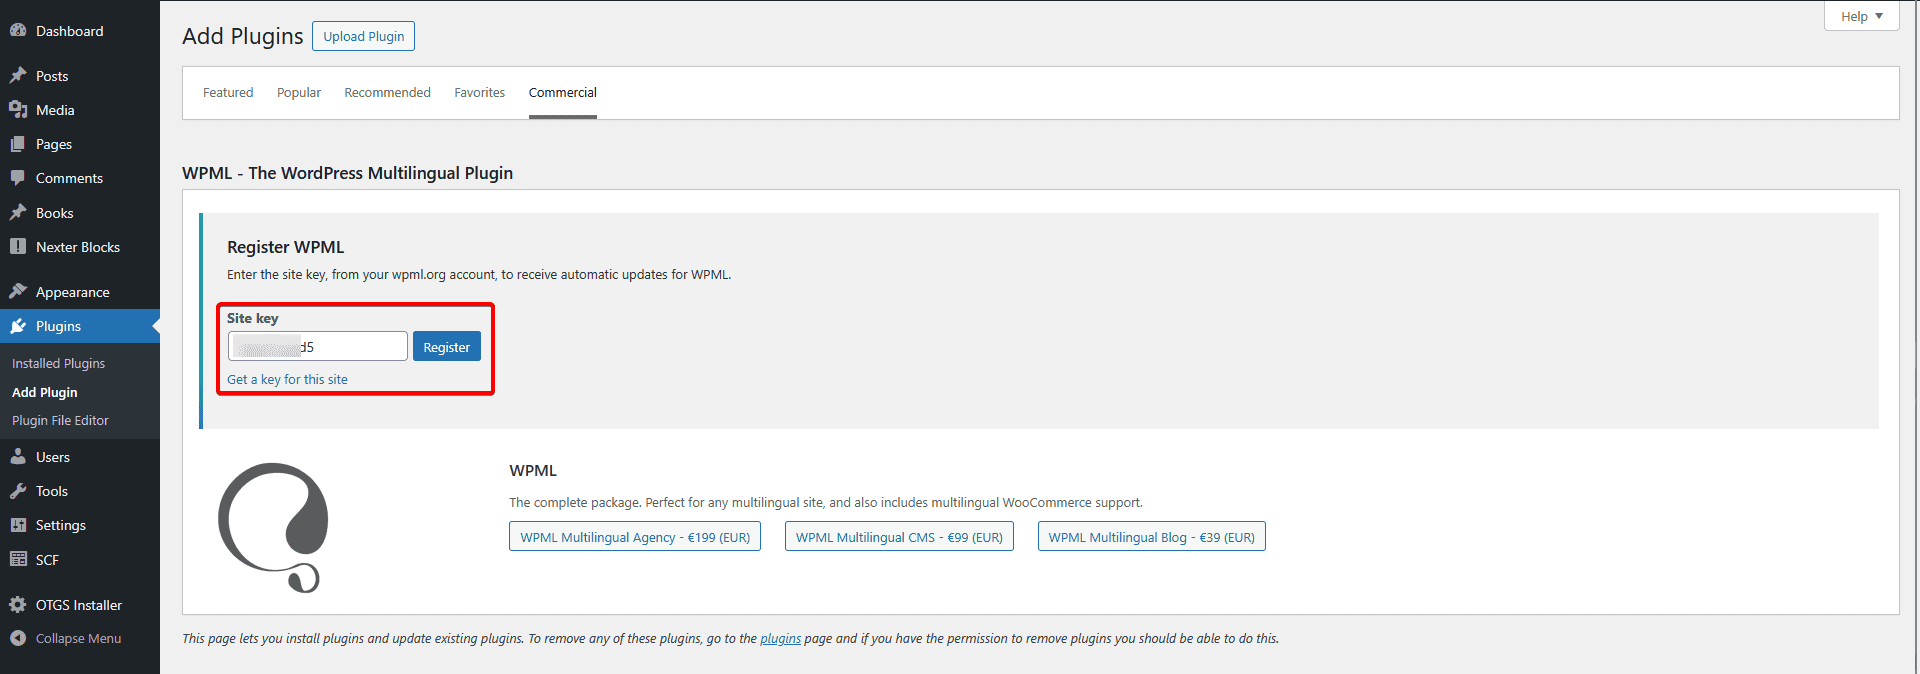
5. Then you have to add your “Site Key” that you got while registering your site to WPML, or you can click on the “Get a key for this site” to register your site and get a site key. Once added, click on the Register button.
Install and Activate Other WPML Plugins
Now you have to install the following plugins –
- WPML Multilingual CMS
- String Translation
- Media Translation
1. Once you’ve registered your site you’ll see this plugin installer, select WPML Multilingual CMS, String Translation and Media Translation, then click on the Download button.
2. Once all the plugins are installed, activate them.
Once you activate the WPML Multilingual CMS plugin, you will see a notification in your Dashboard to start configuring WPML.
You can click on the Configure WPML button to start the setup wizard.

WPML Setup Wizard
The setup wizard will walk you through the entire multilingual setup process and help prepare your website for translation.
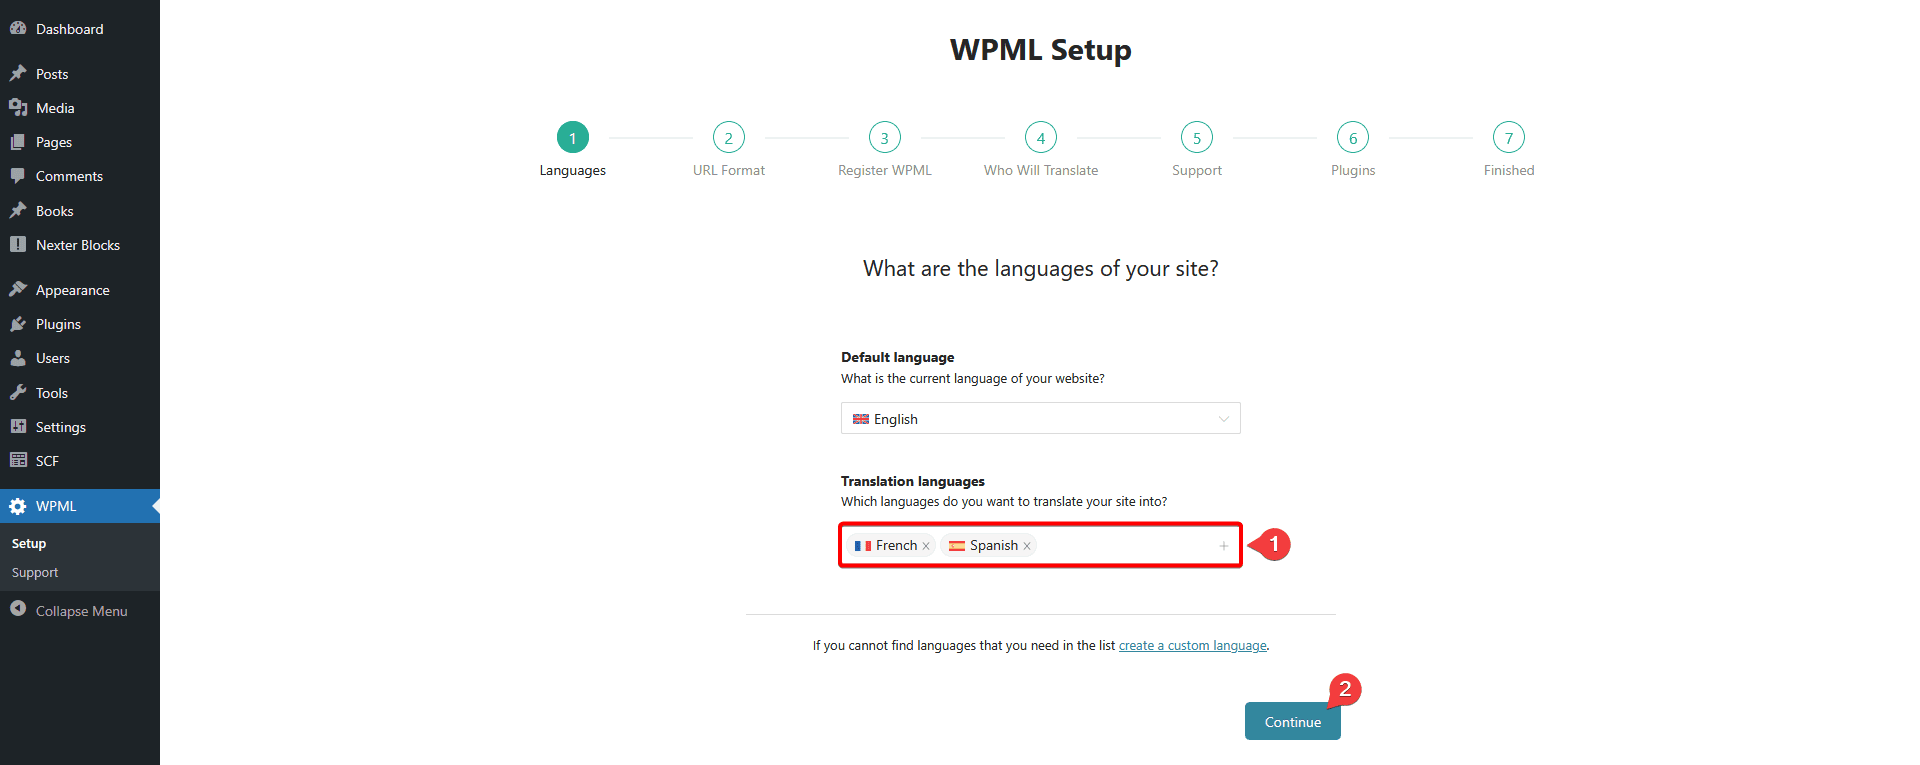
1. In the Languages step, you’ll have the default language of our site selected in the Default language field. You can change that if required.
Then, from the Translation languages section, you have to select the languages you want to translate your website. You have to click the + icon to select the languages.
If you can’t find your language in the dropdown list, you can create a custom language.
For example, we will use English (default), French and Spanish languages.
Once you’ve added the languages, click on the Continue button.
2. Then, in the URL Format step, you have to select the URL format for the different languages, then click on the Continue button.

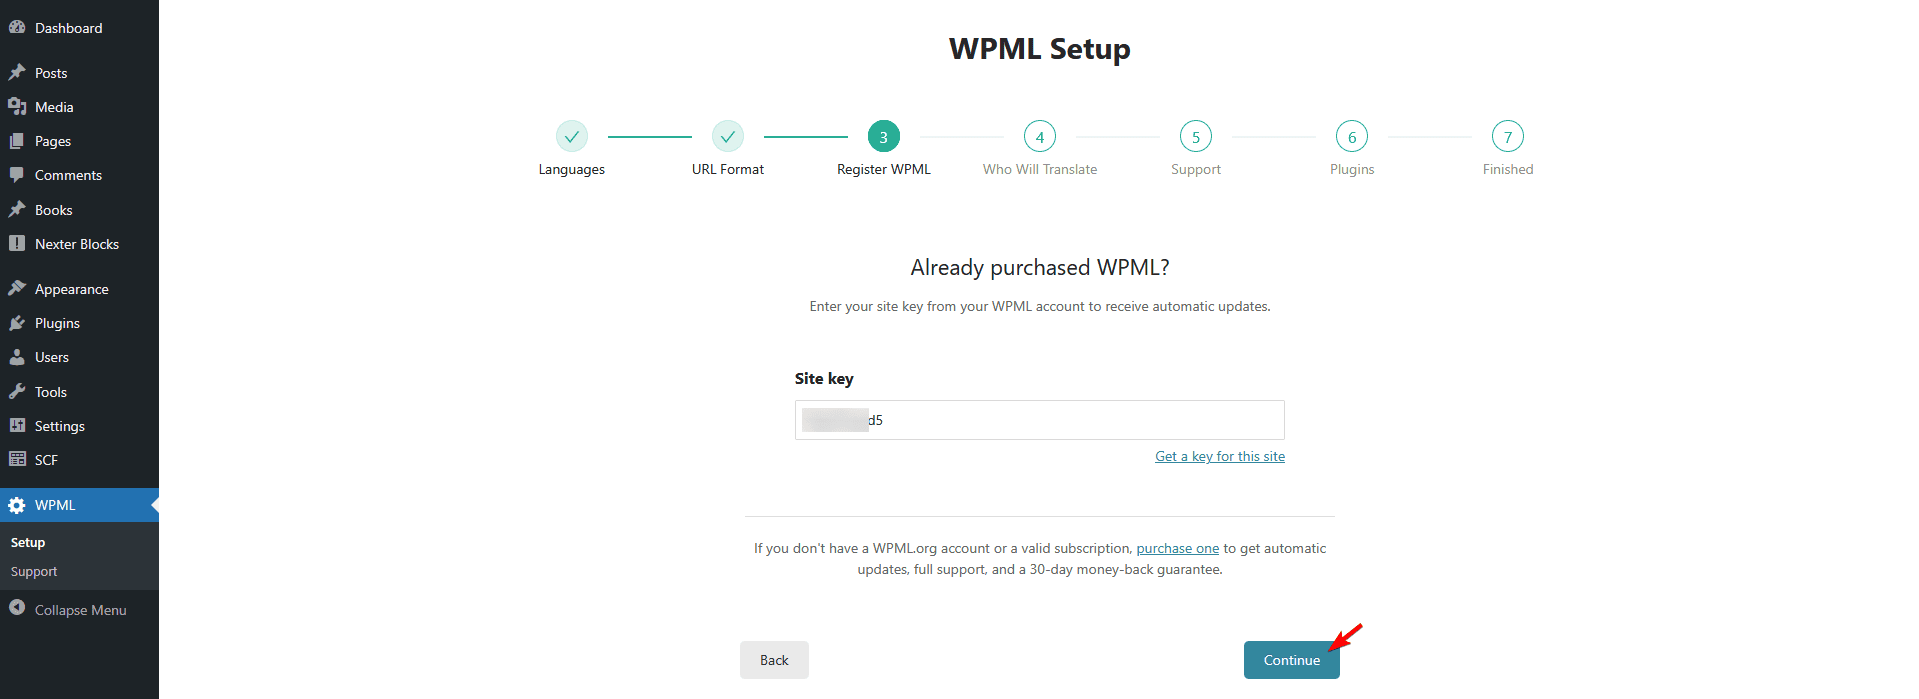
3. After that, in the Register WPML step, you’ll have your site key already added since it was added previously. If not added previously, you can click on the “Get a key for this site” to register your site and get a site key.
Once done, click on the Continue button.
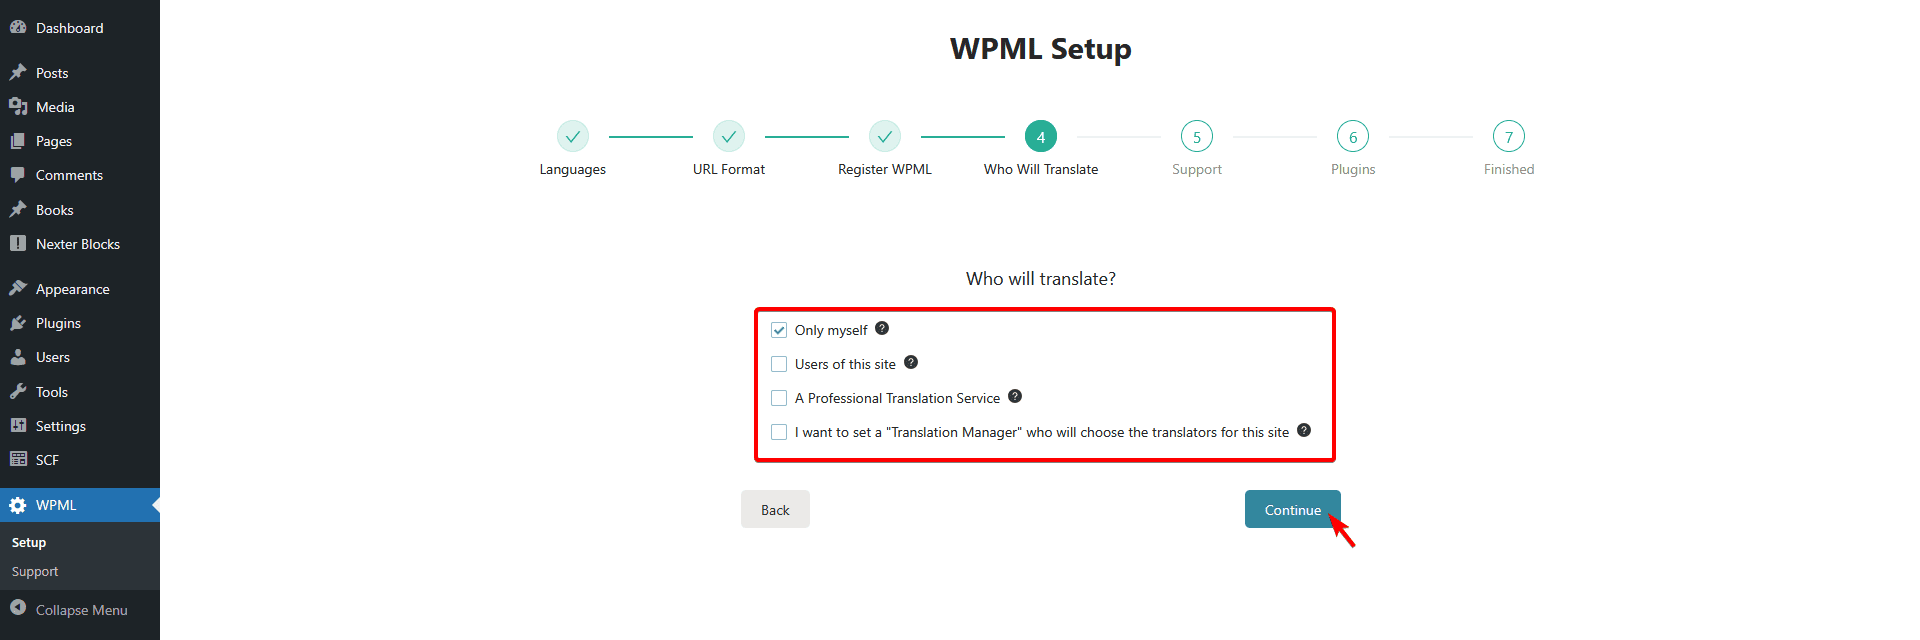
4. Then, in the Who Will Translate step, you have to select who can translate the website. If you are going to translate, then you can select Only myself option.
You can also assign other users of your site or a professional translation service..
If you’re building a website for a client, you can select the “Translation Manager” option, who can choose the translators for the site.
Once you’ve selected the appropriate options, click on the Continue button.
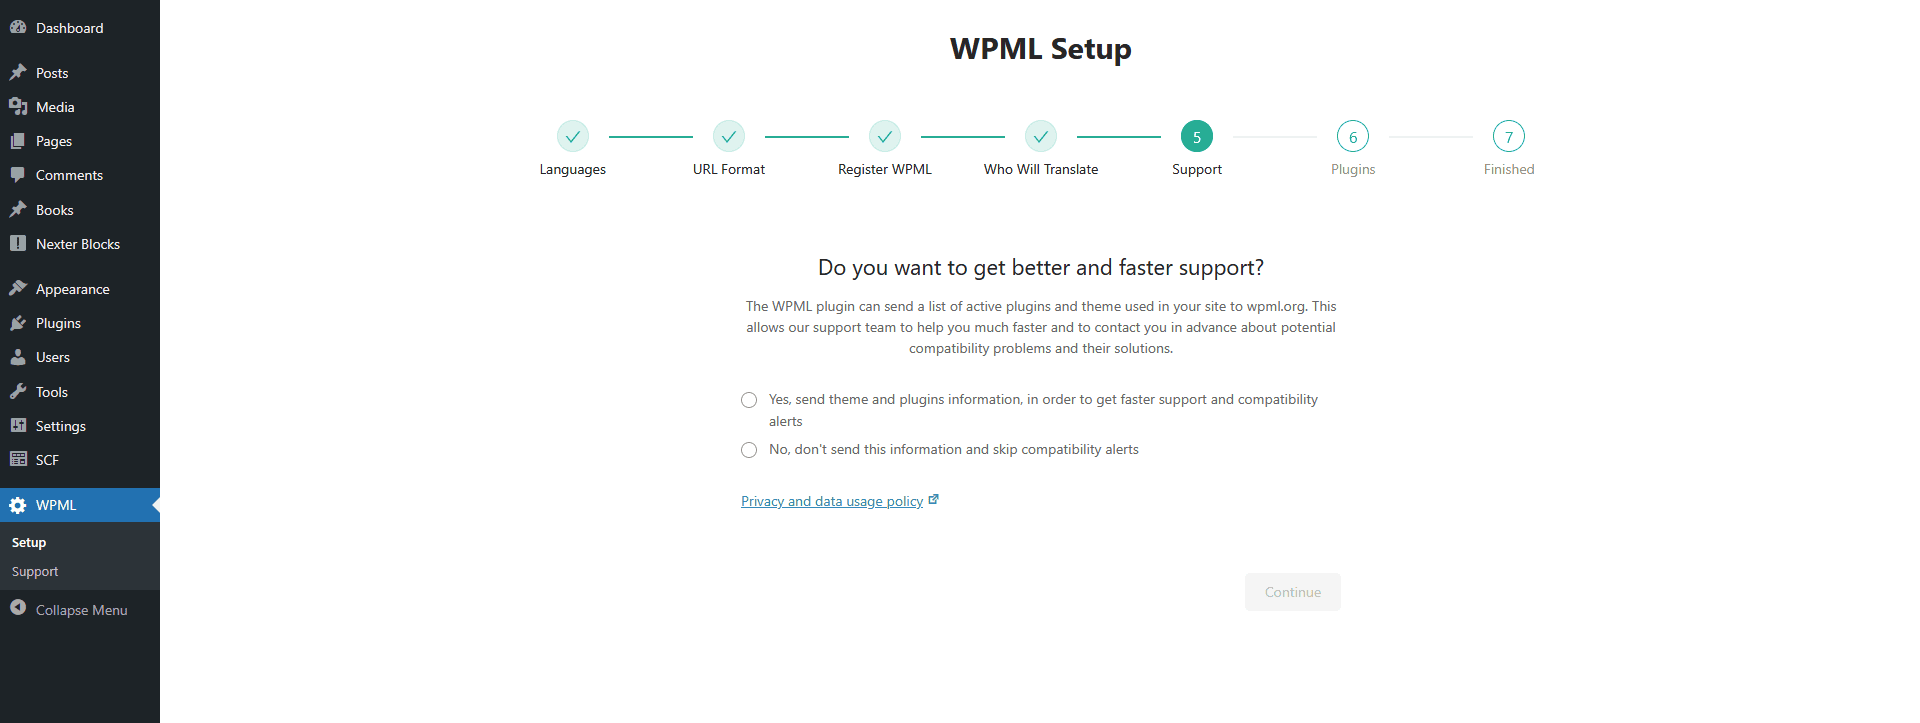
5. From the Support step, you can decide if you want to share your theme and plugin information with WPML to receive quicker support and compatibility notifications or not. Select the appropriate option and click on the Continue button.
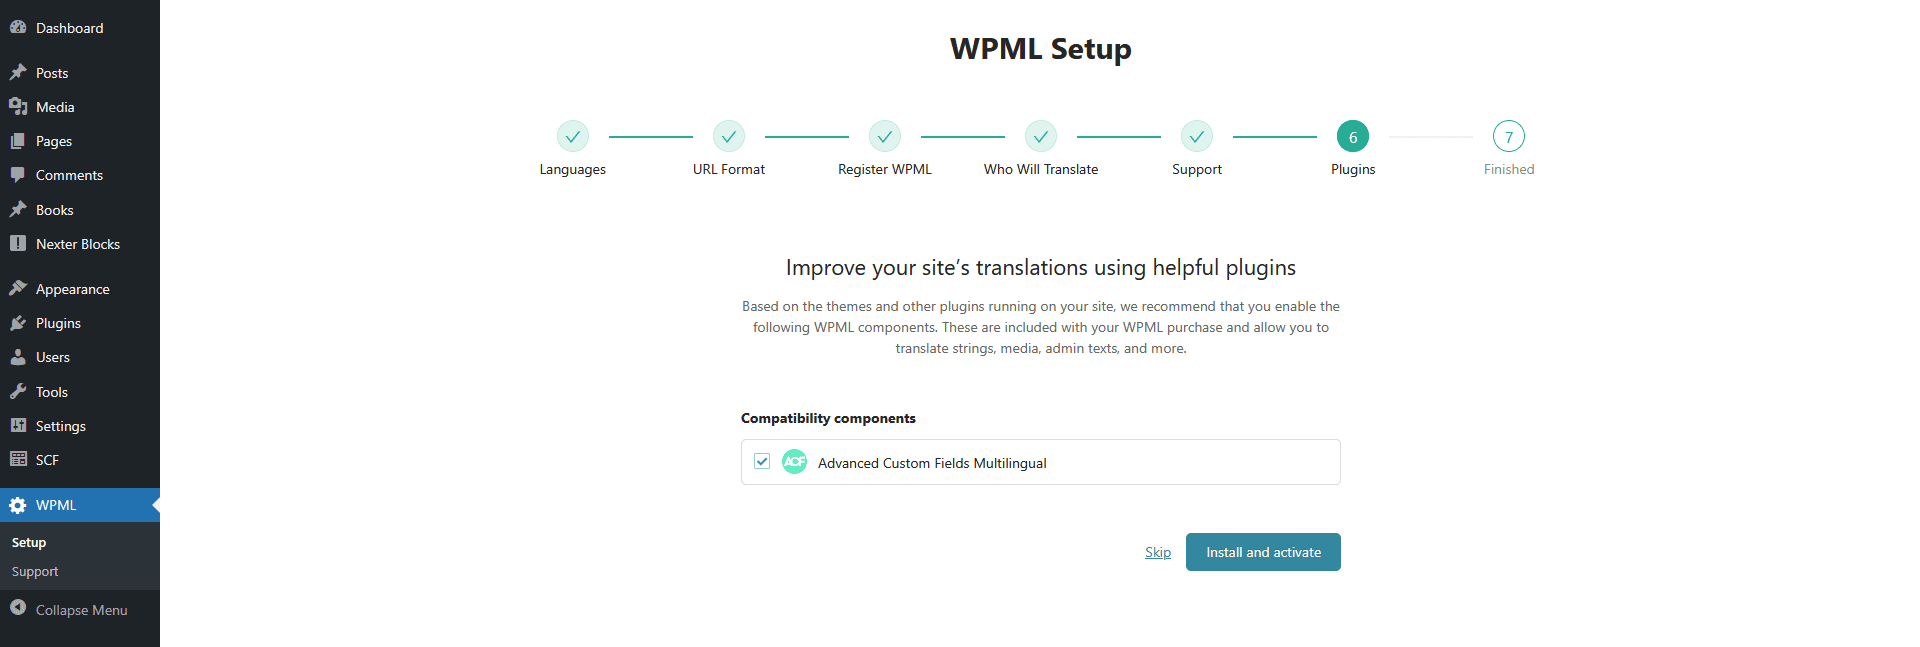
6. In the Plugins step, if you’re using third-party plugins like WooCommerce or Advanced Custom Fields, it will suggest relevant WPML components for them (if available). If you want these plugins to support multiple languages as well, it’s recommended to install the suggested components.
To install and activate these plugins, simply select them from the list and click Install and Activate. If you don’t need them, click Skip to proceed to the final step.
7. In the Finish step, WPML will automatically add a language switcher to the bottom of your footer. You can customize or disable this switcher and enable other options by going to WPML > Languages in your dashboard.

With that, WPML is set up on your site, now you can translate your content, media and site options.
Translate Content (Pages, Post and Post Types) in Nexter Theme
When you translate pages or posts using WPML, it creates linked versions of each page or post, with each version assigned to a specific language.
Let’s see how you can translate a page.
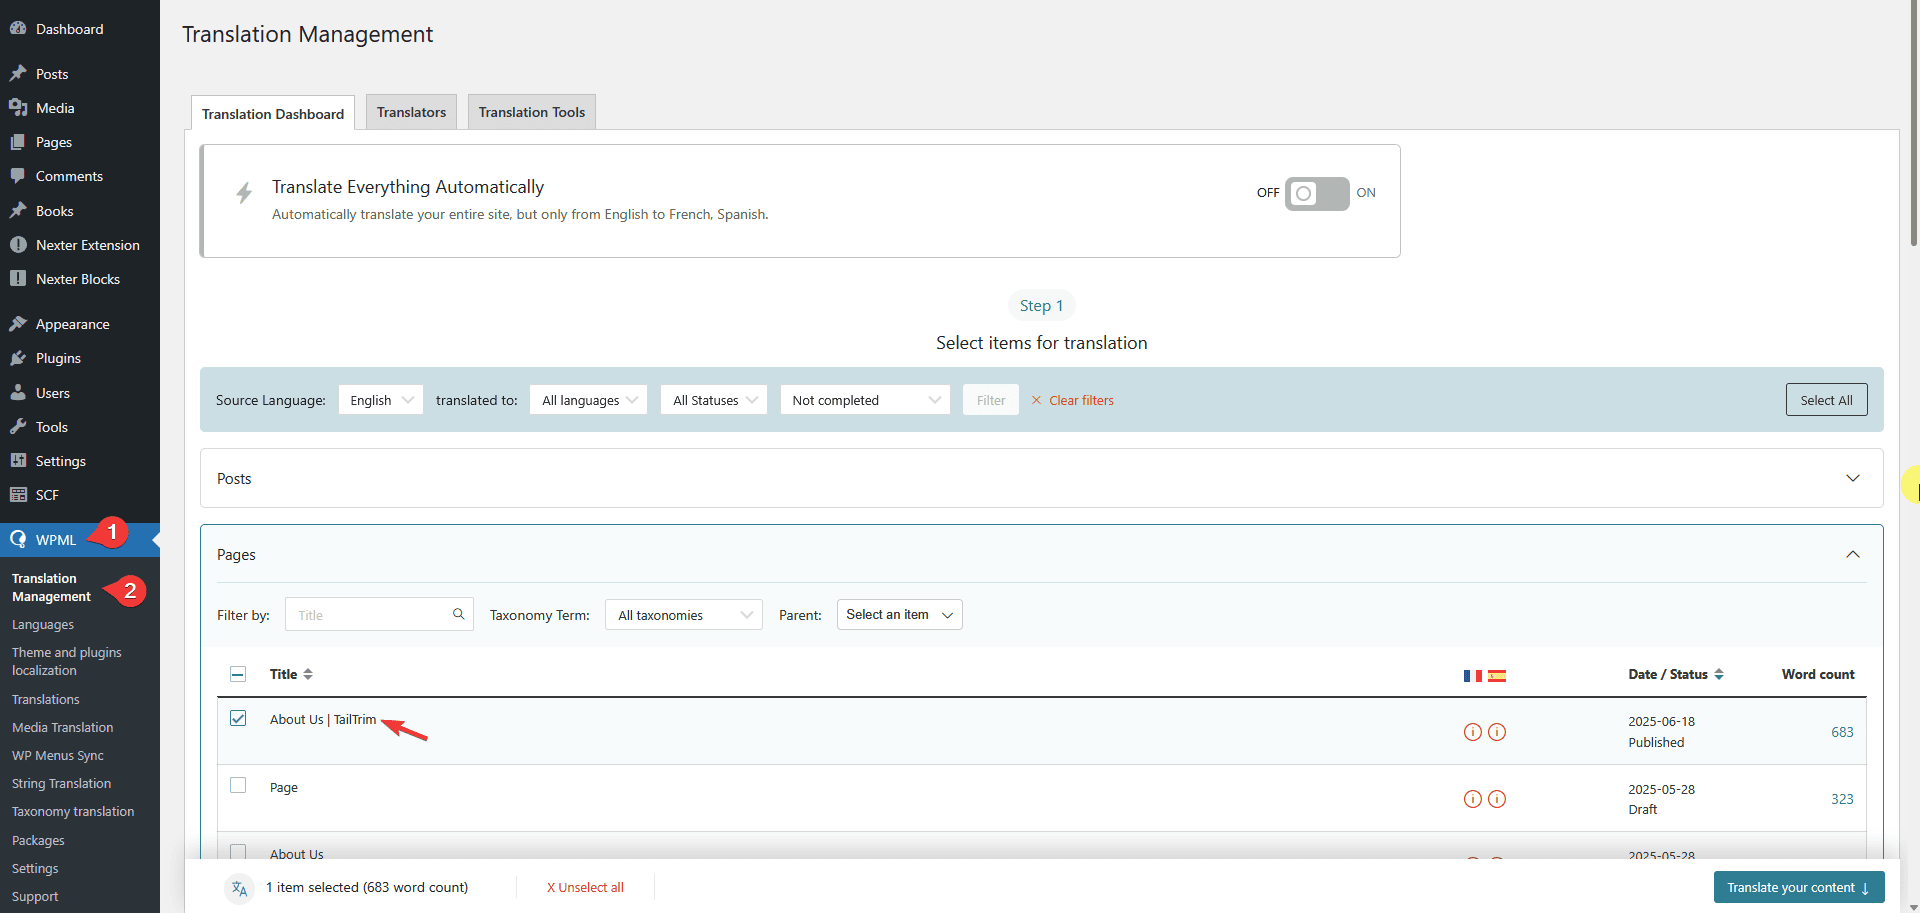
1. Go to WPML > Translation Management and open the sections with the content you want to translate.
For instance, we will be translating a page named “About Us | TailTrim”. Select the page and scroll down to the Step 2 section.
2. In the Step 2 section, you have to select how you want to translate the content for a specific language.
For the best translation quality, we recommend selecting Translate automatically. With this option, WPML uses integrated automatic translation engines such as DeepL or ChatGPT to translate your content efficiently and accurately.
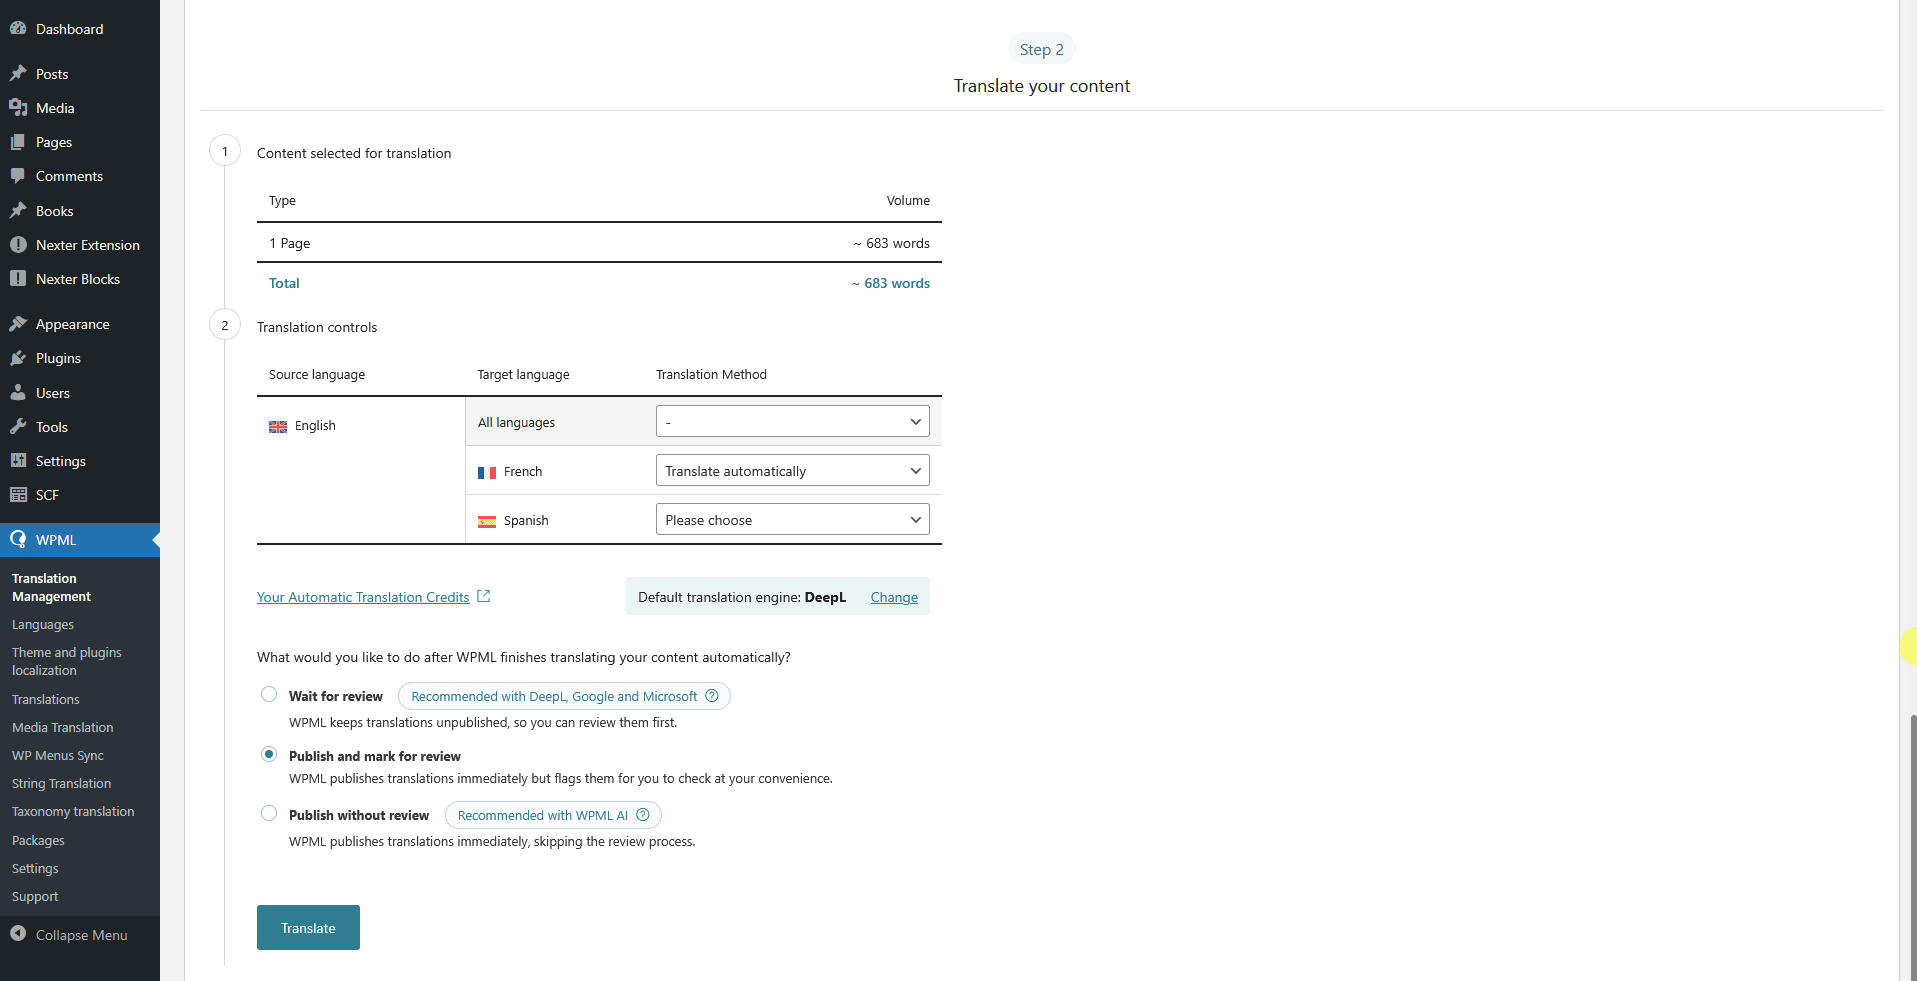
3. Finally, if you’re using automatic translation, choose whether you’d like to review translations before they’re published on your site. Then, click the Translate button to start the process.
Now, WPML will automatically translate the content of your page.
Review Translation
Once the translation is done, you have to review the translation.
To do that, go to WPML > Translations and click the Review button to start a review.
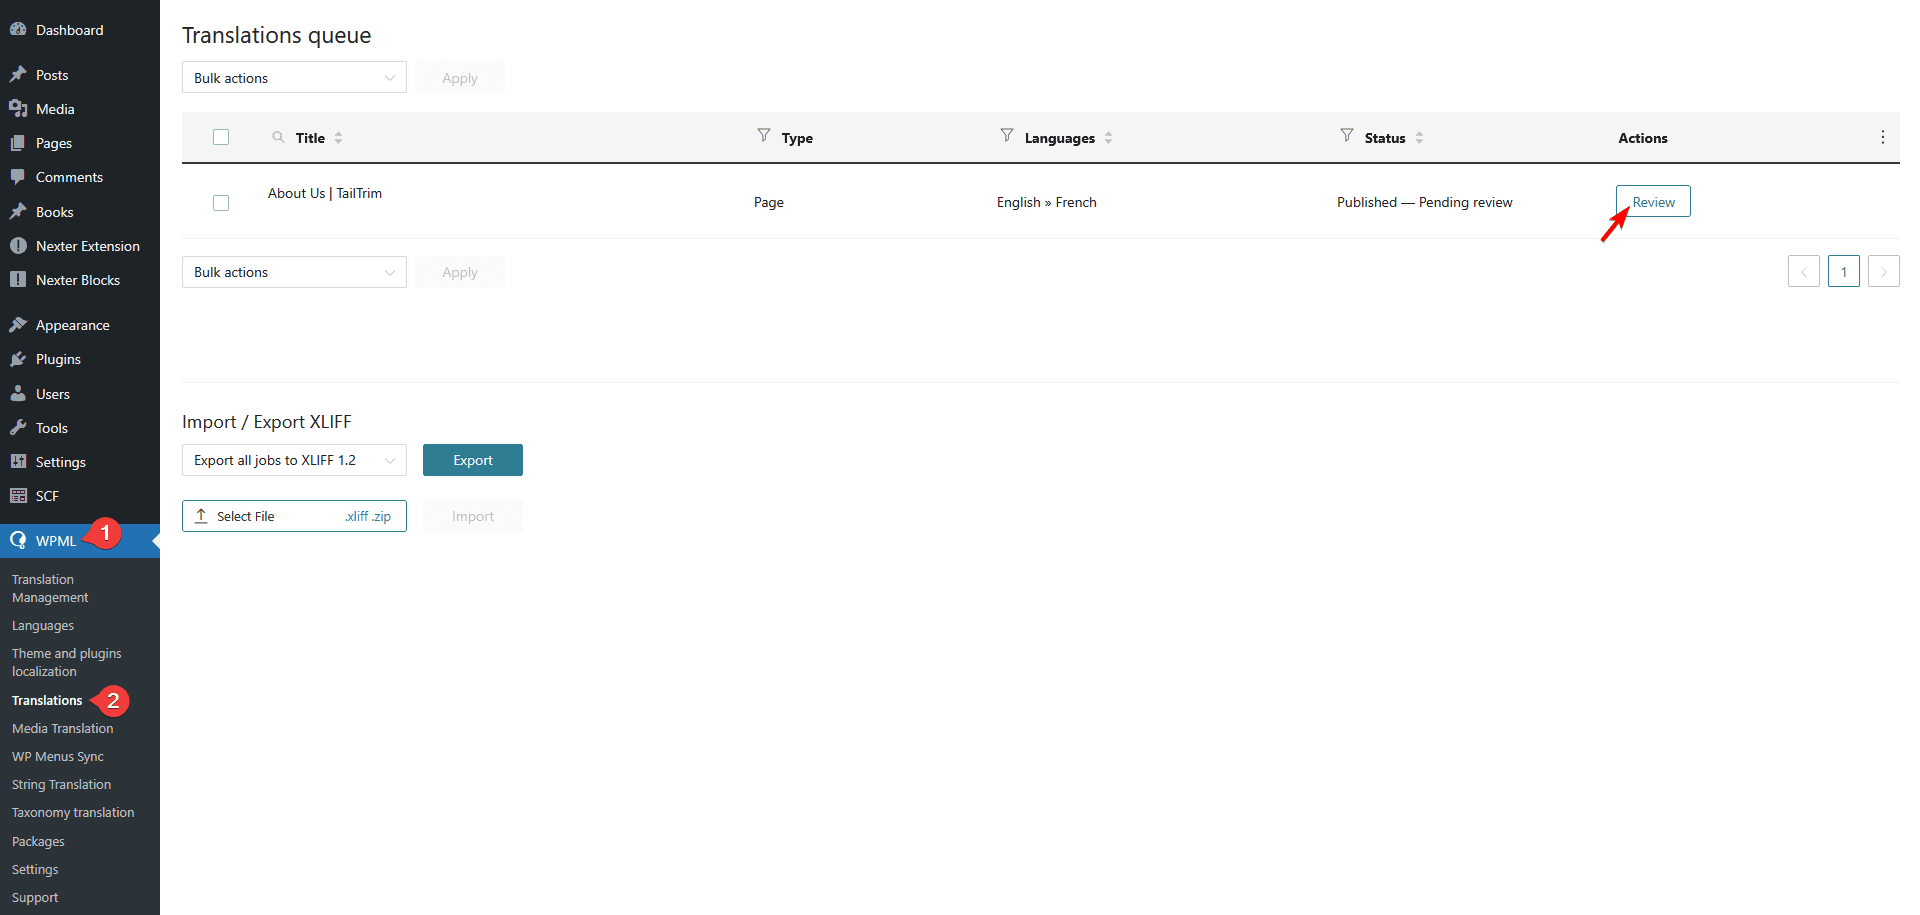
It will show your content on the front-end of how the translated content will look.

If you want to update any translation, click on the Edit translations button to make changes.
It will open the WPML translation editor, where you can easily update the translation.

Make the changes once done click on the Complete Translation button to publish translations.
Now your content will appear in the selected language whenever visitors switch languages on your site.
Media Translation
Now, if you want to translate your media files as well, go to WMPL > Media Translation.

To translate any media, go to the media, click on the + icon for the specific language you want to translate.
It will open a pop-up, where you can add the translated name of the media.
You can also add a different version of the media for the specific language. This feature is useful if you have a logo or images that contain text you want to translate.
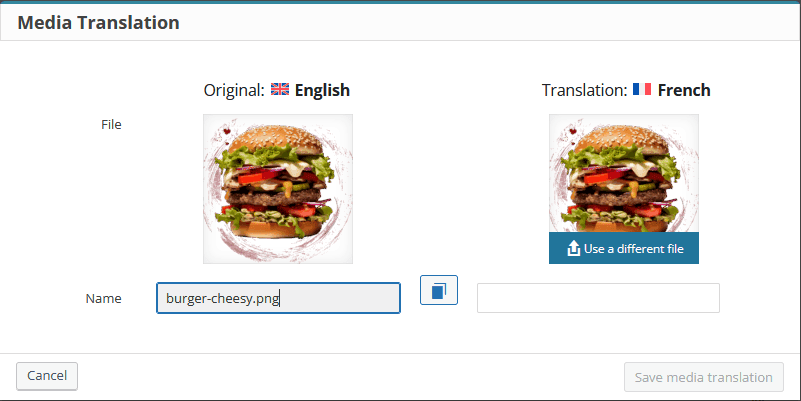
Once done, click on the Save media translation button.
This is how you can translate other media files as well.
Translate Menus
Now let’s translate the menus of your site.
Before editing your menus, make sure to check whether activating the WPML plugin has affected any of your permalinks or menu locations. If needed, adjust them accordingly.
Let’s suppose we are translating the Primary Menu, the process will be the same for other menus as well.
1. Go to Appearance > Menus and select your Primary Menu. Your primary menu will be set for your default language. That is English in our case.
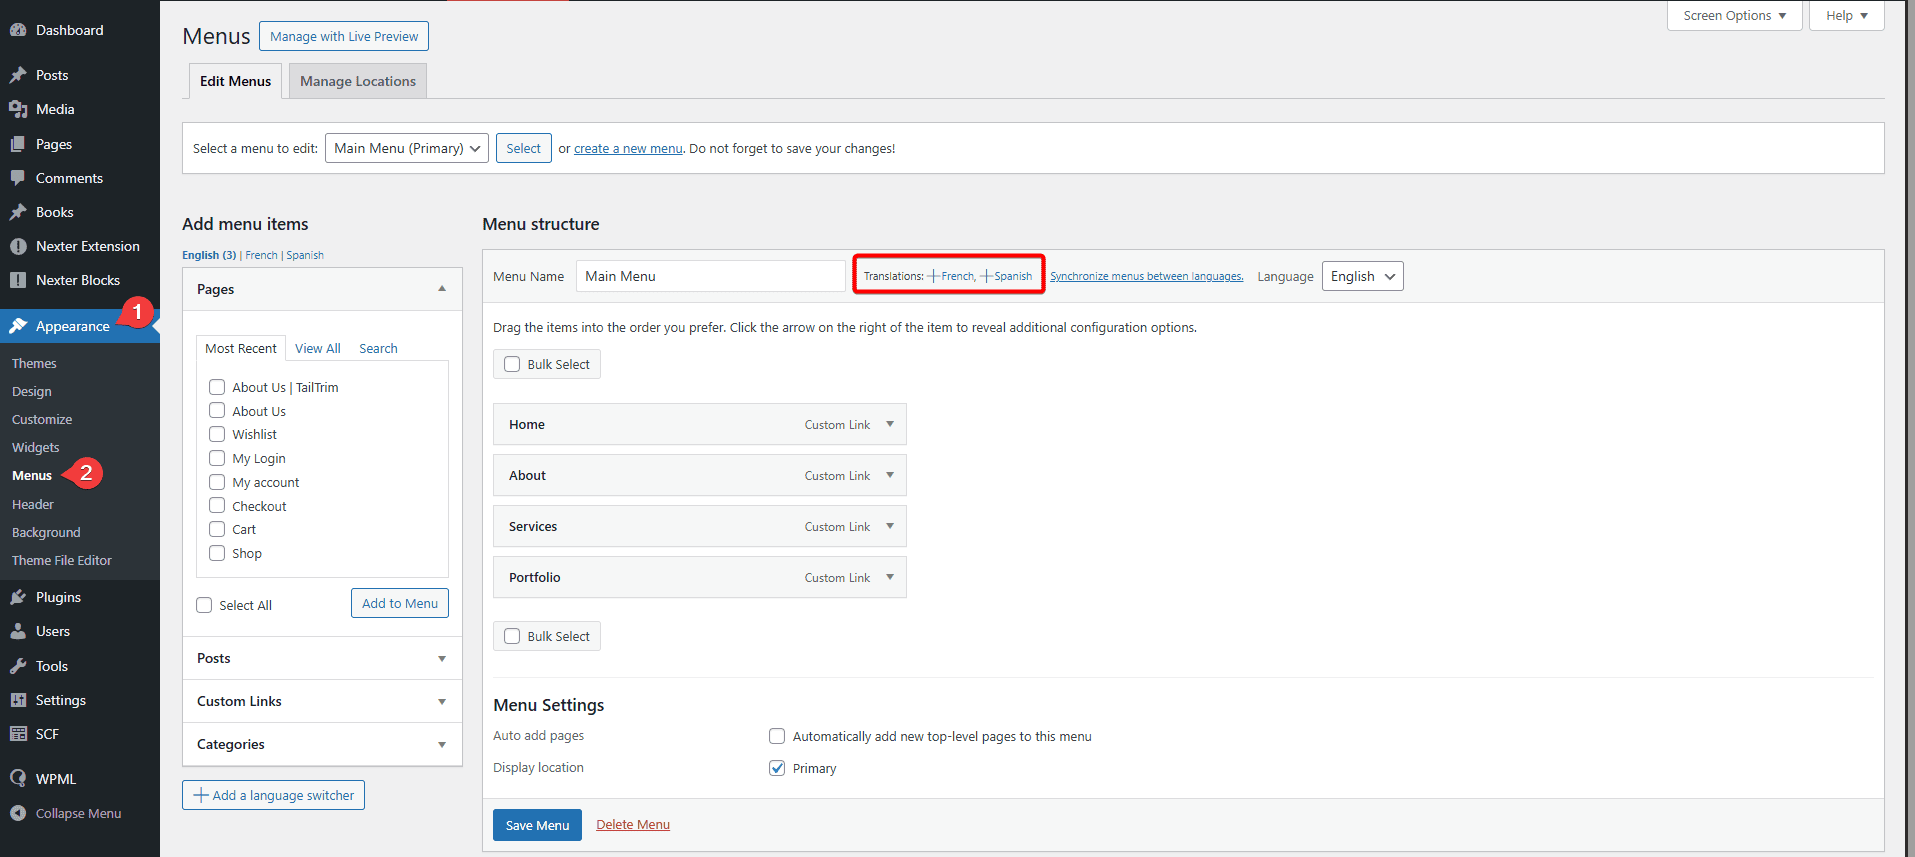
2. Beside the Menu Name, you’ll see the translation options for different languages. Click on the language you want to translate the menu into. For instance, we’ll translate into the French language.
3. Add a name for your translated menu; the original menu name and the targeted language will be automatically selected.
4. Once the menu is created, you can add menu items to it. Keep in mind that only translated pages and posts will appear in the item list. Any content that hasn’t been translated into the language of the menu you’re editing will not show.
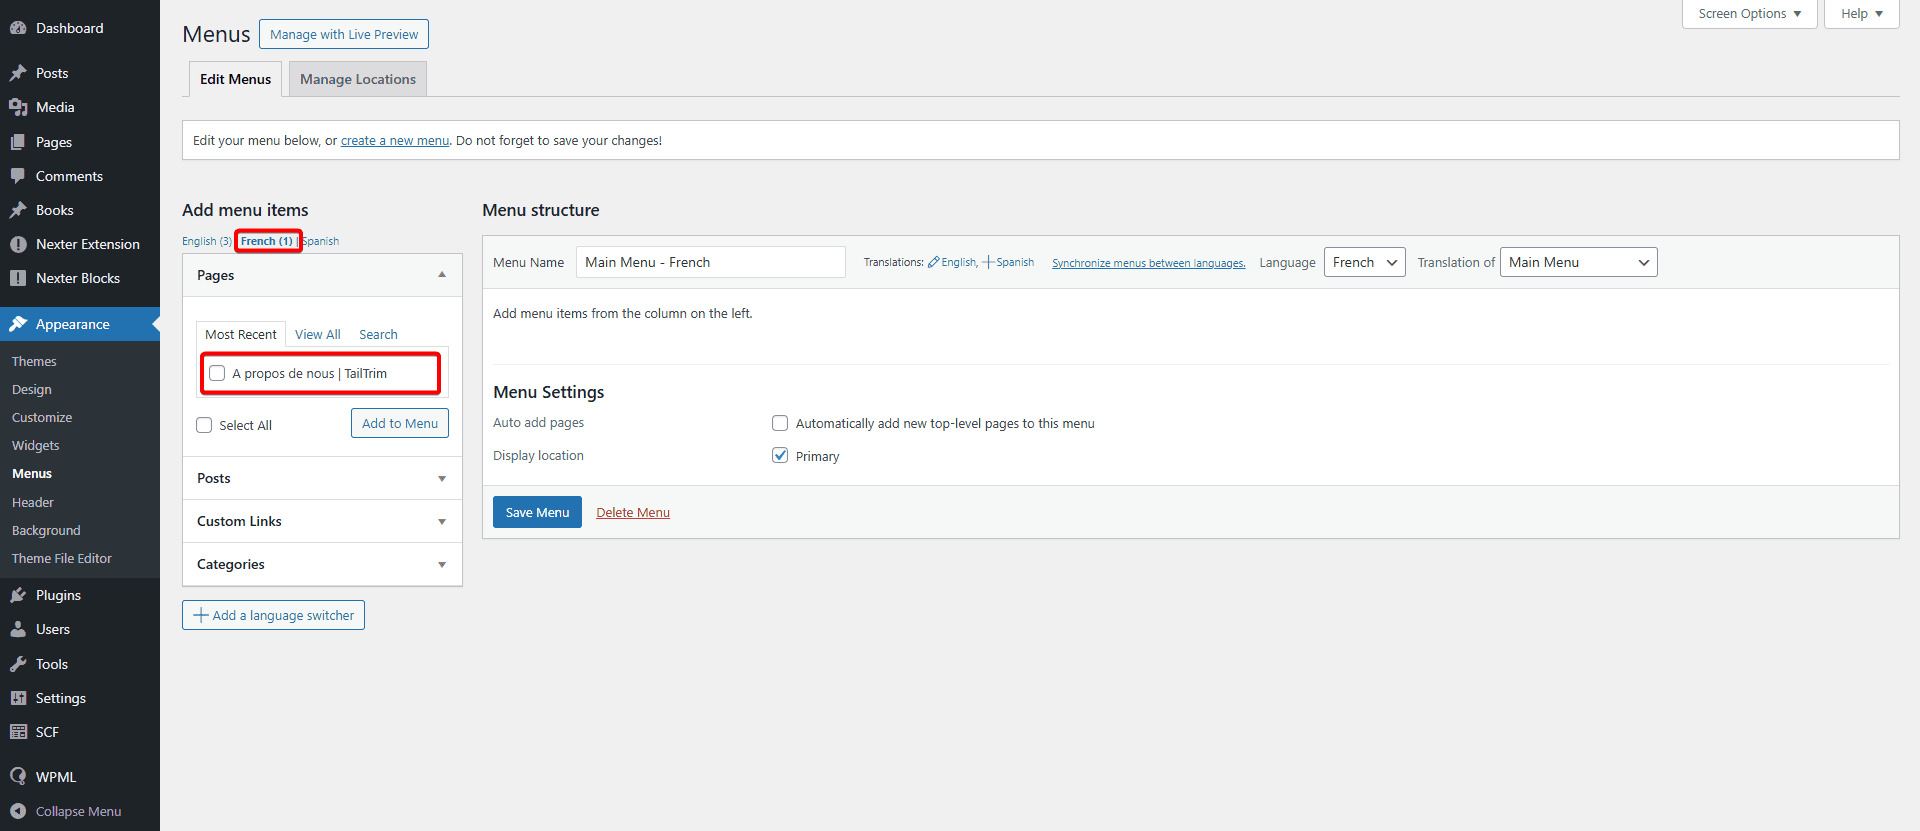
5. Once you’ve added the menu items, click on the Save Menu button to save the menu.
Following this process, you can translate other menus as well.
Manage Language Switcher
Adding a language switcher allows users to easily switch to the language of their preference. WPML offers a built-in Language Switcher that you can easily add to your menus, widgets, or footer.
To add and manage a language switcher, go to WPML > Languages.
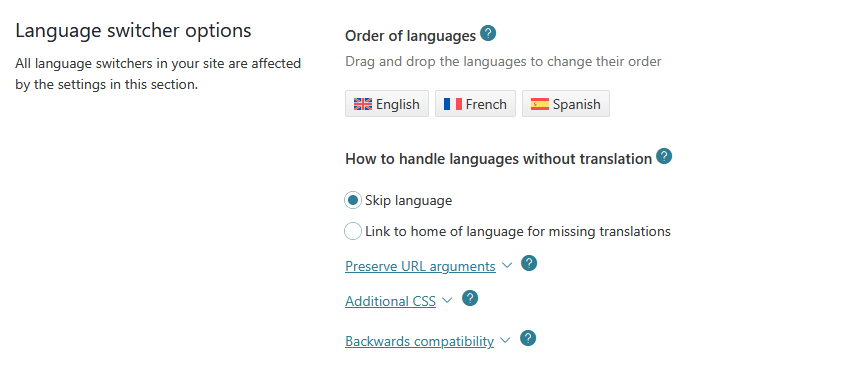
From the Language switcher options section, you can make changes to the switchers globally.
From the Order of languages section, you can rearrange the order of the switcher button.
Then, from the How to handle languages without translation section, you can set the behavior of the content not translated. You can skip them or you can link to the home page in the selected language.
If you’re using any plugins that rely on URL arguments to function correctly, you can add those arguments in the Preserve URL arguments section to preserve them when switching languages.
In the Additional CSS section, you can add custom CSS to style the language switchers.
You can keep the Skip backwards compatibility checked for Backwards compatibility, since Nexter theme doesn’t use the old CSS IDs and classes.
Now you’ll find individual sections for adding the language switchers in the menu, widget, footer and posts.
You can even add language switchers to a custom location as well.
WPML by default adds the language switcher to the footer.
From the Footer language switcher section, you can manage the language switcher of the footer.
Add a language switcher
For instance, let’s add a language switcher to the menu.
1. Go to WPML > Languages and scroll down to the Menu language switcher section and click on the Add a new language switcher to a menu button. It will open a pop-up.
2. Select the menu from the Menu dropdown where you want to add the language switcher.
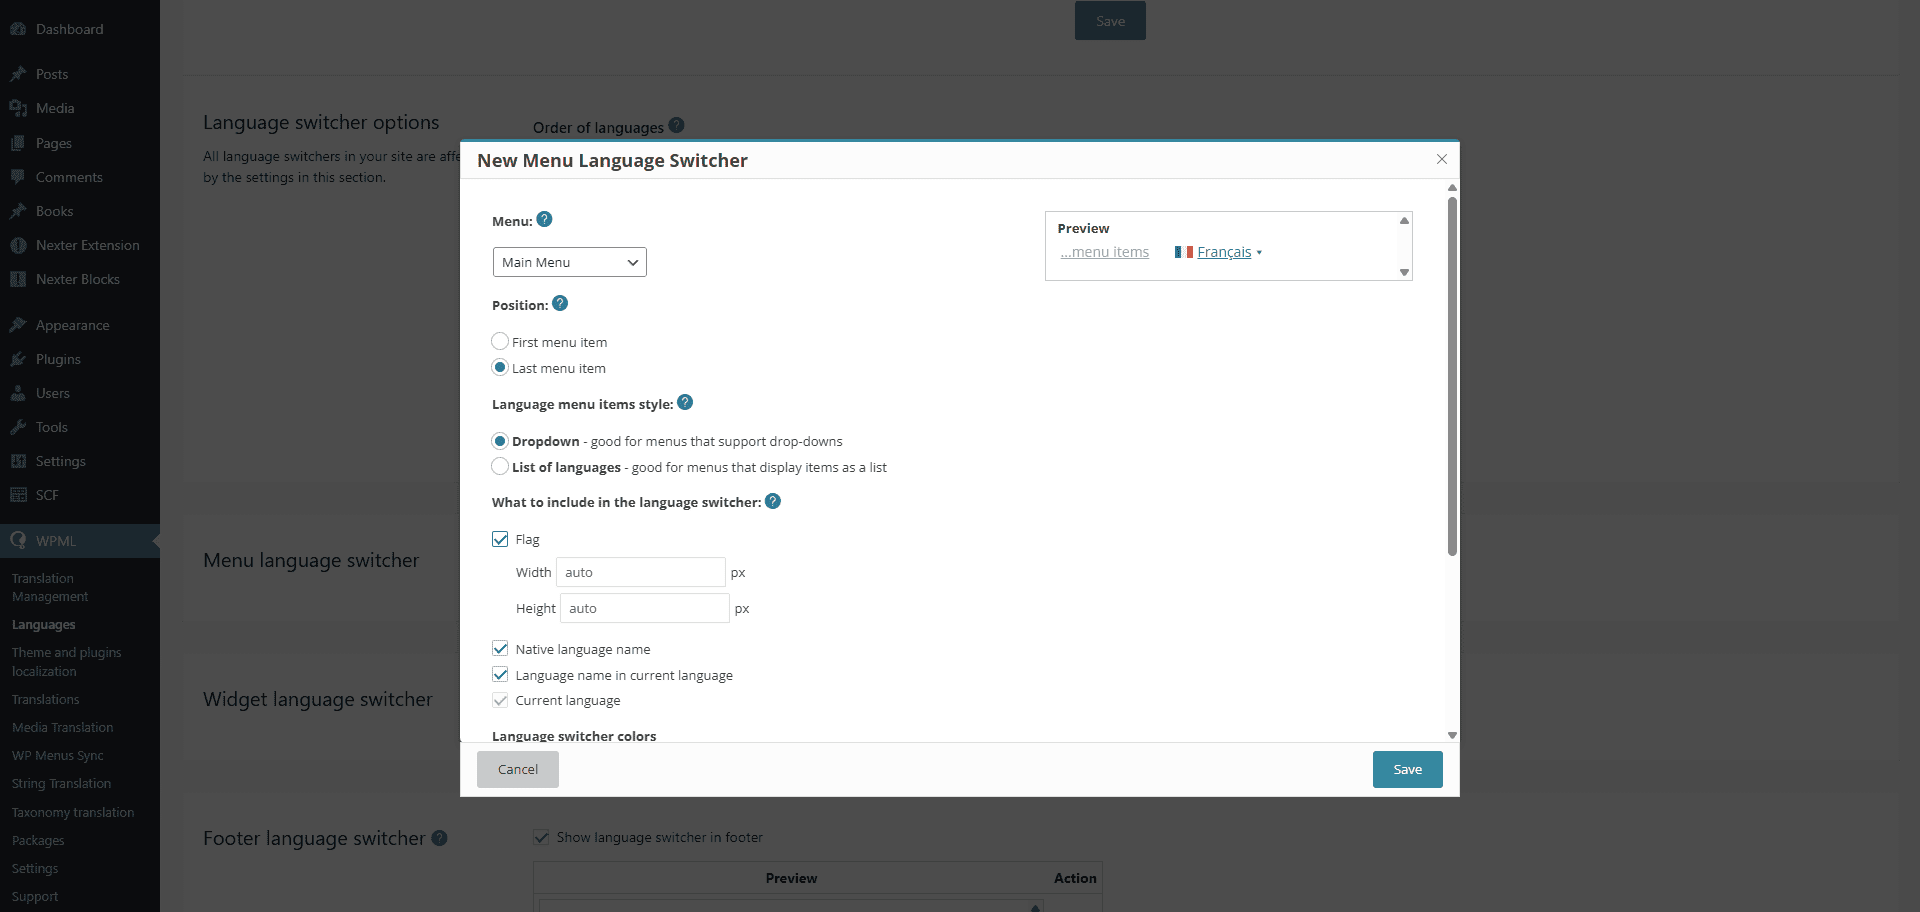
3. Then select the language switcher position in the menu.
4. After that, select how the language switcher will show, in a dropdown or in a list.
5. Then you can set how the languages will be displayed—using flags, the native language names, or the names in the current language. You can also decide whether to show or hide the “current language” in the language switcher.
6. You can also set the switcher colors.
7. Once done, click on the Save button.
Now the user can easily switch between the languages.
In addition to the options mentioned above, the WPML plugin offers a wide range of features to help you build a fully multilingual website. For more details, refer to the official WPML documentation.
This is how you make your website multilingual with Nexter Theme and WPML.


