Image scroll sequence allows you to create a dynamic storytelling experience, where a series of images transitions seamlessly as users scroll down the page. This interactive feature not only captivates visitors but also encourages them to explore your website further, thereby improving user engagement and retention.
With the Scroll Sequence block from Nexter Blocks, you easily create amazing image scrolling animations on your WordPress website.
Required Setup
- Make sure the default WordPress Block editor is active.
- You need to have the Nexter Blocks plugin installed and activated.
- This is a Premium block, and you need the PRO version of Nexter Blocks.
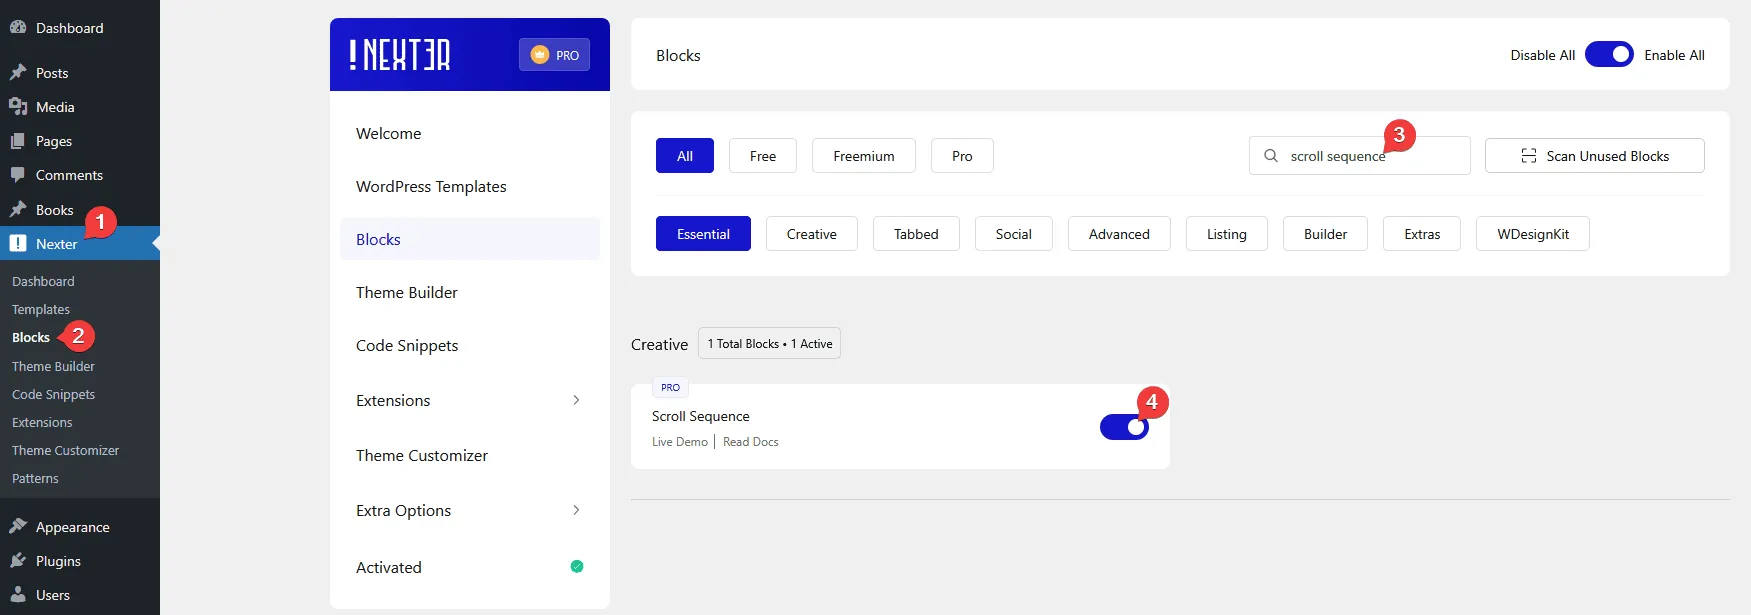
- Make sure the Scroll Sequence block is activated, to verify this visit Nexter → Blocks → and Search for Scroll Sequence and activate.
Learn via Video Tutorial
How to activate the Scroll Sequence Block?
Go to
- Nexter → Blocks
- Search the block nameandturn on the toggle.
Key Features
- Multiple places to add scroll sequence – You can apply scroll sequence to multiple places, Body, Container, Inner Container and None.
- Multiple image sources – You can create image sequence animation from an image gallery or an external URL.
How to Use the Scroll Sequence Block?
Add the Scroll Sequence block to the page.
Note: To make the Scroll Sequence block work, ensure there’s enough content on the page for users to scroll.
Scroll Sequence
In the Media Type section, keep Image selected.
Then, in the Upload Type section, you can choose the image source for the sequence animation. Here you’ll find two options –
- Gallery – In this option, you can add images from your WordPress media library.
- Remote Server – With this option, you can add images from an external URL to create an image scroll sequence.

Select the option as per your requirements. Let’s select Gallery here.
Then, from the Image Upload section, you have to add images from the media library.
Note: Supported image type – JPG, PNG and WebP.
By enabling the Reverse Order toggle, you can reverse the sequence.
In the Apply To section, you have to choose where you want to add the scroll sequence animation. Here you’ll find four options –
- Body – This option, will apply the image sequence to the page body.
- Container – This option, will apply the image sequence to a section or container. This will only work with the Container block from the Nexter Blocks.
- Inner Container – This option, will apply the image sequence to an inner section or inner container. This will only work with the Container block from the Nexter Blocks.
- None – This option, will keep the image sequence as a normal element on the page, it will play the animation as you scroll.
Select the option as per your requirements, let’s select None here.
Extra Option
From the Preload Image (%) section, you can choose the number of images to load at first from your image sequence, and then the rest of the images will load.
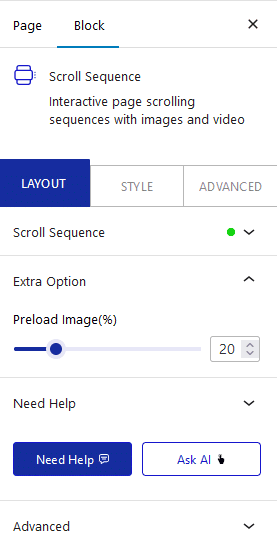
You can decide the number based on your image sequence so that it doesn’t increase the load time.
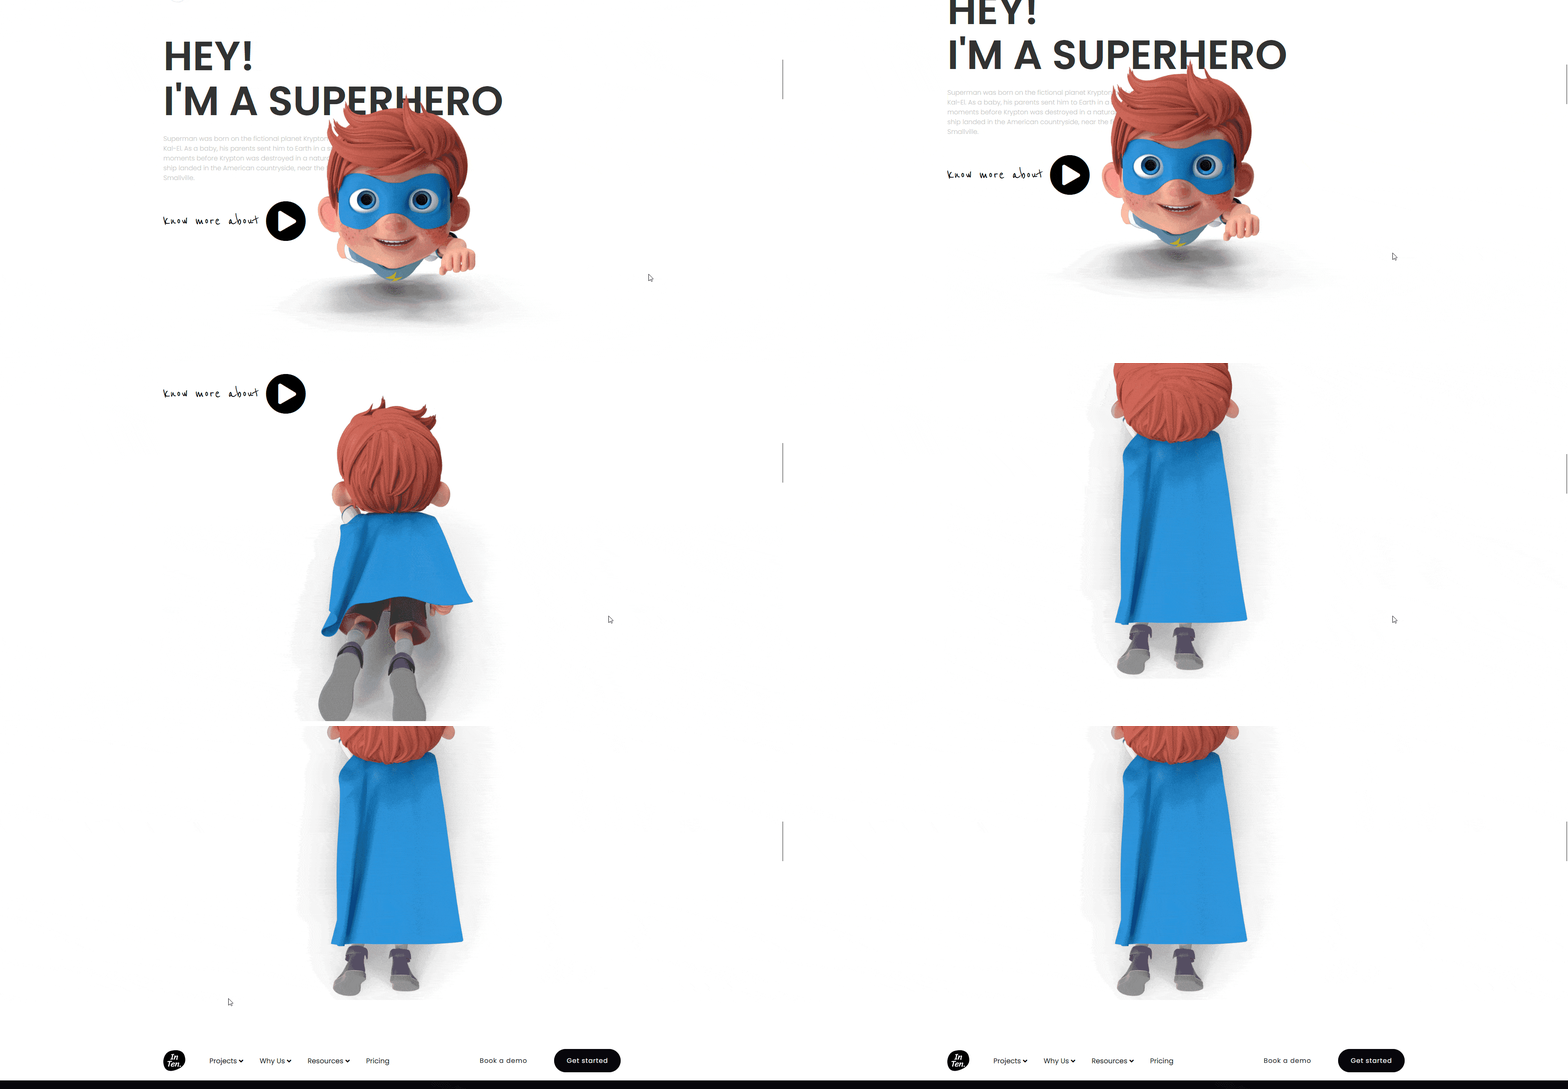
Now you should have a beautiful image scrolling sequence animation.
How to Style the Scroll Sequence Block?
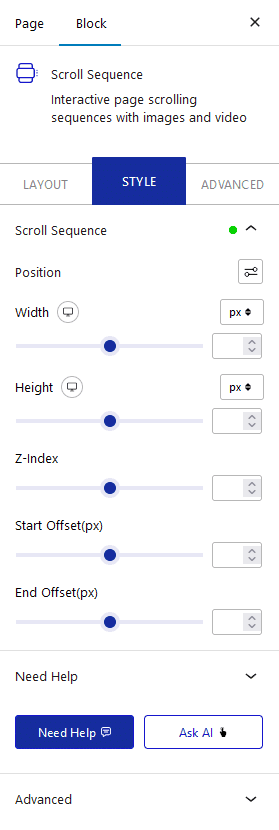
To style the Scroll Sequence block, you’ll find all the options in the Style tab.
Position – From here you can move the Scroll Sequence from top and left.
Alignment – You’ll see this option only when you select None from Apply To in the Layout tab. From here you can align the image sequence on the page.
Width – From here, you can set a width for the Scroll Sequence, by default, it is 100%.
Height – From here, you can set a height for the Scroll Sequence.
Z-index – From here, you can set a z-index value for the Scroll Sequence.
Start Offset (px) – The value set here will delay the start of the sequence by equivalent pixels. For example, if the Start Offset (px) is set to 500, then the animation will start once the user scrolls down by 500px.
End Offset (px) – The value set here will end the sequence before equivalent pixels. For example, if the End Offset (px) is set to 500, then the animation will end 500px before the section ends.
Advanced options remain common for all our blocks, you can explore all it options from here.


