White labeling or customizing your WordPress login page is a crucial step in establishing a professional and branded online presence. As a website owner or developer, it is important to ensure that every aspect of your website aligns with your brand identity. The login page is no exception. By customizing the WordPress login page, you can create a seamless brand experience for your users and improve the overall aesthetic of your website.
To customize or white label the WordPress login page, you have to use third party plugins or custom coding, but if you are using the Nexter Extension (Free) and Nexter Extension (Pro) plugins, you can easily customize the WordPress login page.
Learn via Video Tutorial
How to White Label WordPress Login with the Nexter Extension?
By default, all the WordPress login pages look the same.

So, to customize the WordPress login page with the Nexter theme, from the WordPress Dashboard, go to Nexter Settings > Admin Interface.
Then go to the Branded WP Admin section and enable the toggle, after that click on the gear icon (⚙).

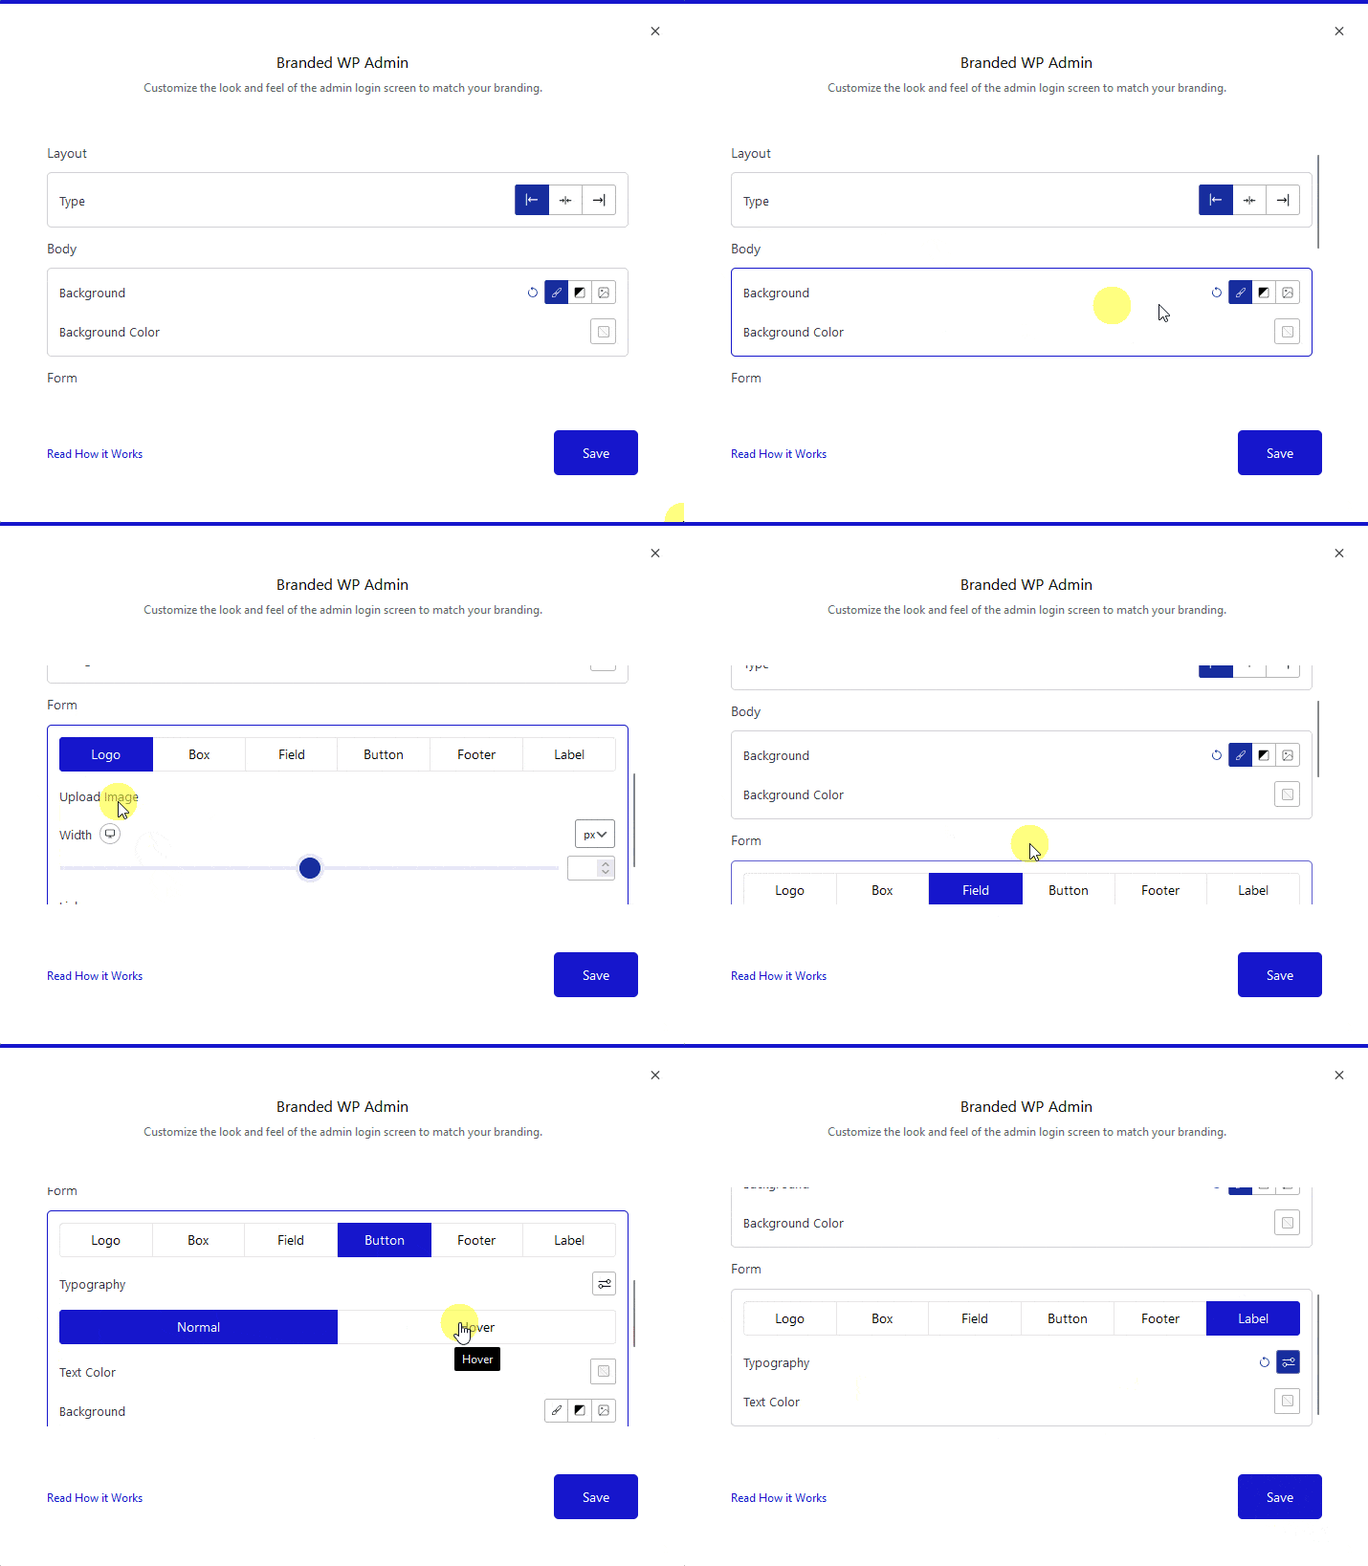
It will open the Branded WP Admin popup, here you’ll find three main sections with all the options required to customize your WordPress login page to match your branding.

Layout – From here, you can change the position of the login form.
Background – From here, you can adjust the login page background.
Form – Here, you’ll find different options to customize the form.
- Logo – From here, you can add your custom logo, manage its width and set a custom URL.
- Box – From here, you can manage the form container style.
- Field – From here, you can manage the login form field typography, color, background, border etc. for normal and focused states.
- Button – From here, you can manage the login form button typography, color, background, border etc. for normal and hover states.
- Footer – From here, you can manage the login form footer typography and color for normal and focused states.
- Label – From here, you can manage the login form field label’s typography and color.
Once you’ve made the customization, click the Save button.

Now, your WordPress login page will have your custom design.


