


Adding Google reCAPTCHA to a WordPress website improves security against automated bots. Google reCAPTCHA, a free service provided by Google, is an advanced security tool that helps prevent automated bots from accessing your website and submitting spam or malicious content.
With the Nexter Extension (free) plugin, you can add Google reCAPTCHA V3 to your WordPress website.
Best Used For:
- Business websites that receive spam through contact or comment forms
- Membership and community sites where bot registrations are a common problem
- WooCommerce stores that need to protect login and checkout forms from automated attacks
Learn via Video Tutorial

Why Add Google reCAPTCHA?
As a website grows, the risk of security threats from spammers and hackers increases. As a website owner, it is important to protect your website and its users from such threats.
This is where Google reCAPTCHA comes into play. It distinguishes between human and automated traffic, significantly reducing the risk of spam and fraud.
How to Generate Google reCAPTCHA Site Key and Secret?
Make sure you are logged into your Google account, then go to this link.
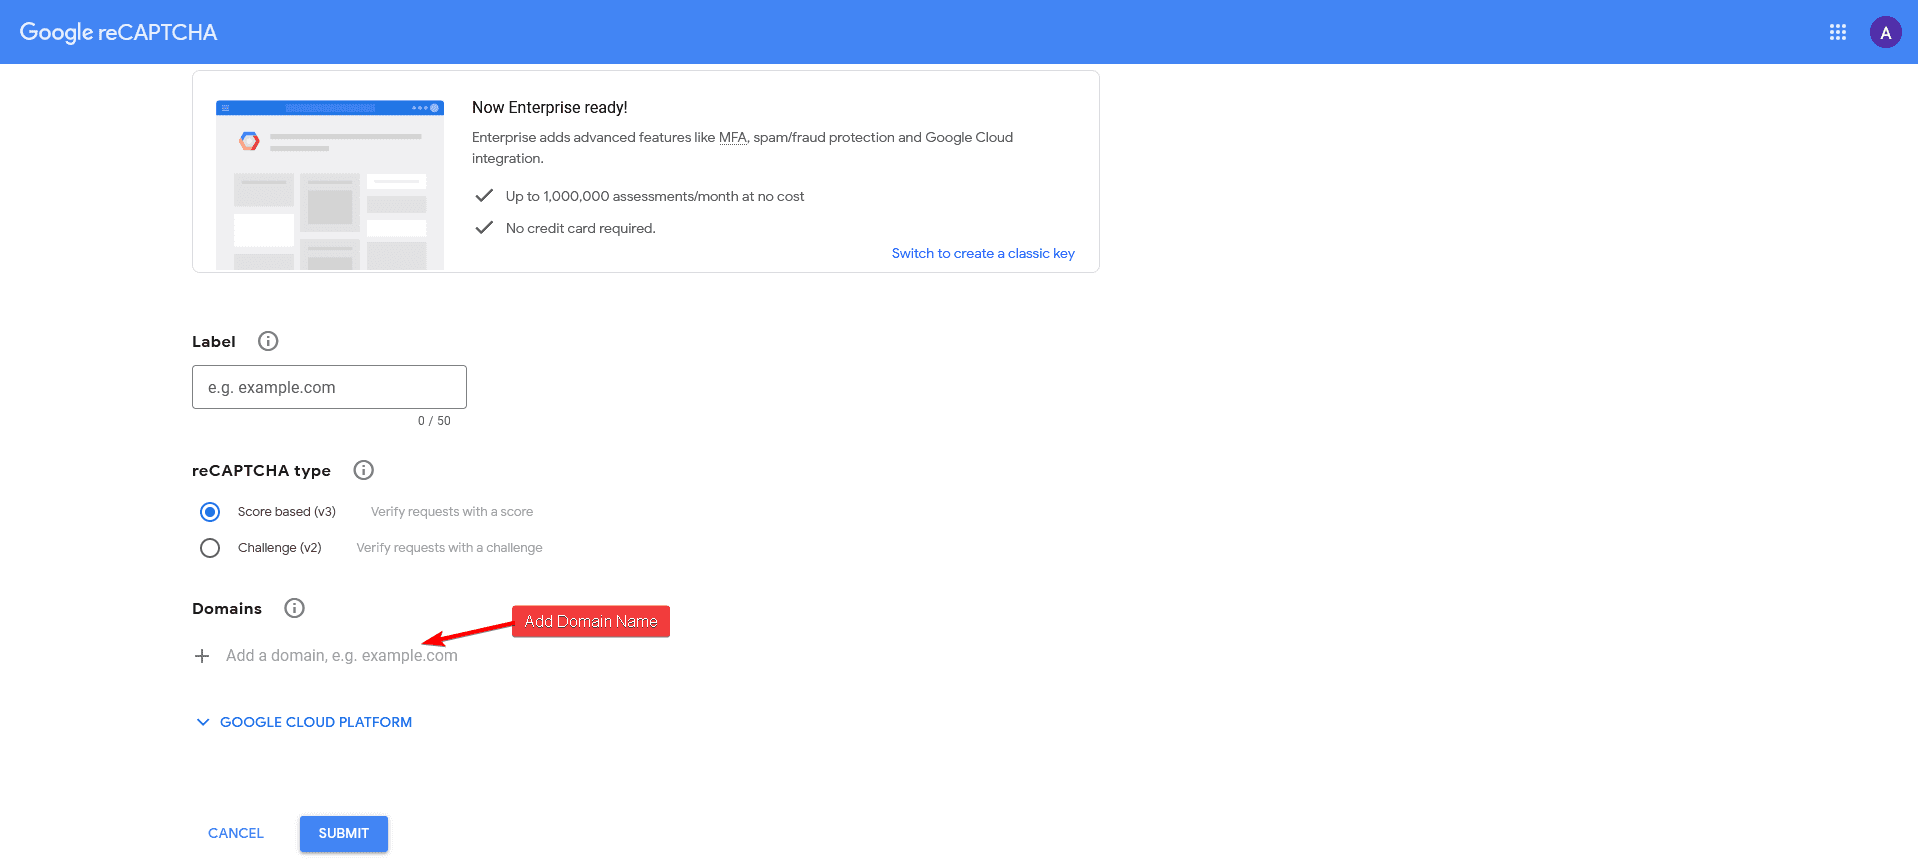
Then, on the page, add a label in the Label field. Use your domain name for easy identification.
In the reCAPTCHA type, select the appropriate reCAPTCHA type. Choose reCAPTCHA V3 to get a score-based (invisible) check that does not interrupt users with a challenge.
Then add your domain name in the Domains field. Make sure to add the domain name without http or https.
You can add multiple domain names.
Then click the Submit button.
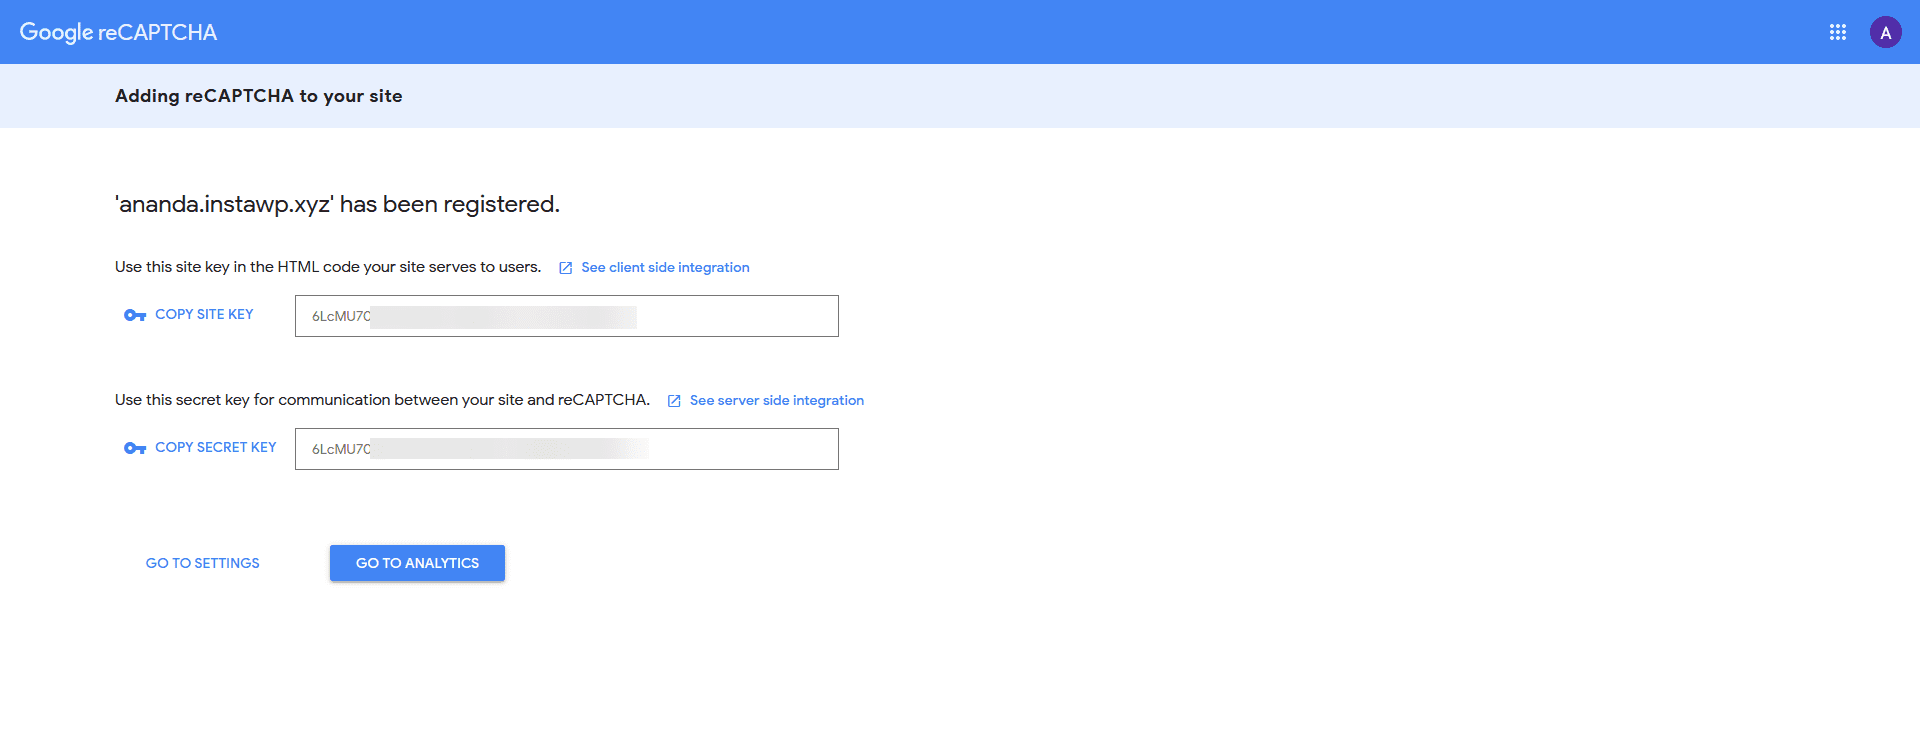
On the next page, you will find your Google reCAPTCHA Site Key and Secret Key.
How to Add Google reCAPTCHA with the Nexter Extension?
With the Nexter Extension, you can add Google reCAPTCHA V3 to your site.
To do this, from the WordPress dashboard go to Nexter > Extensions > Security.
Then go to the CAPTCHA section and enable the toggle, then click on the gear icon (⚙).
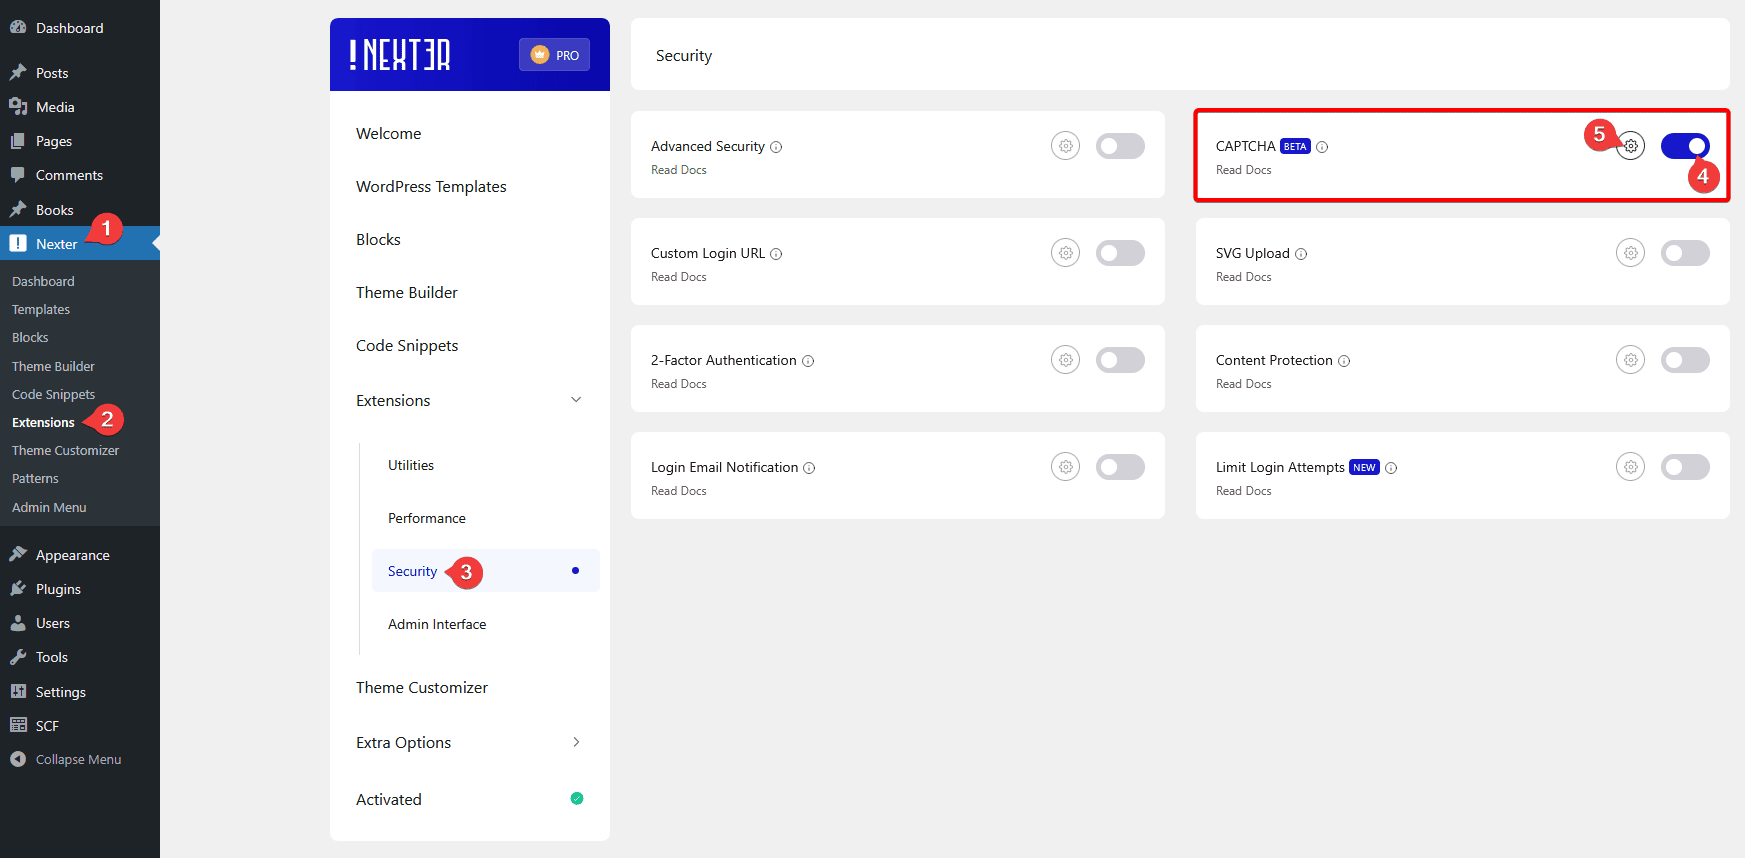
It will open the CAPTCHA popup with the following options.
Go to the Google reCAPTCHA tab.
Then, in the Site Key and Secret Key fields, add your Google reCAPTCHA V3 Site Key and Secret Key respectively.
After that, from the WordPress Default section, select where to enable Google reCAPTCHA on the site. You can add Google reCAPTCHA on the Login Form, Registration Form, Reset Password Form, and Comments Form. Use this when you want to protect specific entry points without applying reCAPTCHA site-wide.
Then click the Save button to enable Google reCAPTCHA on your selected locations.
Google reCAPTCHA V3 is now active on your WordPress website. To manage URL changes or fix broken links across your site, see How to Change URL in a WordPress Website.