Do you need to update an image or media file that’s already being used on your WordPress site, without breaking the link or updating every reference? There are times when you just want to swap out a file (like fixing a typo in a PDF or updating an outdated image) without changing the URL. Replacing the media file keeps everything intact, so you don’t have to reinsert the file across the site manually.
With the Nexter Extension (Free) and Nexter Extension (Pro) plugins, you can easily replace an existing media file in your WordPress site.
How to Replace Media Files with the Nexter Extension Pro?
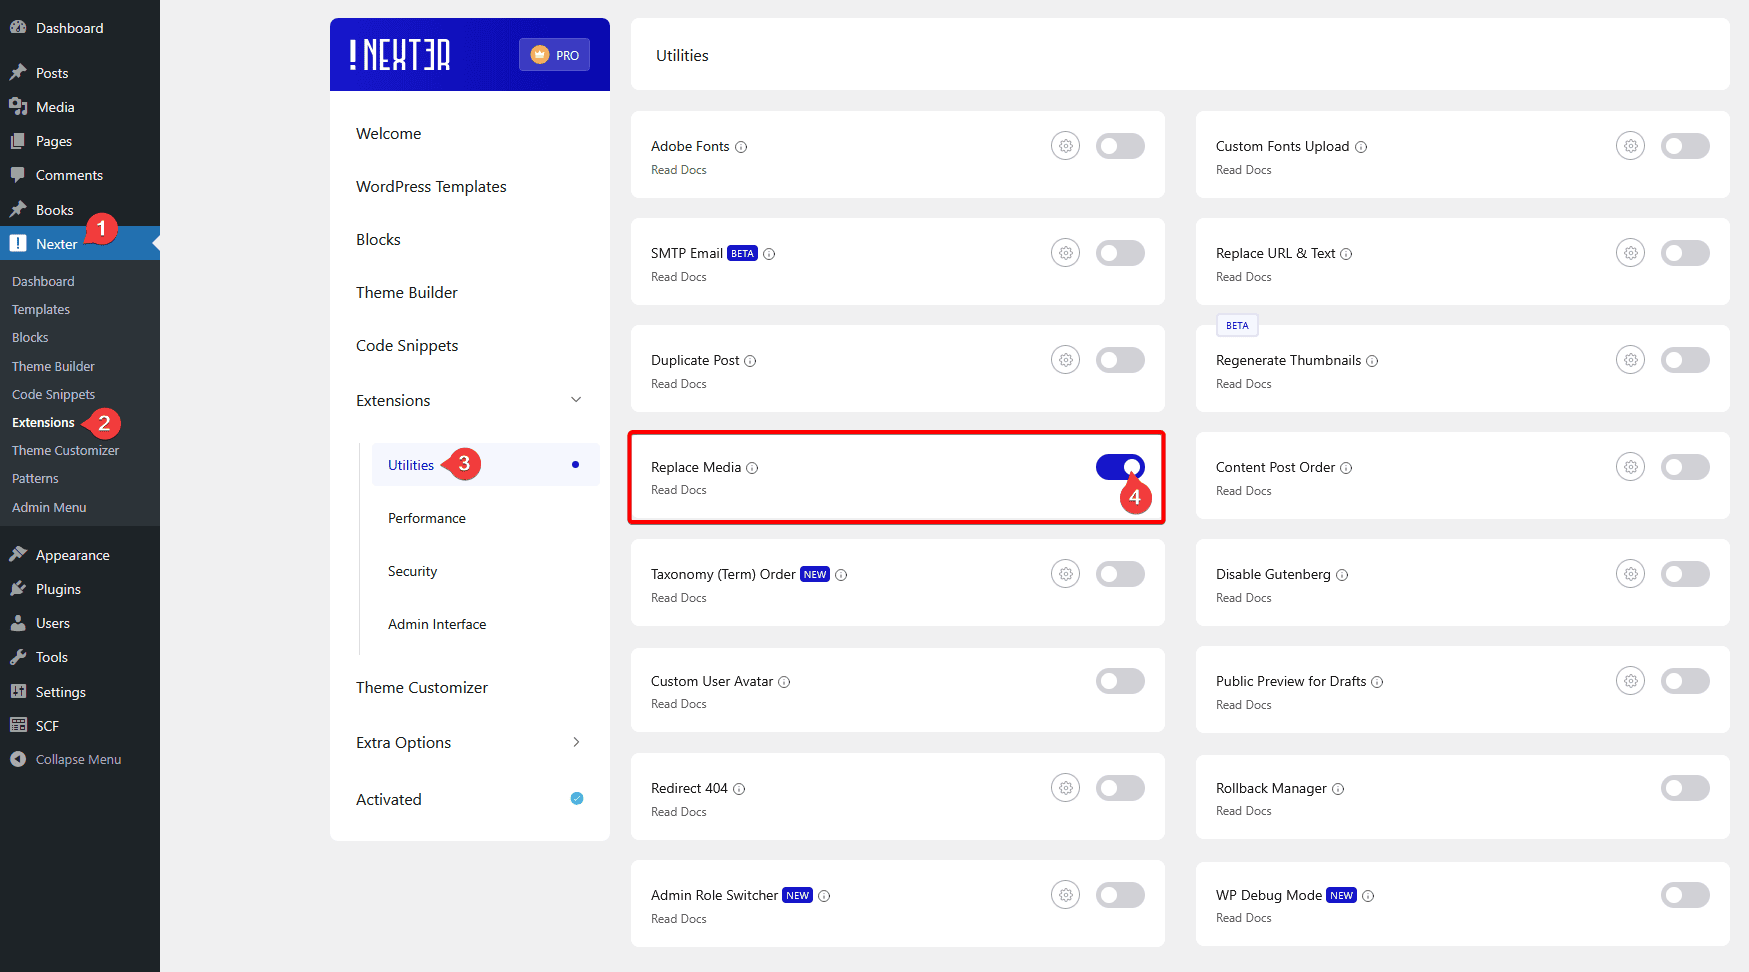
To replace media files with the Nexter Extension Pro plugin, from the WordPress Dashboard, go to Nexter > Extensions > Utilities.
Then go to the Replace Media section, and enable the toggle.

Now, to replace a media file, go to the Media page.
Replace Media in List View
In the List View, once you hover over a media file, you’ll see an Edit or Replace link; click on it.
In the Edit Media page, click on the Select File or Replace button.
Then you can add a new file or use an existing file from the Media Library to replace the media file.
Note: Make sure the file type of the new media file is the same as the one you are replacing.
Replace Media in Grid View
In the Grid View, click on the media file you want to replace.
Then, in the Attachment Details popup, click on the Upload a new file button.
It will take you to the Edit Media page, click on the Select File or Replace button.
Then you can add a new file or use an existing file from the Media Library to replace the media file.
Note: Make sure the file type of the new media file is the same as the one you are replacing.


