Do you want to rearrange the WordPress admin menu to better suit your workflow? By default, WordPress orders the admin menu items in a fixed way, which might not be ideal for everyone, especially if you’re managing a large site or using multiple plugins. There are times when you may want to move important items (like Posts, Pages, or custom post types) to the top or want to hide unused menu items to reduce clutter.
With the Nexter Extension (Free) and Nexter Extension (Pro) plugins, you can easily organize the WordPress admin menu items.
How to Organize WordPress Admin Menu with the Nexter Extension Pro?
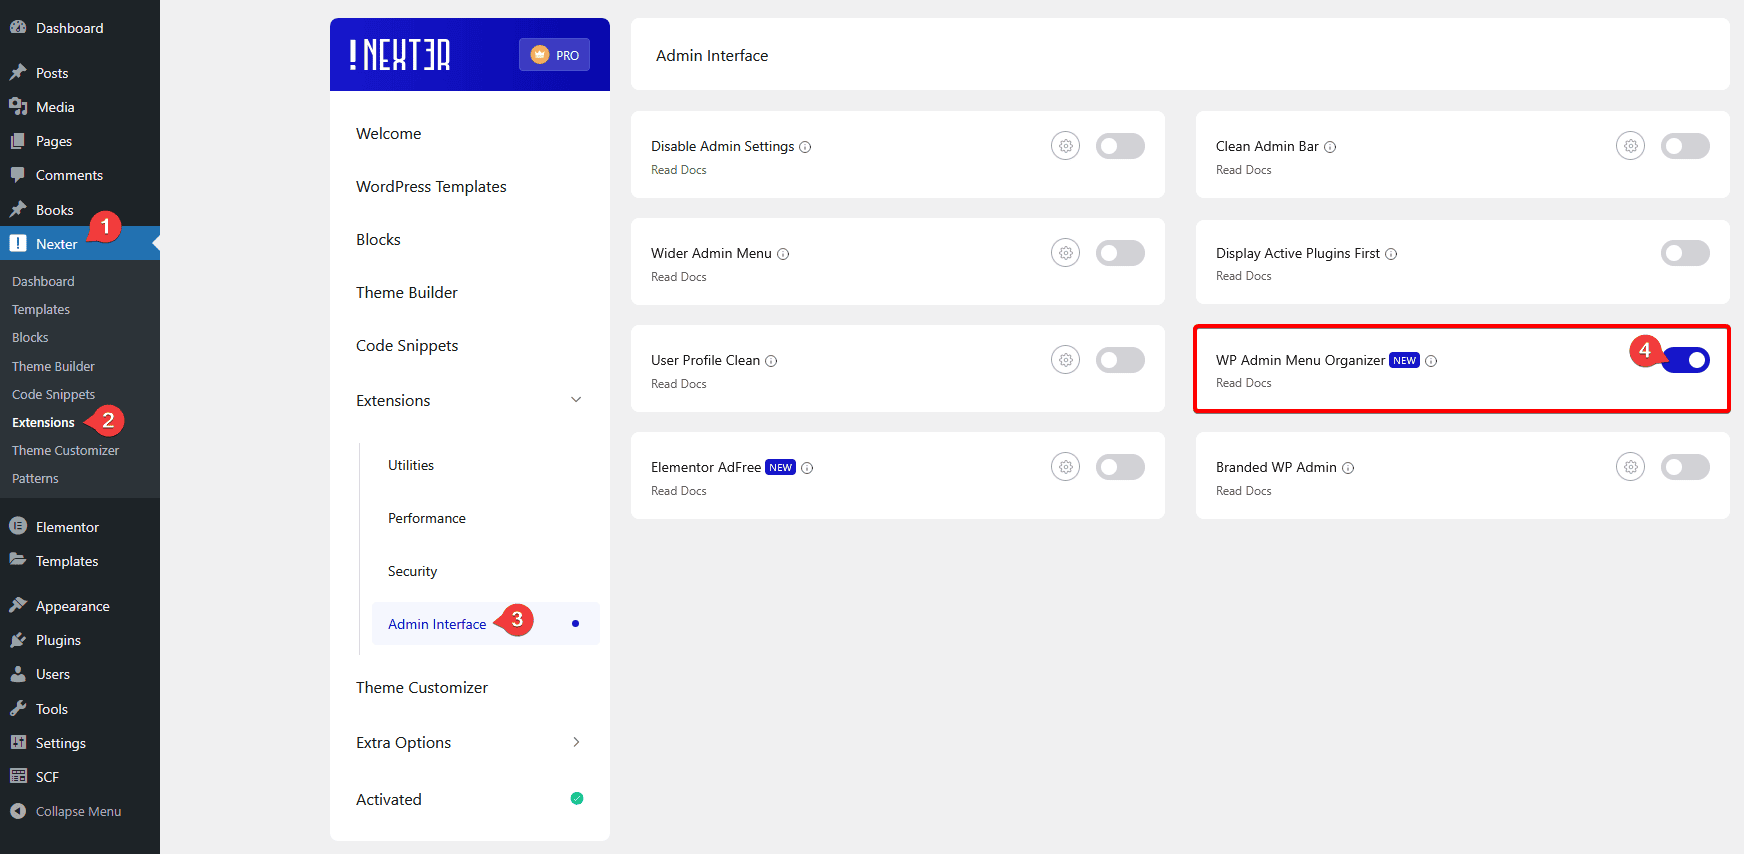
To organize the WordPress admin menu with Nexter Extension Pro plugin, from the WordPress Dashboard, go to Nexter > Extensions > Admin Interface.
Then go to the WP Admin Menu Organizer section, and enable the toggle.

Then reload the page.
Now you’ll see a menu item Admin Menu under Nexter Extension, click on it.
On the next page, you’ll see all of your WordPress dashboard menu items listed, which you can easily organize, hide or even rename (post type only) as per your requirement.
Rearrange Menu Items
To rearrange the menu items, you can simply drag and drop them to rearrange. If a menu item has a submenu, you can click on the Submenu link to rearrange the submenu items as well.
Hide a Menu Item
To hide a menu item, click on the arrow icon, and you’ll see two options –
- Hide until toggled – With this, you can hide the menu item from the left menu bar. But if you access that menu item or its child item by URL directly, then the menu item will show.
- Always hide for user role(s) – With this, you can hide the menu item by roles. You can hide for all users, specific users or exempt users by role. Based on your selected option, the menu item will not be visible to those users. But if those users access that menu item or its child item by URL directly, even then, the menu item will not show.
Note: You can do the same for a submenu item as well.
Note: This option will hide the menu item from the left menu bar but the pages will remain accessible by URL.
Rename a Menu Item
You can rename the post type menu items. You’ll see an editable text field for the post type menu items you can directly edit the name from there.
Once done, click on the Save Changes button to save the changes.
Then reload the page to see the changes.
You can click on the Add Separator button to add a separator line in the menu items. You can drag and drop to position it. You can click on the cross button to delete the separator as well.
From the Reset Menu button, you can reset the changes to the default state.


