Do you want to manage how often the Heartbeat Control API runs on your WordPress site? By default, the Heartbeat API keeps a constant connection between your browser and the server to support real-time features like auto-saving posts, showing notifications, and handling session management. While helpful, this constant activity can put an extra load on your server. Adjusting how often the Heartbeat API runs can help reduce server usage and improve performance without losing essential functionality.
With the Nexter Extension (Free) plugin, you can easily manage how often the Heartbeat Control API runs on your WordPress site.
How to Manage Heartbeat Control API with the Nexter Extension?
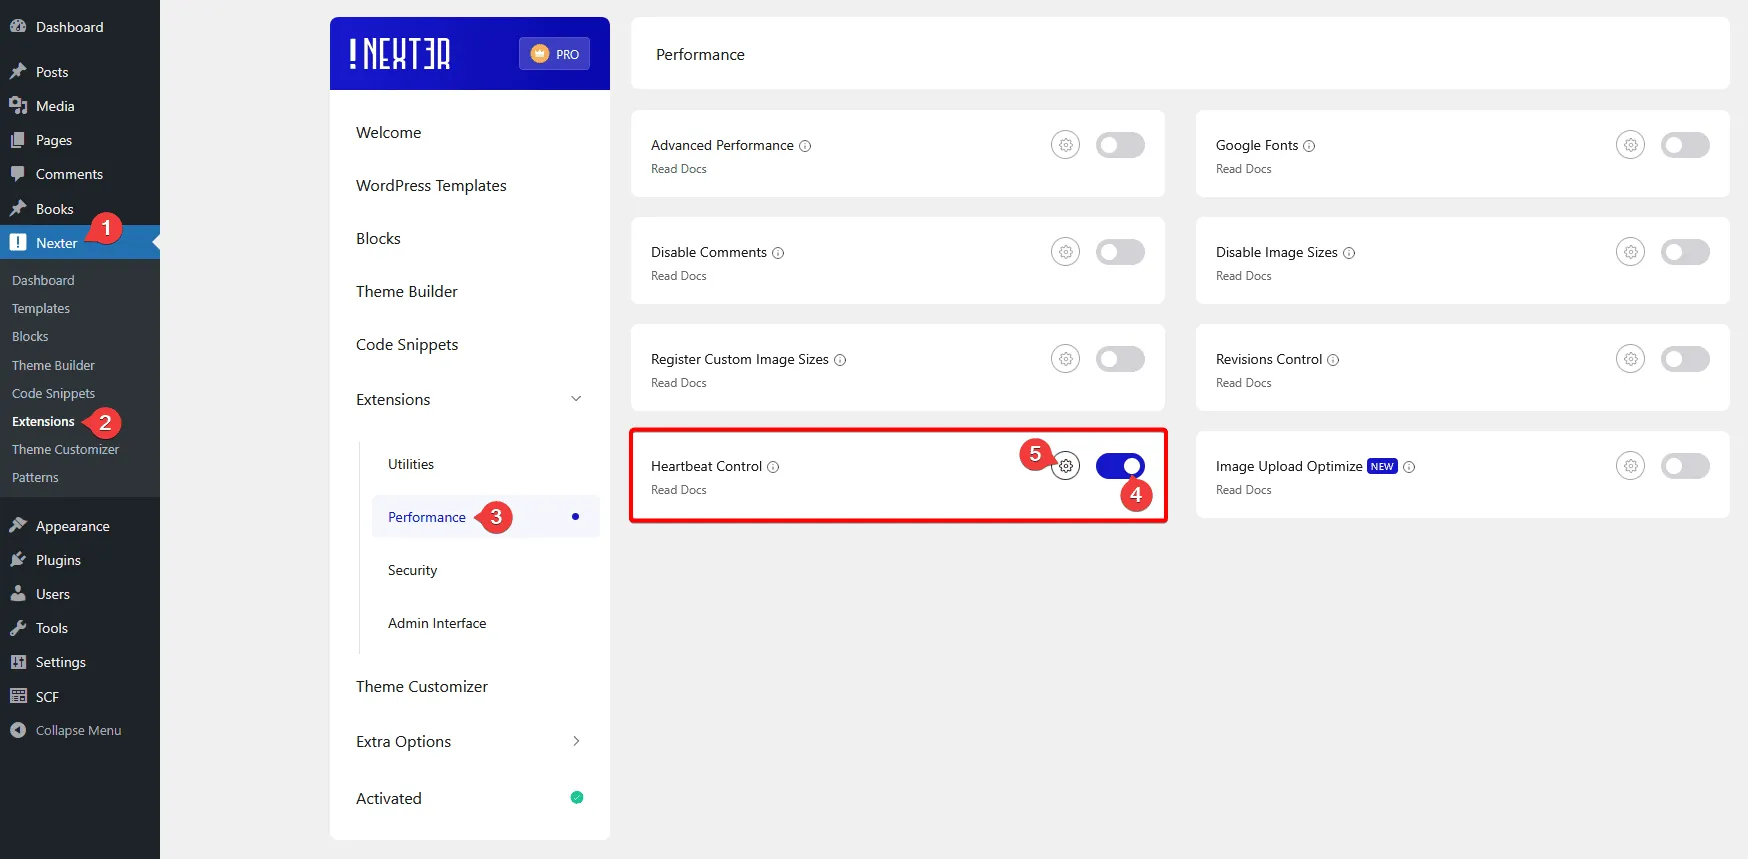
To manage Heartbeat Control API with the Nexter Extension plugin, from the WordPress Dashboard, go to Nexter > Extensions > Performance.
Then go to the Heartbeat Control section, enable the toggle, and click on the gear icon (⚙).

It will open the Heartbeat Control pop-up. Here you’ll find three options –
WordPress Dashboard – From here, you can set how often the Heartbeat Control API will send requests when you work in the WordPress Dashboard.
WordPress Frontend – From here, you can set how often the Heartbeat Control API will send requests when you work in the WordPress Frontend.
Post Editor – From here, you can set how often the Heartbeat Control API will send requests when you work in the WordPress Post Editor.
You can also disable Heartbeat Control for each option.
You can set the settings as per your requirements.
Once done, click on the Save button.
Now, as per your settings, the Heartbeat Control API will run on the specific locations.


