For websites, their content is their primary asset, and everything else is built around that. But unfortunately, on the web, it is tough to keep your content secure as everything is in public and it can be copied easily.
While we can’t make our content 100% safe, we can make the process harder for someone to copy the content from our WordPress website.
The Nexter theme and Nexter Pro Extension offer many such options through its Content Protection feature to make your content more secure.
Required Setup
- You need to have Nexter Extension plugin installed and activated.
- This is a Premium feature, you need the Nexter Pro Extension plugin installed and activated.
How to add Content Protection in WordPress?
Do you want to protect the content of your WordPress website?
WordPress is so popular you’ll find various free and paid content protection plugins in the market that can do the job for you.
The downside of using a 3rd party plugin is that it may not work properly with your WordPress theme.
But with the Nexter theme, you are in safe hands.
The Nexter theme has its own extensions that you can use to protect the content of your WordPress website.
The Nexter Pro Extension, apart from offering various options to protect your content, just on installation it disables any kind of selection on your website, adding an extra layer of protection.
To check the settings, go to Nexter Extension > Security.
Then go to the Content Protection section, enable the toggle, and click on the gear icon (⚙).
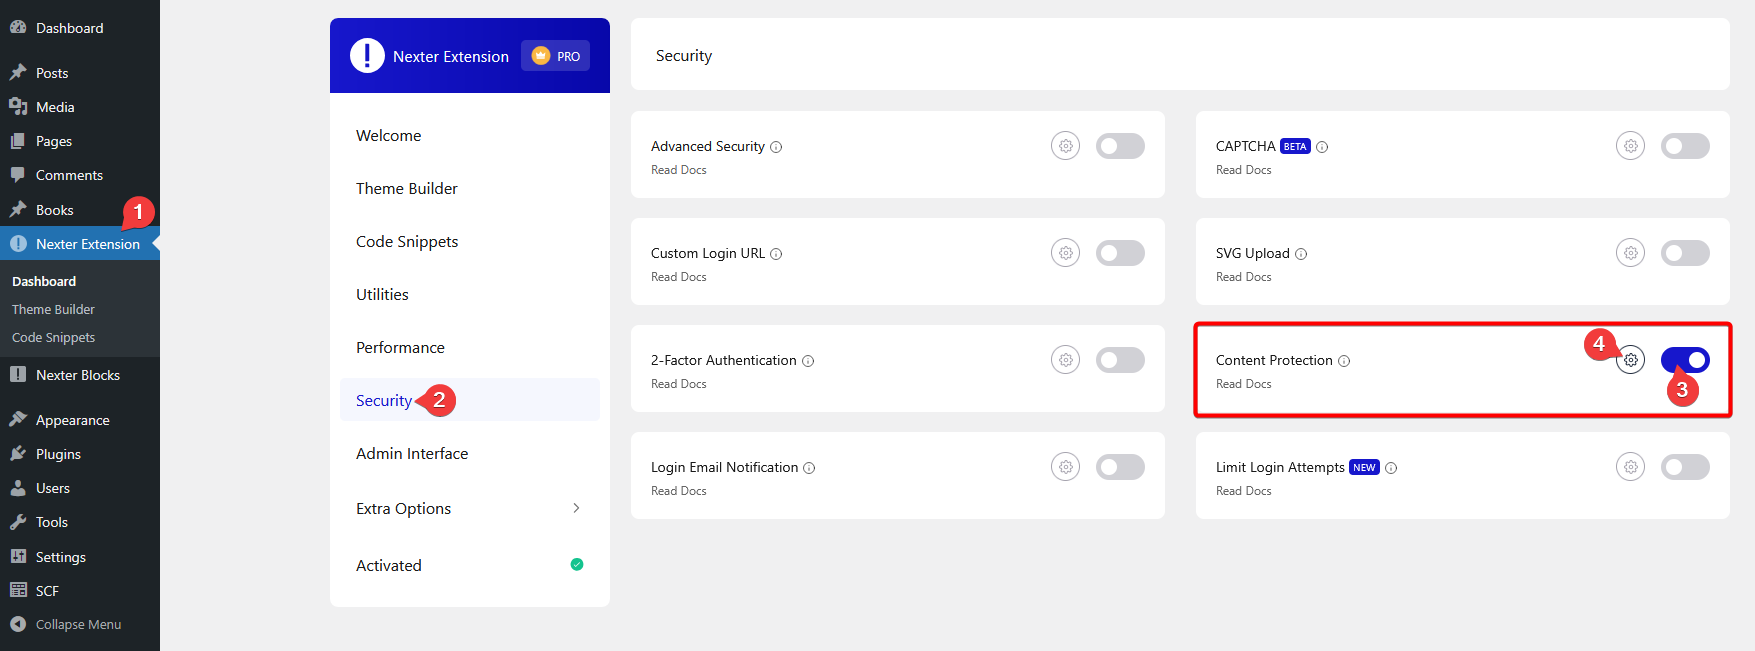
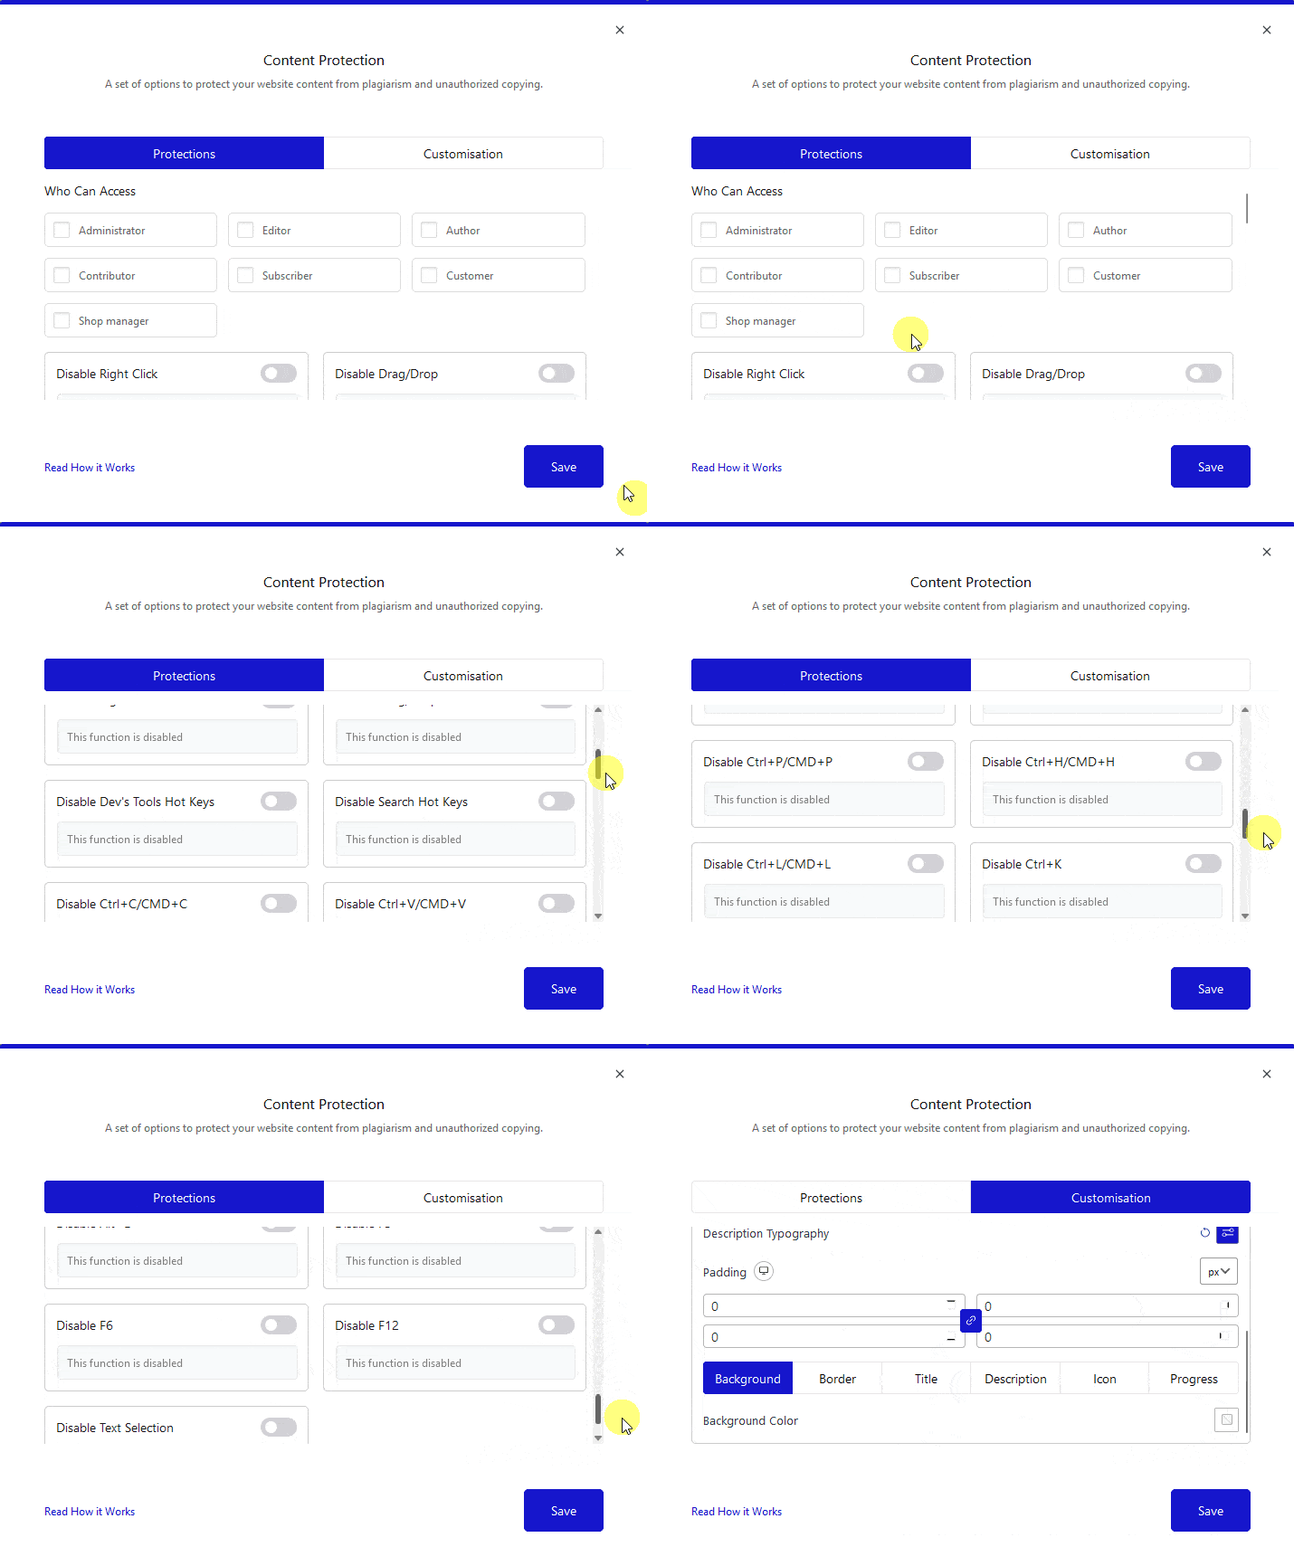
It will open the Content Protection popup.
In the Protections tab, you’ll find different options to protect your content.
From the Who Can Access section, you can exclude users by role from the content protection rules, so people working on the site don’t face any restrictions.
Then you’ll find different options to protect your content.
Disable Right Click – To disable right clicks on your site.
Disable Drag/Drop – To disable drag and drop of images from your WordPress website.
Disable Dev’s Tools Hot Keys – To disable hotkeys for Developer tools.
Disable Search Hot Keys – To disable search hotkeys.
Disable Ctrl+C/CMD+C – To disable copy hotkey on your website, so users can’t easily copy content from your website.
Disable Ctrl+V/CMD+V – To disable the paste shortcut, that way, spammers can’t paste spam content in contact forms or comments.
Disable Ctrl+A/CMD+A – To disable select all hotkey.
Disable Ctrl+U/CMD+U – To disable the view page source hotkey to prevent users from viewing your code.
Disable Ctrl+P/CMD+P – To disable the print hotkey to stop users from printing your web pages.
Disable Ctrl+H/CMD+H – To disable the hotkey for open browser history or hide window.
Disable Ctrl+L/CMD+L – To disable the hotkey for the focus address bar.
Disable Ctrl+K – To disable the hotkey for search in the address bar.
Disable Ctrl+O – To disable the hotkey for the open file.
Disable Ctrl+E – To disable the hotkey for search in the address bar.
Disable Alt+D – To disable the hotkey for the focus address bar.
Disable F3 – To disable the hotkey for the find next feature.
Disable F6 – To disable the hotkey for the focus address bar or panel.
Disable F12 – To disable the F12 hotkey to open the inspect elements window.
Disable Text Selection – To disable text selection on your website.
For each option, you can set a custom toast message.
From the Customisation tab, you can customize the look and feel of the message popup.
