With the rise of cyber attacks and data breaches, taking extra precautions to protect sensitive information has become essential. One of the most effective ways to enhance the security of your WordPress website is by implementing two-factor authentication. This additional layer of security adds an extra step to the login process, making it much harder for hackers to gain access to your account.
With the Nexter Extension (Free) and Nexter Pro Extension plugins, you can easily enable 2 factor authentication for WordPress login.
Why Enable Two Factor Authentication?
One of the most effective ways to safeguard our online accounts is by implementing two-factor authentication (2FA). This adds an extra layer of security to the traditional username and password login process, making it significantly harder for cybercriminals to gain unauthorized access.
With 2 factor authentication, users have to add a unique security code after entering their username and password to log in to their account, this extra step makes your account much more secure.
Learn via Video Tutorial
How to Add Two Factor Authentication with the Nexter Pro Extension?
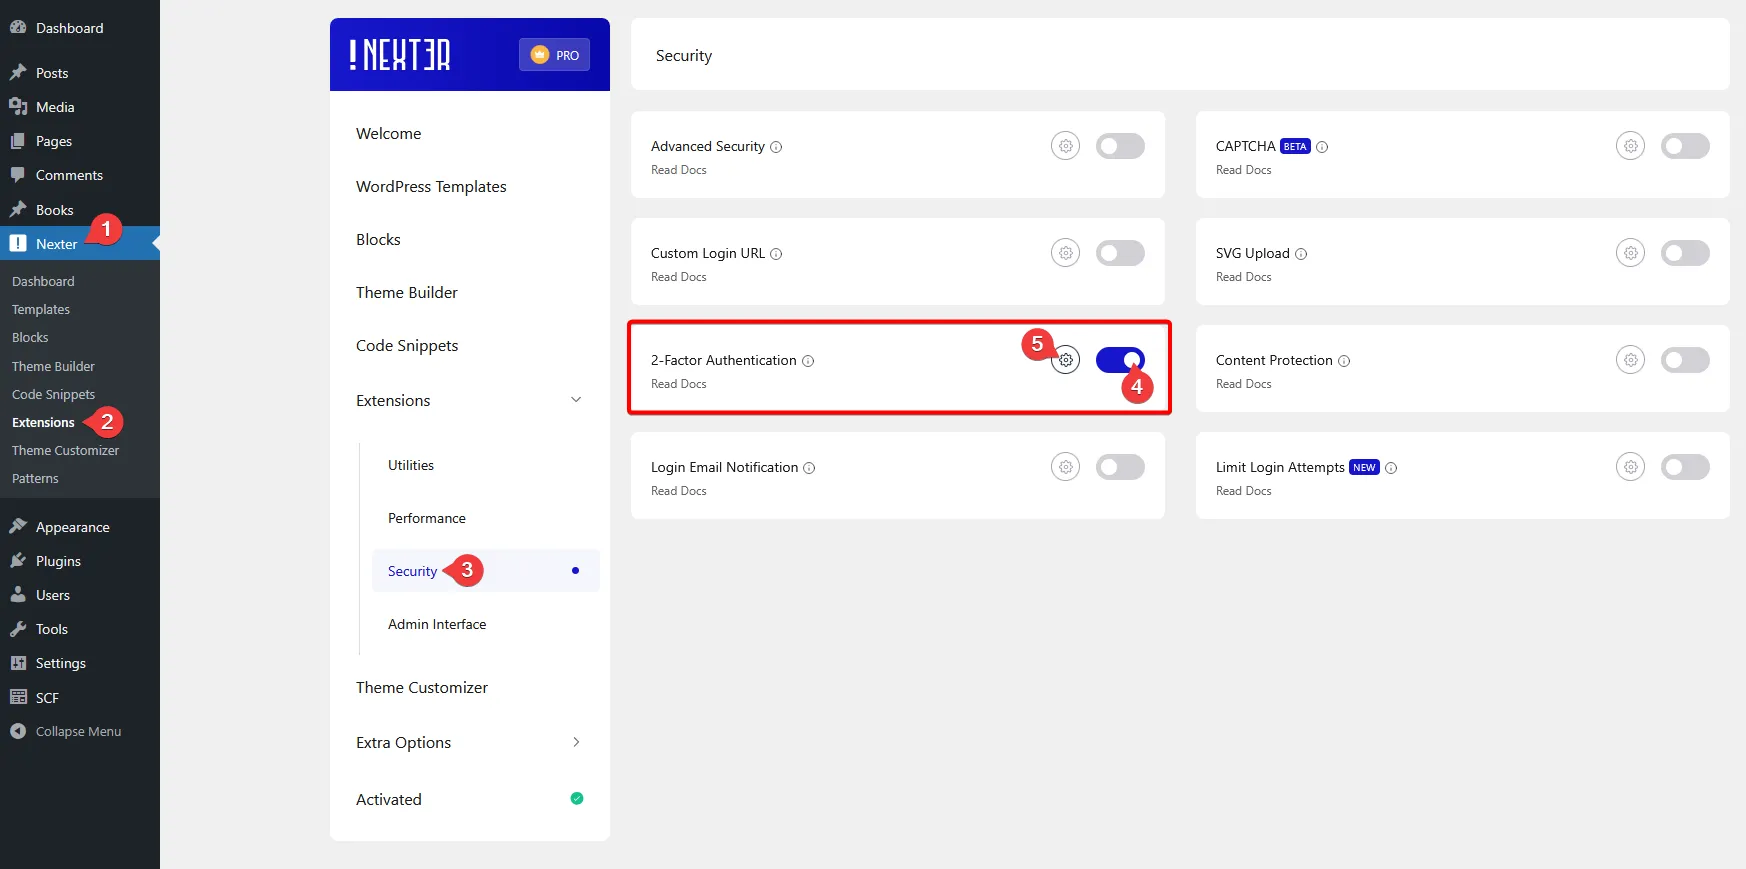
To add Two Factor Authentication using the Nexter Pro Extension plugin, from the WordPress dashboard and go to Nexter > Extensions > Security.
Then go to the 2-Factor Authentication section and enable the toggle, after that click on the gear icon (⚙).
It will open the Two Factor Authentication Login popup; here, you’ll find some options.
From the Which User Roles are allowed section, you have to select the user roles for which you want to enable two factor authentication.
Note: You can select multiple user roles. But if you have just one user, then select the Administrator role.
Then, from the 2FA Email Customization section, you can add a custom email subject and message.
Note: You can leave the email customization blank as well to use the default email message.
Once done, click on the Save button.
How to Customize 2FA Email Content with Nexter?
If you want to send a customized two-factor authentication email, then you can do that from the Nexter Two Factor Authentication Login popup.
In the 2FA Email Customization section, you can add a custom email subject and message.
For the message, you can use hot tags {username} for username, {nicename} for Name, {token} for One time token and {time} for time the message was sent.
Example
Subject – Your Authentication Code for Account Verification
Message –
Hi {nicename},
Your verification code is {token}. This code will expire in {time} minutes. Please use it promptly to complete your login.
Note: In the custom email, make sure to include {token} else you won’t get the verification code.
Enable Two Factor Authentication for the User
Then go to Users > All Users.
If you have multiple users, then edit the user as per the role you’ve set in the Nexter 2-Factor Authentication settings.
Note: If you have just one user, then simply go to Users > Profile.
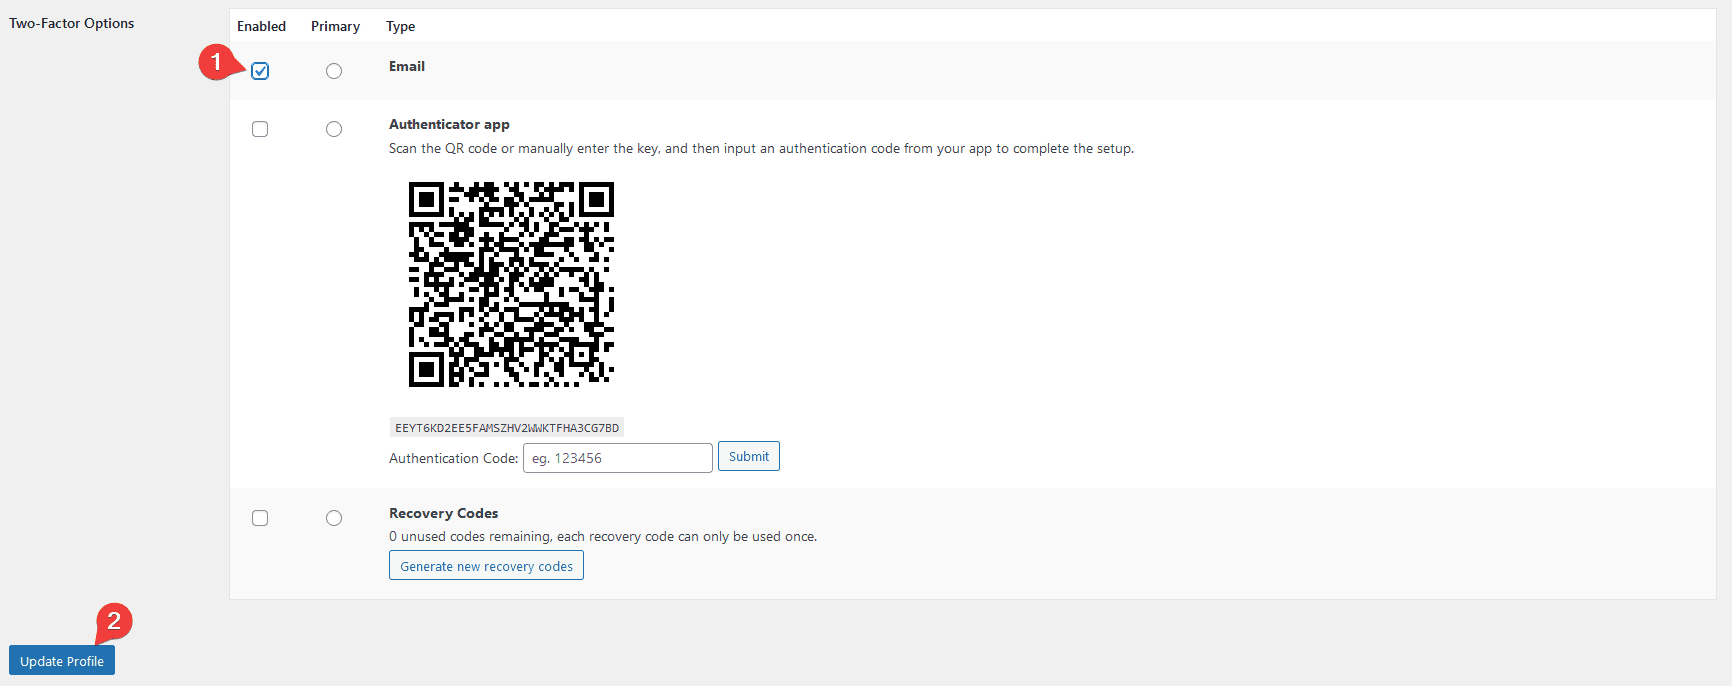
Then, on that page, scroll down to the Two-Factor Options section. Here, you’ll find three authentication methods.

Email – In this method, you’ll get an email with a verification code.
Authenticator app – In this method, you have to link your site with an authenticator app then generate verification codes.
Recovery Codes – In this method, you can generate recovery codes beforehand and use them.
You can enable all the methods together and set anyone as the primary method by selecting the corresponding radio button or you can also use any one method.
Use Email Method
To use the Email method, click the corresponding Enabled checkbox, then click on the Update Profile button to save the changes.
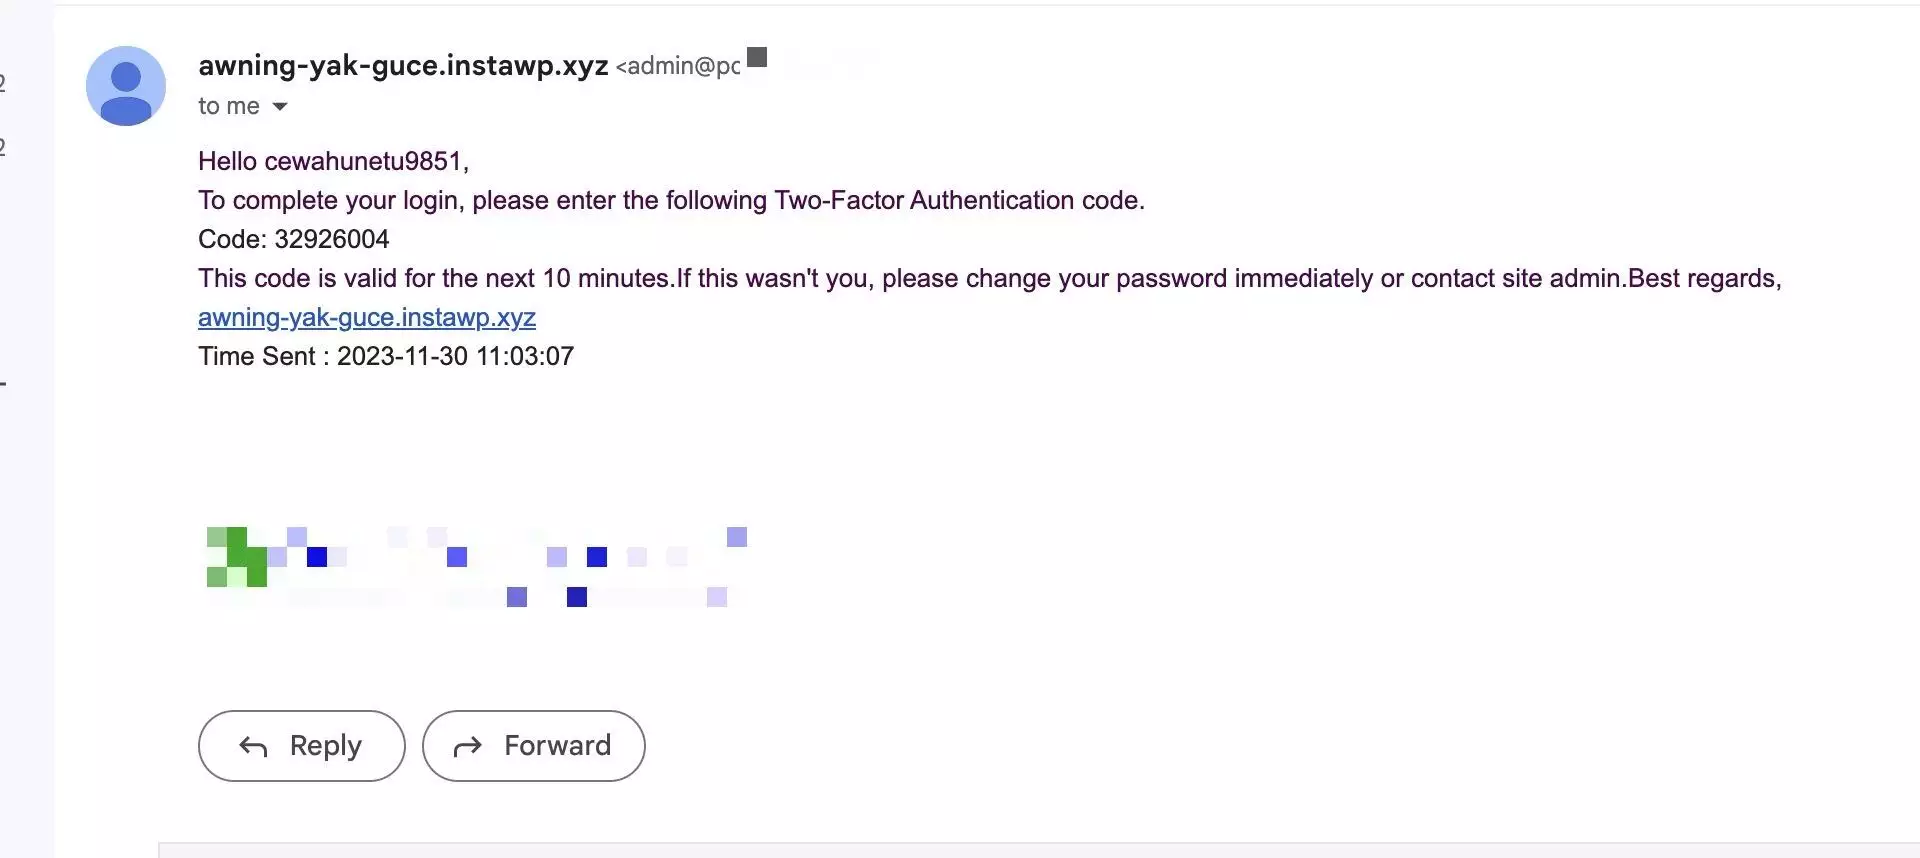
Now, if you try to log in to your WordPress profile, you’ll get an email with the recovery code to your registered profile email ID.
You can write a custom email message in the Nexter 2-Factor Authentication settings, or you’ll get a default email message.
Note: Make sure you’ve set up SMTP (Simple Mail Transfer Protocol) properly so the email goes to the inbox, You can use the free Fluent SMTP Plugin.
Use Authenticator App Method
To use the Authenticator app method, click the corresponding Enabled checkbox.
Now, you have to use the Google Authenticator app or other authenticator apps to scan the QR code or manually enter the key.
Then, input an authentication code from your app to the Authentication Code field and click Submit to complete the setup.
After that, click the Update Profile button to save the changes.
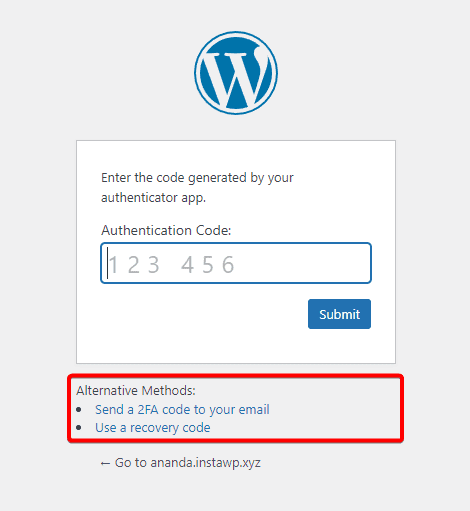
Now, if you try to log in, after entering your username and password, you have to enter a code from your authenticator app to log in to your account.
Use Recovery Codes Method
To use the Recovery Codes method, click the corresponding Enabled checkbox.
Then click on the Generate new recovery codes button to generate new codes.
It will generate 5 codes at a time then click on the Download Codes button to download the codes because those codes will disappear on page reload.
After that, click the Update Profile button to save the changes.
Now, you can use these codes as a verification code for your login.
Note: You can use one code just once. If all the codes are used you can re-generate new codes again.
You can use this method as a backup of the email and authenticator app method just in case you don’t have access to those.
If you are using multiple authentication methods at the same time, you’ll get options to switch between verification methods.
This is how easily you can enable two-factor authentication on your WordPress website.


