As an online business, having a user-friendly login process is essential for attracting and keeping customers. Utilizing a platform such as Facebook for logging in to your website is a great way to streamline the process for your users. Allowing for a Facebook login not only simplifies the process for your members but also reduces the amount of data you need to collect from your users. Implementing a Facebook login can also help build user trust, as it shows that you value their privacy and security.
With the Login & Signup block from Nexter Blocks, you can easily add a Facebook login option to your login or registration form.
To check the complete feature overview documentation of Nexter Blocks Login & Signup block, click here.
Requirement – This block is a part of Nexter Blocks, make sure its installed & activated to enjoy all its powers.
First, you have to generate your Facebook App Id and Facebook App Secret.
Generate Facebook App Id and App Secret
1. For this, you have to login to your Facebook account and go to Facebook for Developers.
2. If you don’t have a developers account, click the Get Started button at the top.
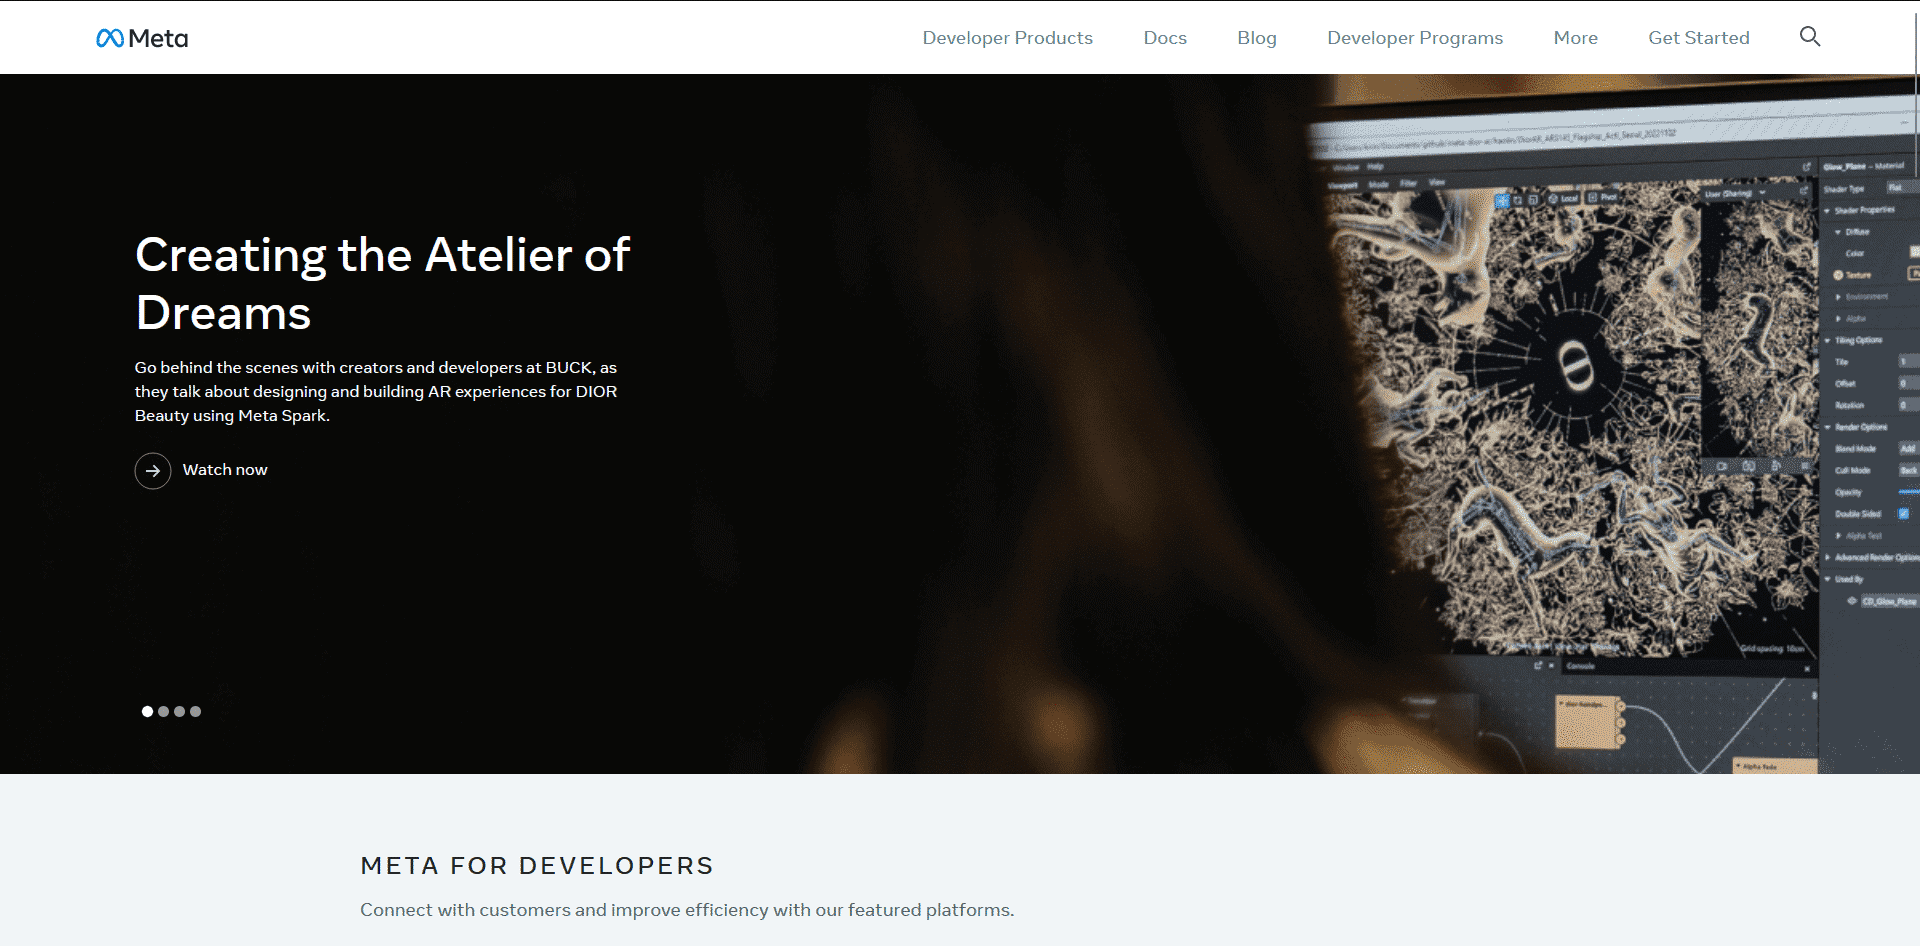
3. Then, you have to register for a developer account and follow the steps to create your account.
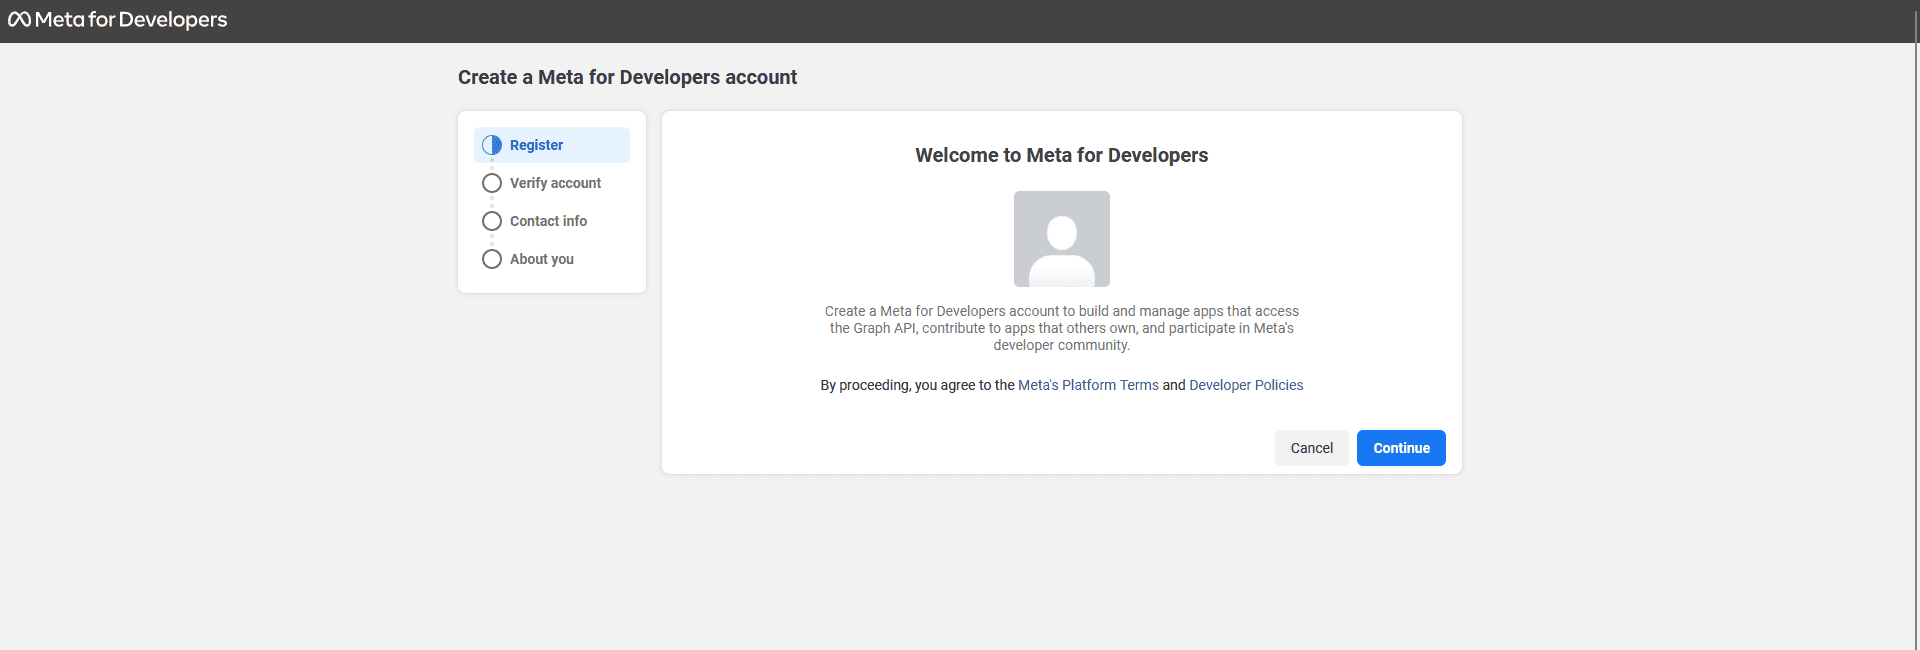
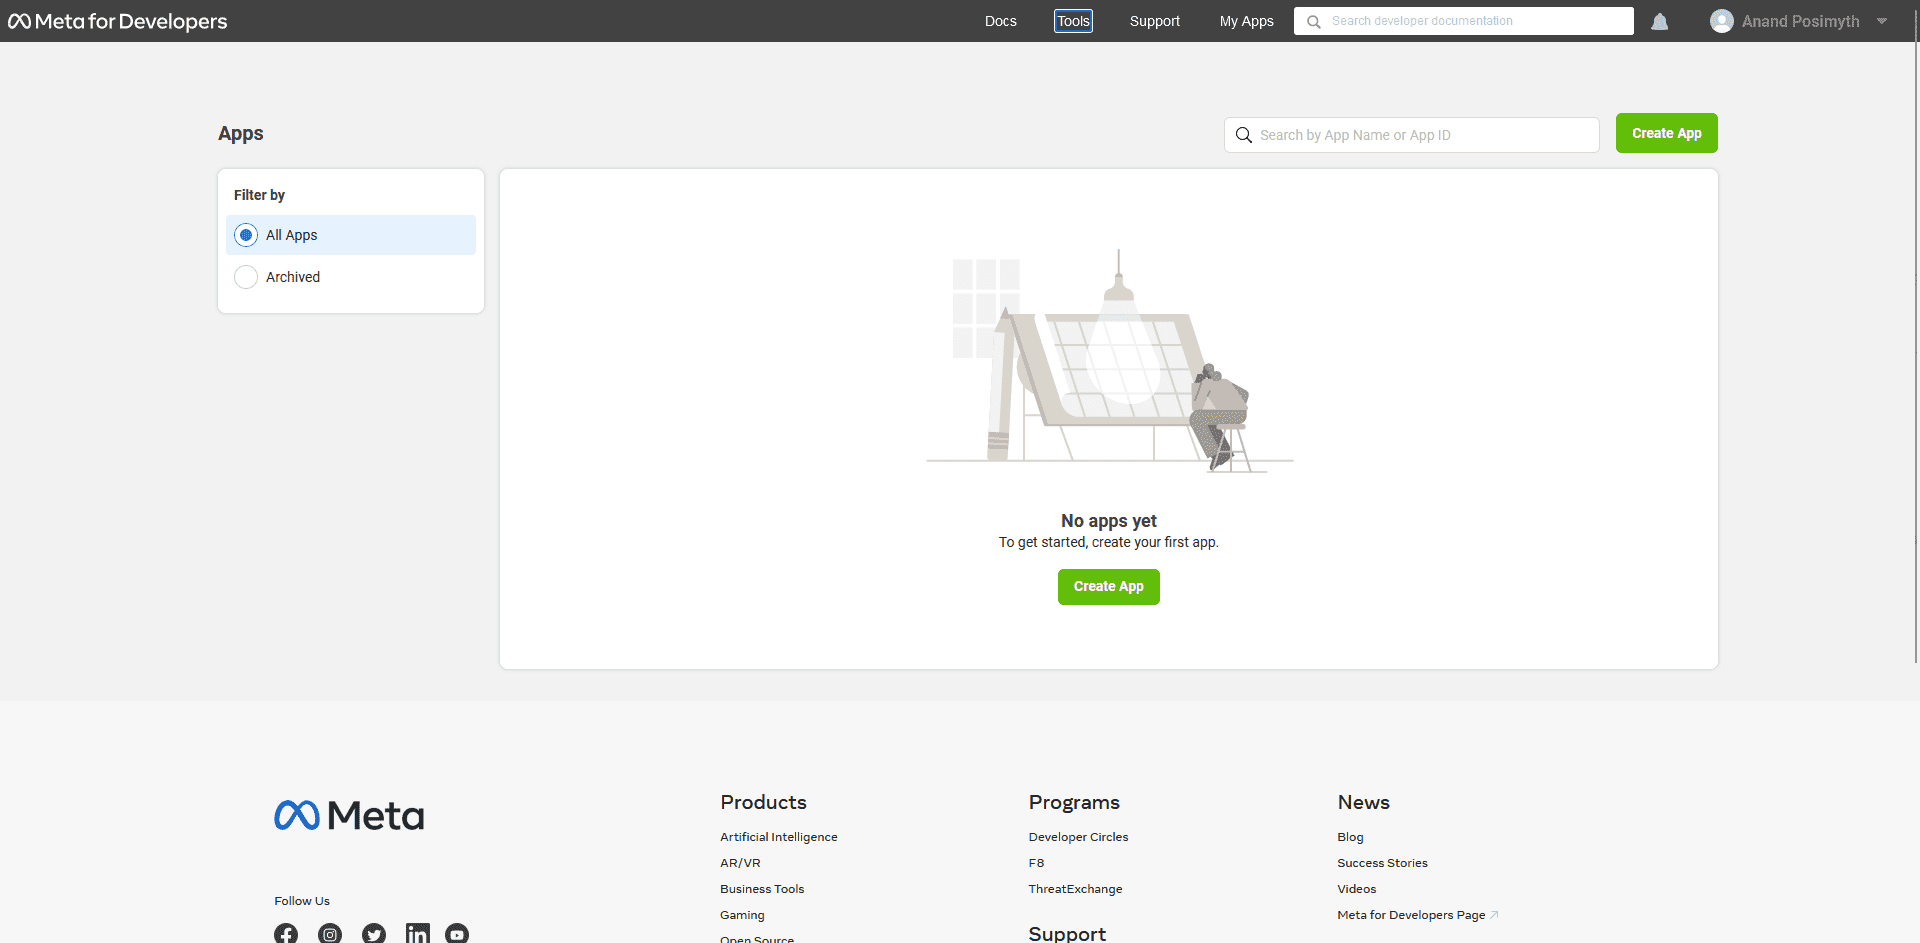
4. Once done, you’ll get to the Apps page, click on the Create App button.
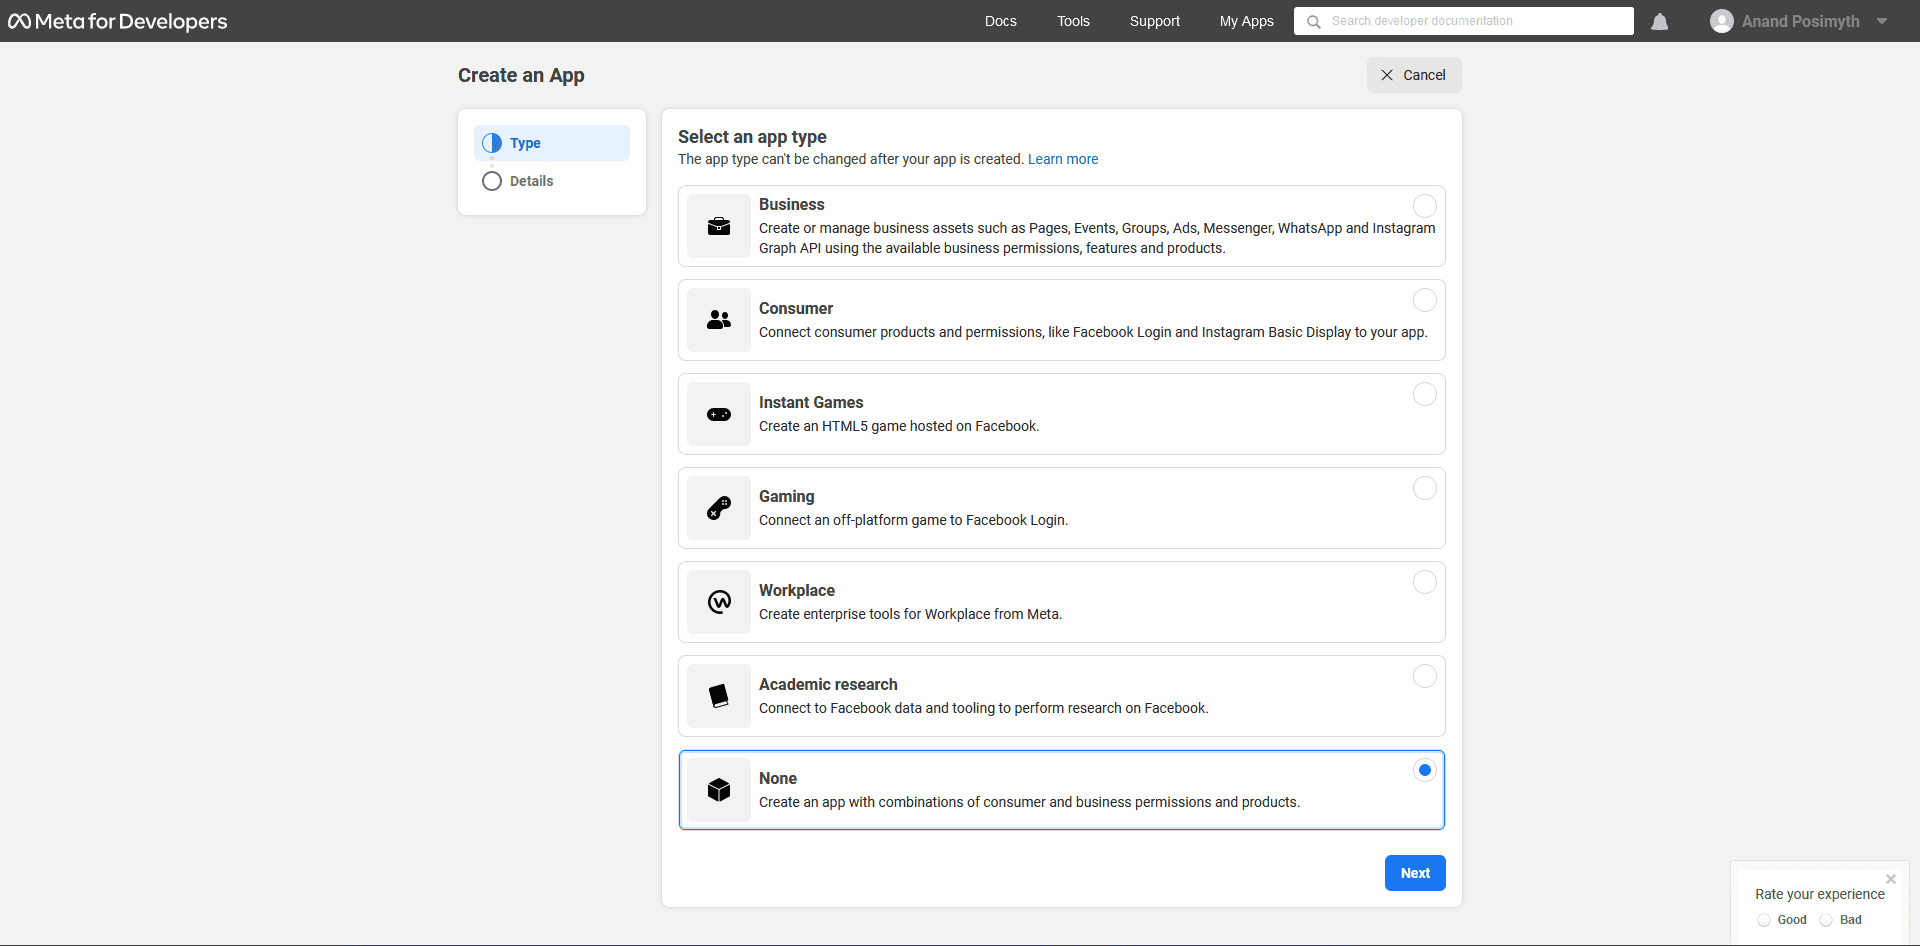
5. On the next screen, you have to select your app type, select None and click on Next.
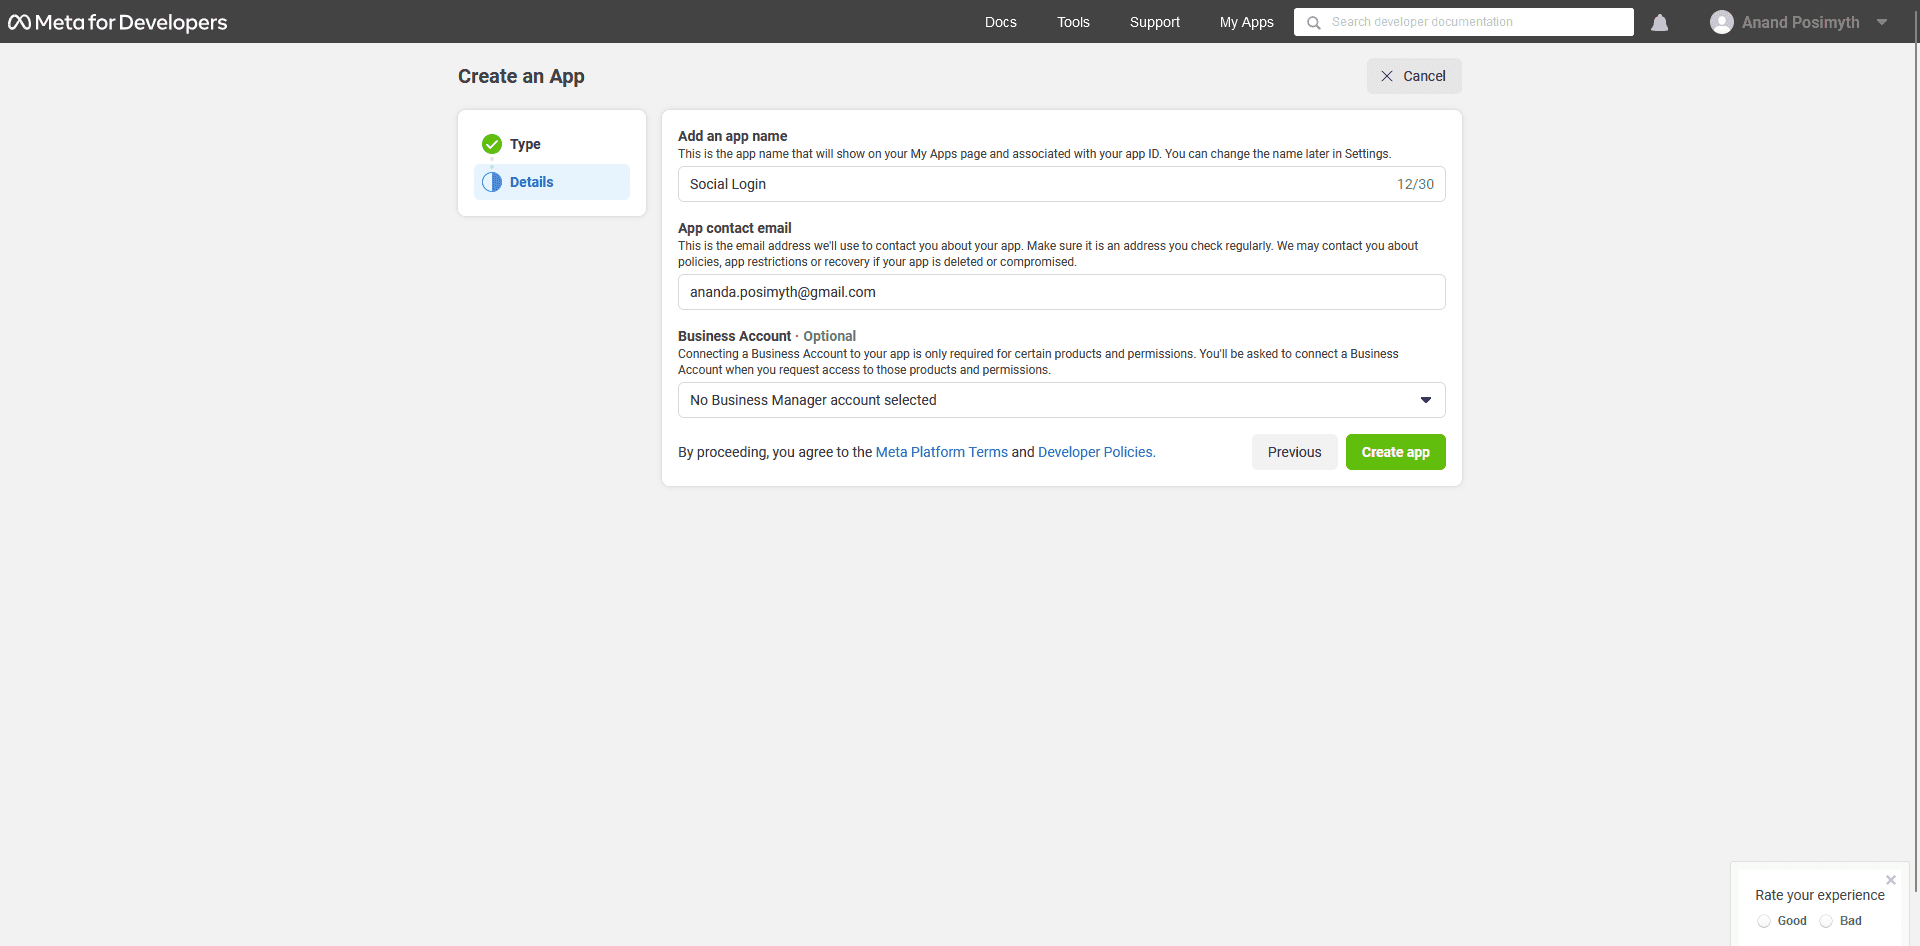
6. Then add an app name, email id and optionally connect your business account. Once done, click on Create App button.
7. On the next page, from the left sidebar, click on Settings > Basic.

8. Now, you’ll find your App Id and Secret. Click on the show button in the App secret field to see the secret key.
Copy and paste both App Id and Secret into a notepad. You’ll need it later. You need to perform a few more steps before you can use them.
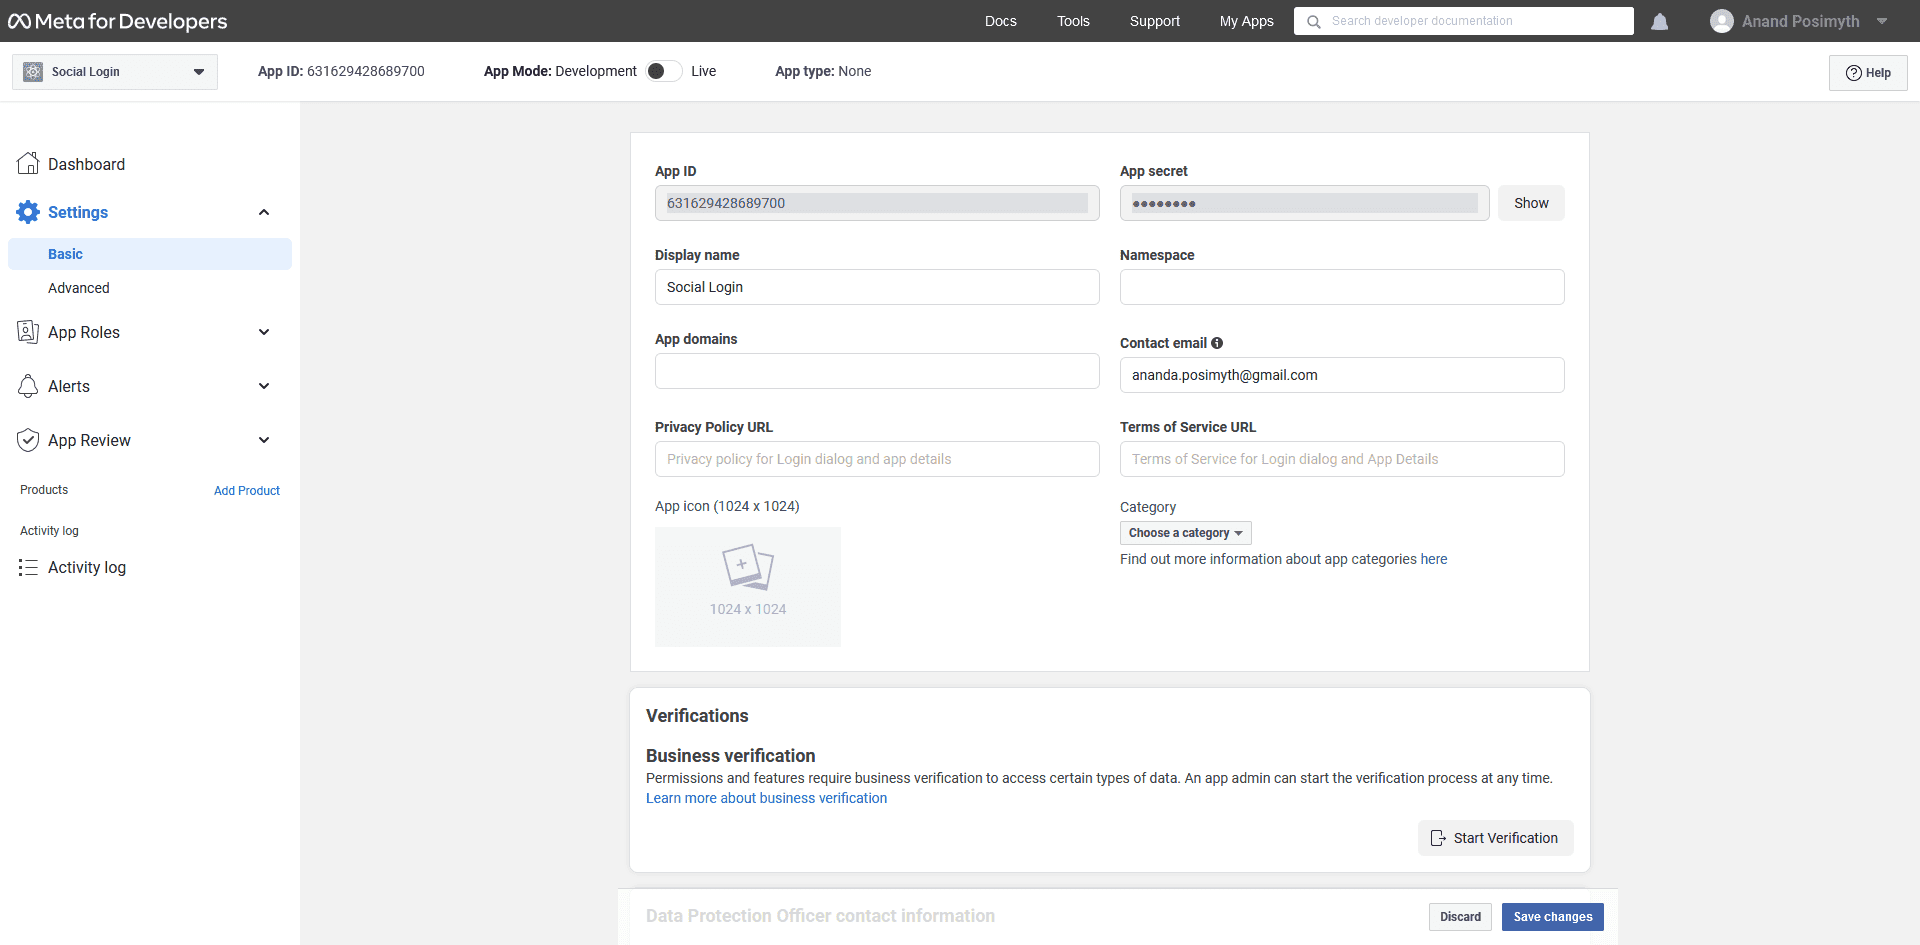
9. Now, you need to make the app live. In order to do so, you’ll have to add a Privacy Policy URL.
You can add your website URL or privacy policy page URL. Then from the Category dropdown, you have to select a category for your app.
Once done, click on the Save changes button.
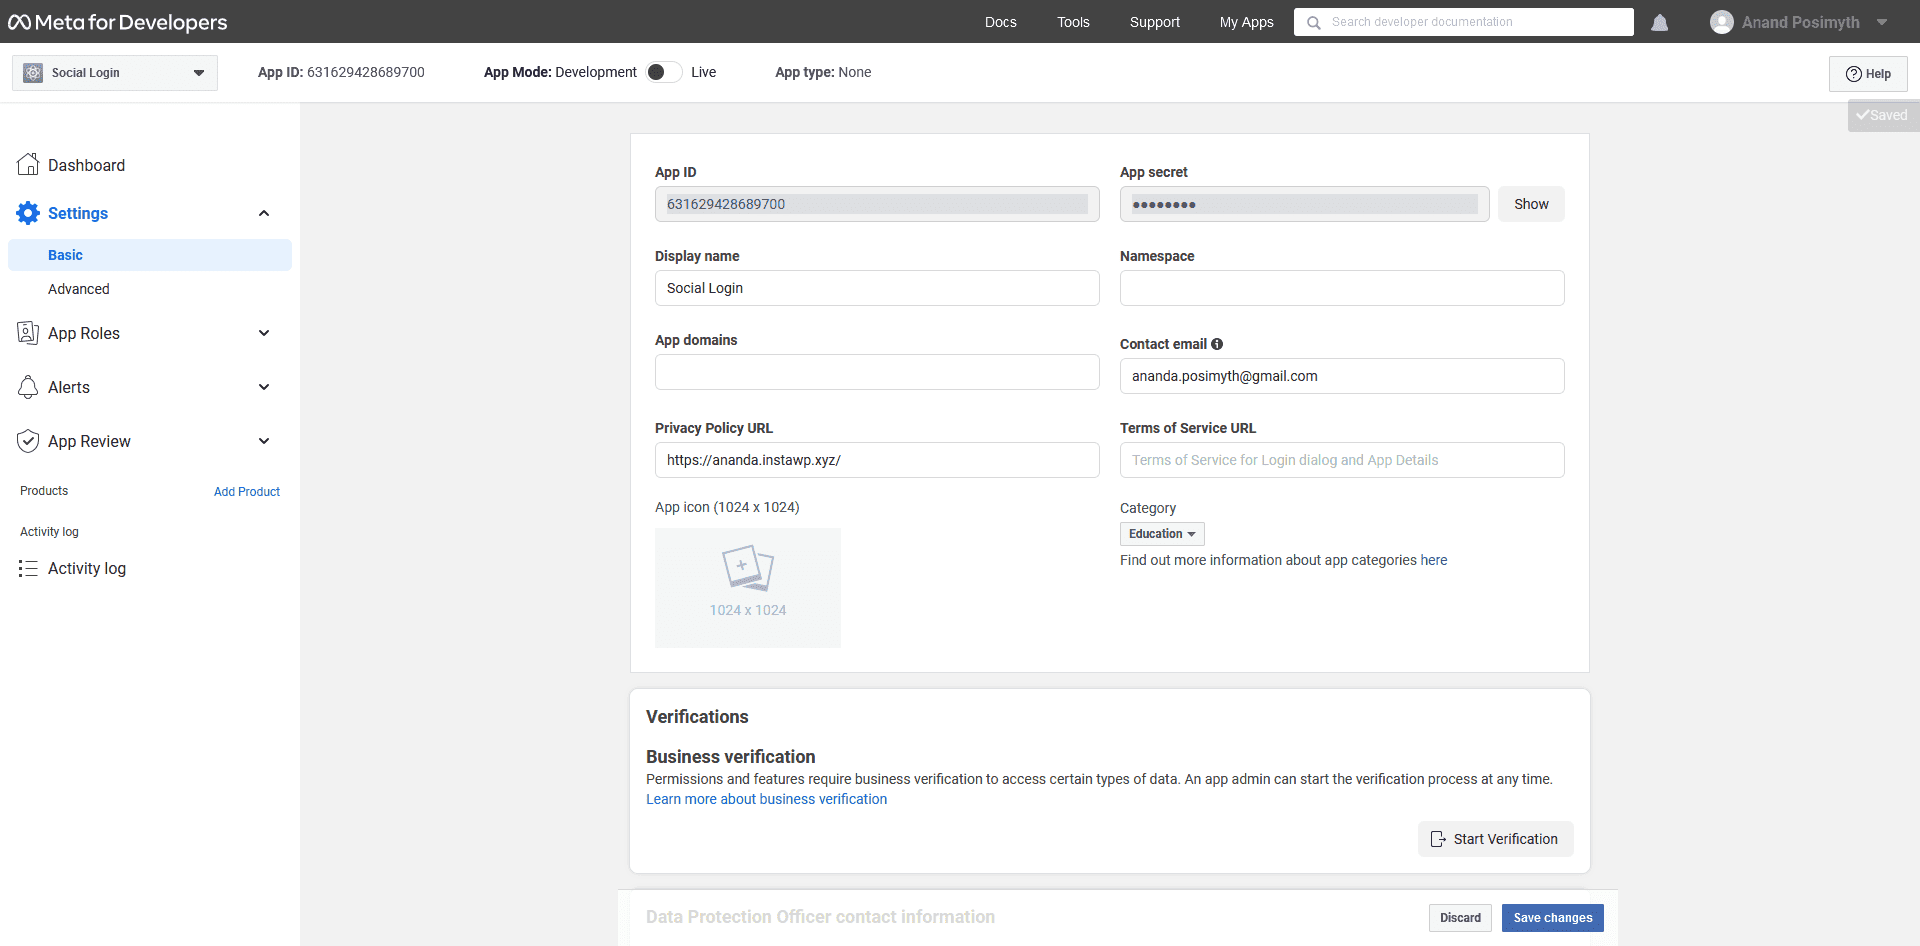
10. Then, from the top, turn on the App Mode toggle to Live.

11. Now click on the Add Product link in the left sidebar.
12. On the next page, click the Set up button in the Facebook Login.

13. This will add a Facebook Login link in the left sidebar. Go to Facebook Login > Settings.
14. On the next page, in the Valid OAuth Redirect URIs field, add the page URL where you have added the Login & Signup block.
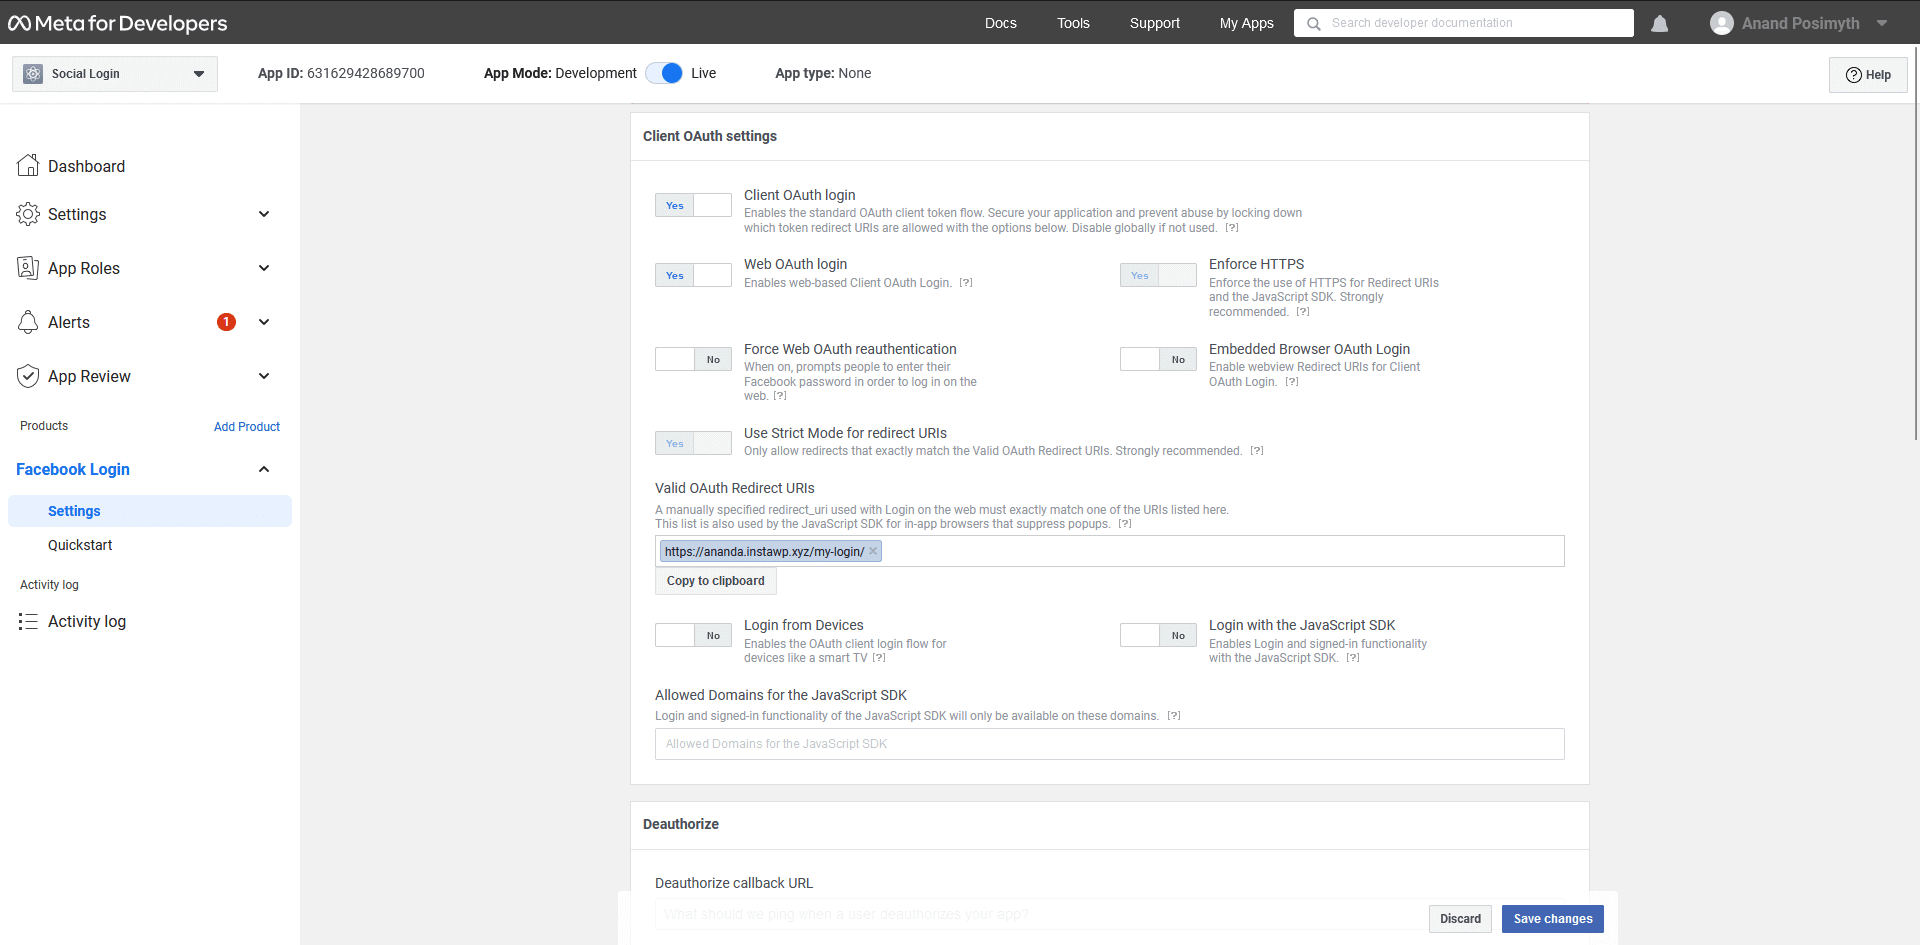
15. Then turn on the Login with JavaScript SDK toggle to Yes, and in the Allowed Domains for the JavaScript SDK field, add your website URL. Then click on the Save changes button.

Add the Facebook App Id and Facebook App Secret in the Login & Signup block
Now add the block on the page, got to Forms > Type and select any form types Login, Register or Login & Register.
Select the appropriate layout from the Layout section.
Note: Here, we are using the Login form, but following the same process, you can add Facebook login to both Register and Login & Register forms.

Once your form fields are ready, go to the Login tab and click the +Add Field button.
From the Field dropdown, select Social Login.
Turn on the Facebook toggle. From the Layout dropdown, you can select a layout for the button.
Then in the Facebook App Id and Facebook App Secret fields, add your Facebook app id and secret key, respectively.
From the Redirect URL field, you can add a page link to redirect users to a specific page after login.
From the Alignment, you can align the button in the form.
Also, read How to add Google login to a WordPress website.


