When you are creating your website the default image sizes provided by WordPress may not always fit the requirements of your website design. In such cases, custom image sizes can be added to your website to ensure that the images are displayed in the right size.
To add a custom image size in WordPress you have to use third party plugins or custom coding, but if you are using the Nexter Extension (Free) plugin, you can easily add different custom image sizes as per your requirement in your WordPress website.
How to Register Custom Image Sizes with the Nexter Extension?
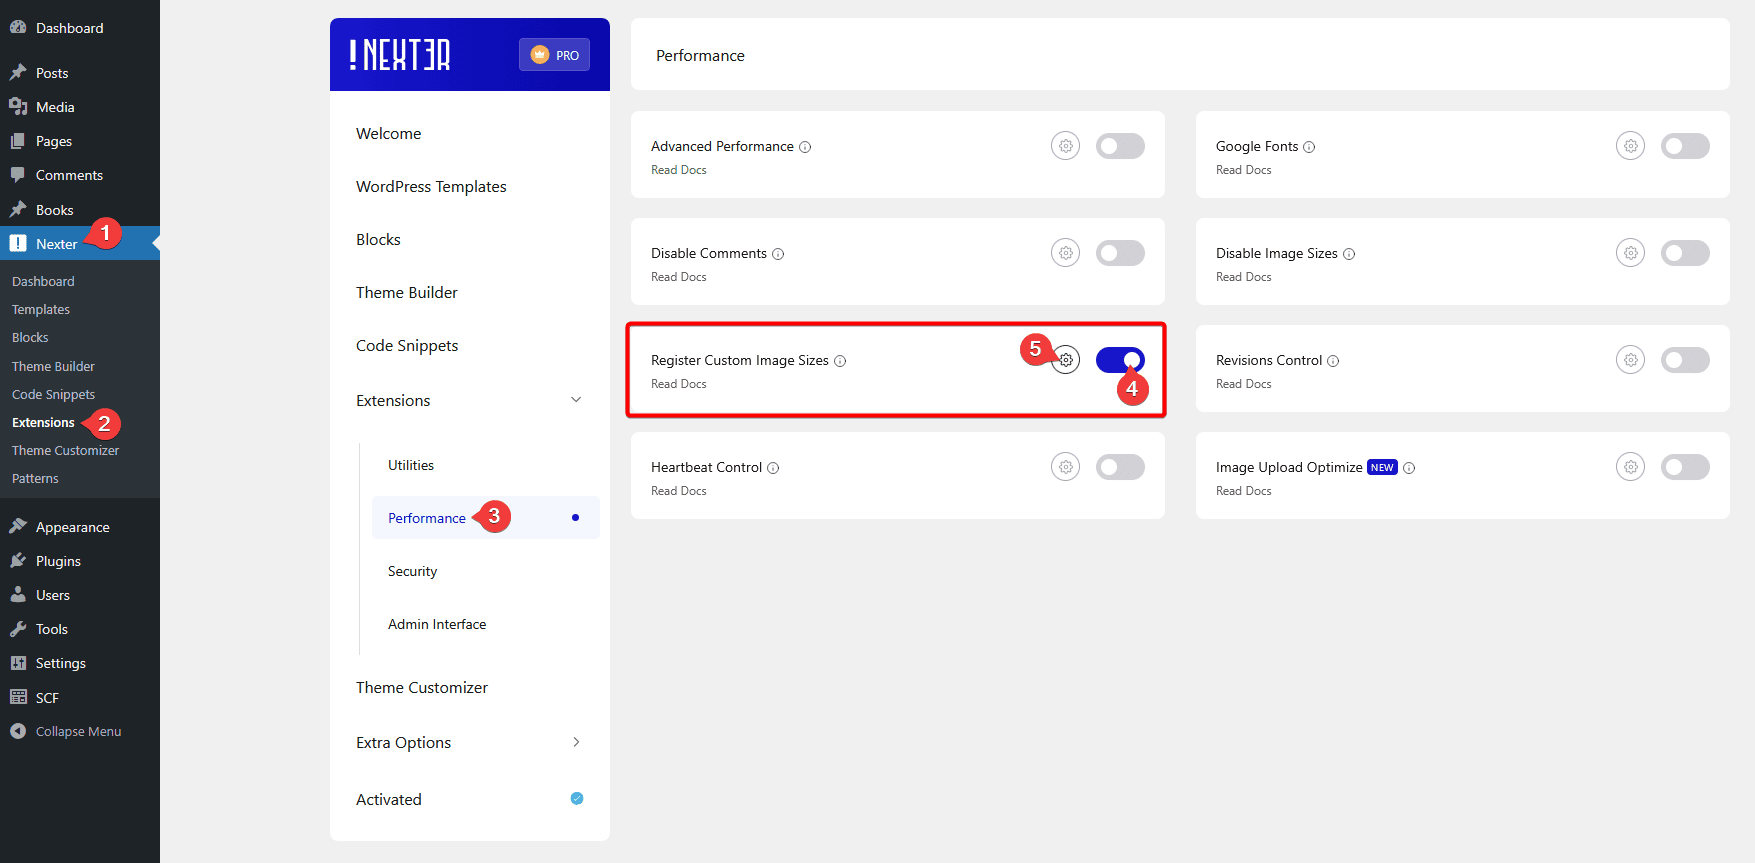
To add a custom image size with the Nexter theme, from the WordPress Dashboard, go to Nexter > Extensions > Performance.
Then go to the Register Custom Image Sizes section, enable the toggle, and click on the gear icon (⚙).

It will open the Register Custom Image Sizes popup.
In the Image Name field, you have to add an image name.
Then in the Width and Height fields, you have to add your desired image width and height respectively.
After that, you have to select the image crop type from the Crop dropdown.
Once done click on the Save button and your custom image size will be generated.
This way, you can easily generate multiple custom image sizes.
You’ll see your custom image sizes in a section below, from there you can delete your custom image sizes as well.


