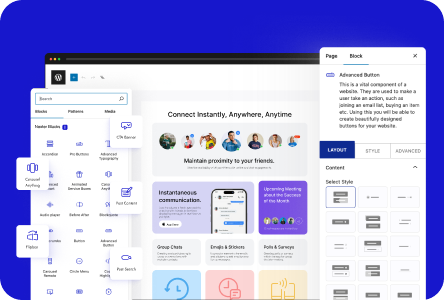
Want to boost trust, improve user experience, and drive engagement? Learn how to embed Google Maps in WordPress Contact Forms.
If you’ve ever tried adding a map manually, you know it can get frustrating. Many website owners can end up with forms that confuse visitors, or lose conversions because of a confusing business address.
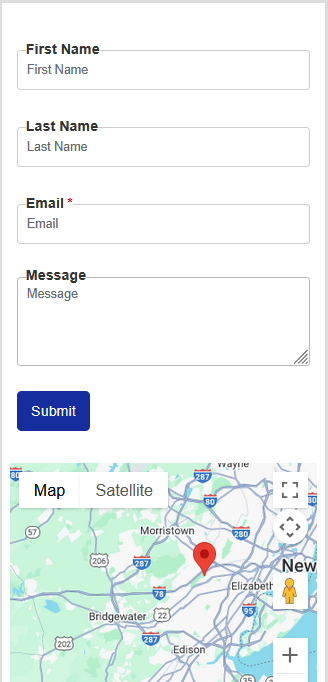
The good news is that you can embed Google Maps much more simply, without any hassle, using the free Contact Form block from Nexter.
This tutorial will walk you through how to embed Google Maps in your contact form and how to customize it. Everything below works with Nexter Blocks, no extra plugins required. Let’s get started.
What is Google Maps Embedding in WordPress Contact Forms
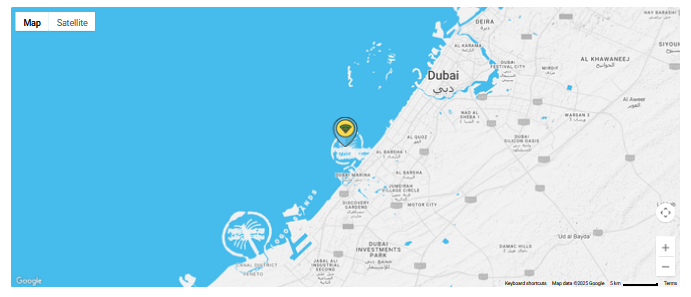
It is likely that you already have multiple contact forms across your WordPress website: to ask visitors to sign up for a newsletter, give feedback, or simply reach out in case of questions. Contact forms can make a bigger impact with a simple visual attribute added: a Google Map.
Embedding Google Maps means visually adding a map to your contact form that shows your business location. Users can zoom in and out, move around, and get directions. This map can be interactive, support multiple pins, and be fully responsive.
When embedded inside your contact form, it makes it much easier for users to associate the form with a real-world location. This simple addition can increase trust, form completion rates, and lead to future customer conversions. In the next section, let us take a closer look at the benefits this simple addition has to offer.
Starting from scratch? Learn how to make a WordPress website for free in easy-to-follow steps.
Benefits of Adding Google Maps to the Contact Us Page
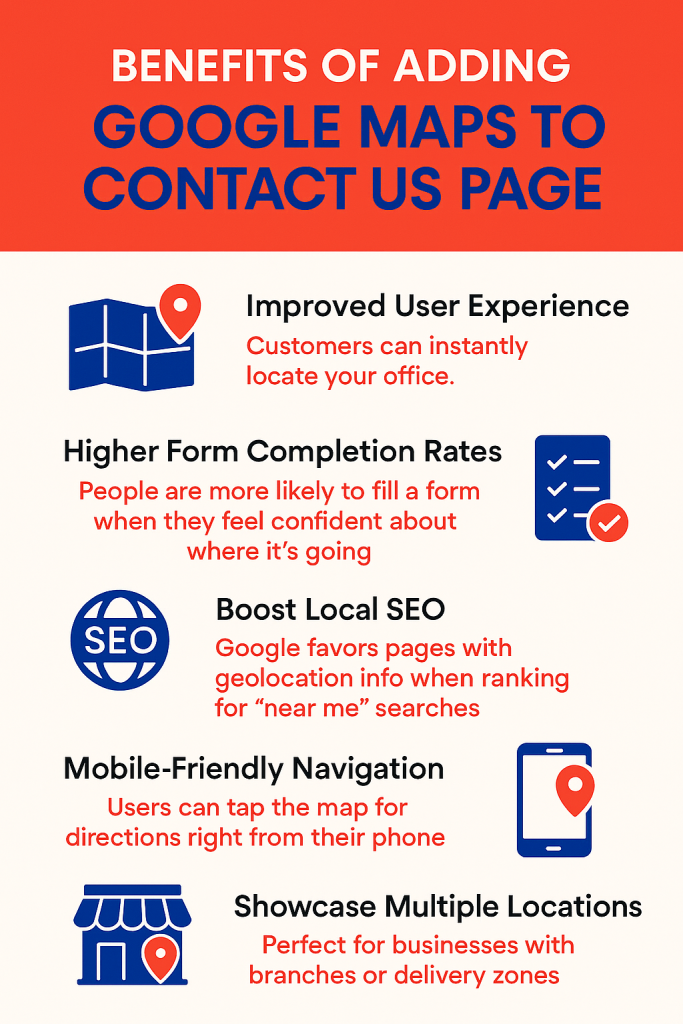
If you’re operating the website for a business or an office, here is why embedding Google Maps inside your WordPress contact form makes a big difference:
- You get an improved user experience.
Website visitors can instantly locate your office, store, or pop-up shop when the location is available right beside a contact form.
- You get higher form completion rates
People are more likely to fill out a form when it feels complete and offers clarity on the validity of the business.
Want to get notified when your forms are completed? Check out how to set up WordPress email notifications in this short guide.
- It improves your local SEO
People in your vicinity often search for “business near me” on Google. In turn, Google favors pages with geolocation info when ranking for “near me” searches. With Google Maps embedded into your website, your local SEO is likely to improve.
- It offers mobile-friendly navigation
You can reduce the number of steps visitors have to take to find your location. Users can tap the map for directions right from their phone. With mobile-friendly responsiveness, embedding Google Maps in your contact form is the ideal choice.
- You can showcase multiple locations
If your business or office has multiple locations, you can add pins within the embedded map to showcase them all. If you’re planning a simple pop-up shop, a sign-up form for the event along with the map location, can add a lot of credibility and trust for your website’s visitors.
With these benefits in mind, we’ll look at a step-by-step embedding tutorial next. Let’s begin.
Looking for the right Map plugin for your website? Check out this guide on the 5 best WordPress Google Map Plugins.
How to Embed Google Maps in WordPress Contact Form (Step-by-Step)
Step 1: Install and Activate Nexter WordPress Blocks
First, make sure you have the Nexter Blocks plugin installed on your WordPress site.
Go to your WordPress dashboard. Navigate to Plugins -> Add Plugin. Search for “Nexter Blocks” in the search plugins bar.

Click Install and then Activate Nexter Blocks. Now you are ready to start adding Contact Forms to your WordPress website pages.
Build your first form today. Learn how to create a donation form for your WordPress website in this simple, straightforward article.
Step 2: Add the Contact Form Block to Your Page
Begin by navigating to Nexter Blocks -> Blocks. Here, search for the “Form” plugin in the search bar to your right. Turn the toggle on, and click on “Save Settings” to ensure that the plugin is in working order.

Next, open the page where you want to place the form, or create a new one. Inside the block editor, search for Form.
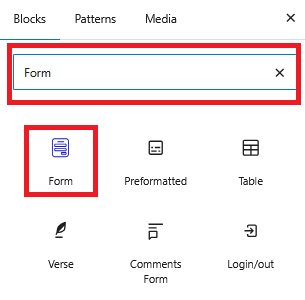
Add the correct block to your page by dragging and dropping it.
Watch our comprehensive video on the Contact Form and its customization possibilities here. Try the Nexter Contact Form block here.
Find out your options by reading this guide on the 5 best WordPress Form Builder Plugins by NexterWP.
Step 3: Set Up the Contact Form Fields
Within the Form Styler options to the right of your screen, customize your form.
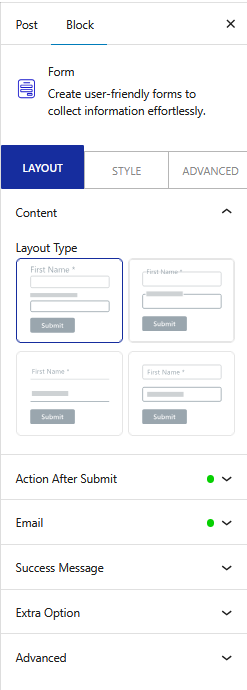
Change the form name, email, message, labels, buttons, actions after submission, alter the styling options, and more. Nexter’s form builder is 100% drag-and-drop and supports conditional logic, layout styles, and form validation.
Want to send form data via email? Check out our guide on setting up email notifications in WordPress.
Step 4: Add the Google Maps Block Below the Form
Before this step, make sure that the Google Map Block is activated. Navigate to Nexter Blocks > Blocks, search for Google Map Block, and toggle it on. Save these settings.
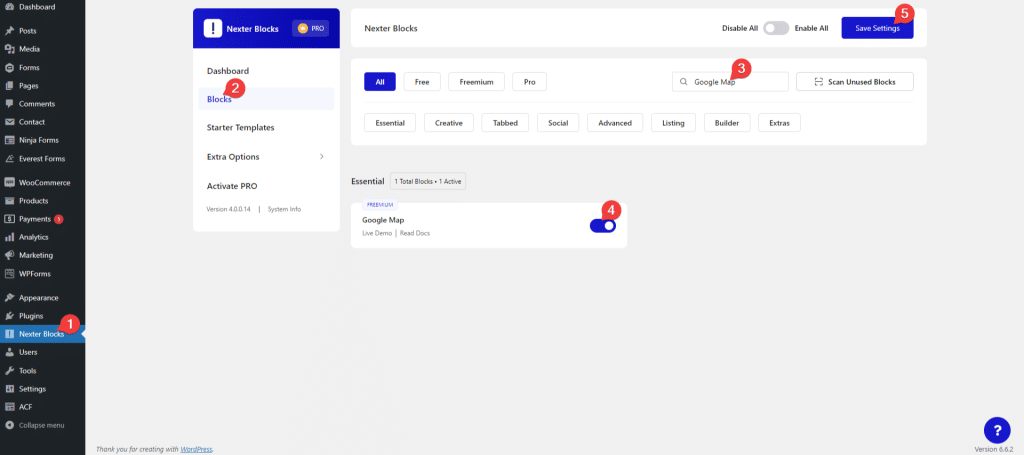
Next, to make the Google Map block work on your WordPress website, you need to have access to a Google Maps API Key. Here is how you can generate a Google Maps API Key.
Once you have your Google Maps API key, navigate to Nexter Blocks > Extra Options > Settings.
Here, enable the “Connect Google Maps API Key” toggle.
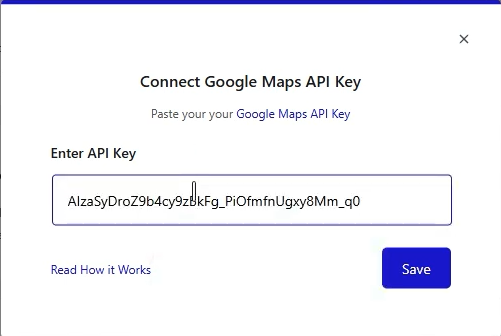
Click the settings icon. In the “Enter API Key” field, paste your Google Map API Key and then “Save” the key details. Click on “Save Settings” to confirm your options.
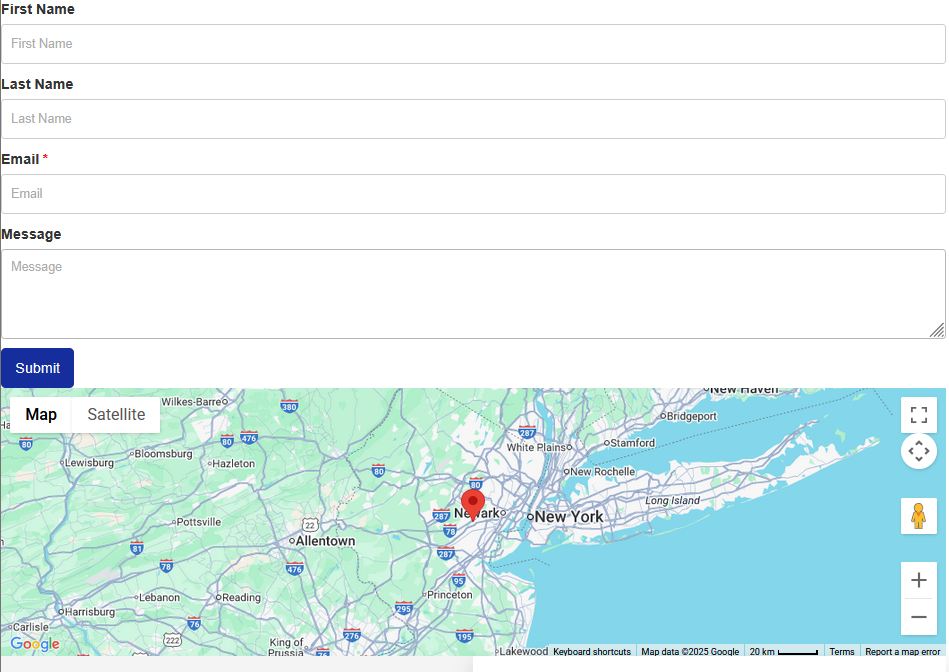
Now, below the contact form block, search for the Google Maps block from Nexter. Drag it below your form.
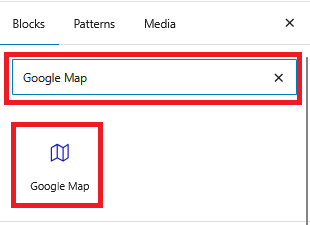
Screen Recording 2025-06-16 234121.mp4
As easy as that, a Google Map has been added to your WordPress page. If you want a follow-along tutorial, check out our YouTube video on how to add Google Maps in the WordPress Gutenberg environment.
Learn more about Map embedding in this article on How to Add Google Maps to WordPress by NexterWP.
Step 5: Customize Map Settings and Layout
After adding the map to your page, you will be able to customize it from the options to the right of your screen. You’ll now be able to add custom pin icons, change overlay content, add different user controls, use map variations, and more. Explore at your own pace.


Step 6: Publish Your Contact Page with Google Maps
Once your form and map look as you wish, click on “Publish” or “Update” for an existing WordPress page. Visit your site to preview the final design
Advanced Tips: Boosting Engagement and SEO with Embedded Maps
Once your map is embedded and working, here are a few advanced tips that can help you get more out of it.
1. Add Multiple Pins
If you have multiple locations or service zones, enable multi-pin support. Now, drop pins for each location. This is perfect for chain stores, or real estate websites, as all needed location data can be shown in a single, convenient location.
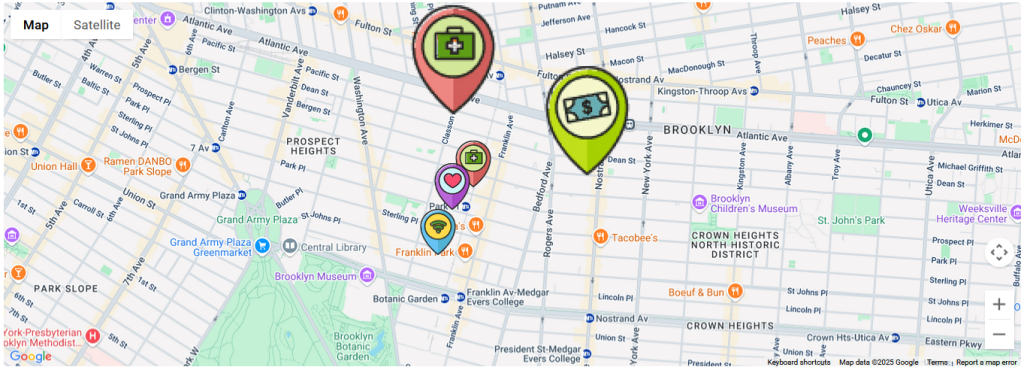
To add multiple pins to the Google Map, start by editing your page in Elementor. Select the map. In the settings panel to the left of your screen, scroll down to the Content tab. Here, you can add multiple pins, change the pin locations, the text that will be shown on the tooltip, as well as icons for each pin.

Click on “Publish” or “Update” at the top right of your screen. Your map should look something like this, with multiple pins:
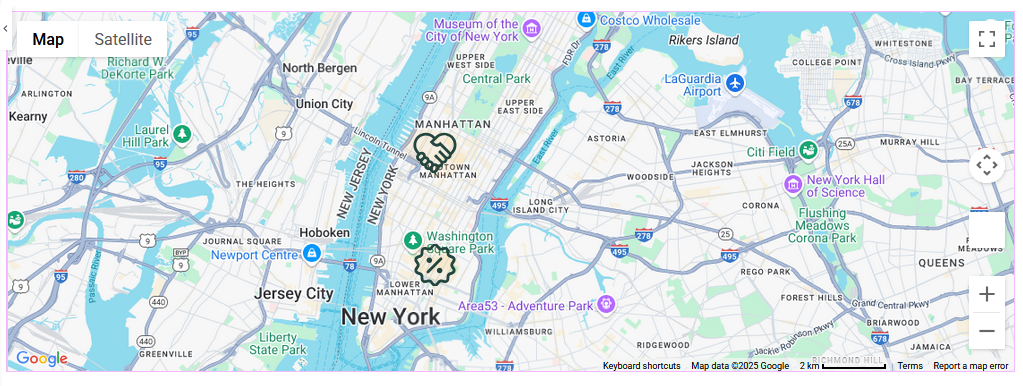
For a quick video demonstration, take a look at our YouTube tutorial on adding multiple location pins in Google Maps.
2. Custom Map Markers
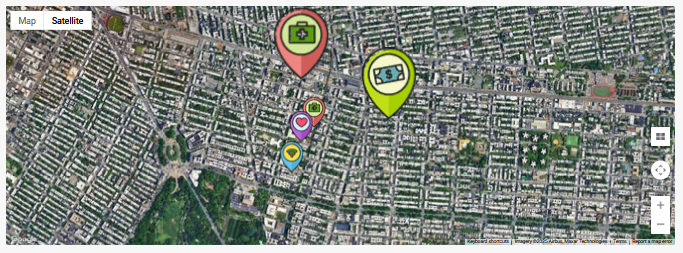
Another tip is to upload custom map markers to match your branding. This small detail helps your location stand out and reinforces your brand image to website visitors.
3. Avoid Text Overlap
Finally, make sure your map doesn’t overlap with form fields or CTAs on smaller screens.
Nexter makes it easy to adjust map size with responsive previews for mobile, tablet, and desktop, along with column stacking controls. The end goal is to keep everything clean and accessible while making the process flexible and simple on your end.
Stay updated with Helpful WordPress Tips, Insider Insights, and Exclusive Updates – Subscribe now to keep up with Everything Happening on WordPress!
Wrapping Up: Who Should Use Google Maps in WordPress Contact Forms?
Any business or office that relies on foot traffic, local visibility, or service-based appointments can benefit from adding Google Maps to their contact form. Showing your physical presence on your WordPress website is a seemingly small action that can build trust and make it easier for customers to reach you.
If you want to add Google Maps to your contact forms, look no further than Nexter Blocks. With the Form Builder Block for WordPress, you can create custom forms with multiple templates, no coding or extra plugins required. As an add-on, Google Maps Block for WordPress lets you add maps to contact forms seamlessly. With its map overlay content, integration with Google Maps API, and interactive map features like zooming and tilt modes, Nexter Blocks is an ecosystem letting you build location-aware contact forms in seconds.
Nexter Blocks’ suite of features spans 90+ WordPress blocks, optimised CSS and JS loading, and stellar user reviews.
Take your WordPress experience up a notch. Start using Nexter Blocks to build the perfect website today.
FAQ on Embedding Google Maps in WordPress Contact Forms
How do I show a map in my WordPress contact form?
To show a map in your WordPress contact form, use a plugin like Nexter Blocks. It lets you drag and drop a Google Maps block directly into your form, making it easy to display your location without coding.
Can I add multiple locations to a map in WordPress?
Yes, you can add multiple locations to a map in WordPress. Use plugins that support multiple markers or custom code with the Google Maps API. This is useful for displaying various branches, store locations, or offices on a single interactive map.
Is it possible to embed Google Maps without a plugin?
Yes, it is possible to embed Google Maps without a plugin. However, this method offers limited functionality and customization. A better way to do it is by using a simple and flexible plugin like Nexter Blocks’ Google Maps Block for WordPress.
How do I use Google Maps API in WordPress forms?
To use Google Maps API in WordPress forms, create an API key in the Google Cloud Console and enable required APIs. Then, paste the key into your map plugin’s settings to activate features like autocomplete and interactive location display.
Can I add a map field to Contact Form 7?
Yes, you can add a map field to Contact Form 7, but it requires an extra plugin or custom code. Add-ons like “Contact Form 7 Google Maps” can help integrate location fields and display maps within the form layout.
Are there free ways to embed maps in WordPress?
Yes, there are free ways to embed maps in WordPress. You can use the default embed code from Google Maps or plugins like Nexter Blocks, which allow map integration without needing a paid upgrade. An API key is still required.
How do I customize the map size in a contact form?
To customize the map size in a contact form, adjust the block’s width and height settings within your page builder. Plugins like Nexter Blocks also allow manual resizing or responsive layout controls for better map display across devices.
Does embedding a map slow down my site?
Embedding a map may slightly slow down your site, especially if using advanced features or multiple markers. To reduce this likelihood, opt for performance-optimized plugins. Only load the map where necessary, such as on contact or location-specific pages.
Can I add directions or markers to the embedded map?
Yes, you can add directions or markers to the embedded map. Use a plugin with advanced settings or the Google Maps API. This allows you to show routes, label locations, and provide extra context for visitors on your contact page.

