---
title: "How to generate Google Maps API Key for WordPress?"
url: https://nexterwp.com/docs/generate-google-maps-api-key/
date: 2023-02-01
modified: 2026-04-15
author: "Aditya Sharma"
description: "In order to use the Nexter Blocks Google Map Block you must have a Google Maps API key. So let’s see how to get a Google Maps API key. To..."
image: https://nexterwp.com/wp-content/uploads/2024/05/generate-google-maps-api-key-1024x519.jpg
word_count: 510
---

# How to generate Google Maps API Key for WordPress?

## Key Takeaways

- Nexter Blocks Google Map Block requires a Google Maps API key, and Nexter Blocks must be installed and activated before the block works.
- Google Maps API key creation starts from the Credentials page, where a new project is created, billing is set up, and the API key is generated after the project questions are submitted.
- Google recommends restricting the key with API restriction and Maps Embed API, then Nexter Blocks → Extra Options → Settings lets the user enable Connect Google Maps API Key, paste the key, and save it.

In order to use the Nexter Blocks Google Map Block you must have a Google Maps API key.

So let’s see how to get a Google Maps API key.

To create a **Google Maps API key** [click here](https://developers.google.com/maps/documentation/embed/get-api-key#create-api-keys).

From there, click on the **Go to the Credentials page** button.

*To check the complete feature overview documentation of the Nexter Blocks* *Google Map block, [click here](https://nexterwp.com/docs/google-map-block-settings-overview/).*

**Requirement  - This block is a part of *the Nexter Blocks*, make sure its installed & activated to enjoy all its powers.**

[LIVE BLOCK LINK](https://nexterwp.com/nexter-blocks/blocks/wordpress-google-maps/)

## Create a New Project

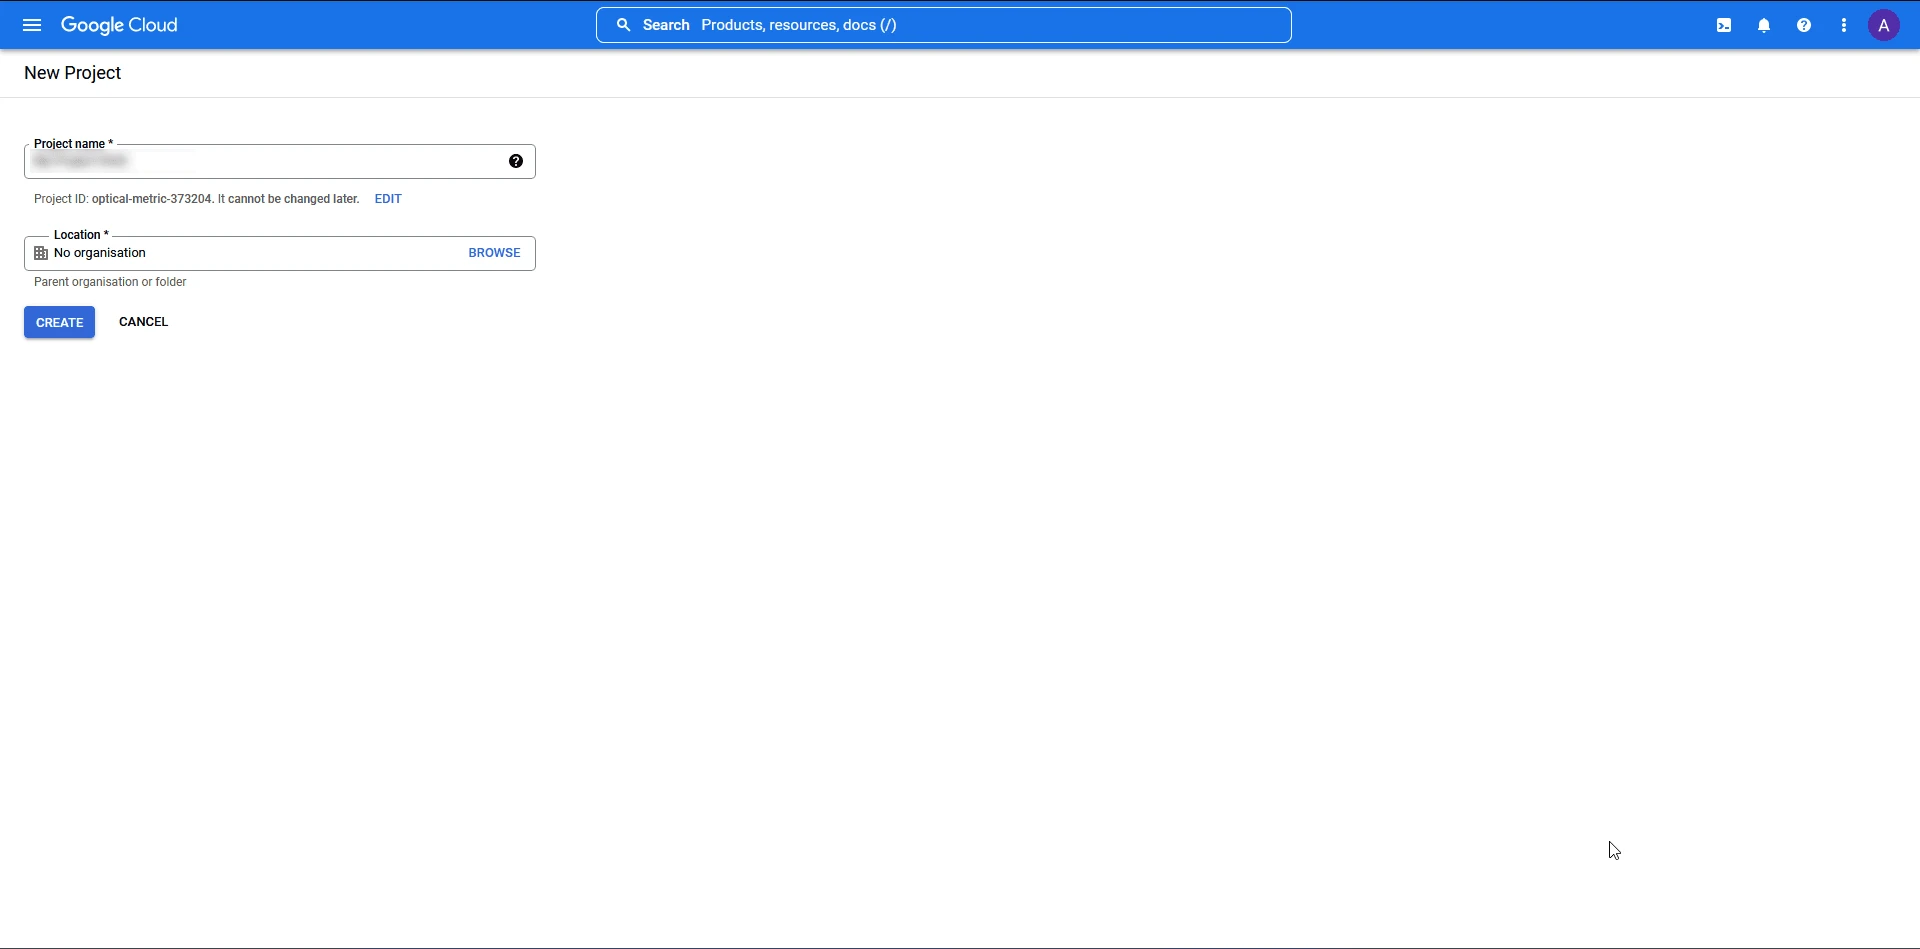
From the Credentials page you have to create a new project.

![google map api step 1](https://nexterwp.com/wp-content/uploads/2023/02/google-map-api1.png)

- Add a Project name.

- Enter your location and click on the **Create** button.

## Set up Billing

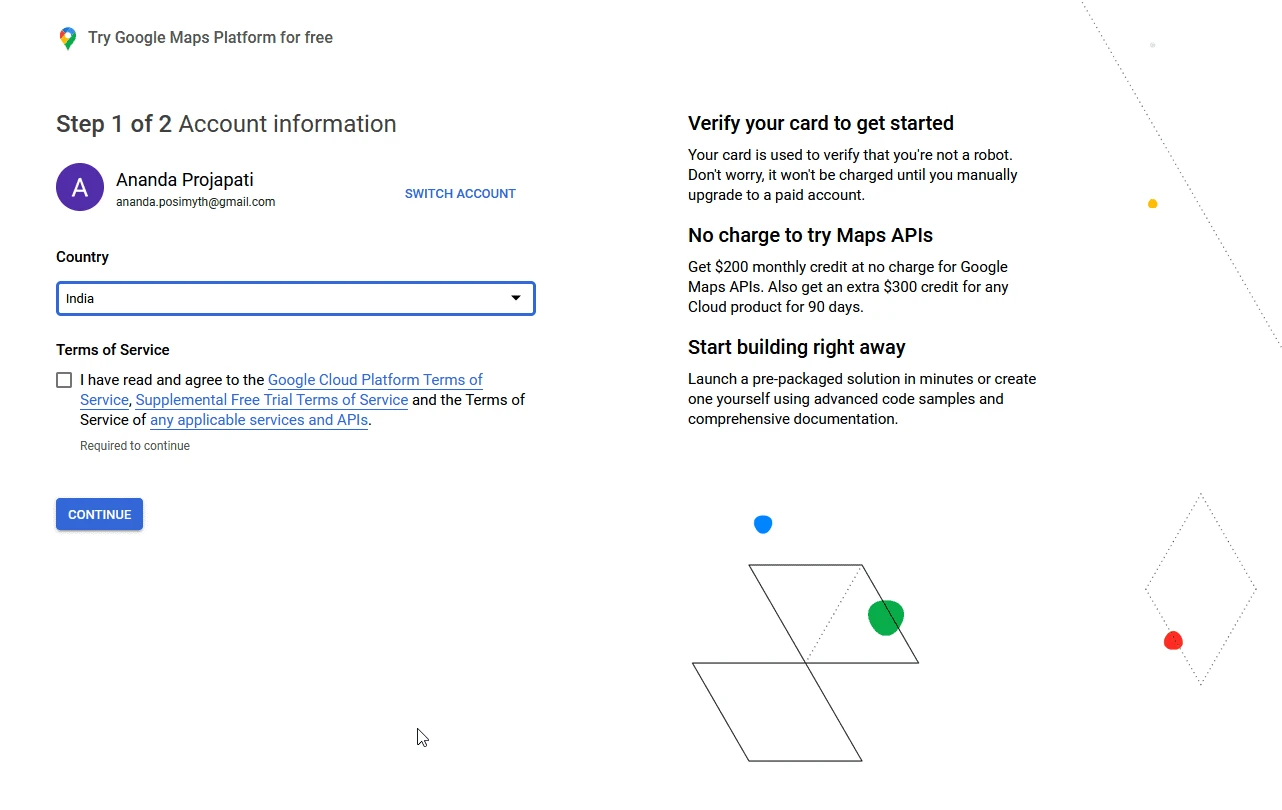
Once the project is created, on the next page, you have to set up billing information for your project.

![google map api step 2](https://nexterwp.com/wp-content/uploads/2023/02/google-map-api2.png)

**Step 1**

- Choose your country.

- Agree to the Terms of Service and click on the **Continue** button.

![google map api step 3](https://nexterwp.com/wp-content/uploads/2023/02/google-map-api3.png)

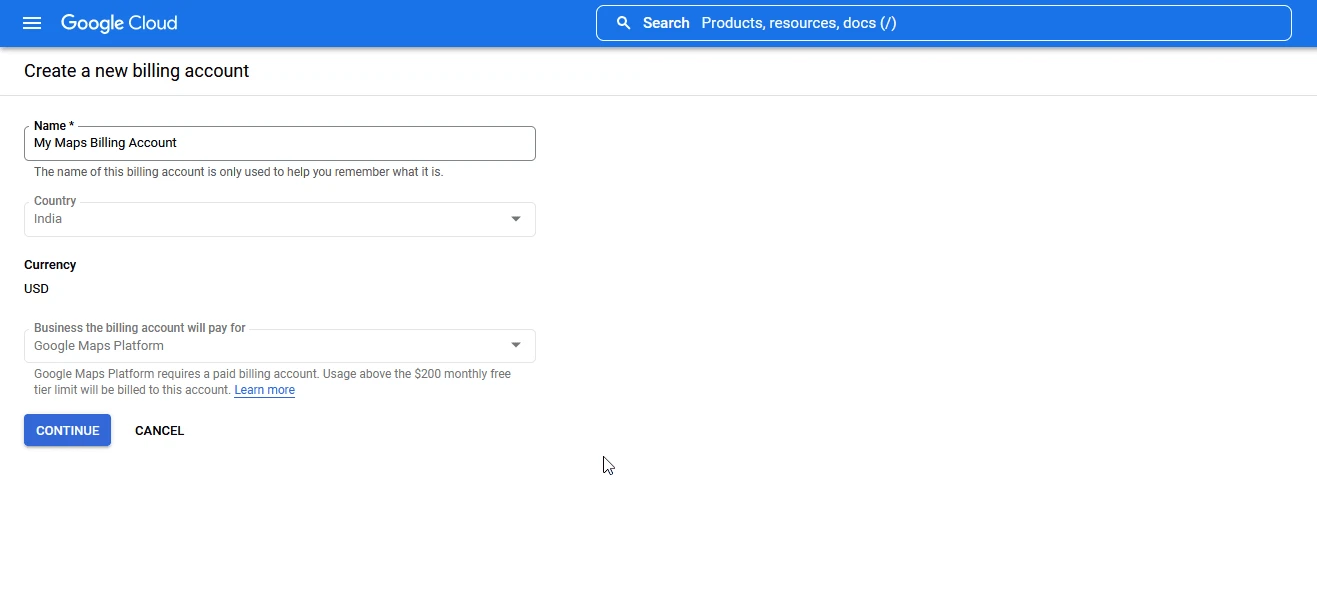
**Step 2: Create a new billing account**

- Choose a name for your billing account.

- Verify the details and click on the **Continue** button.

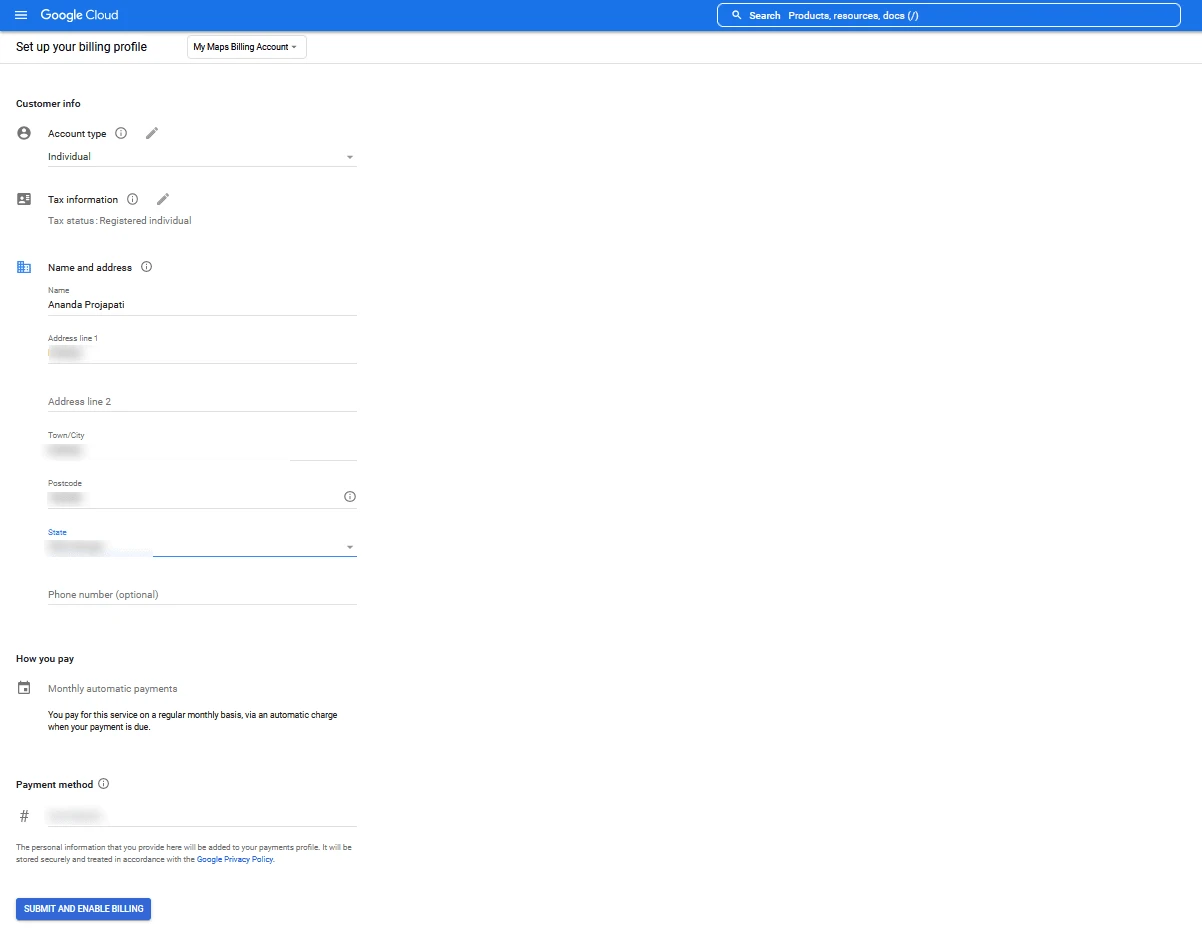
On the next page, add your billing information.

![google map api step 4](https://nexterwp.com/wp-content/uploads/2023/02/google-map-api4.png)

- Choose your Account Type.

- Fill in your Tax information.

- Add your personal details.

- Add a payment method (For example Credit Card).

- Click on the **Submit and Enable Billing** button.

![google map api step 5](https://nexterwp.com/wp-content/uploads/2023/02/google-map-api5.png)

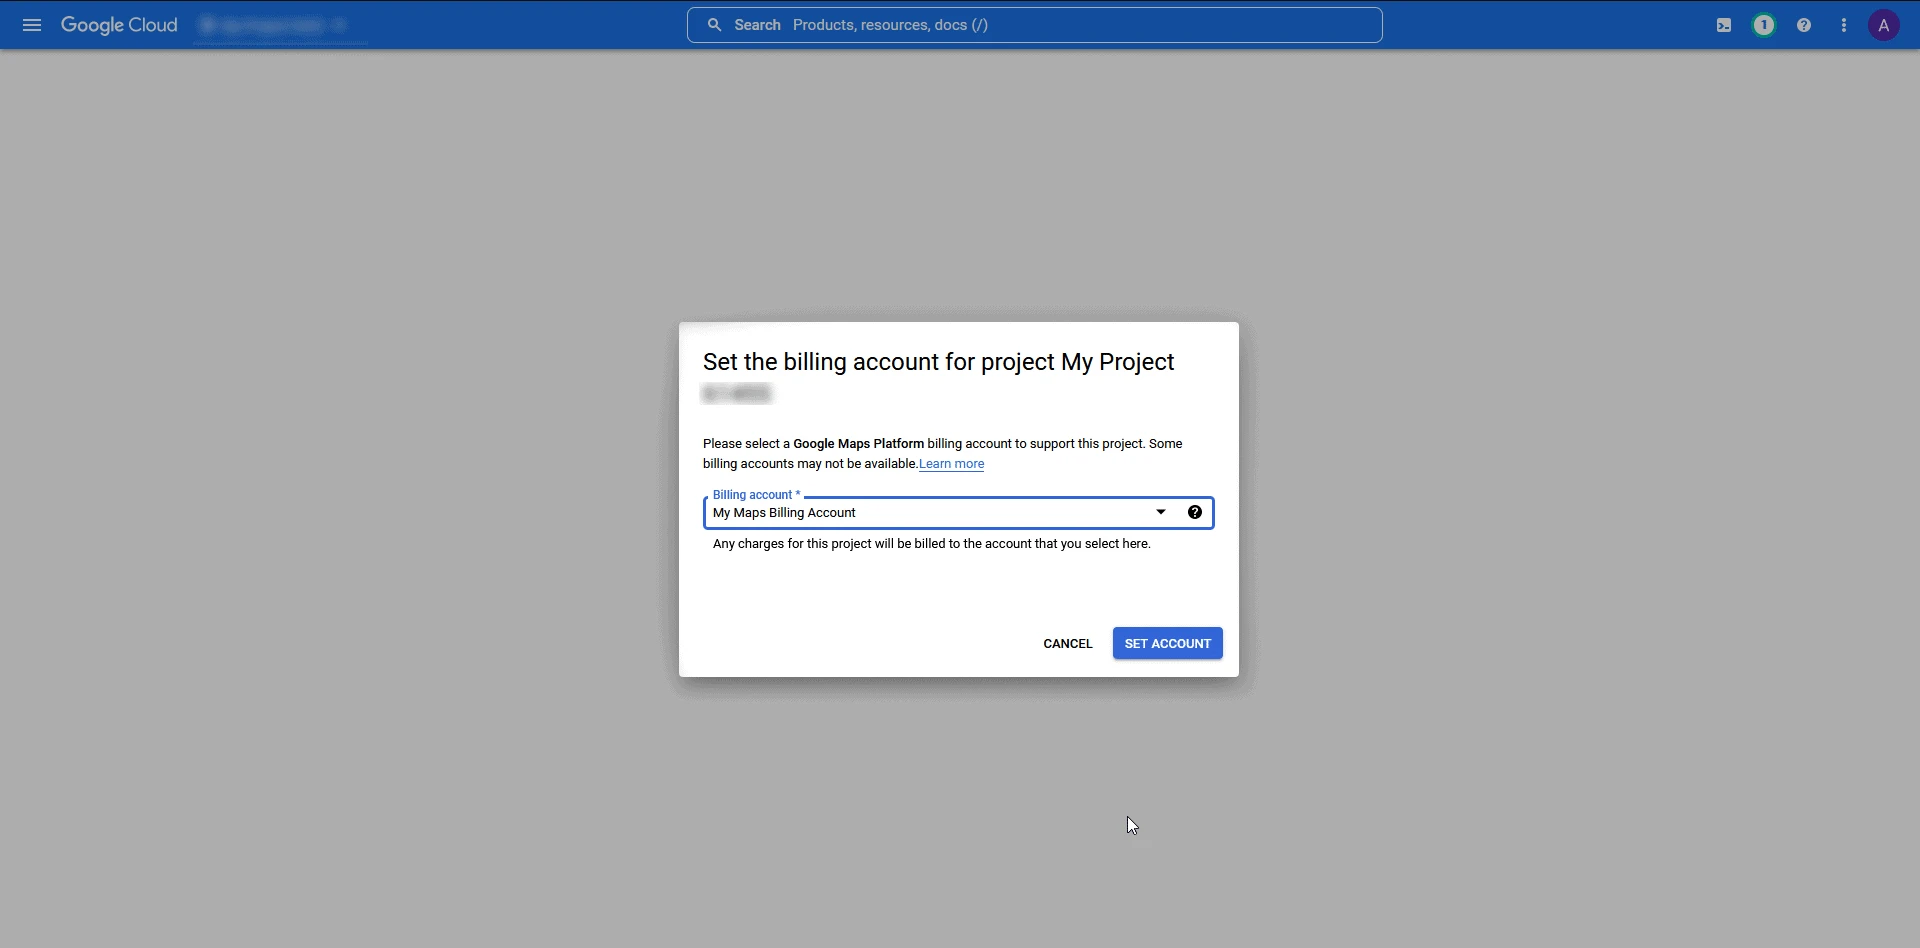
On the next page choose the billing account for your project and click on the **Set Account** button.

Then Google Maps will ask a few questions related to your project like your industry, the platform you are building the project for, etc. fill in the answers accordingly and click on the **Submit** button.

![google map api step 6](https://nexterwp.com/wp-content/uploads/2023/02/google-map-api8.png)

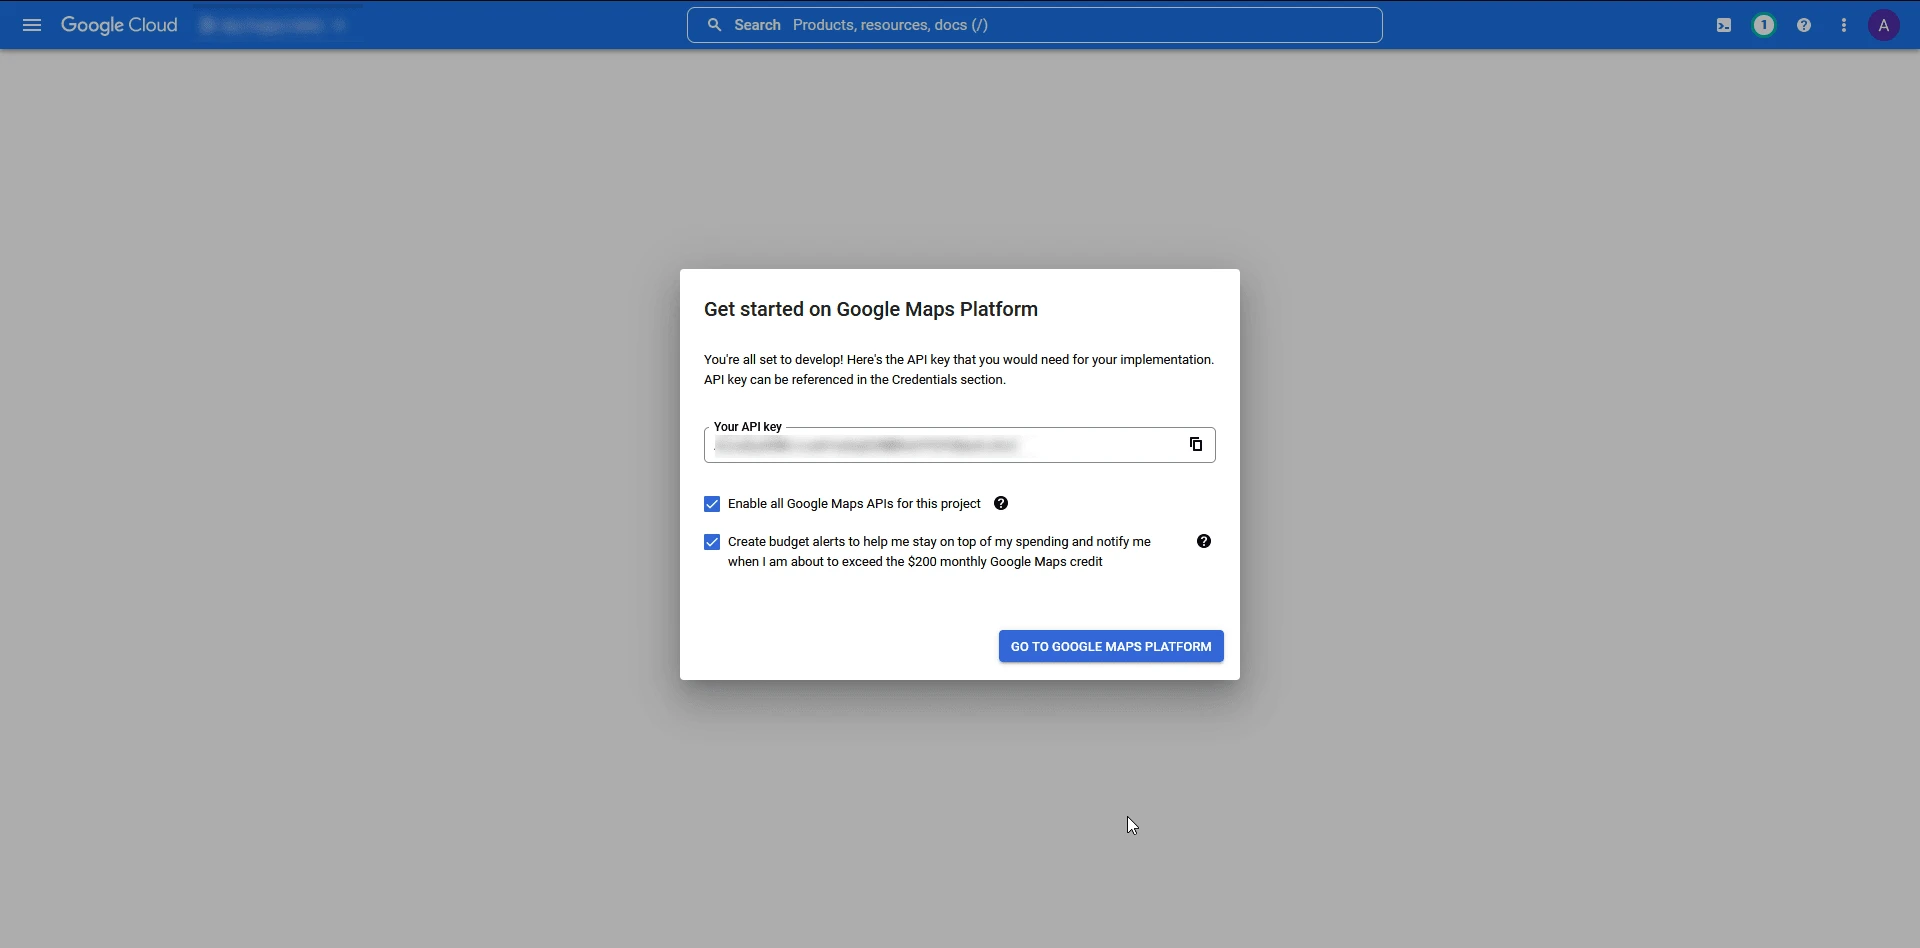
On the next page, you will get your Google Maps API Key, copy the API and click on the **Go to Google Maps Platform** button.

Now you have your API key but as per [Google Maps recommendation](https://developers.google.com/maps/documentation/embed/get-api-key#restrict_key) you need to restrict the usage of your API key by limiting its usage to the needed APIs for your application.

## Protect your API (adding Maps Embed API)

Now on the next page, Google Maps will automatically ask you to protect your API key.

![google map api step 7](https://nexterwp.com/wp-content/uploads/2023/02/google-map-api9.png)

- Select restriction type as **API restriction**.

- And from the Limit usage dropdown, select **Maps Embed API** and click on the **Restrict Key** button.

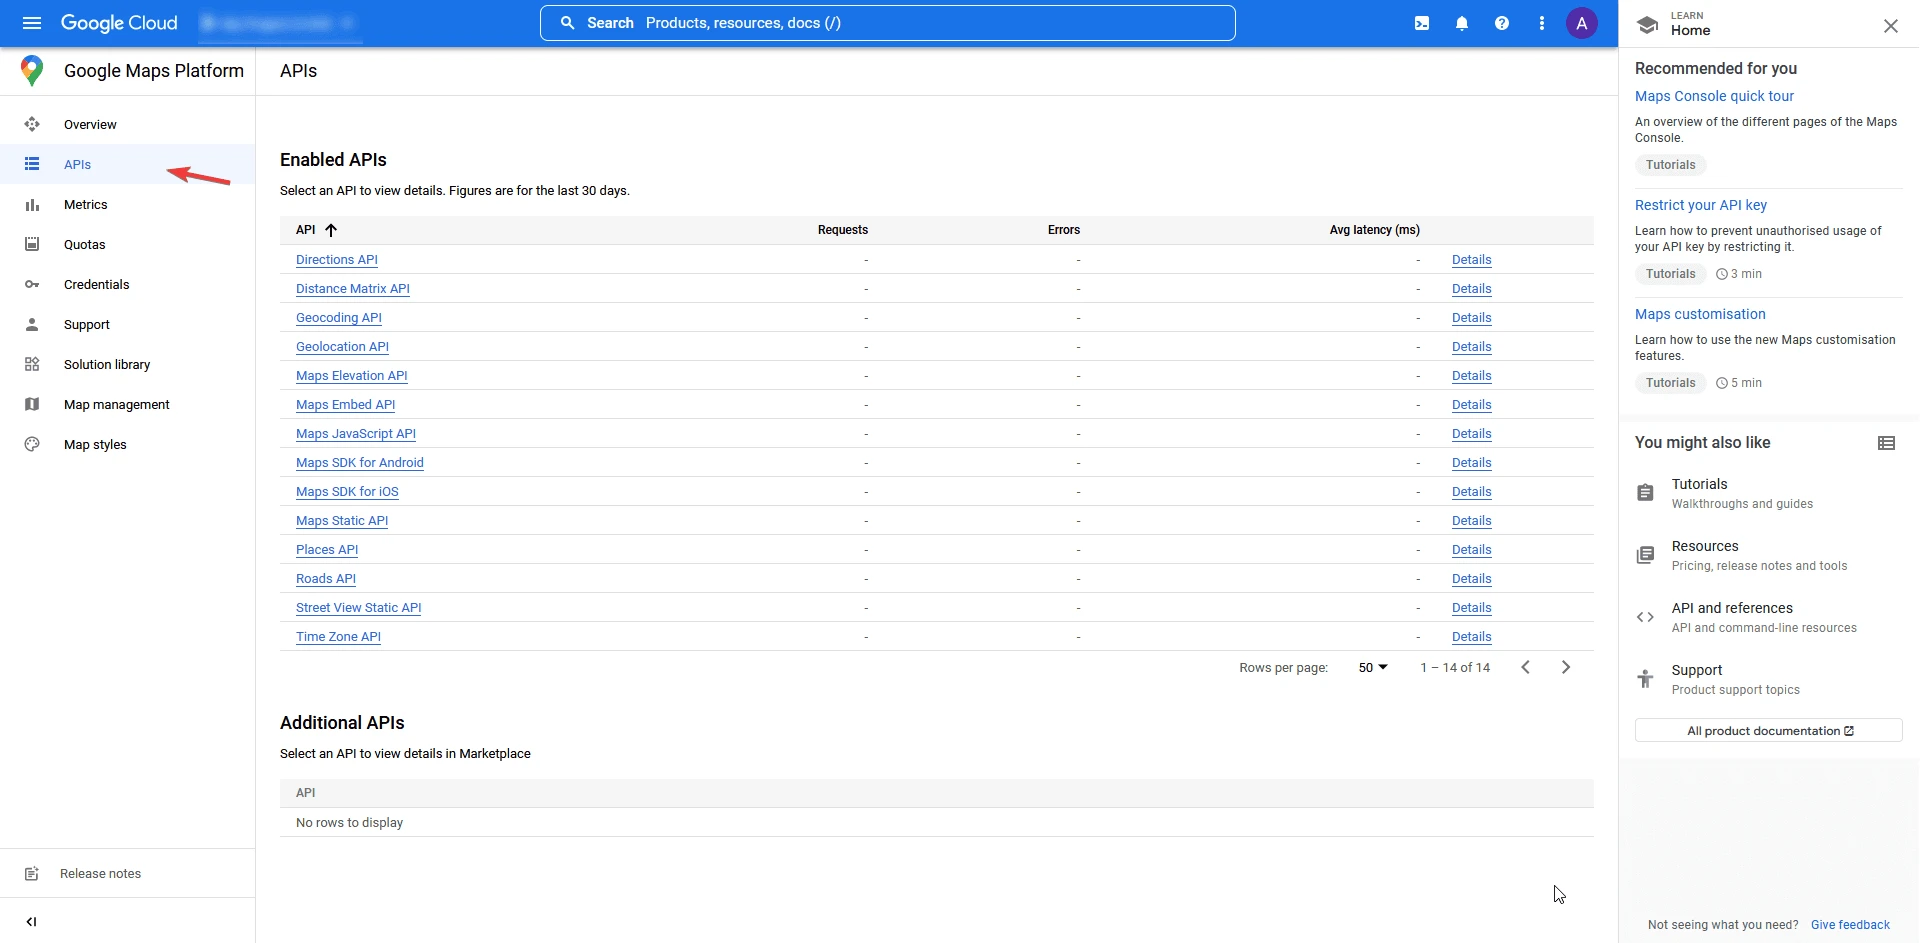
Now the usage of your API key has been restricted. To check the list of enabled APIs for your project click on the **APIs** from the left panel and it will display all the enabled APIs.

![google map api step 8](https://nexterwp.com/wp-content/uploads/2023/02/google-map-api12.png)

Now you can use your newly created Google Maps API Key with the Nexter Blocks Google Map Block.

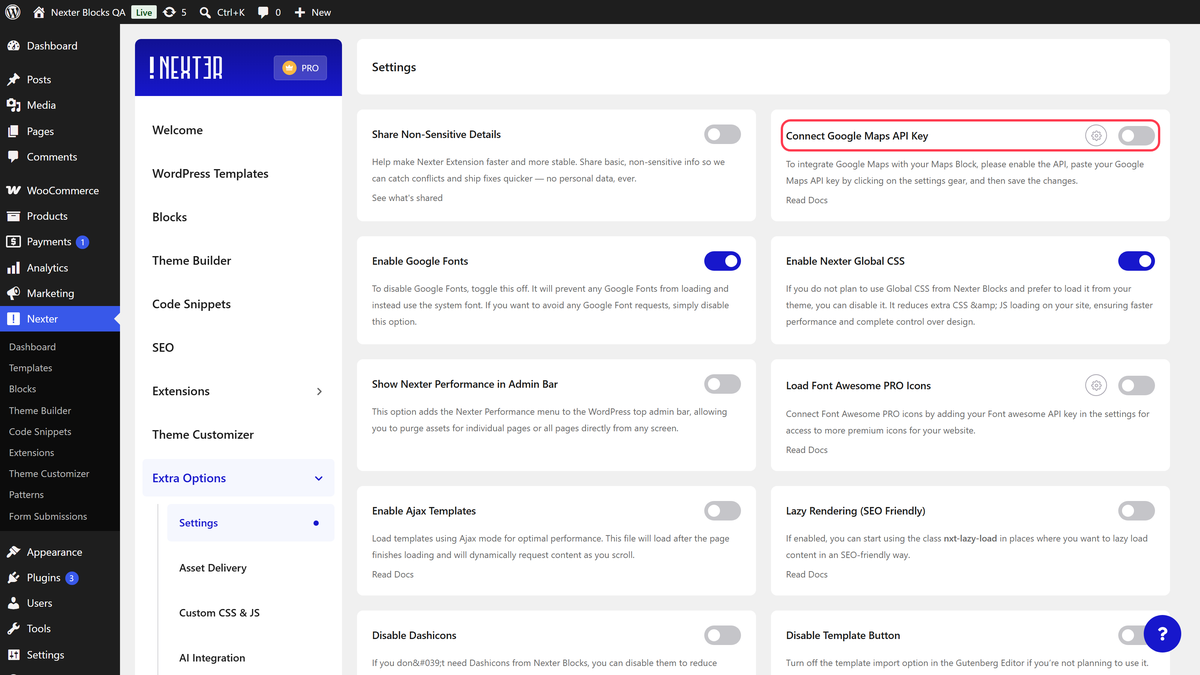
To do this go to

- **Nexter Blocks **→** Extra Options  **→ **Settings**

- Then, enable **Connect Google Maps API Key** **toggle** and paste your API key**.**

- Then, Click on** **the **Settings Icon **and you will see a popup box.

- And on the **Enter API Key** field box paste the Google Map API Key then click on **Save **and close the popup then click on the **Save Settings** Button.

![](https://nexterwp.com/wp-content/uploads/2023/02/google-map-api-key-1-1024x458.png)

Also, check out [How to Remove Google Maps API Error of browser console in WordPress](https://nexterwp.com/docs/remove-google-maps-api-error/).