Do you want to make sure your images are optimized as soon as you upload them to WordPress? Uploading large, uncompressed images can slow down your site and affect performance, especially on mobile devices. By optimizing images during the upload process, you can reduce file sizes without losing quality, which helps your pages load faster and improves the overall user experience.
With the Nexter Extension (Free) and Nexter Extension (Pro), you can easily resize and optimize the images while uploading.
This is a freemium feature. If you are using the free Nexter Extension version, you can resize the image to reduce the file size.
With the Nexter Extension pro version, you can resize the image and set the image quality as well.
How to Optimize an Image with the Nexter Extension Free?
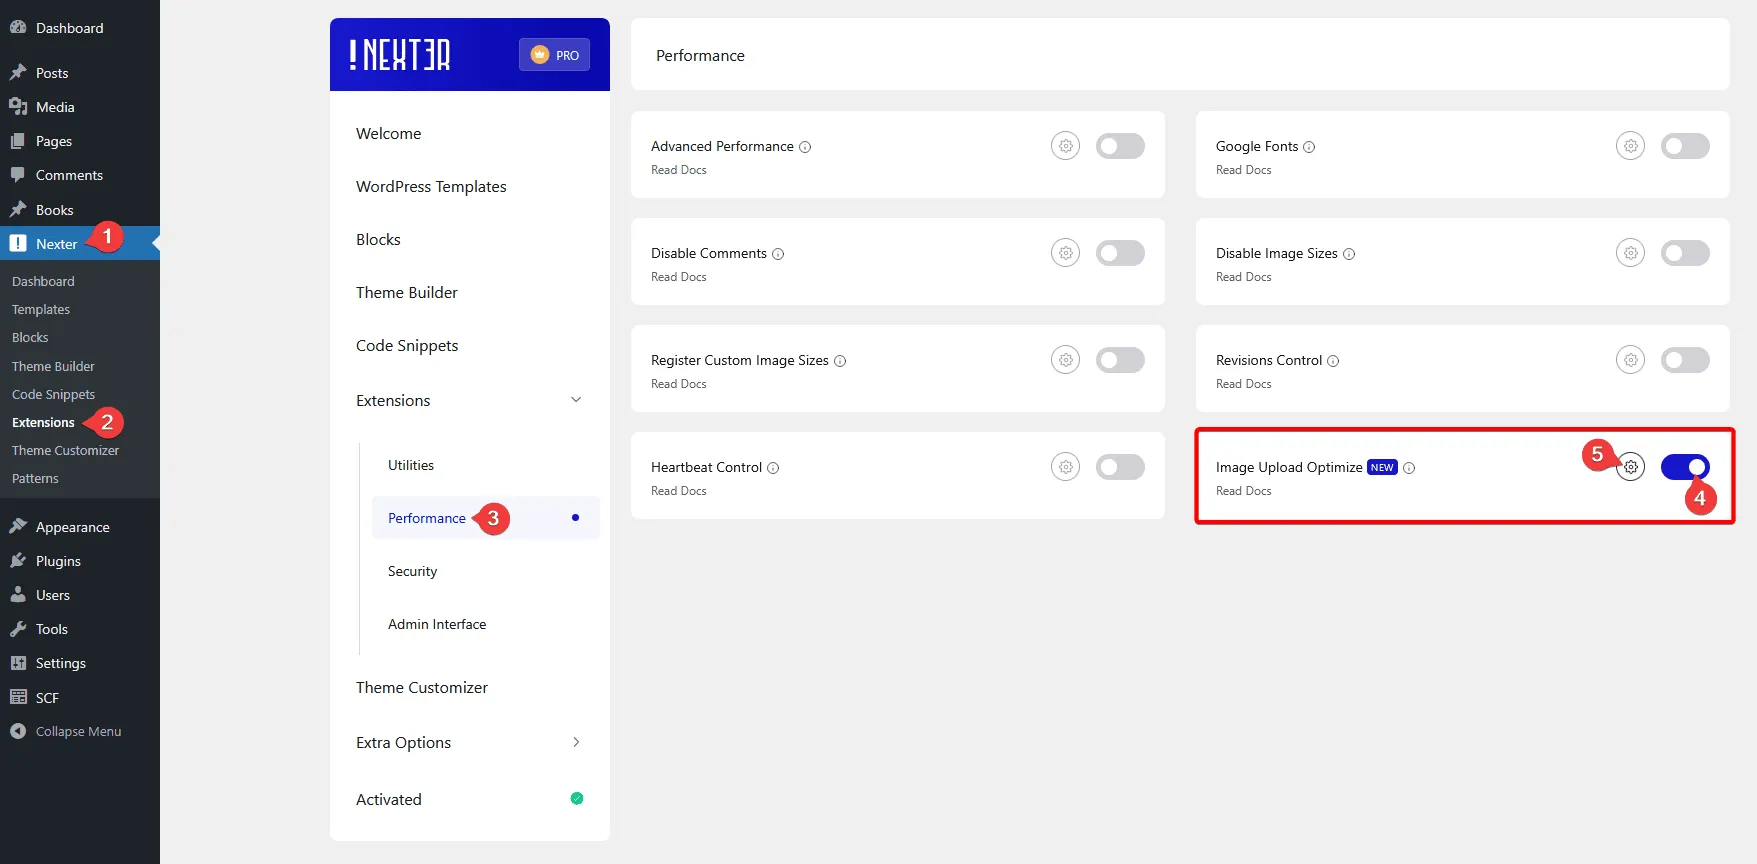
To optimize an image while uploading with the free Nexter Extension, from the WordPress Dashboard, go to Nexter > Extensions > Performance.
Then go to the Image Upload Optimize section, enable the toggle and click on the gear icon (⚙).

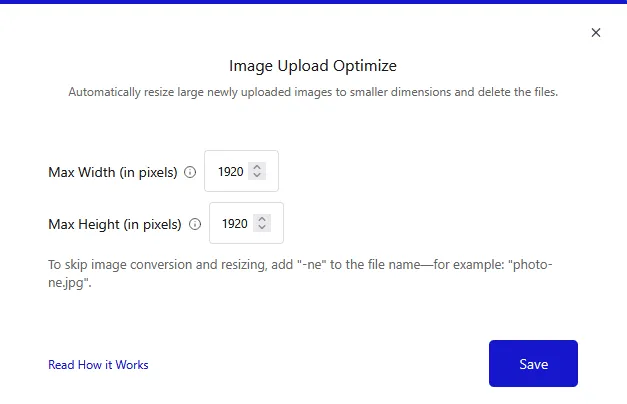
It will open the Image Upload Optimize pop-up.
You can set the maximum width and height (in pixels) of the image.
Once done, click on the Save button.

Now, when you upload an image, it will be resized automatically based on its aspect ratio in JPG file format. The resizing uses whichever is larger — the maximum width or height you’ve set.
Note: If you don’t want to resize any image, add “-ne” to the file name—for example: “photo-ne.jpg”, it will not be resized while uploading.
For example, if both the maximum width and height are set to 500px:
- If you upload an image with 1000px X 600px, it will be resized to 500px X 300px to fit the width.
- If you upload an image with 800px X 1200px, it will be resized to 333px X 500px tall to fit the height.
This way, your image will be resized, maintaining the original aspect ratio.
Note: This will not affect the old uploaded images.
How to Optimize an Image with the Nexter Extension Pro?
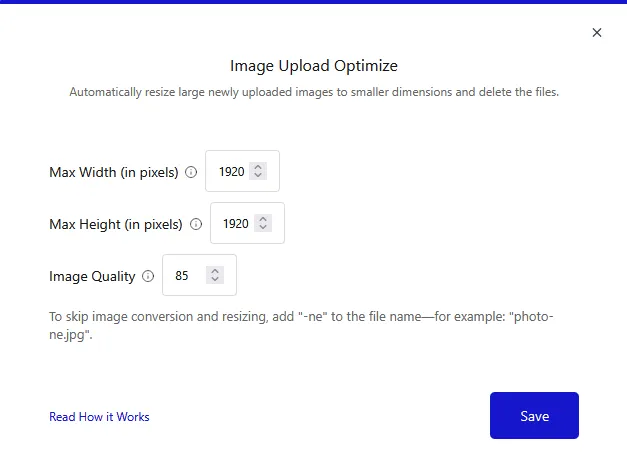
To optimize an image while uploading with the Nexter Extension Pro plugin, open the Image Upload Optimize pop-up.
You can set the maximum width and height (in pixels) of the image.
Then you can set the image quality. You can set the value between 1 to 100. Higher values give better image quality but increase file size.
Once done, click on the Save button.

Now, when you upload an image, it will be resized automatically based on its aspect ratio. The resizing uses whichever is larger — the maximum width or height you’ve set.


