If you’re familiar with WordPress, you know how powerful this content management system can be for creating a beautiful website.
But, what about making it even more eye-catching and unique?
One way to do this is to upload custom fonts to WordPress. Custom fonts can add a personalized touch to your website. They can make your site stand out from the competition and bring a certain level of professionalism to your content.
But how do you add custom fonts in WordPress?
Generally, the process of adding custom fonts in WordPress is not straightforward. Either you have to upload the fonts to your server and then use CSS to load the fonts, or you might have to use some 3d party plugins to get the job done.
Fortunately, the Nexter Extension (free) plugin, makes this process very easy, so you can easily add custom fonts to your WordPress website.
Learn via Video Tutorial
Where to find Free Custom Fonts for WordPress?
If you are looking for free custom fonts for your WordPress website, then there are many websites, from where you can find hundreds of free fonts, such as –
Just make sure to check the font license before using it on commercial websites.
How to Upload Custom Fonts with the Nexter Extension?
Adding custom fonts in WordPress using the Nexter theme is very simple.
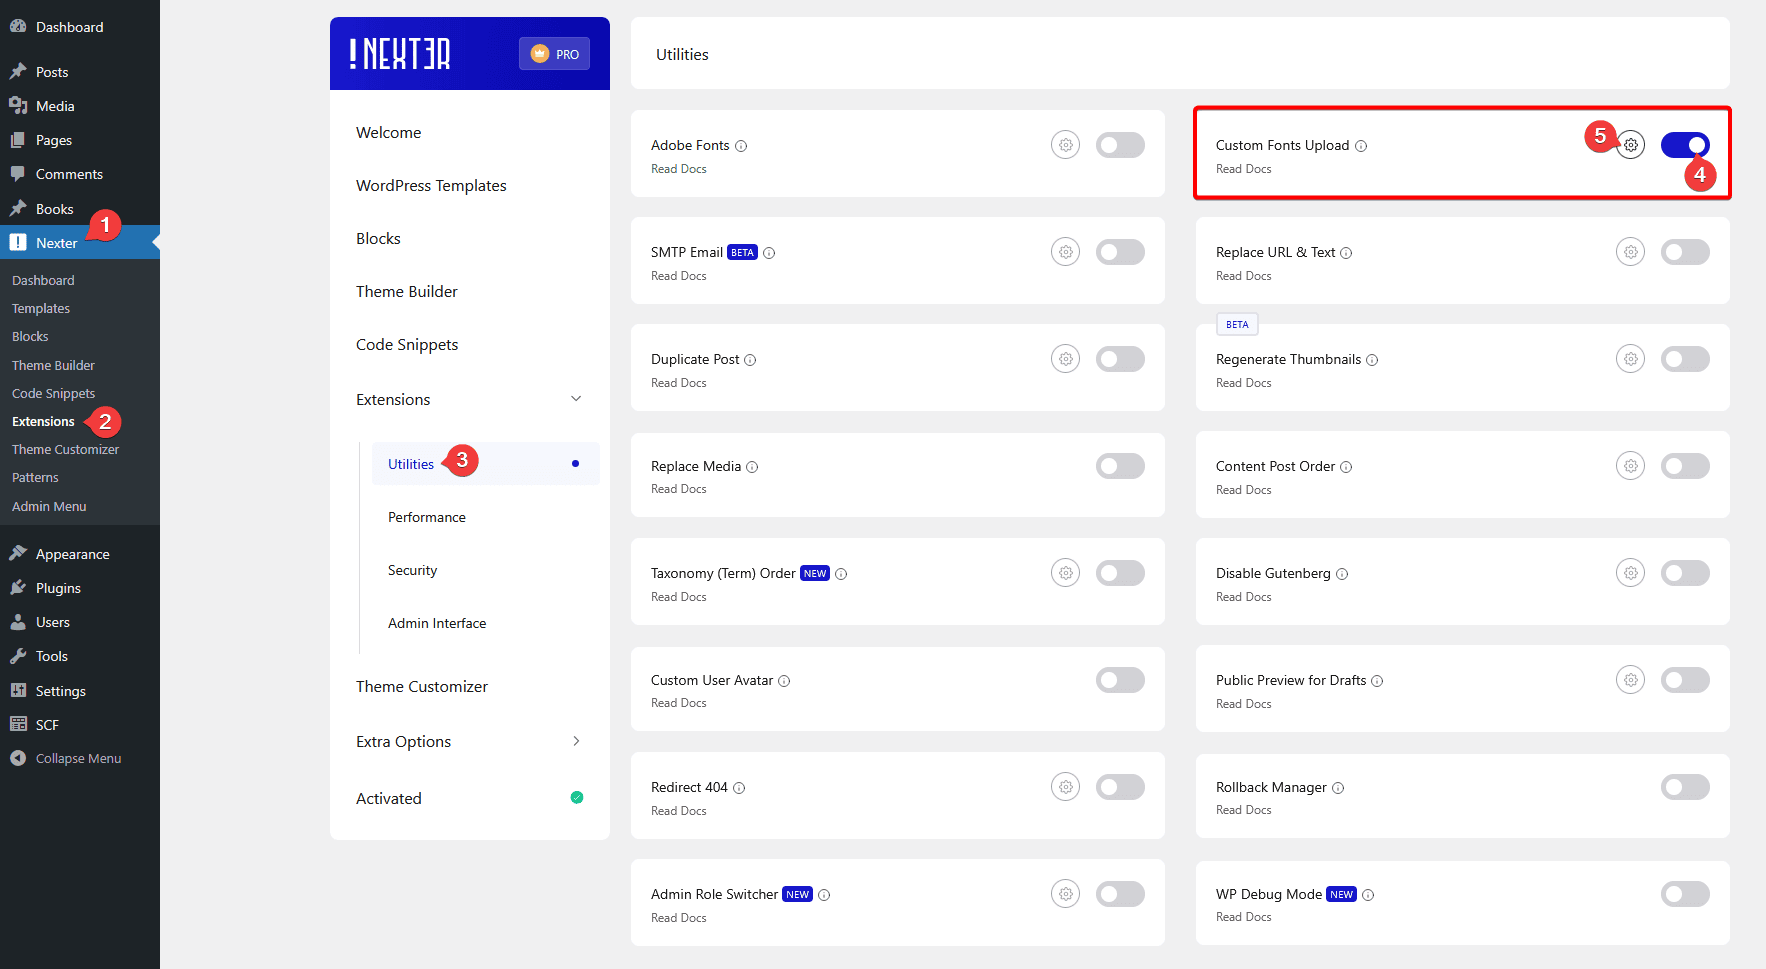
From your WordPress dashboard and go to Nexter > Extensions > Utilities.
Then go to the Custom Fonts Upload section and enable the toggle, after that click on the gear icon (⚙).

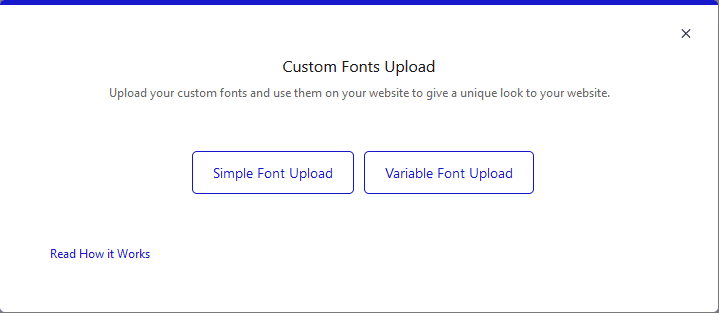
It will open the Custom Upload Fonts popup; here, you’ll find options to upload two types of fonts.

Simple Font Upload – With this option, you can upload individual font files for each style, for example, Open Sans font has separate files for different styles such as OpenSans Bold, OpenSans Italic, OpenSans Light, OpenSans Regular, and so on.
You can upload the specific font files that you want to use in your website rather than uploading all and generally, individual font files (simple/static fonts) will be smaller than a variable font file.
Variable Font Upload – With this option, you can upload a font file that can contain different styles in a single file.
Taking the above example, if you need all the styles of the Open Sans font, rather than uploading all the static font files individually, you can upload the variable font version file which will contain all the styles.
Now, let’s understand both processes.
Simple Font Upload
Let’s say we have downloaded a font called Purple Smile from dafonts.com and want to use it on our WordPress website.
Since this font has only one style, we will use the Simple Font Upload option.
From the Custom Upload Fonts popup, click on the Simple Font Upload button.
Then from the Choose File option, choose the font file from the media library, you can also upload the file directly there if it is not uploaded earlier.
Note: You can only upload in WOFF2 and TTF file formats.
Once you’ve selected the file, add a name for your font in the Font Name field.
Then you have to select a variation for the font from the variation dropdown, choose the variation to match your font style and if you want to add more variation, then click on Add Variant button and follow the same process.
Once done, click on the Save button and it will show your added fonts.
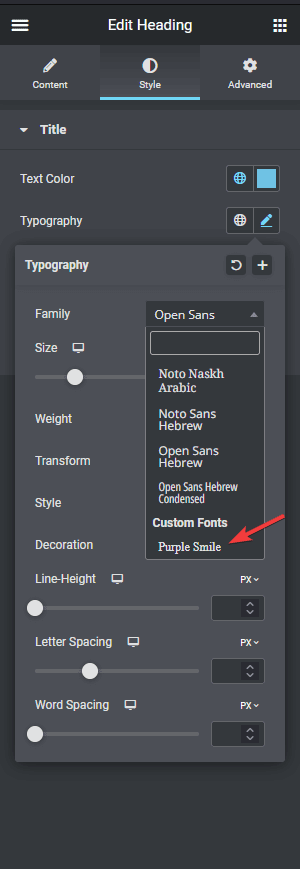
Now your font is uploaded, and you can access it from the Nexter customizer, different WordPress blocks and even form Elementor widgets.

Variable Font Upload
Now for the variable font, we will use the OpenSans variable font which contains all the styles.
So to do this, from the Custom Upload Fonts popup, click on the Variable Font Upload button.
Then from the Choose File option under Regular choose the font file from the media library, you can also upload the file directly there if it is not uploaded earlier.
You can also add an italic version from the Italic field.
Note: You can only upload in WOFF2 and TTF file formats.
Once you’ve selected the file, add a name for your font in the Font Name field.
Once done, click on the Save button and it will show your added font.
Similar to the simple fonts upload, you can access this custom font from Nexter customizer, different WordPress blocks and Elementor widgets.
But the difference will be you can choose different font styles, unlike the simple font.
So this is how easily you can upload custom fonts and use them in your WordPress websites.
But if you want to learn how to use Adobe Fonts in your WordPress website you can check this link.


