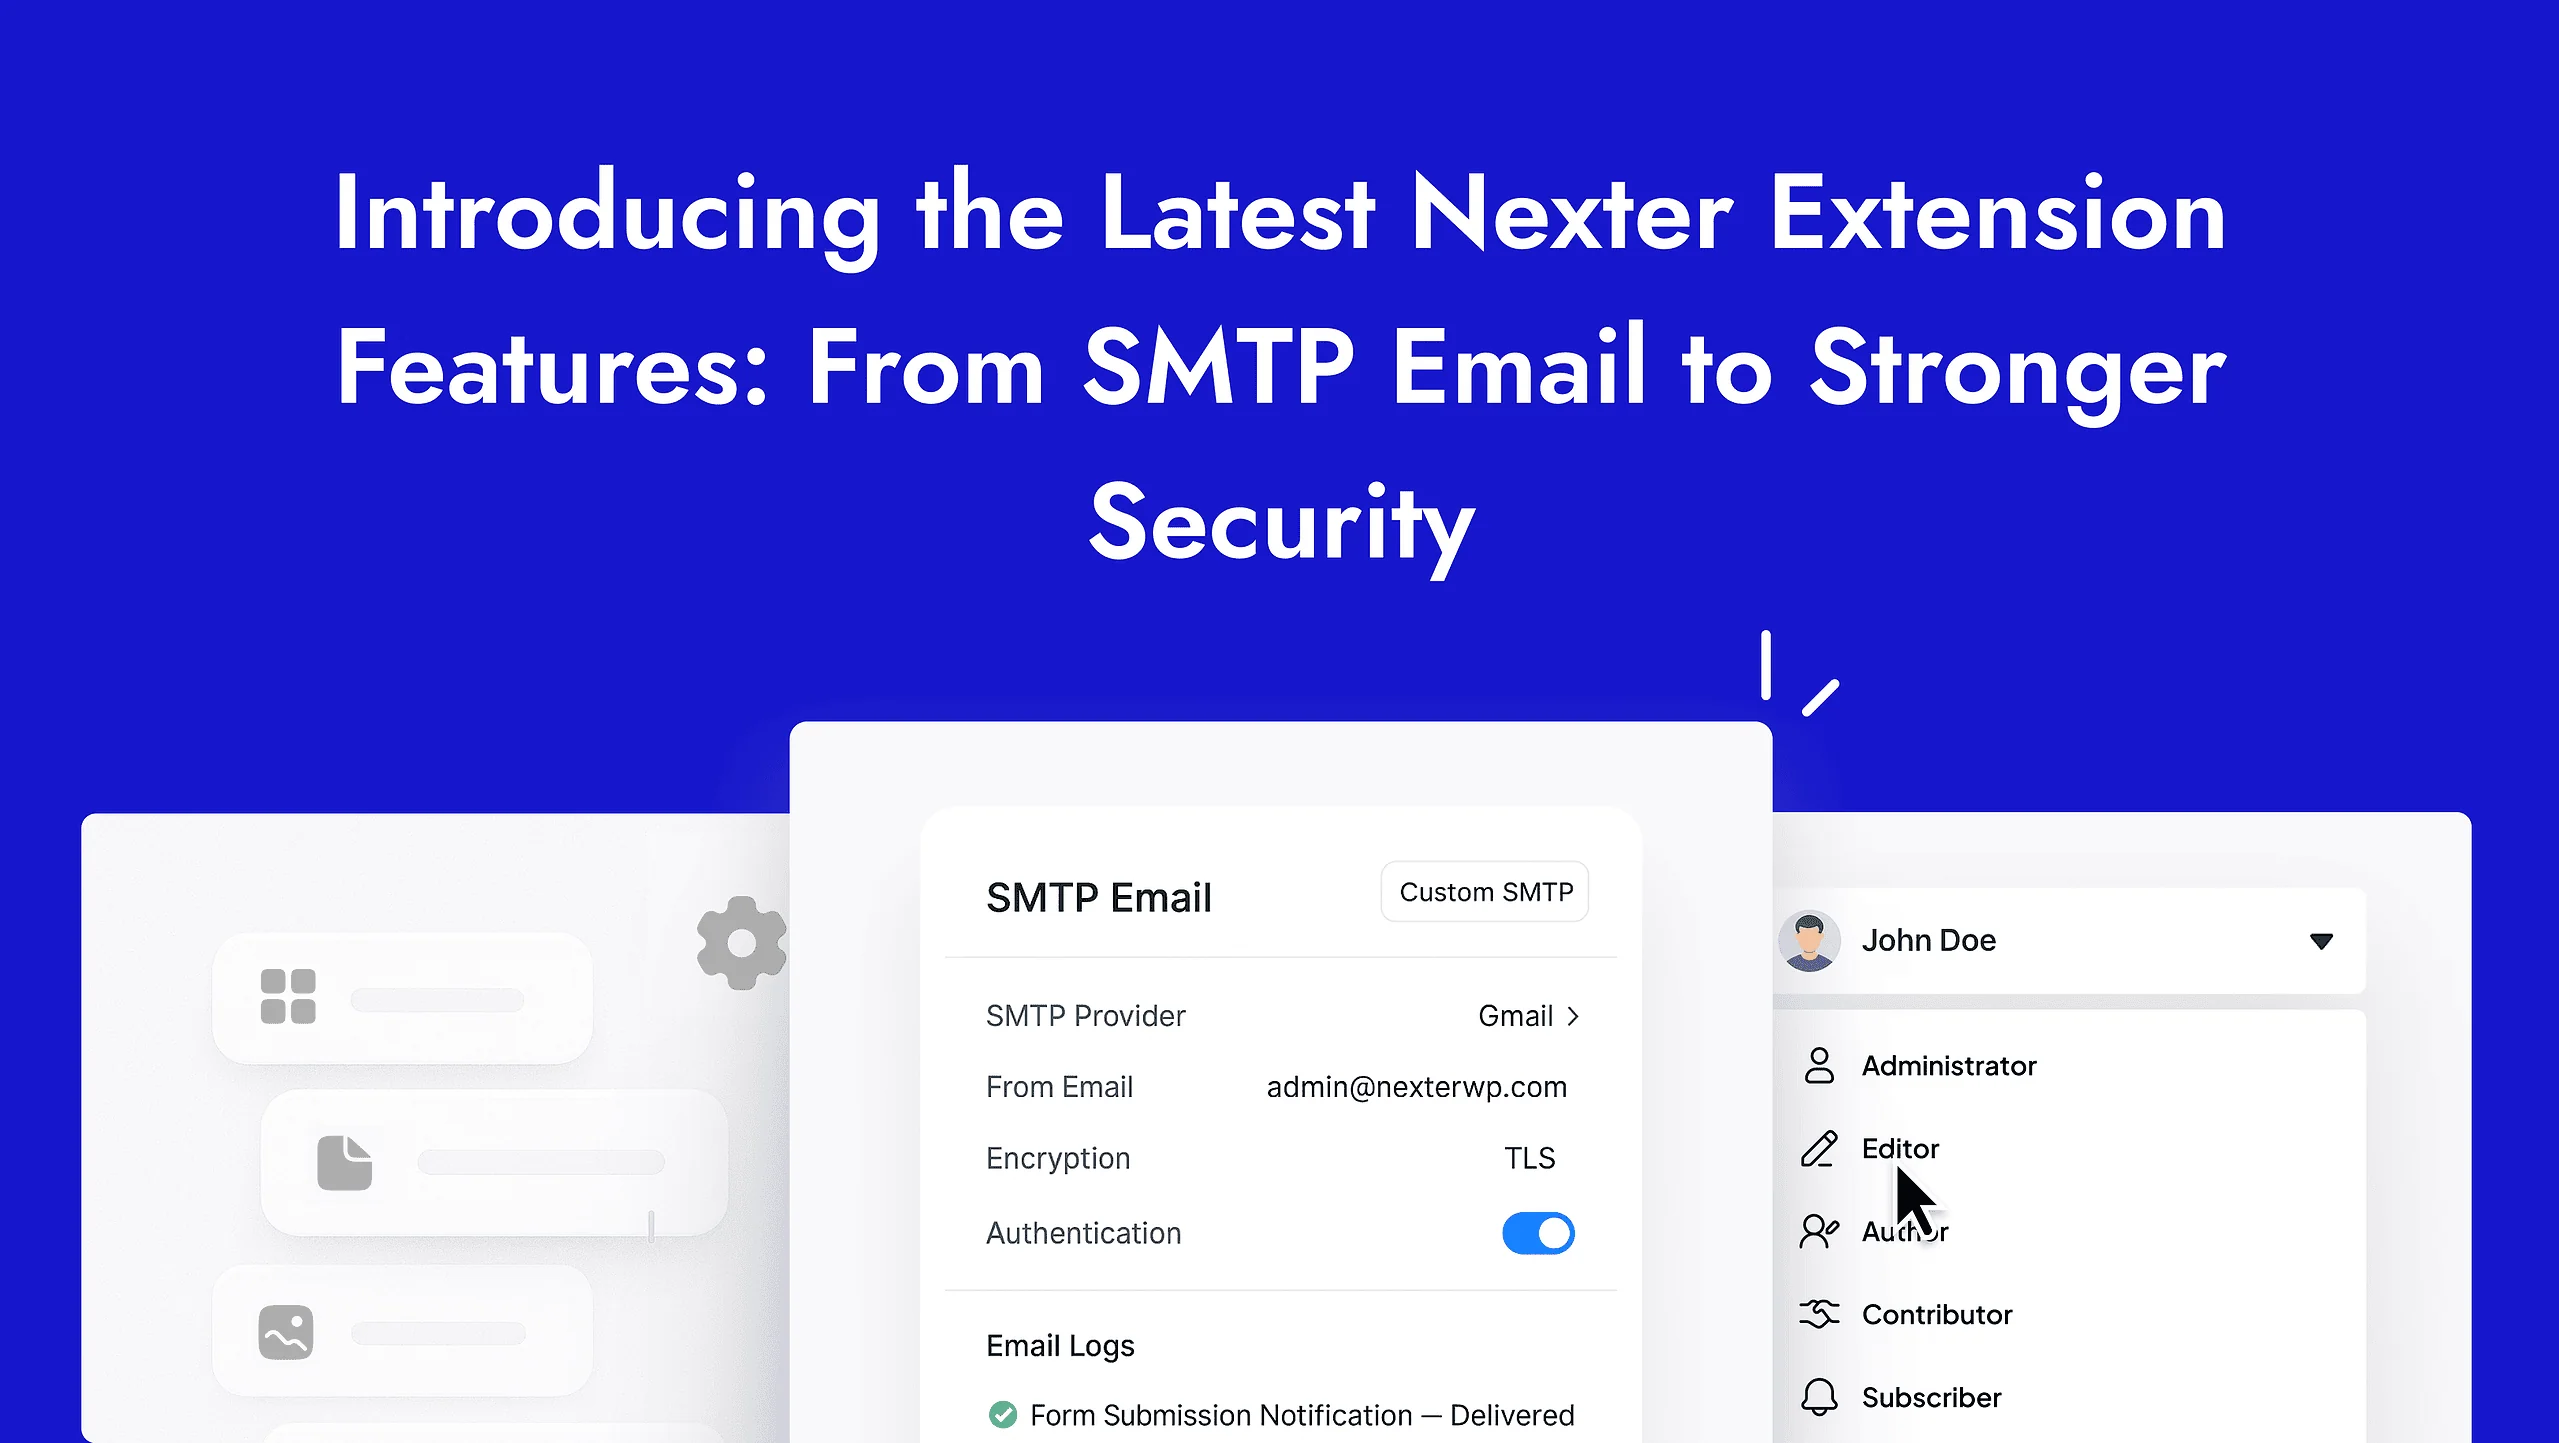
Are your WordPress emails landing in the spam folder or not reaching users at all? By default, WordPress relies on the PHP mail function to send emails — but this method is unreliable, especially with many hosting providers limiting or blocking it. As a result, essential emails like contact form submissions, order confirmations, and password resets often go undelivered.
This can cause serious issues, especially if you’re running a business or e-commerce website.
A better approach is to send emails using SMTP (Simple Mail Transfer Protocol) — a method that ensures better email deliverability and avoids the spam folder.
With the Nexter Extension (Free) plugin, you can easily configure Custom SMTP settings in WordPress. Whether you’re using a transactional email service like Zoho Mail, Gmail SMTP or your own SMTP server, this setup ensures your site’s emails are sent reliably and securely.
How to Set Up Custom SMTP with the Nexter Extension
To set up a custom SMTP with Nexter Extension, from the WordPress Dashboard, go to Nexter > Extensions > Utilities.
Then go to the SMTP Email section, enable the toggle, and click on the gear icon (⚙).
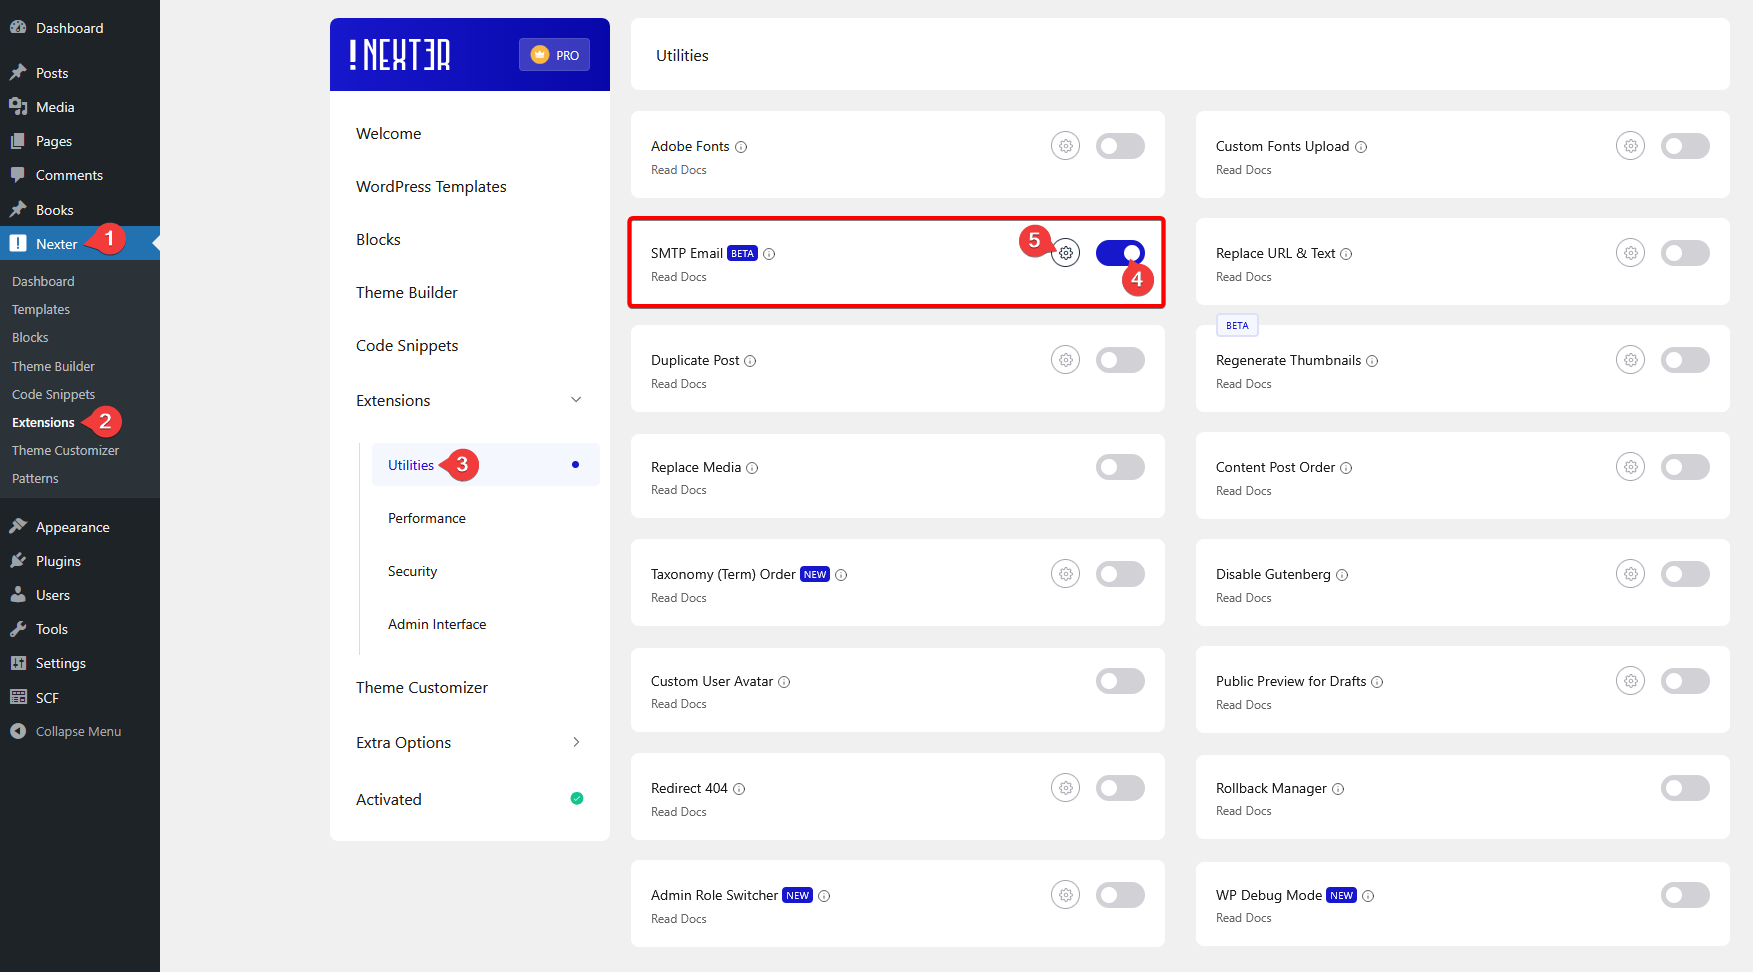
It will open the SMTP Email pop-up, then go to the Custom SMTP tab.
In the From Email and From Name fields, you can add the sender’s email ID and name.
In the SMTP Host field, you have to add the SMTP server name.
Then, in the SMTP Port field, you have to add the SMTP port number.
Then, from the Encryption section, you have to select the encryption type. Here you’ll find three options
NONE – No encryption. This is not recommended, as emails are sent in plain text and can be intercepted.
SSL (Secure Sockets Layer) – Encrypts the connection from the start. Often uses port 465. Secure and widely used.
TLS (Transport Layer Security) – Starts as a plain connection and then upgrades to a secure one using encryption. Usually uses port 587. Also secure and recommended.
Auto TLS – When enabled, the system tries to automatically start a TLS-encrypted session if the server supports it. Best used if you’re unsure about server capabilities but still want security.
Authentication – When enabled, it tells the SMTP server to require a username and password for sending emails. Disabling it might be allowed only for trusted, internal servers.
After that, you have to enter the SMTP username and password in the SMTP Username and SMTP Password fields, respectively.
Once done, click on the Connect SMTP button.
If set up properly, you should see a successful connection message, and you can even send a test email to verify the connection.
Set up SMTP with Zoho Mail
Do you want to use Zoho Mail to send your emails securely from your WordPress site? Then follow the steps.
To use Zoho Mail SMTP, you have to generate an app password.
Generate Zoho Mail App Password
1. Log in to your Zoho Mail account.
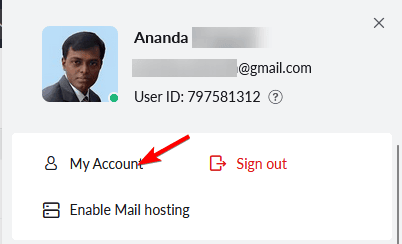
2. Click on the profile icon at the top right and then click on My Account.
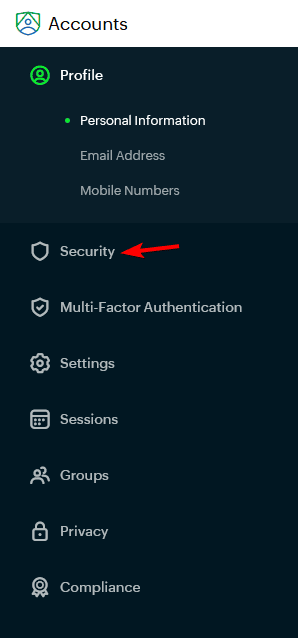
3. On the next page, click on Security from the left sidebar.
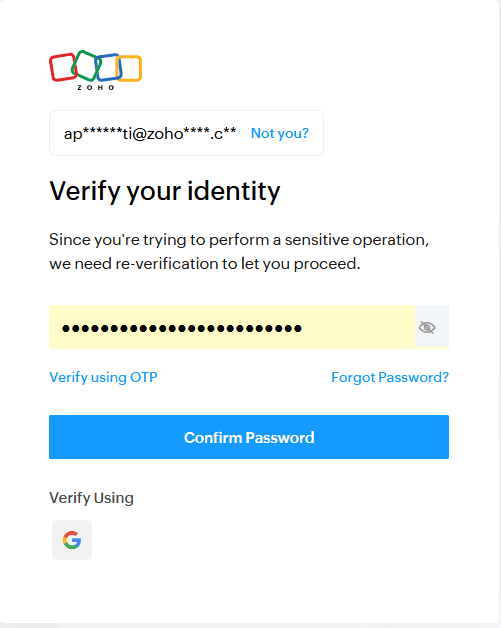
4. You might have to verify your account.
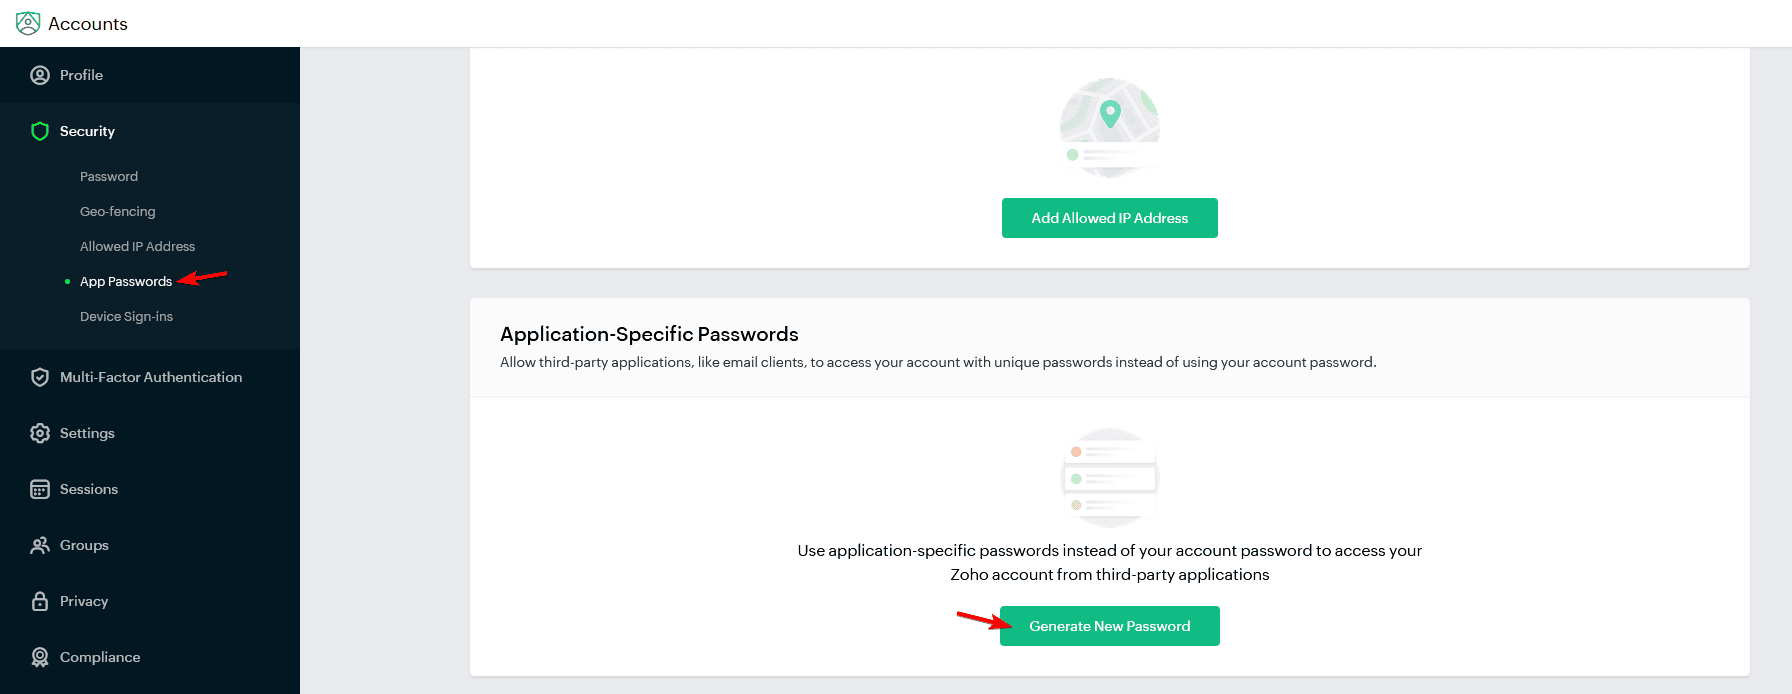
5. Once done, on the next page, click on App Passwords under Security from the left sidebar. Then click on the Generate New Password button.
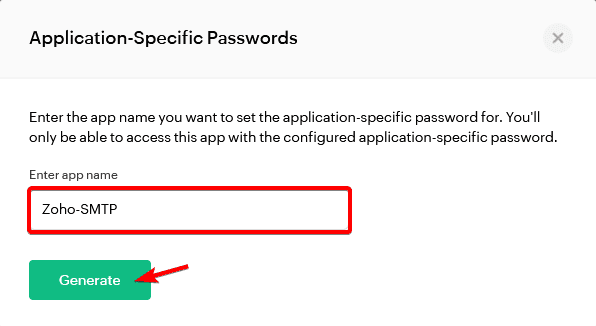
6. In the pop-up, enter an app name (for reference only) and click on the Generate button.
7. Now you’ll see the app password. Click on the Click to Copy link to copy it and save it in a notepad.
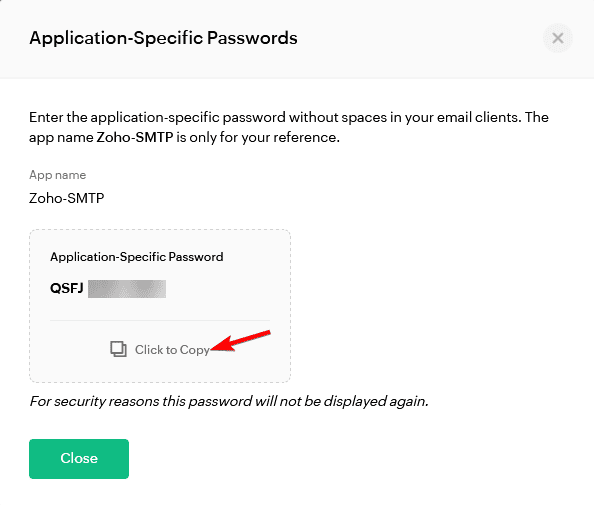
Note: Once you close the pop-up, you won’t be able to see the password again. You have to create a new app and generate a new password.
Zoho Mail SMTP Details
You would also need other Zoho Mail SMTP details, along with the app password.
Here are the required Zoho Mail SMTP details –
Zoho SMTP Host: smtp.zoho.com
Port:
- None: 2525
- SSL: 465
- TLS: 587
Set up Zoho Mail SMTP with the Nexter Extension
1. In the Nexter SMTP pop-up, go to the Custom SMTP tab.
You can add the sender’s email ID and name in the From Email and From Name fields.
2. Then add the Zoho Mail SMTP server name or host in the SMTP Host field.
3. After that, enter the correct port number as per your desired encryption type in the SMTP Port field.
4. Then, accordingly, select the correct option from the Encryption section.
Note: Based on your entered port number, you have to select the correct encryption type; otherwise, it will not connect.
5. Then enable the Authentication toggle.
Note: You can enable the Auto TLS toggle if you want to automatically use the TLS encryption type if your server supports it.
6. Then, in the SMTP Username field, add your Zoho account email ID.
7. After that, add the generated app password in the SMTP Password field.
8. Then click on the Connect SMTP button.
You should see a successful connection message.
Send Test Email
Once authorized, you’ll see a field to send a test email, add an email ID, and click on the Send button to verify the connection.
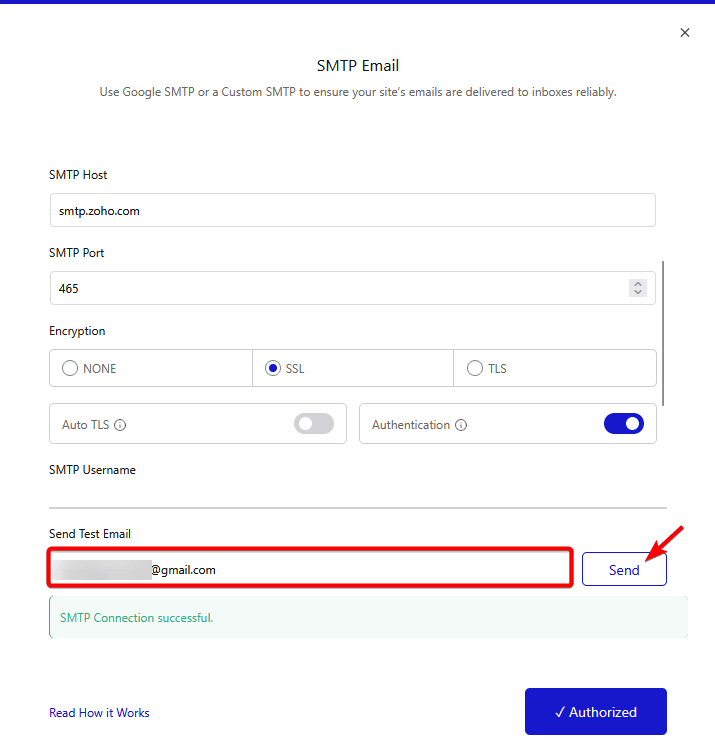
You should receive a test email in your entered email address.
Set Up Custom SMTP with Gmail SMTP
Do you want to use Gmail SMTP as your custom SMTP to send emails from your WordPress site? Then follow the steps.
To use Gmail SMTP, you have to generate an app password.
Generate Google Account App Password
1. Log in to your Google account.
2. Click on the profile icon at the top right and then click on Manage Your Google Account.
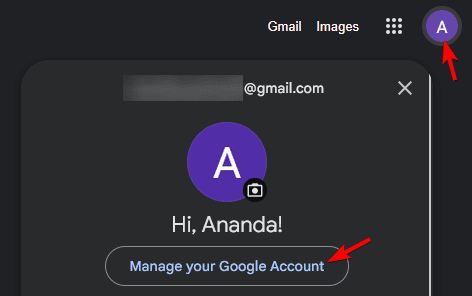
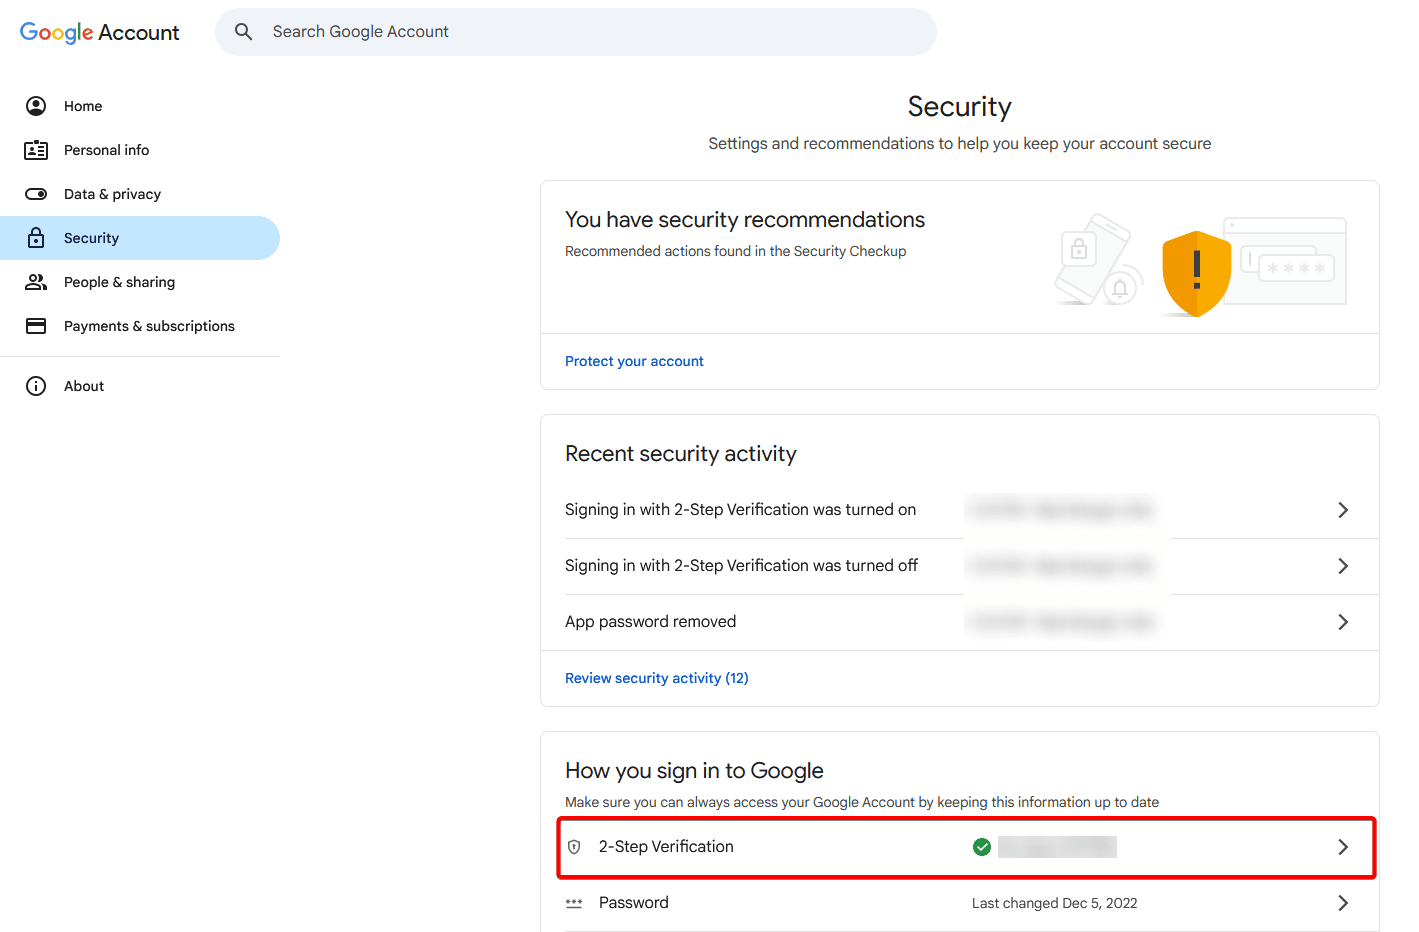
3. On the next page, click on Security from the left sidebar.
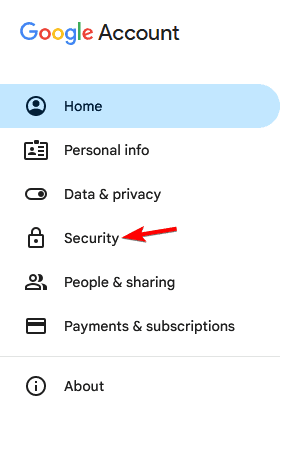
4. On the next page, scroll down to the 2-Step Verification section and click on it.
5. You might have to verify your account.
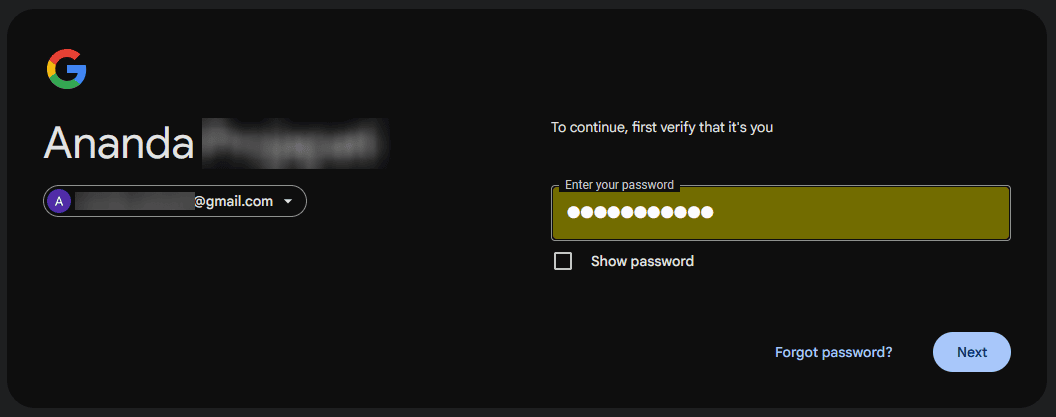
Note: Make sure you have enabled the 2-step verification. If not enabled, then enable it first.
6. Once enabled, you’ll see the App passwords section in the 2-Step Verification page.
If you don’t see the App Password section, then go to this link.
https://myaccount.google.com/apppasswords
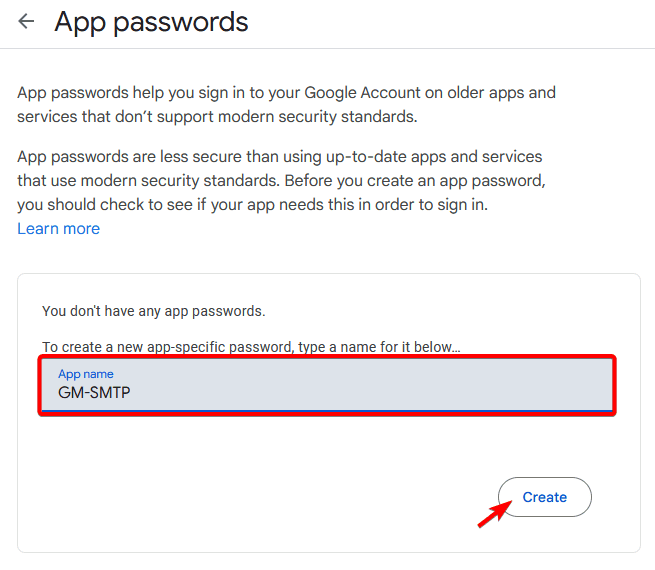
7. Then enter an app name (for reference only) and click on the Create button.
8. Now you’ll see the app password in a pop-up. Copy it and save it in a notepad.
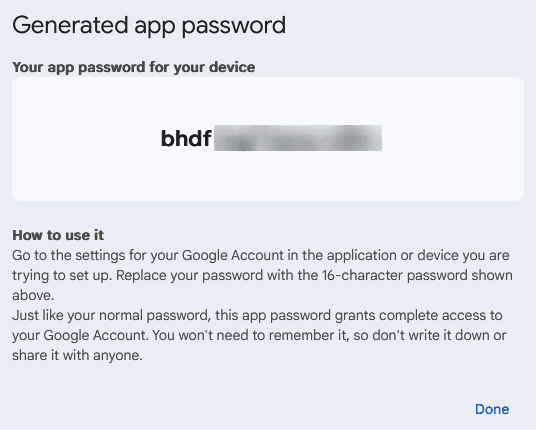
Note: Once you close the pop-up, you won’t be able to see the password again. You have to create a new app and generate a new password.
Gmail SMTP Details
You would also need other Gmail SMTP details, along with the app password.
Here are the required Gmail SMTP details –
Gmail SMTP Host: smtp.gmail.com
Port:
- None: 2525
- SSL: 465
- TLS: 587
Set up Gmail SMTP with the Nexter Extension
1. In the Nexter SMTP pop-up, go to the Custom SMTP tab.
You can add the sender’s email ID and name in the From Email and From Name fields.
2. Then add the Gmail SMTP server name or host in the SMTP Host field.
3. After that, enter the correct port number as per your desired encryption type in the SMTP Port field.
4. Then, accordingly, select the correct option from the Encryption section.
Note: Based on your entered port number, you have to select the correct encryption type; otherwise, it will not connect.
5. Then enable the Authentication toggle.
Note: You can enable the Auto TLS toggle if you want to automatically use the TLS encryption type if your server supports it.
6. Then, in the SMTP Username field, add your Gmail ID.
7. After that, add the generated app password in the SMTP Password field.
8. Then click on the Connect SMTP button.
You should see a successful connection message.
Send Test Email
Once authorized, you’ll see a field to send a test email, add an email ID, and click on the Send button to verify the connection.
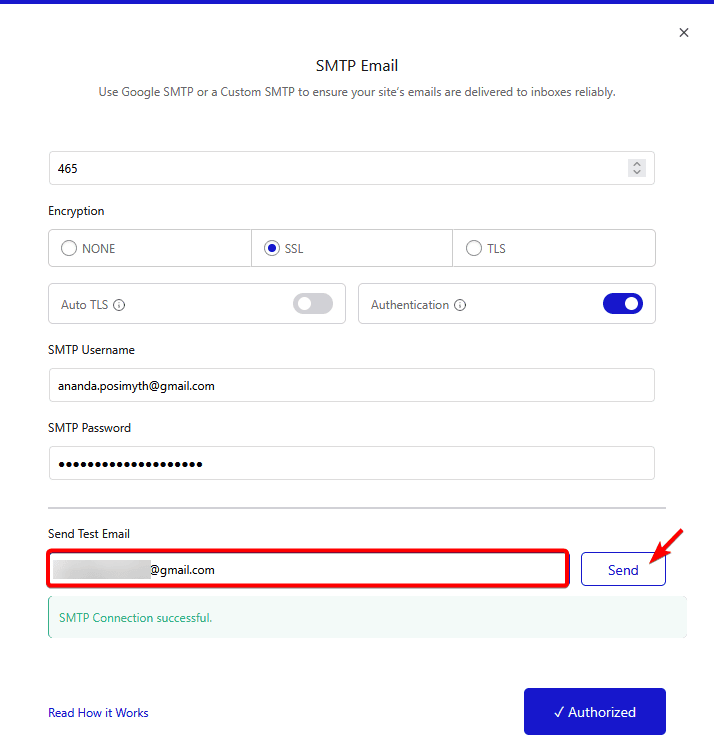
You should receive a test email in your entered email address.


