If you want to showcase your latest podcast episode or feature a music track for your visitors, having an audio player on your site can greatly enhance the overall user experience.
With the Audio Player block from Nexter Blocks, you can easily add an audio player to your WordPress website.
Required Setup
- Make sure the default WordPress Block editor is active.
- You need to have the Nexter Blocks plugin installed and activated.
- This is a Premium block, and you need the PRO version of Nexter Blocks.
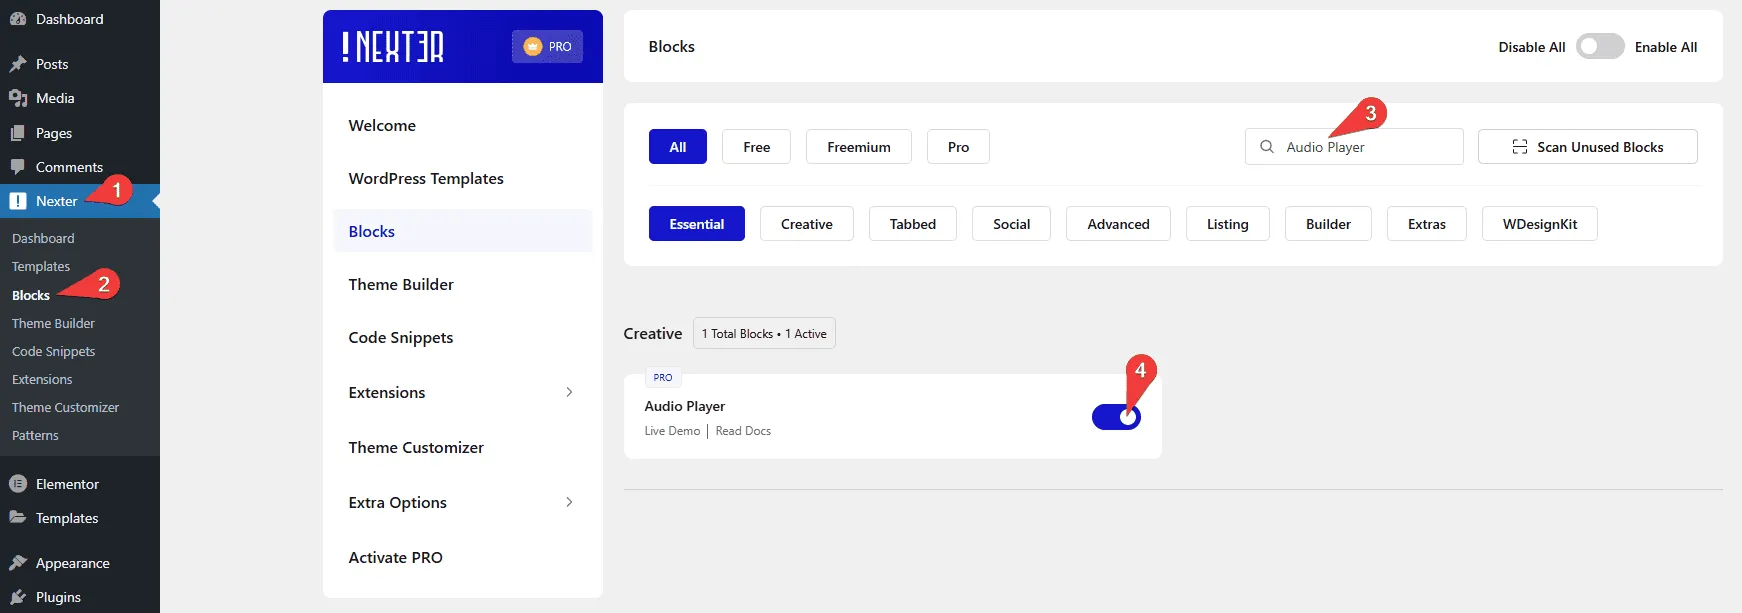
- Make sure the Audio Player block is activated. To verify this, visit Nexter → Blocks → and search for Audio Player and activate.
Learn via Video Tutorial
How to activate the Audio Player Block?
Go to
- Nexter → Blocks
- Search the block name and turn on the toggle.

Key Features
- Multiple styles – You can easily choose from multiple styles.
- Add playlist – You can easily add a playlist.
- Multiple sources – You can add audio from two sources, self hosted or external sources.
How to Use the Audio Player Block?
Add the Audio Player block to the page.
Then click on the Design from Scratch button to design the layout from scratch.

Note: By clicking on the Import Pre-Designed Template button, you can import a preset template and customize it as per your requirements.
Audio Player
From the Style section, you can select a predefined style.

Playlist
Here you can add the playlist items. In the Content section, by default, you’ll find one repeater item open it –
In the Song Title field, you can add the audio title.
Then in the Song Author field, you can add the name of the audio’s author.
From the Source section, you have to select the source. Here you’ll find two options –
- Self Hosted – With this option you can use audio from your WordPress media library.
- External – With this option you can use audio from external sources. This option is useful when your audio files are hosted somewhere else.
Note: Supported audio file types .mp3, .wav, .ogg, .flac and .m4a.
Let’s select External here.
Then in the URL field, you have to add the audio file URL.
Note: When the Self Hosted option is selected, you have to select the audio file from the File field.
After that from the Image section, you can add an image for the audio.
You can click on the + Add Content button to add more audio, this way you can create an audio playlist.
Common Setting
In the Split Text field, you can add a text between the audio title and the author’s name.

In the Max-width section, you can set the maximum width of the audio player for different devices.
From the Default Volume section, you can adjust the default sound level of the audio player.

How to Style the Audio Player Block?
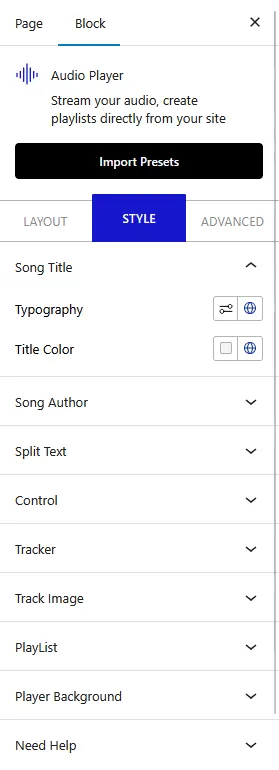
To style the Audio Player block, you’ll find all options in the Style tab.
Song Title – From here, you can manage the audio title typography and color.

Song Author – From here, you can manage the audio author’s name typography and color.
Split Text – From here you can manage the Split Text style.
Control – From here, you can style the audio player controls.
Tracker – From here, you can style the audio player tracker.
PlayList – From here, you can style the audio player playlist.
Player Background – From here, you can manage the audio player background style.
Advanced options remain common for all our blocks, you can explore all it options from here.


