


If you’re trying How to Add Custom Fields in Gutenberg to create more dynamic content but don’t want to write a single line of code, this is the blog for you.
When creating a website in WordPress, the default Gutenberg editor gives you fields for a title and a body, which works fine for creating a basic blog post.
But what if you need more? What if you want to include metadata such as client testimonials, product specs, event dates, or author bios across multiple posts or pages?
Custom fields are a good way to do that. They let you add metadata to your content, keep everything clean and consistent, and display it exactly where and how you want. While WordPress doesn’t offer an easy way to add custom fields, an ACF Gutenberg plugin is all you need.
In this guide, we’ll walk you through how to display custom fields in the WordPress Gutenberg editor without writing a single line of code.
What Are Custom Fields in WordPress?
Custom fields in Gutenberg are an easy way to add extra metadata to your posts, pages, or custom post types. This metadata can be anything – product descriptions, prices, ratings, buttons, YouTube URLs, author bios, extra details – you name it.
In WordPress classic editor, custom fields are displayed in a box below the post editor at the bottom of the page. In Gutenberg, custom fields are disabled by default, but you can enable them in the post settings.
However, there is no easy way to display extra metadata wherever you want on the website.
Why Use Custom Fields with Gutenberg?
Gutenberg gives users the flexibility to design pages using advanced blocks. However, when it comes to managing repetitive or extra content, such as metadata, the block editor has its limitations. That’s where custom meta fields become essential.
Custom fields allow you to integrate dedicated metadata into your website content. Instead of manually adding the same content for every post or page, you can input dynamic data into custom fields and have it automatically replicated within a predefined structure.
Custom fields, or advanced custom fields, ACF in Gutenberg allows you to pull data from other parts of the website or external sources to display dynamic content in Gutenberg. Plus, you can create a more customized website layout and manage metadata to create a user-friendly website experience.
Just getting started with Gutenberg? Check out our beginner’s guide on What is Gutenberg?
How to Add Custom Fields in Gutenberg (With ACF)
Adding custom fields in the WordPress block editor is an easy process, especially with a dedicated WordPress plugin like Advanced Custom Field.

Let’s dive into the step-by-step guide to creating custom fields in Gutenberg with ACF-
Step 1: Install and activate ACF
To get started, go to Plugins > Add New Plugin on your WordPress dashboard and search for the “Advanced Custom Fields” plugin in the library.

Install and activate the plugin.
Step 2: Create a new group field
Back on the dashboard, go to ACF > Field Groups and click on Add New on the page that appears.

This will take you to the form editor page.
Give the new group field a title and start registering your first field by adding a Field Type and Field Label. Note that the Field Name will be auto-generated once you add the field label.

You will also find other sections like “Validation,” “Presentation,” and “Conditional” to add more instructions to the custom fields.
If you want to add multiple fields, click on + Add Value.
Step 3: Set field group location
Once you have edited the custom fields you want to create, go to the Settings tab and Location Rules to define the location of your various custom fields.

This setting allows you to display certain custom fields on certain pages or posts to keep your website layout clean and manageable.
For instance, if you want to add a custom field for “Estimated Reading Time” to every blog post, go to Custom Fields > Field Groups and create a new group called “Blog Extra Info”.
Add a field named “Estimated Reading Time” and set the location rule like “Post Type – is equal to – Post”.
This will ensure that the custom field appears only on the blog posts. You can also target specific locations for the custom fields by clicking on the “and” button on the far right.
Finally, you can also set multiple rule groups by clicking on Add rule group.
Step 4: Configure additional settings and save
In the Settings tab, you can configure additional settings like enabling or disabling the field group or customizing its appearance. You can also adjust the field layout and stylize the fields to align with your website design.

Once you’ve created and designed all the WordPress custom meta fields, click on Save Changes to save your work.
Now, go back to the WordPress dashboard and navigate to Add New Post. You will be able to see your custom field for “Estimated reading time” at the bottom of the page, below the post editor.

Want to dive into the world of blogging? Learn How to Start a WordPress Blog and what you need to make it a success.
Displaying ACF Custom Fields in Gutenberg
Another way to add a WordPress custom field block is to use WordPress’s default custom field settings in the Gutenberg editor.
- To access the default custom fields, add a new post or edit an existing one on your site.
- Click on the three dots at the top-right corner and click on Preferences.

- In the popup that appears, navigate to the Advanced section and enable Custom Fields.

- Click on Enable and Reload to reload the post editor and find the newly added custom fields panel under the post editor.
- Now, insert a new custom field by adding a name and value.

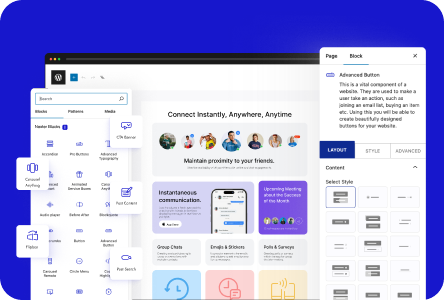
Using Nexter Blocks to Display Custom Fields (No Coding)
While ACF lets you create and manage custom fields easily, displaying those fields inside Gutenberg can be tricky, especially if you’re not comfortable writing code or shortcodes.
But not with Nexter Blocks. The powerful, no-code plugin built for the Gutenberg editor makes it easy to display WordPress custom meta field values directly inside custom blocks. Once you create your custom fields using the ACF plugin, you only need to activate Nexter Blocks and edit your content in the editor to display dynamic content in the custom fields.
Here’s a Gutenberg custom field tutorial-
Step 1: Install and activate the Nexter Blocks
On your WordPress dashboard, go to Plugins > Add New Plugins and search for Nexter Blocks.
Install and activate plugin.
Step 2: Edit post and add dynamic content
With the Nexter Blocks, you don’t need to activate anything else to display custom fields and dynamic content. This is a default feature with Nexter Blocks, meaning you can simply use it with every block you add to the editor.
To add dynamic content, let’s say you add the Paragraph content block from the Nexter Blocks.
Under the Layout tab on the right, click on the cylindrical icon at the top corner of the Content field.

Click on Dynamic Field to open the dropdown menu. From here, you can select the data you want to add. As you scroll down, you will find the custom content fields you have created.

You can click on it to add it to the website.
Best Practices When Using Custom Fields in Gutenberg
Custom fields give you powerful control over how your metadata is structured and displayed, but to get the most out of them, it’s important to follow a few best practices for a user-friendly experience.
- Describe the field clearly: When naming the ACF field, use a specific name that clearly defines its purpose to avoid confusion while editing the content.
- Keep PHP-friendly names: Field names should be written in lowercase, be descriptive, and use underscores instead of spaces. Avoid abbreviations or vague names.
- Apply specific location rules: Instead of displaying the custom fields on every website page by default, use location rules to limit field groups to only appear where needed. This reduces clutter and makes editing easy for you.
- Use accurate field types: Use the right field type for the right content to simplify content editing and prevent input errors. For instance, use a URL field instead of a simple Text field for links.
Create a stunning WordPress website that looks good and performs well. Learn How to Choose A WordPress Theme for your website.
Stay updated with Helpful WordPress Tips, Insider Insights, and Exclusive Updates – Subscribe now to keep up with Everything Happening on WordPress!
Wrapping Up
If you’re looking to add more dynamic content to your website using Gutenberg, custom fields are the way to go. They are easy to add, design, and manage using plugins, and you don’t need to write a single line of code to use them.
Whether you’re using ACF or any other custom fields plugin, Nexter Blocks offers a no-code way to work with custom fields inside Gutenberg. With over 90+ Gutenberg blocks, including dynamic blocks, post loops, sliders, and more, you can connect your custom field data visually and manage your metadata seamlessly.
From customizable layouts to design features and advanced functionalities like breadcrumb bars, hover animations, and video galleries, Nexter Blocks helps you do more with Gutenberg.
FAQs on adding a Custom Field
Can I use ACF with Gutenberg?
Yes, Advanced Custom Fields (ACF) is fully compatible with the Gutenberg editor. You can create field groups, set location rules, and then use custom blocks or third-party plugins like Nexter Blocks to dynamically display ACF field data inside your Gutenberg layouts.
What’s the easiest way to display custom fields without coding?
The easiest way to display custom fields without coding is to use a WordPress plugin like Advanced Custom Fields and Nexter Blocks to add, fetch, and display ACF (or other custom field) values directly on the website.
How are custom fields different from custom post types?
Custom fields are additional data fields added to posts, pages, or custom post types to insert metadata like a price, image, or date. Custom post types, on the other hand, are entirely new types of content (e.g., Portfolio, Testimonials) that can have their own custom fields, taxonomies, and templates.
Do I need to use a theme builder to display custom fields?
While some page builders or theme builders offer custom field support, you can achieve the same in Gutenberg using plugins like ACF and Nexter Blocks, which support dynamic content without relying on theme builders.
Can I use Nexter Blocks with ACF?
Yes, Nexter Blocks works smoothly with ACF. You can pull in custom field values from ACF and display them dynamically across various blocks, including headings, images, buttons, sliders, and more, all within the Gutenberg editor.