












Open a WooCommerce product to edit its description and you land in a plain text box, the old classic editor, while the rest of your WordPress site uses the modern Gutenberg block editor. It is a jarring switch, and it is about to matter more than it used to.
WooCommerce is winding down its own experiment with a block-based product editor. The beta is being removed in WooCommerce 11.0, currently scheduled for July 28, 2026, and the deprecation window opens in WooCommerce 10.9 on June 23, 2026. After that change, the classic editor is the only product editing experience that ships with WooCommerce core.
So if you want the drag-and-drop block experience for your product descriptions, you add it yourself. The good news: it takes one small code snippet. This guide covers two ways to do it, which one to pick, and how to move your existing product content into blocks.
What WooCommerce 10.9 and 11.0 Change for Product Editing
For a while, WooCommerce shipped its own block-based product editor as an opt-in beta. That experiment is ending. According to the WooCommerce developer blog, the block product editor beta is being removed from core in WooCommerce 11.0 (scheduled July 28, 2026), with the final deprecation notices starting in WooCommerce 10.9 (scheduled June 23, 2026).
WooCommerce is clear about what happens next: “the classic editor will be the only product editing experience in WooCommerce core.” If you had the beta enabled, you get a one-click way to switch back, and no product data migration is required because the underlying product data stays the same.
That is exactly why the method in this guide is worth knowing. Enabling the standard WordPress Gutenberg editor for the product post type is a separate path from WooCommerce’s retired beta. It keeps working, it uses core WordPress behavior, and it gives you real blocks for product descriptions without depending on a feature WooCommerce is removing.
Why Use the Gutenberg Editor for WooCommerce Products?
The classic editor gives you a single formatting bar and a text area. That is fine for a paragraph of copy, but it is limiting once you want a product description that actually sells.
With the Gutenberg block editor turned on for products, you build descriptions the same way you build the rest of your site: columns, images, buttons, tables, headings, and any block your theme or plugins add. You get more control over layout, you stay consistent with your brand, and your team edits products in the same interface they already know.
Also Read: New to the block editor? Start with What Is Gutenberg: A Beginner’s Guide to the WordPress Block Editor for the fundamentals.
How to Add Gutenberg Editor to WooCommerce (Step by Step)
WooCommerce does not expose a setting for this, so you enable it with a short PHP snippet that tells WordPress to use the block editor for the product post type. You can add that snippet two ways: through a plugin (safe, recommended) or directly in your theme functions.php file (faster, riskier). Pick the plugin method unless you are comfortable editing theme code.
Method 1: Using the Code Snippets Plugin (Recommended)
Code Snippets is a free plugin with more than 1 million active installations and a 4.7-star rating. It lets you run custom PHP without touching theme files, so your snippet survives theme switches and updates. Here is the full process.
Step 1: Install the Code Snippets Plugin
Go to Plugins > Add New in your WordPress dashboard, search for Code Snippets, then install and activate it.

Also Read: Not sure how the two relate? See the 6 Key Differences in WooCommerce vs WordPress.
Step 2: Add the Code Snippet
In the dashboard, go to Snippets > Add New. Give the snippet a name, then paste the following code into the Code field.
// enable gutenberg for woocommerce
function activate_gutenberg_product( $can_edit, $post_type ) {
if ( $post_type == 'product' ) {
$can_edit = true;
}
return $can_edit;
}
add_filter( 'use_block_editor_for_post_type', 'activate_gutenberg_product', 10, 2 );
// enable taxonomy fields for woocommerce with gutenberg on
function enable_taxonomy_rest( $args ) {
$args['show_in_rest'] = true;
return $args;
}
add_filter( 'woocommerce_taxonomy_args_product_cat', 'enable_taxonomy_rest' );
add_filter( 'woocommerce_taxonomy_args_product_tag', 'enable_taxonomy_rest' );
The first filter switches the product post type to the block editor. The two taxonomy filters keep product categories and tags working correctly once the block editor and REST API are in play. Set the snippet to Run everywhere, then save and activate it.

Step 3: Check Your Product Page
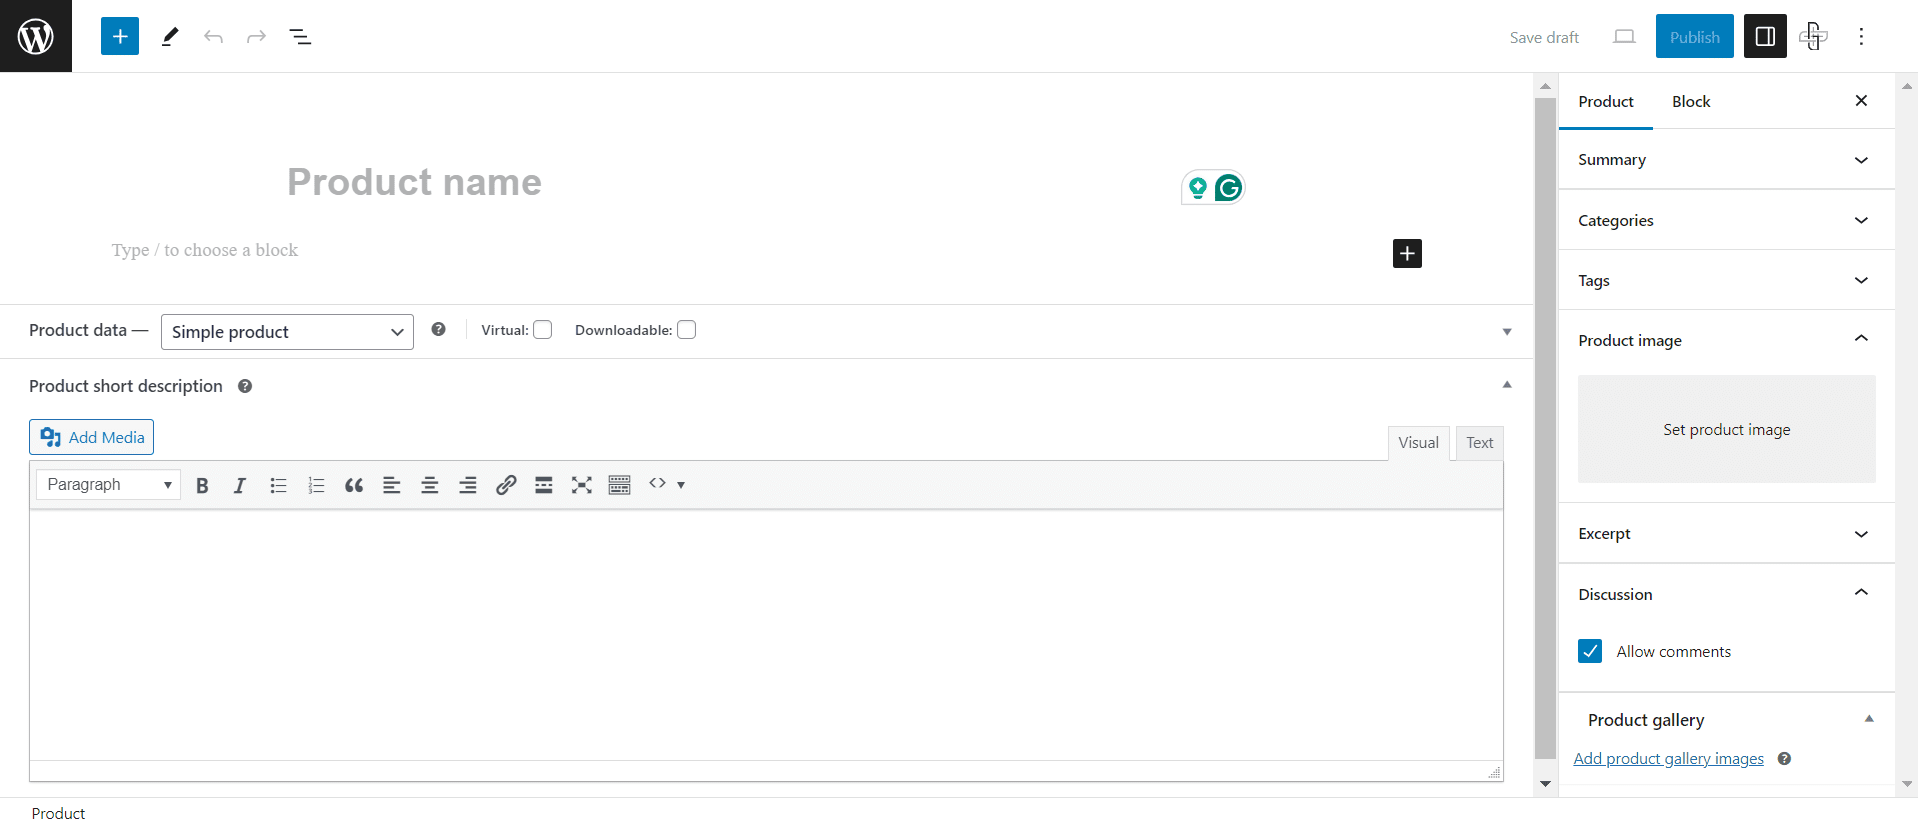
Confirm it worked. Go to Products and open an existing product or add a new one. The description area should now load the Gutenberg block editor instead of the classic box.
Method 2: Using the Theme functions.php File
You can add the same snippet directly to your theme code. This works, but it is the riskier option: the code is lost when you switch themes, an update can overwrite it, and a single typo can take your site down. Only use it if you are comfortable editing PHP and you keep backups.
Go to Appearance > Theme File Editor, open your active theme functions.php file, and paste the snippet from above at the end of the file.

Always do this on a child theme and back up your site first. Even a small mistake in functions.php can break the front end and the admin at the same time.
Also Read: Want a theme built for blocks from the ground up? Explore the 5 Best WordPress Block Themes (Gutenberg).
How to Convert Classic Product Descriptions to Blocks
If you already added products with the classic editor, their descriptions stay inside a single Classic block after you switch on Gutenberg. To edit them as real blocks, convert them once.
Open the product, click the existing Classic block, open its options, and choose Convert to Blocks. WordPress turns the old content into individual Gutenberg blocks you can edit and rearrange.
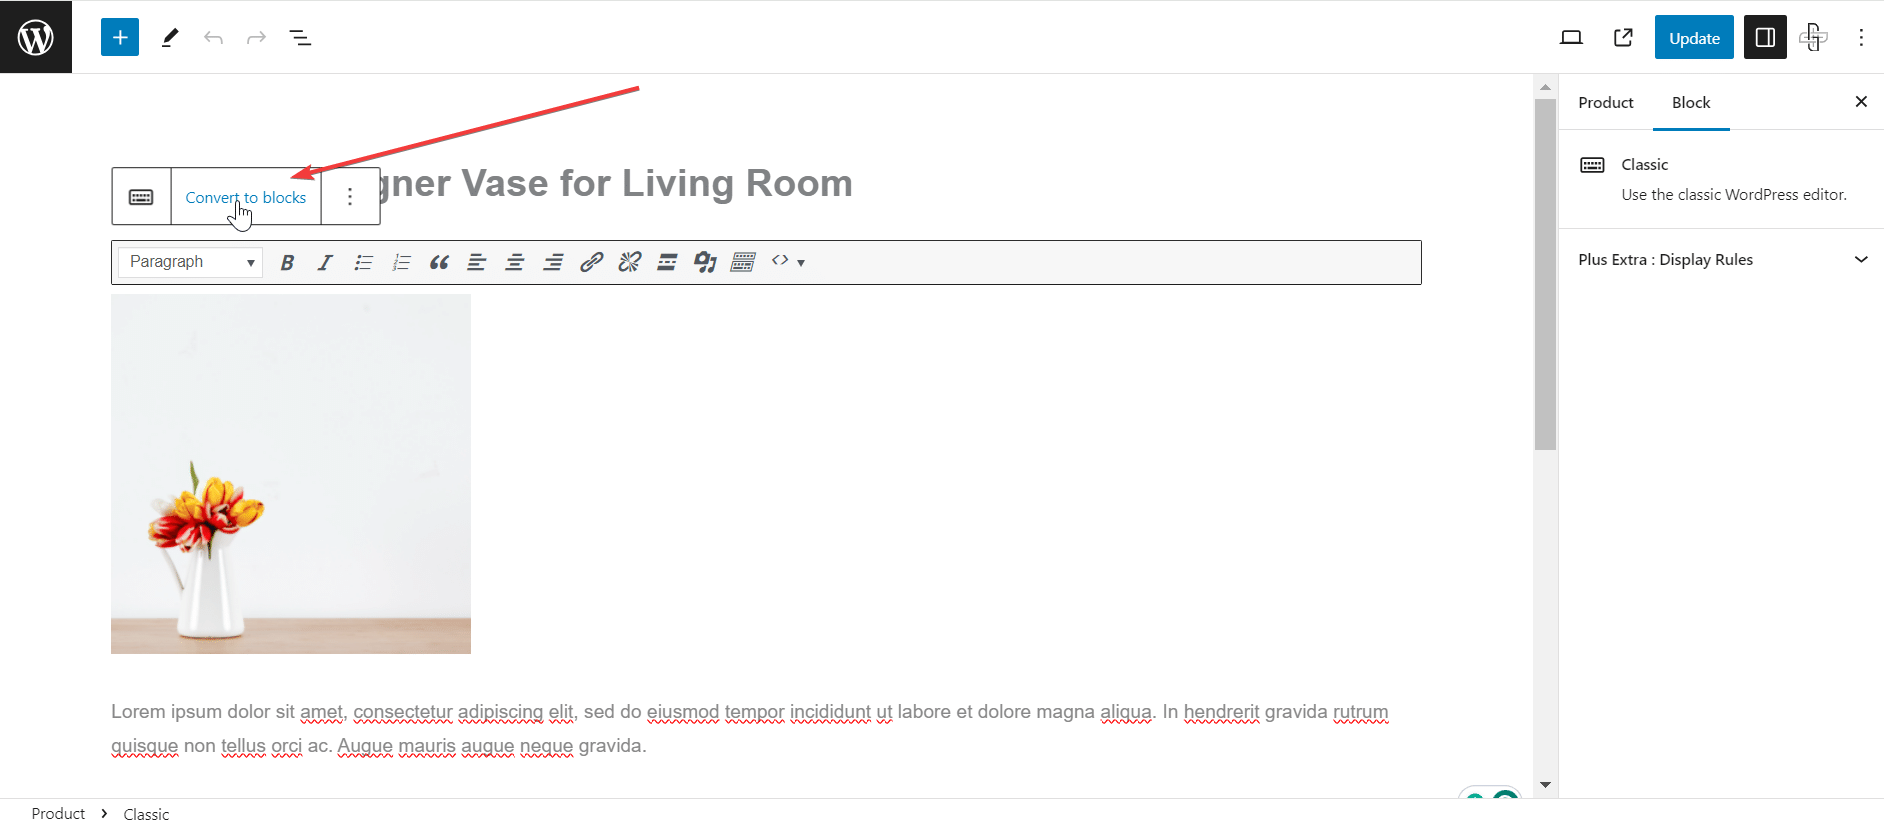
Save the product and review it on the front end. Because the product data layer is unchanged, the content stays intact, it is just editable as blocks now.
Wrapping Up
WooCommerce does not give you the Gutenberg editor for products out of the box, and its own block editor beta is going away. The code-snippet method here is the reliable way to get a true block editing experience for product descriptions, and the Code Snippets plugin keeps it safe and update-proof.
Once Gutenberg is running on your products, the next step is having blocks worth building with. That is where Nexter Blocks comes in.
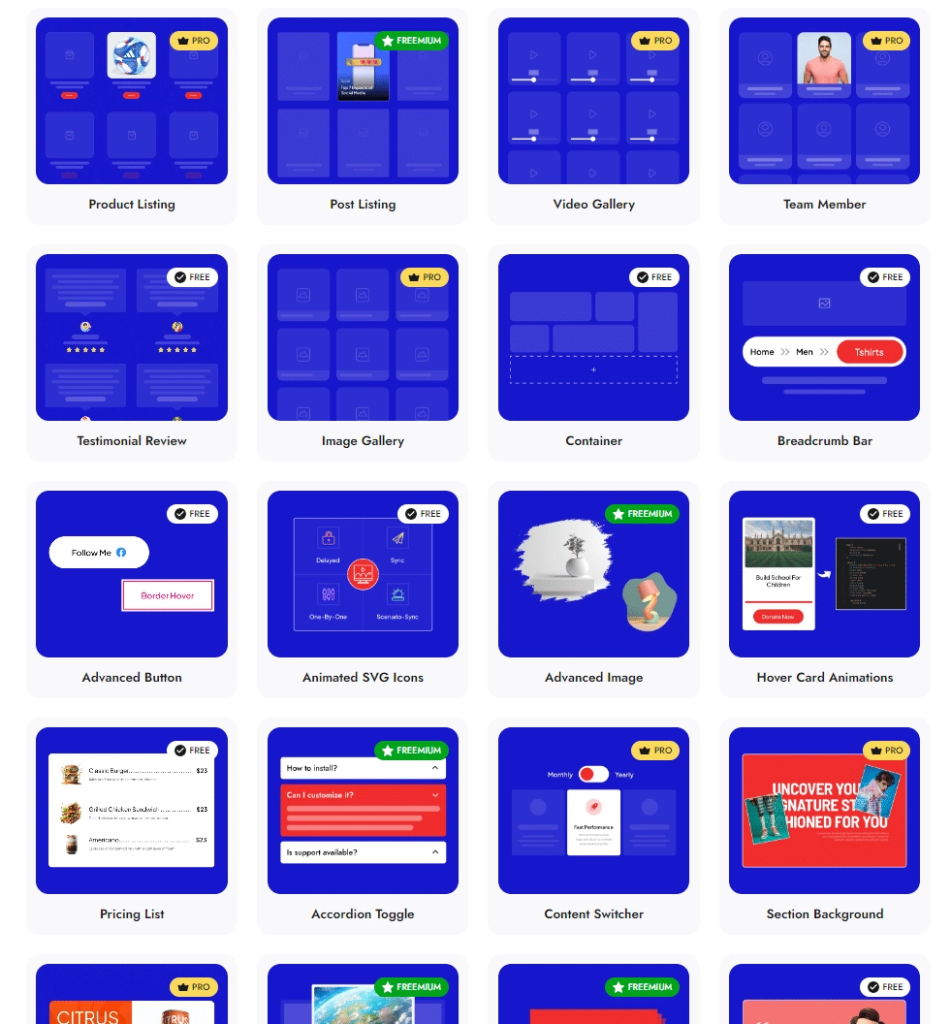
With a collection of 90+ Gutenberg blocks, you can design product layouts, add advanced design elements, build headers and navigation, and customize far beyond what the default blocks allow. Nexter Blocks is freemium, with a free version on WordPress.org.
Suggested Reading
- What Is Gutenberg: A Beginner’s Guide to the WordPress Block Editor
- WooCommerce vs WordPress: 6 Key Differences
- 5 Best WordPress Block Themes (Gutenberg)
- Gutenberg vs Elementor: Which Should You Use?
- What Is a WordPress Block Theme?
Stay updated with Helpful WordPress Tips, Insider Insights, and Exclusive Updates – Subscribe now to keep up with Everything Happening on WordPress!
FAQs on Adding Gutenberg Editor to WooCommerce
Is it safe to add the code to my theme functions file?
No, it is not recommended to add the code directly to your themes file to integrate WooCommerce and Gutenberg. This is because the code can be lost if you switch or update your theme, which will take you back to the classic WordPress editor.
Is it necessary to have coding knowledge to implement the Gutenberg editor in WooCommerce?
No, you don’t need to have coding knowledge to enable Gutenberg for WooCommerce. You can simply use the Code Snippets plugin to add a code to your theme files and start using Gutenberg for WooCommerce.
What is the difference between Gutenberg and the classic editor?
The classic WordPress editor is a simple text editor like Microsoft Word, offering basic formatting options while the Gutenberg editor is a drag-and-drop editor that offers a user-friendly interface to edit and design your websites.
How can I integrate the Gutenberg editor with WooCommerce product pages?
To integrate the Gutenberg editor with WooCommerce product pages, you’ll need to use a plugin like the Code Snippets. This plugin will allow you to add a code to your site to enable Gutenberg.
Can I use custom Gutenberg blocks for product descriptions in WooCommerce?
Yes, you can use custom Gutenberg blocks for product descriptions in WooCommerce. Gutenberg gives you full flexibility over the design and customizations of your product pages and descriptions, allowing you to create stunning e-commerce websites.
Can I revert to the classic editor after adding Gutenberg to WooCommerce if needed?
Yes, you can switch back to your classic editor in WooCommerce whenever needed.
