Do you want to quickly build stunning pages without starting from scratch? Nexter offers more than 1000 pre-designed templates and ready-to-use sections that you can easily import into your site. These templates cover a wide range of layouts and styles, helping you speed up your workflow and create professional-looking designs in just a few clicks.
Whether you’re building a homepage, landing page, blog layout, or individual sections like headers and footers, importing templates in Nexter saves time and ensures a consistent design across your website.
Let’s see how you can import templates in Nexter.
Import Entire Website Templates (Page Kits)
In Nexter, you’re not limited to importing individual templates or sections — you can also import a whole group of templates together to build a complete website in just a few clicks. This means you get pre-designed pages, layouts, and sections that work perfectly together, giving you a ready-made site structure instantly.
It’s a fast and efficient way to launch a new website, maintain design consistency, and save hours of manual work.
Required Setup
- You need to have the Nexter Blocks plugin installed and activated.
- You need to have the Nexter Extension plugin installed and activated.
Import Templates
Before importing a Page Kits template, make sure to back up your site, as it can install additional plugins and may overwrite some of your current settings.
1. Go to Nexter > Templates.
Note: If you are just starting with the Nexter Blocks, you might see an onboarding process; you can click on the close button at the top right to get to this screen.
2. On the next page, click on the Enable Templates button.
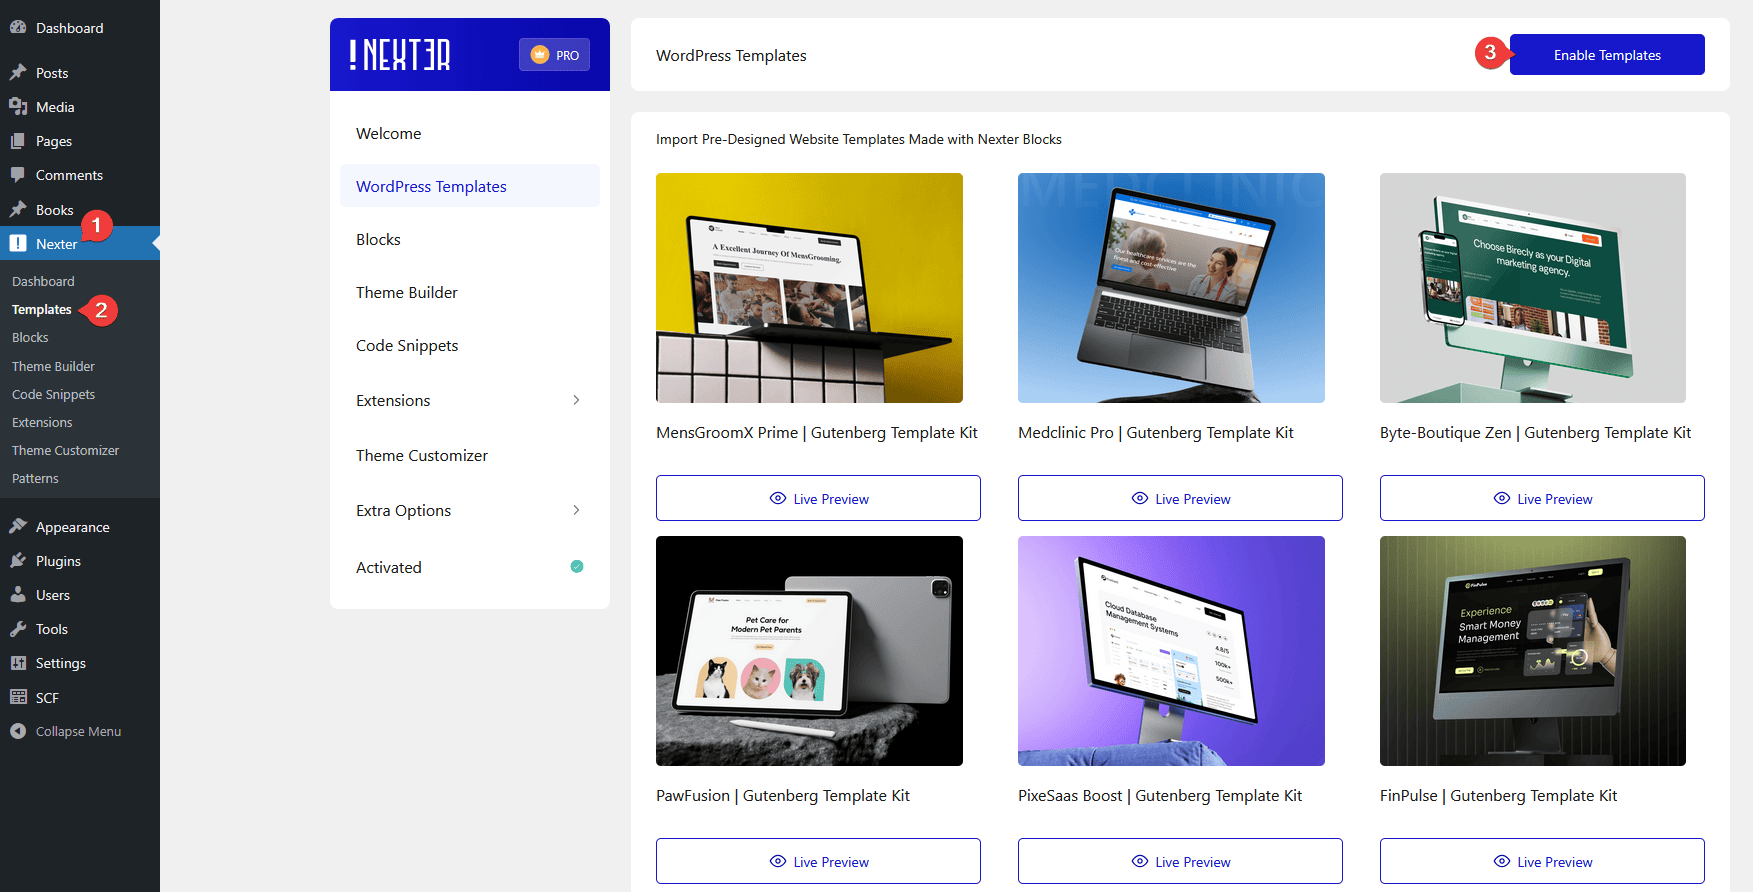
3. It will install and activate the WDesignKit plugin, which is required for the templates. Once done, click on the Open Templates button.
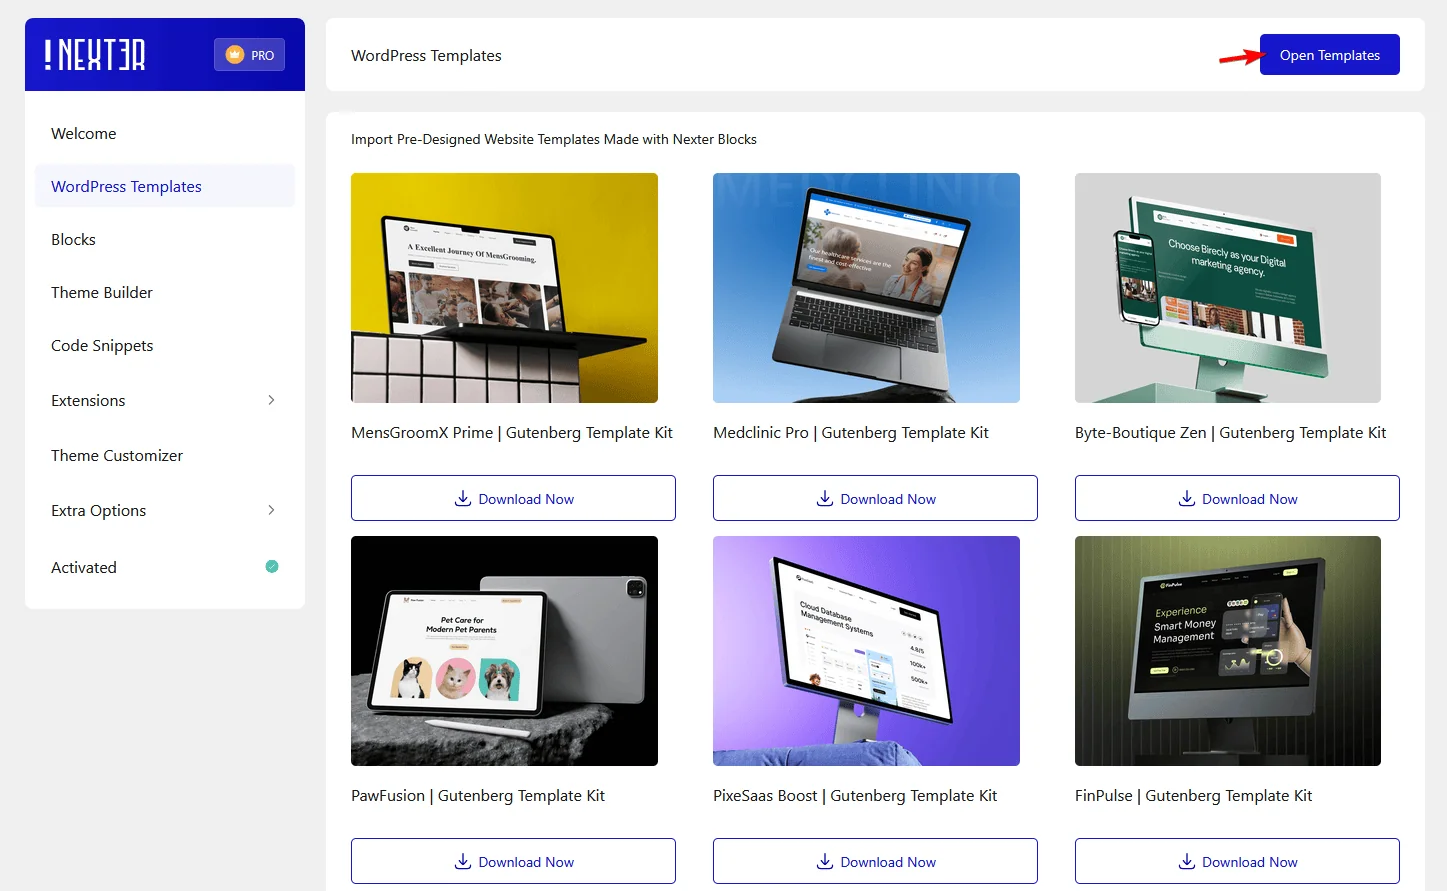
4. On the next page, you’ll see the templates (free and pro). From here, you can use the free templates.
Select the Free option from the filter to show the free templates only.
By default, it will show the Page Kits templates.
You can further filter the templates by plugins and tags.
Note: To use the pro templates, you need the WDesignKit Pro version.
5. Then click on the template you want to download.
6. On the next screen, you have to add a site name, you can also add a site tagline. Once done, click on the Next button.
7. Then you’ll see all the global typography and colors used in the particular template. You can change them as per your requirements. Once done, click on the Next button.
8. On the next screen, it is recommended to enable the Nexter Theme toggle to have the best design experience.
You can include some additional (optional) plugins for e-commerce, dynamic content, performance, security and SEO.
- eCommerce – Will install the WooCommerce plugin.
- Dynamic Content – Will install the Advanced Custom Fields plugin.
- Performance – Will install the WP Optimize plugin.
- Security – Will install the All-In-One Security (AIOS) plugin.
- Extras – Will install the Rank Math SEO plugin.
9. Then check the terms checkbox and click on the Next button.
10. Then select the Quick Demo Content in the next screen, and click on the Next button.
Now it will automatically install all the required plugins, create the pages with demo content, templates and assign them properly.
11. Once the process is done, click on the Preview Site button.
Now you’ll see the template applied to your site.
Enable All Nexter Blocks
Now you have to enable all the blocks from Nexter Blocks to make sure all the elements in the templates show properly.
To do that –
1. Go to Nexter > Blocks.
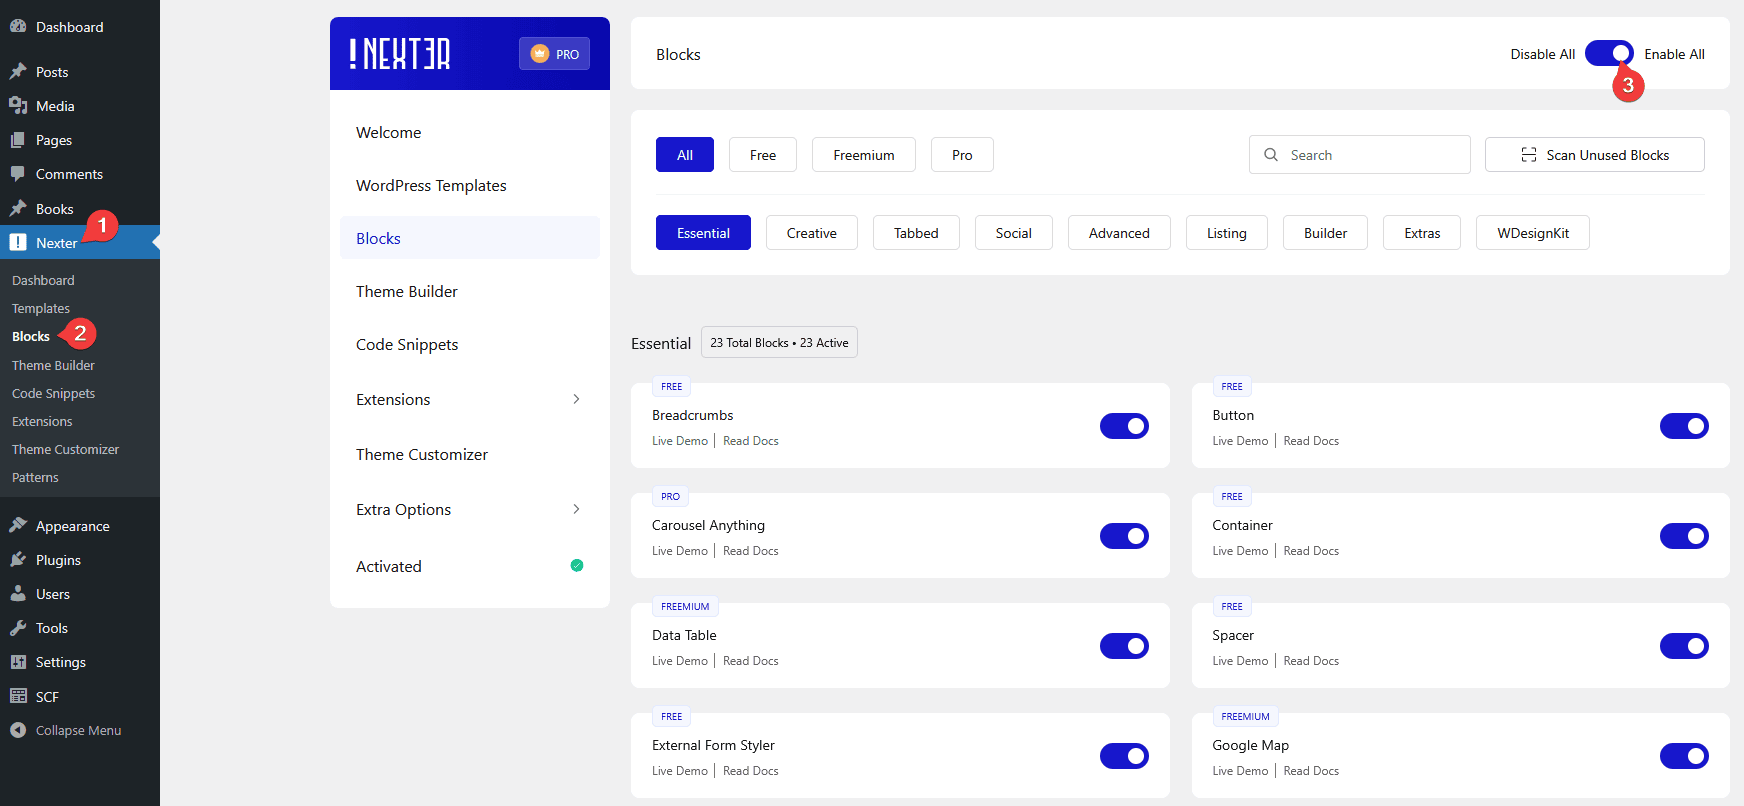
2. Then enable the Enable All toggle. This will enable all the blocks at once.
Edit Templates
Now, if you want to edit any of the imported templates, you can easily do that from their respective sections.
Pages
If you’ve imported a template as a page, it will be included in the Pages section.
To edit the template,
1. From the Dashboard, go to Pages.
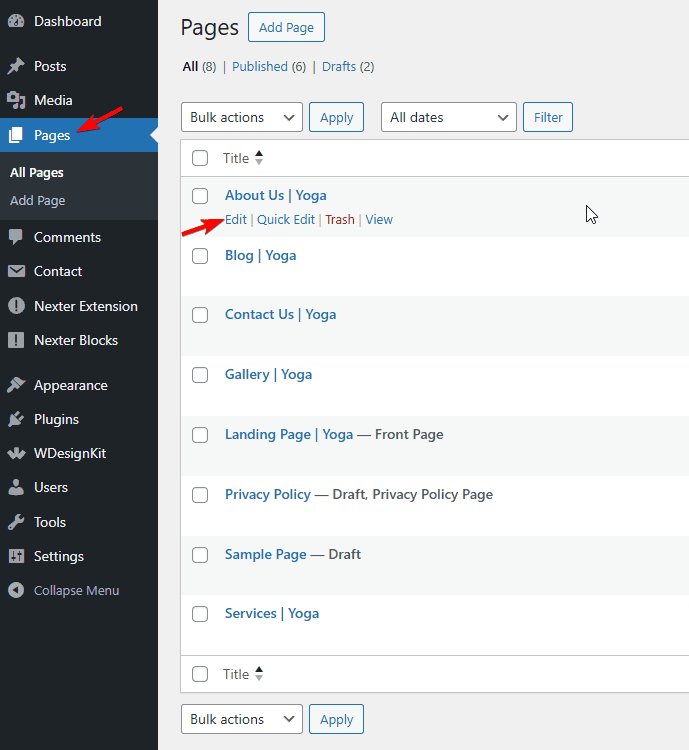
2. Locate your template and click on the Edit button.
It will open the WordPress editor where you can easily edit the template.
Theme Builder
All the templates imported as a Theme Builder it will be included in the Theme Builder section under Nexter Extension.
To edit the theme builder template –
1. From the Dashboard, go to Nexter >Theme Builder.
2. Then go to the template you want to edit and click on the Edit button.
It will open the WordPress editor where you can easily edit the template.
You can also click on the Edit button in the Conditions column to change the display condition of the template.
Import Individual Templates or Sections in Nexter Directly from the Editor
In Nexter, you don’t have to leave the WordPress editor to add ready-made designs. You can easily import individual templates or specific sections right inside the editor, making it simple to design your pages on the go. This gives you the flexibility to pick and insert only the parts you need — like a hero section, testimonial block, or contact form — without importing an entire template. It’s a quick and convenient way to speed up your workflow while keeping full control over your page design.
Required Setup
- You need to have the Nexter Blocks plugin installed and activated.
Note: Use the Nexter theme to have the best design experience.
Import Individual Template or Section
To import an individual template or section, open the page or post in the WordPress editor.
1. Click on the Import Templates button at the top.

2. It will open a pop-up; click on the Install WDesignKit button to install and activate the WDesignKit plugin, which is required for the templates.
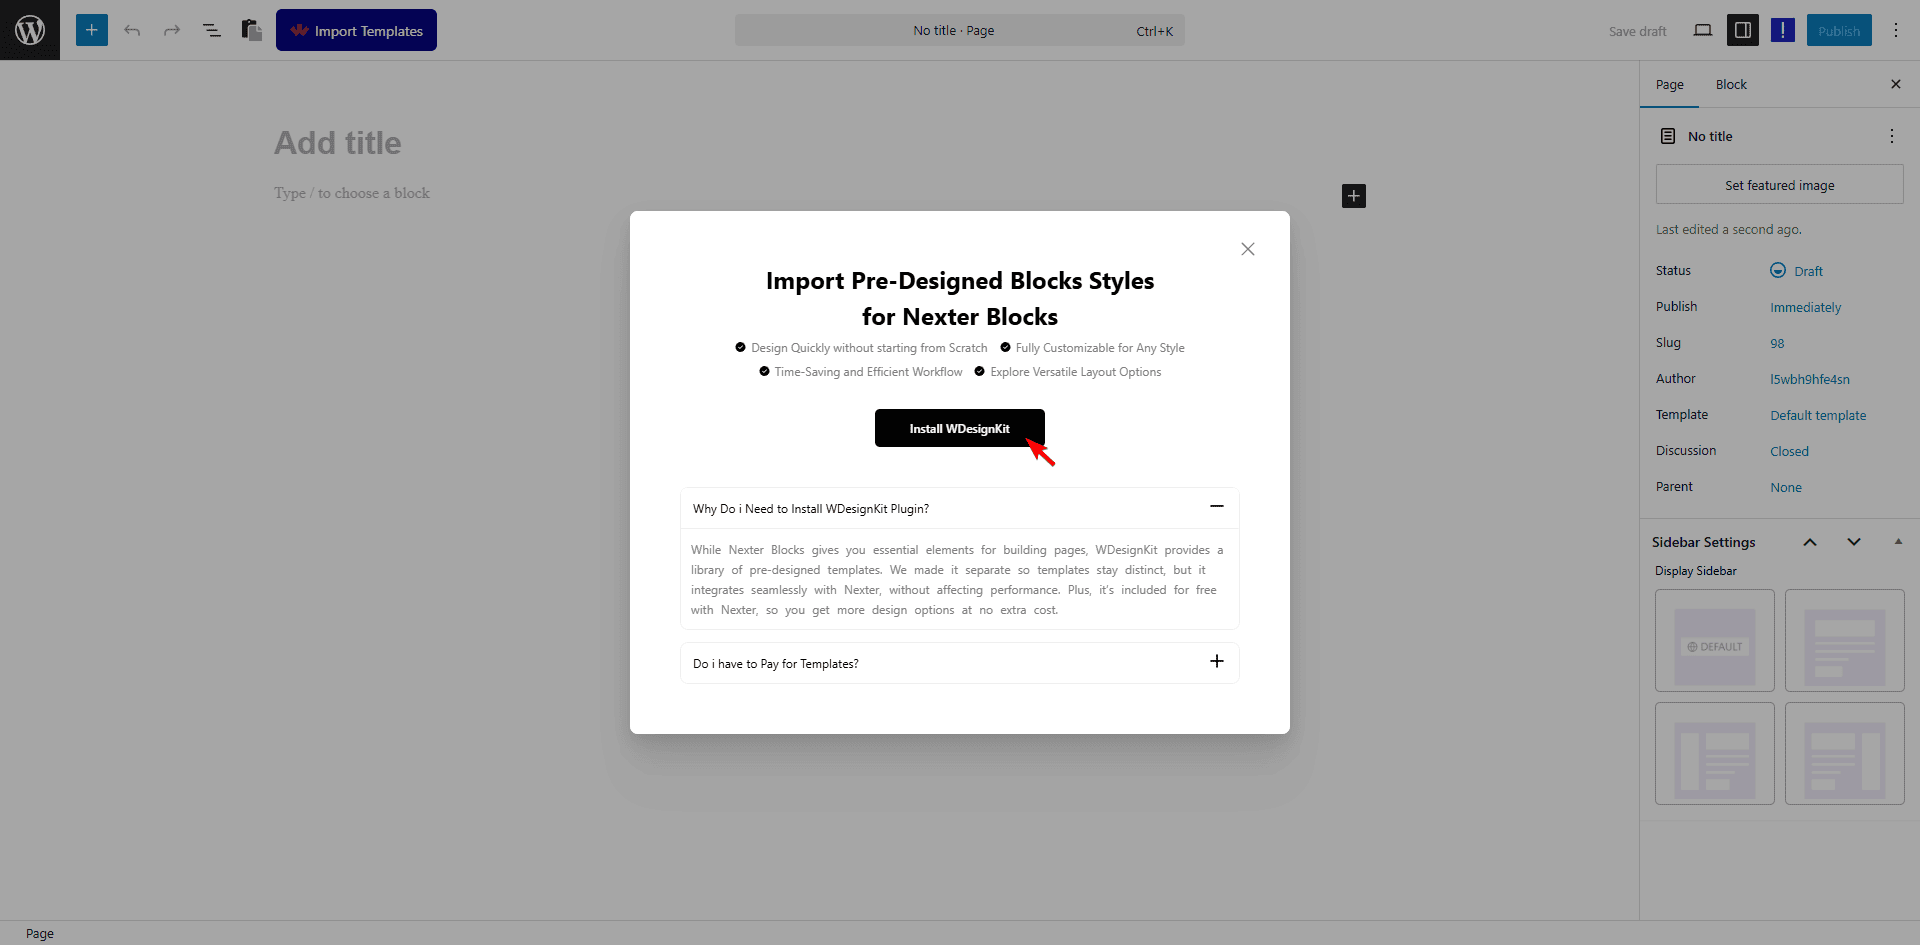
Note: If you already have the WDesignKit plugin installed and activated, it will directly open the template pop-up.
3. Then it will open the template pop-up, and you’ll see the templates (free and pro). From here, you can use the free templates. Select the Free option from the filter to show the free templates only.
Then you can filter templates further by template type (full page or section), plugins and tags.
4. Then click on the download icon in the template you want to download.
5. Now it will automatically install all the required plugins, will adjust the plugin, theme settings.
Once the process is done, you’ll see the template.
Make sure to click the Publish or Update button to save the changes.
Note: If any element in the template doesn’t show properly, make sure to enable all the blocks from Nexter Blocks.
You can edit the template directly from here as well.
Import Preset Designs for Specific Blocks in Nexter
In Nexter, you can go a step further by importing preset designs for individual blocks. This allows you to quickly style specific elements like buttons, headings, or info boxes without starting from scratch. By using these ready-made presets, you can speed up your workflow, maintain consistency across your site, and focus more on customizing the content instead of spending time on design from the ground up.
Required Setup
- You need to have the Nexter Blocks plugin installed and activated.
Import Block Presets
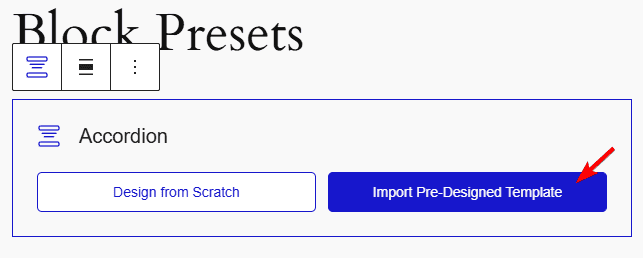
1. Add the block from Nexter Blocks (for instance, Accordion) on which you want to import the design preset in the WordPress editor.
2. Click on the Import Pre-Designed Template button.
2. It will open a pop-up; click on the Install WDesignKit button to install and activate the WDesignKit plugin, which is required for the presets.
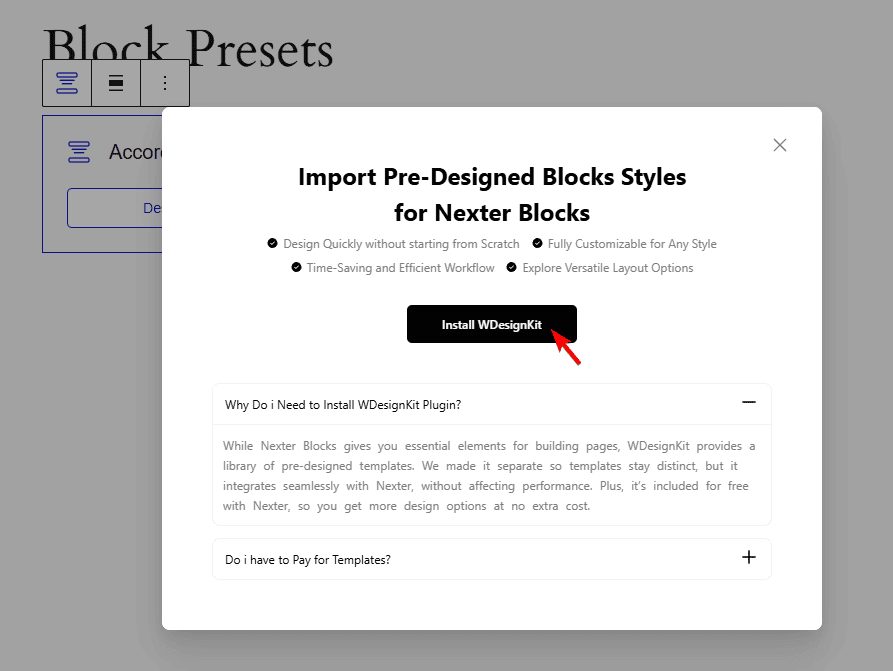
Note: If you already have the WDesignKit plugin installed and activated, it will directly open the presets pop-up.
3. Then it will open the presets pop-up, and you’ll see the presets (free and pro) of the specific block. From here, you can use the free templates. Select the Free option from the filter to show the free templates only.
It will automatically show the templates of the specific block, but you can select a different block as well from the filter section.
4. Then click on the download icon in the template you want to download.
The block with the preset design will be added to the page.


