


Creating a child theme for Nexter is a recommended approach when customising the Nexter WordPress theme.
A child theme allows you to make modifications to the theme’s appearance and functionality while preserving the original theme’s core files. In this way, you can customise Nexter to suit your specific needs without the risk of losing your changes during theme updates.
By following a few simple steps, you can create a Nexter child theme that inherits the styling and functionality of the parent theme.
When to Use a WordPress Child Theme?
When you want to make customisations to a theme, it is recommended to use a child theme. By utilising a child theme, you can safely modify templates, stylesheets, and functions, while still receiving updates for the parent theme.
This is especially important if you have made significant customisations or have added additional functionality to your website. A child theme ensures that your modifications remain intact, provides better maintainability, and offers a seamless upgrade experience for your WordPress site.
Pros and Cons of Using WordPress Child Theme
Pros:
- Keep parent theme updates: When you have a child theme, you can update the main theme without losing the changes you made to your website.
- Customise without worries: With a child theme, you can make changes to how your website looks and works without affecting the main theme. It gives you more freedom to personalise your site.
- Keep your code tidy: By using a child theme, you can keep your customisations separate, making it easier to manage and maintain your website’s code.
- Save time with reusability: If you create multiple websites, you can use the same child theme as a starting point, which saves time and effort.
Cons:
- Learning curve: Setting up and using a child theme requires some technical knowledge about WordPress themes.
- More complexity: Working with a child theme adds some complexity to your WordPress setup, which might require additional troubleshooting.
- Dependence on the main theme: Child themes rely on the main theme being compatible and supported. If the main theme becomes outdated or unsupported, it can cause problems for the child theme.
- Possible conflicts: Sometimes, conflicts can happen between the main theme and the child theme, especially if they have similar features or modifications.
Download Nexter Child Theme
You can download the Nexter Child Theme from the link below, but if you want to further customize the child theme, like changing the image, name etc. you can follow the steps mentioned below.
3 Ways to Create a Child Theme for Nexter
There are multiple ways to create a child theme for the Nexter theme. We’ll look into the following three ways –
- Using a plugin to create a child theme.
- Manually creating a child theme.
- Using an online tool to create a child theme.
You can use any one option you are comfortable with.
Note: Make sure you have the Nexter theme installed and activated.
How to Create WordPress Child Theme for Nexter Using a Plugin?
You can use the free Child Theme Configurator plugin to create a child theme for the Nexter theme.
Once you have installed and activated the plugin, go to Tools > Child Themes from the WordPress Dashboard.
On the next page, under the Parent/ Child tab, you have to select Nexter as the parent theme from the Select a Parent Theme dropdown.

Then click on the Analyze button, it will analyze whether the theme is suitable for a child theme or not. Nexter is a perfectly suitable theme, so you shouldn’t see any issues.
In the Name the new theme directory: field, add the child theme folder name. Then keep the default option in the Select where to save new styles: field, as to where the style will be saved.
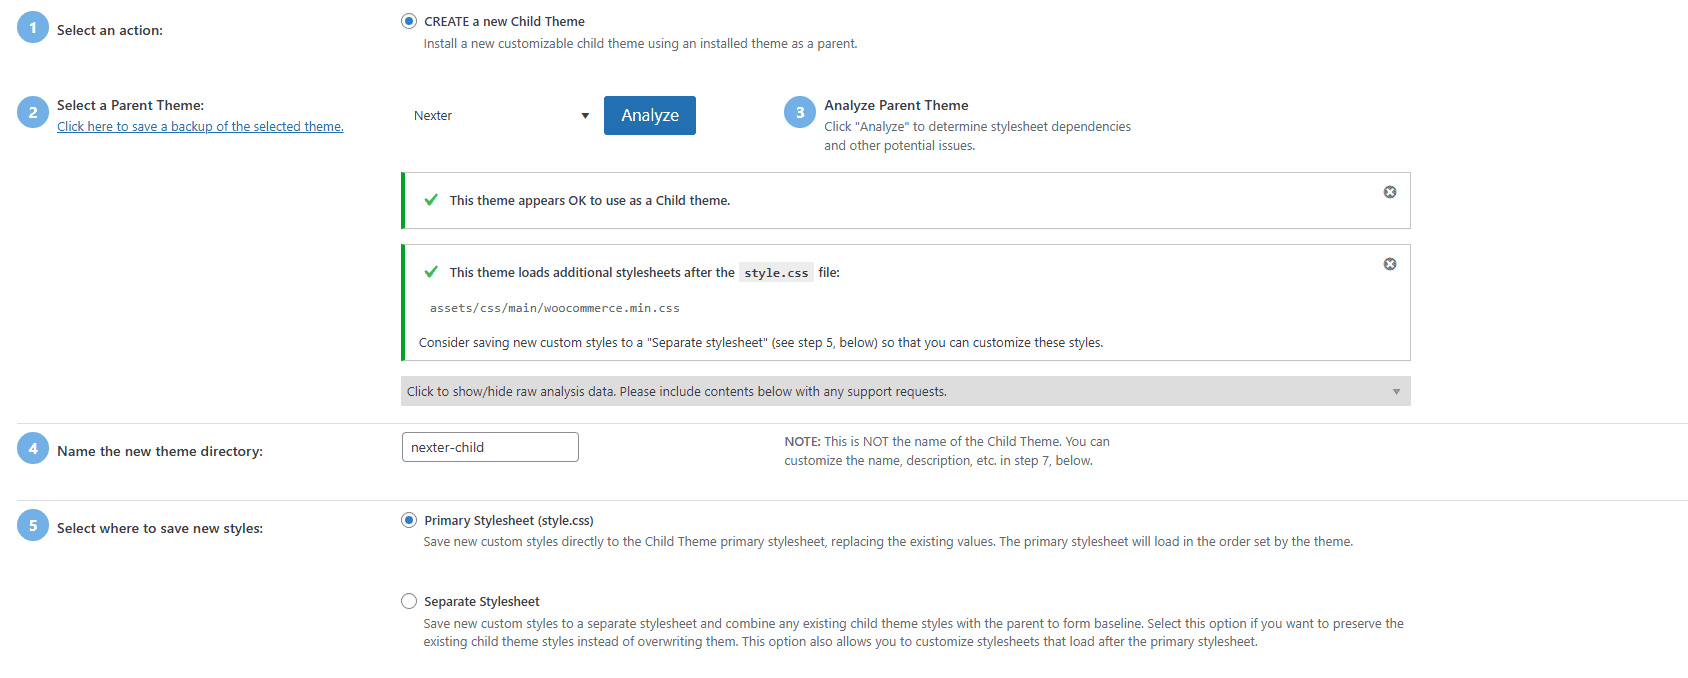
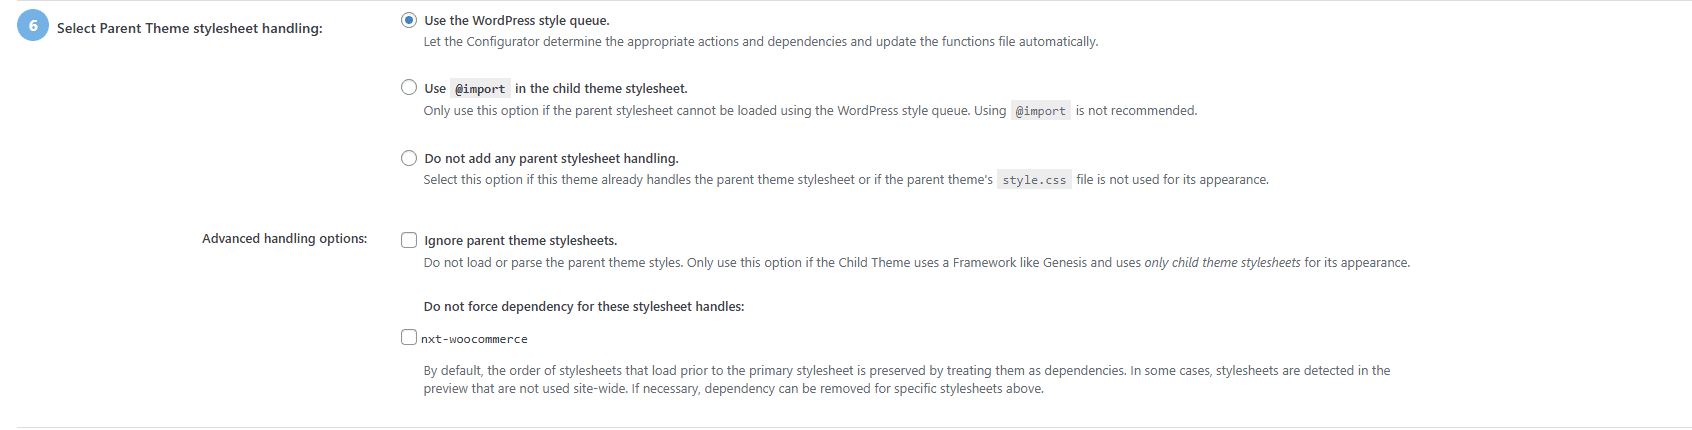
Then again, keep the default option selected in the Select Parent Theme stylesheet handling: field, as how the stylesheet will be accessed.
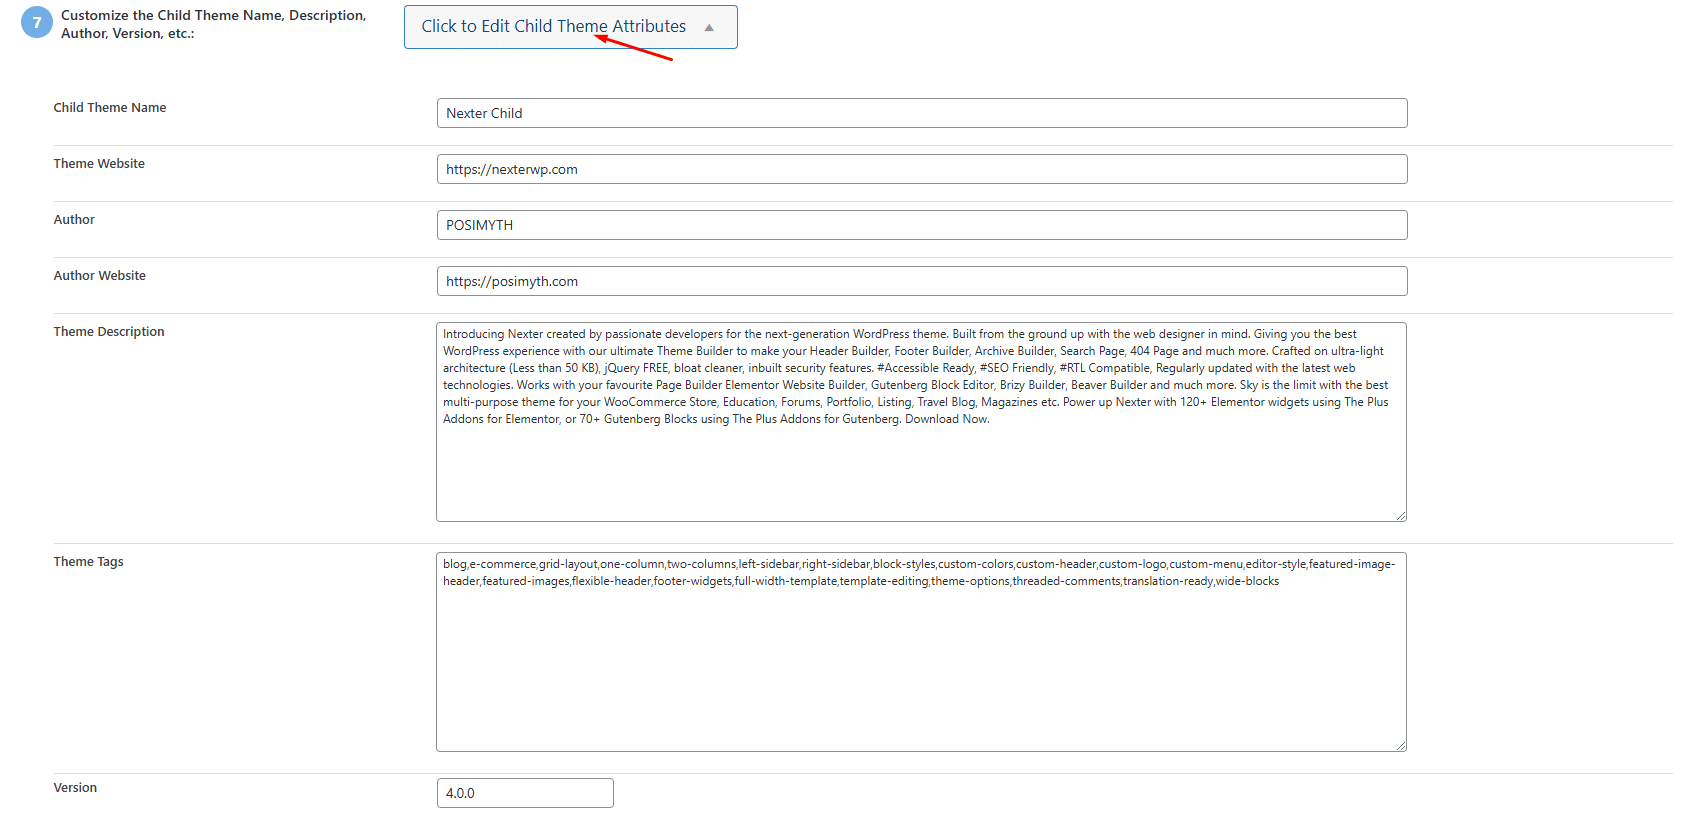
In the next field, you can configure the child theme details by clicking on the Click to Edit Child Theme Attributes button.
The fields will be filled by default, but you can edit the details as needed.
Now, if you want to copy the parent theme’s customizer settings, like menu, widgets, etc., to the child theme, then check the checkbox of point 8.
Once done, click on the Create New Child Theme button, and your Nexter child theme will be created.

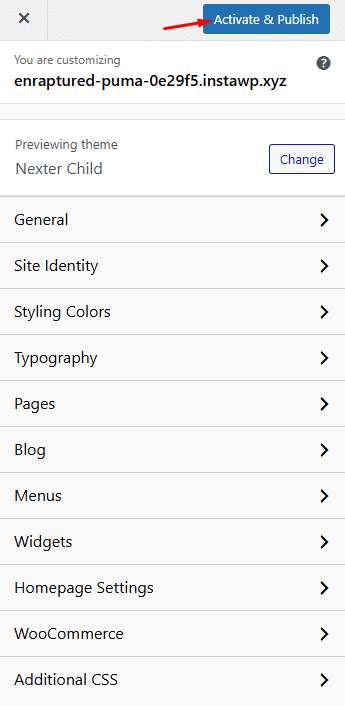
Then you’ll get a link at the top to preview the theme.

Preview the theme if everything looks good, click on the Activate & Publish button to apply the theme.
Once the Child Theme is created, you can safely remove the Child Theme Configurator plugin, your Theme will work perfectly fine.
How to Manually Create a Child Theme of Nexter?
If you are comfortable in editing WordPress theme files, you might consider creating a child theme manually instead of using any 3rd party plugins.
To create a child theme primarily, you need two files –
- style.css
- functions.php
These two files are good enough to create a basic child theme.
Step 1: Create a child theme folder
First, you need to create a folder for the child theme to do so go to the /wp-content/themes/ in your WordPress installation folder, then create a folder like nexter-child for the child theme.
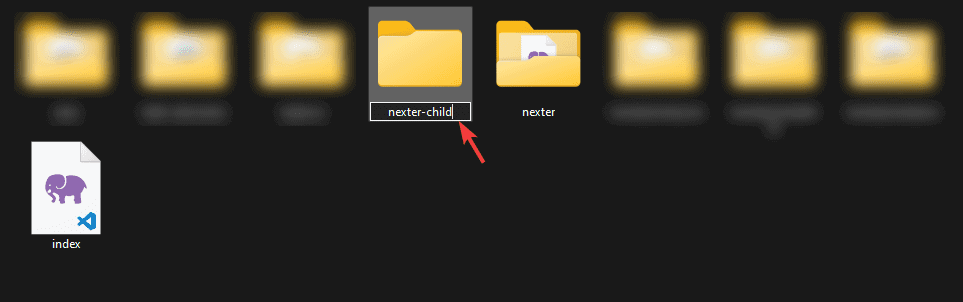
Step 2: Create a stylesheet file
Open the folder and create a style.css file in it. Open the style.css file in a code editor and add the following code.
/*
Theme Name: Nexter Child Theme
Theme URI: https://nexterwp.com
Description: This is a Child Theme for Nexter
Author: POSIMYTH
Author URI: https://posimyth.com
Template: nexter
Version: 1.0.0
License: GNU General Public License v2 or later
License URI: http://www.gnu.org/licenses/gpl-2.0.html
Tags: responsive-layout, two-column, responsive-layout
Text Domain: nexter-child-theme
*/
This will create a child theme for the Nexter theme, you can modify the information as per your need then save the file.
Note: Don’t change the Template info as it links the child theme with the Nexter theme as the parent theme.
Step 3: Import style from parent theme
Now create a functions.php file in the folder, and open the file in a code editor and add the following code.
add_action( 'wp_enqueue_scripts', 'enqueue_parent_styles' );
function enqueue_parent_styles() {
   wp_enqueue_style( 'parent-style', get_template_directory_uri().'/style.css' );
}
This code will import the stylesheet from the Nexter parent theme, so the child theme can inherit all the style from the parent theme.
Note: You can use @import to call the stylesheet, but we don’t recommend that because it will increase the load time.
Step 4: Activate the child theme
Now you should have a basic and working child theme for the Nexter theme. If you are comfortable in coding you can add more files to add custom features to the theme.
To activate the theme from the Dashboard, go to Appearance > Themes.
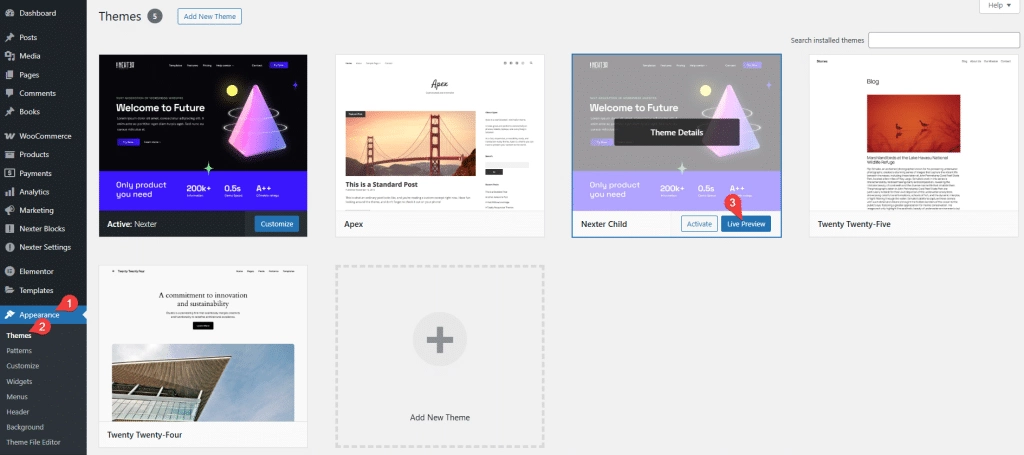
You should be able to see your child theme, hover over the theme and click on the Live Preview button to preview the theme once you are happy, click on the Activate & Publish button to activate the theme.
How to Create a WordPress Child Theme using an Online Tool? (No Plugin Required) ?
Alternatively, you can use online tools such as the Child Theme Generator to create a child theme for the Nexter theme.
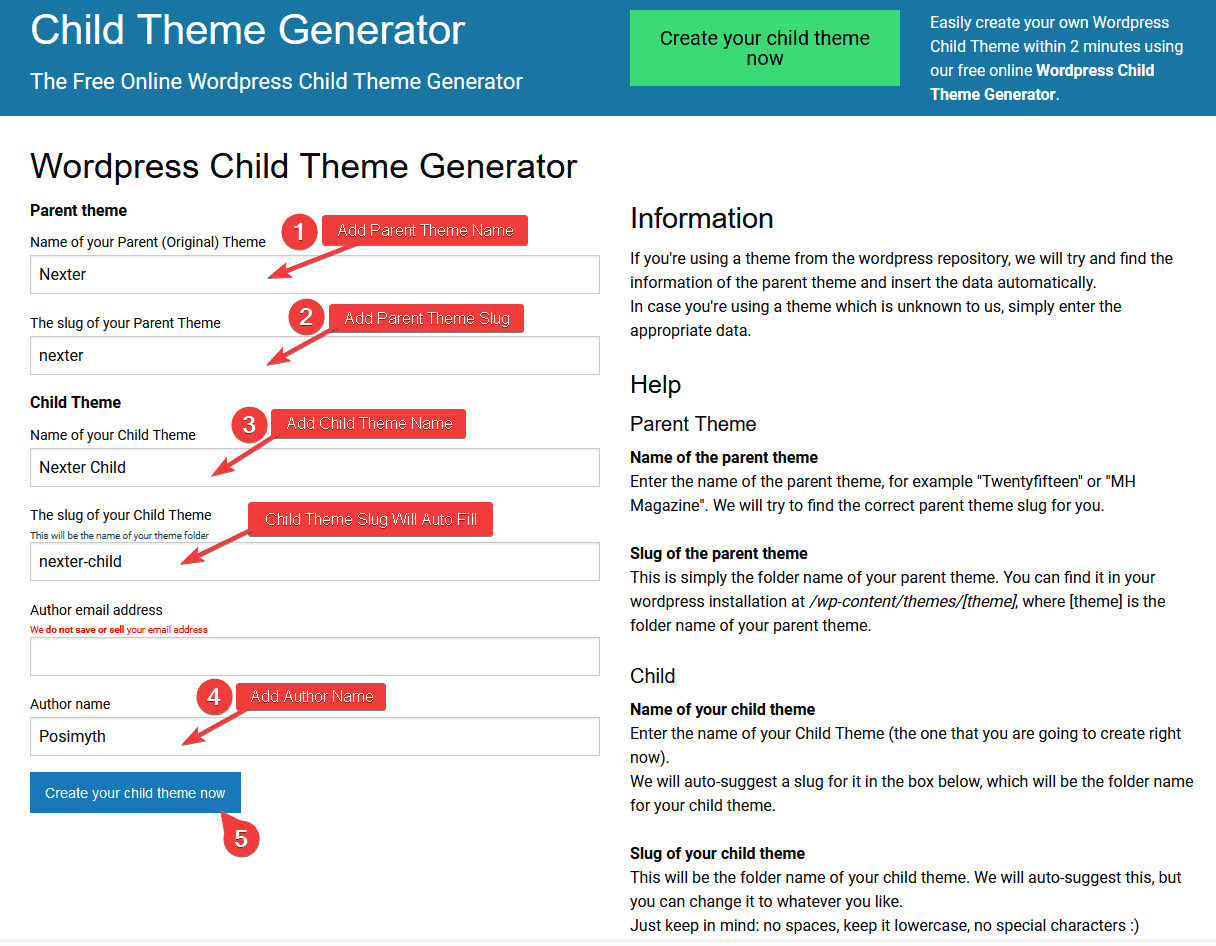
On the page, add Nexter in the Name of your Parent (Original) Theme field and nexter in The slug of your Parent Theme field.
In the Child Theme section, add your child theme name in the Name of your Child Theme field and The slug of your Child Theme field will be filled automatically, which will be the folder name of your child theme.
Optionally you can add your email address in the Author email address field.
Then in the Author name field, you have to add the author name of the child theme.
Once done, click on the Create your child theme now button to generate the child theme.
On the next page, you can download the theme.
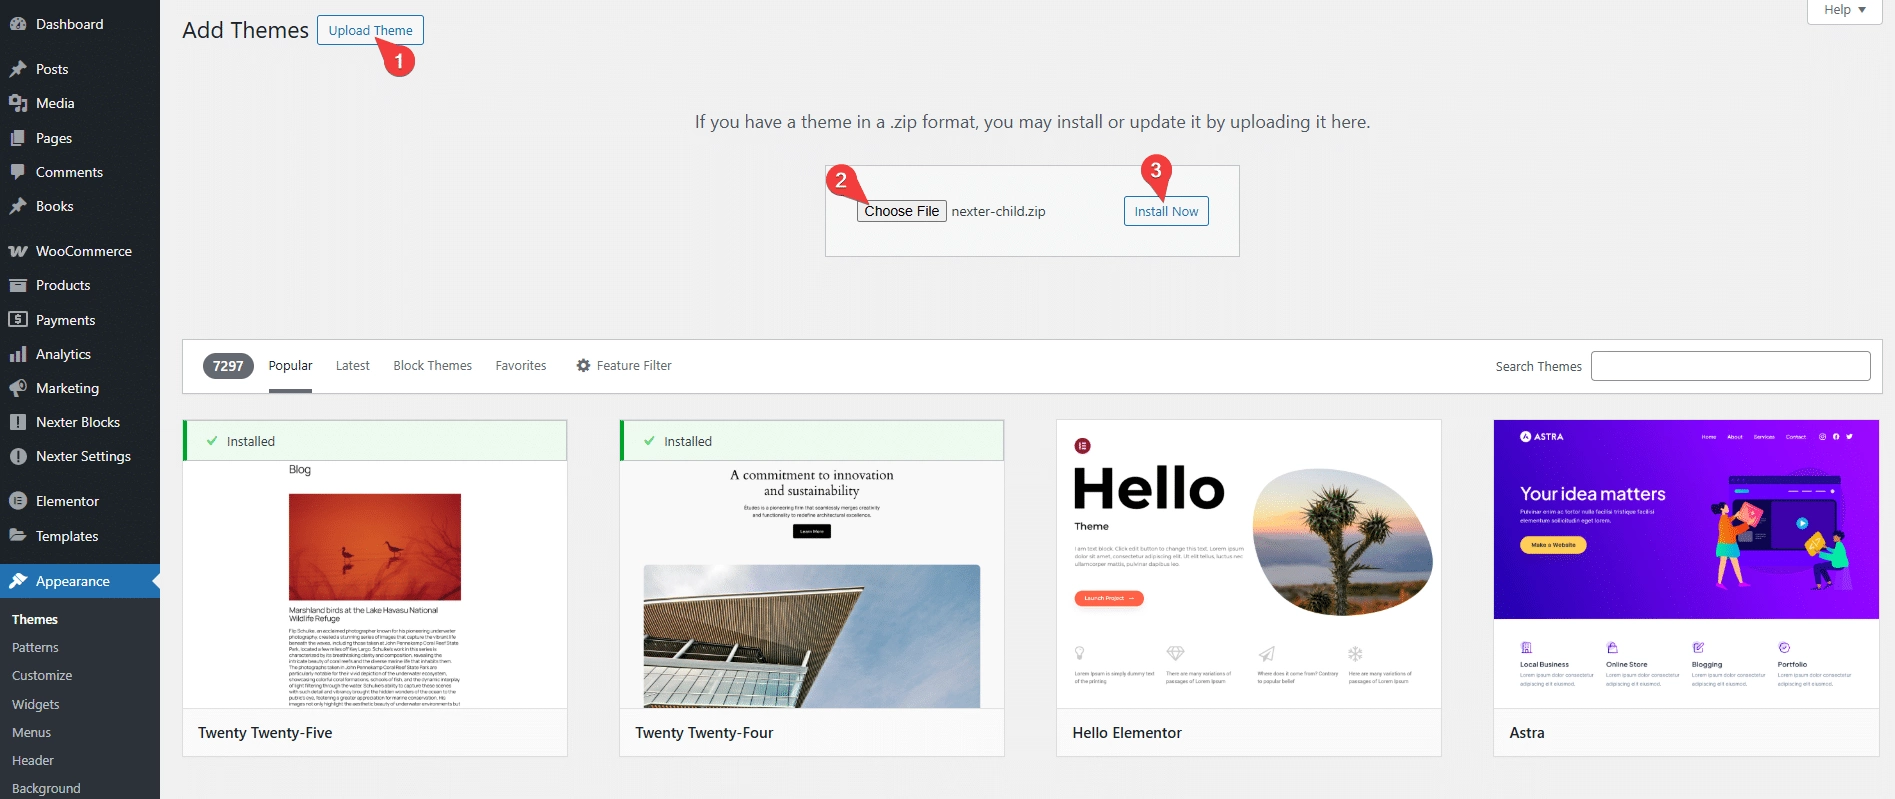
Now to use the theme from the Dashboard, go to Appearance > Themes and click on Add New Theme.
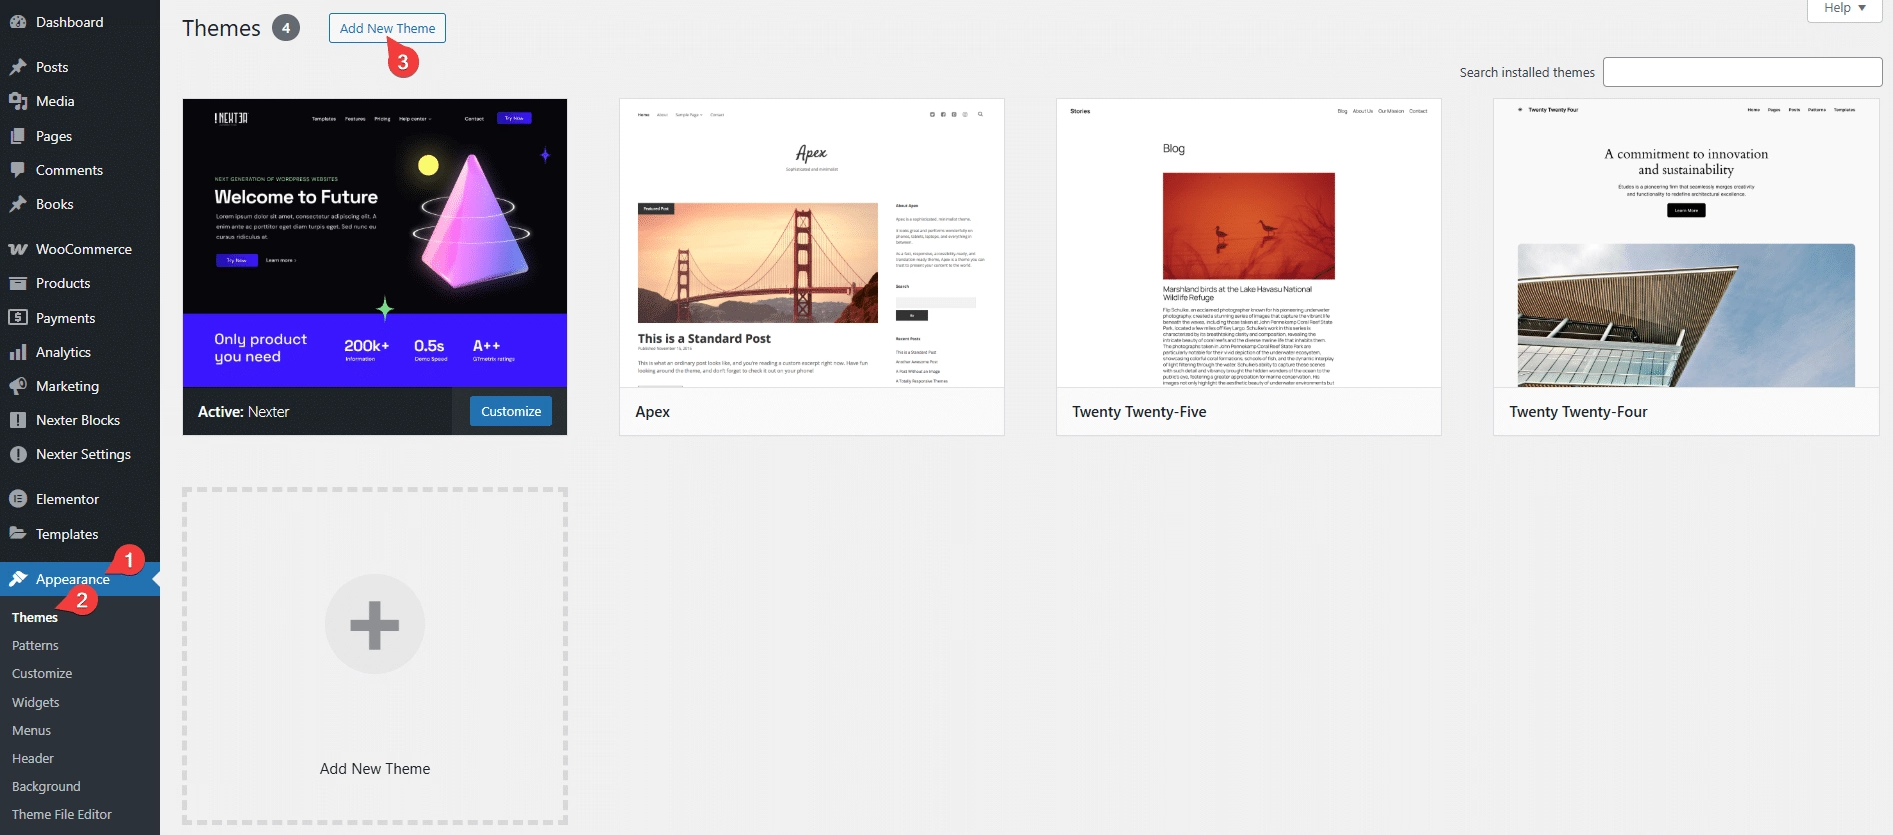
On the next page, click on the Upload Theme button, then click on Choose File and select the downloaded zip folder and click on Install Now button.
If everything is done properly your theme will be installed, then you can preview and activate the theme.