








Looking for a seamless transition from your design to a WordPress website? The Design Tool block from Nexter Blocks ensures pixel-perfect conversion by integrating a grid guide right into the WordPress editor
Required Setup
- Make sure the default WordPress Block editor is active.
- You need to have the Nexter Blocks plugin installed and activated.
- This is a premium block you need the PRO version of Nexter Blocks.
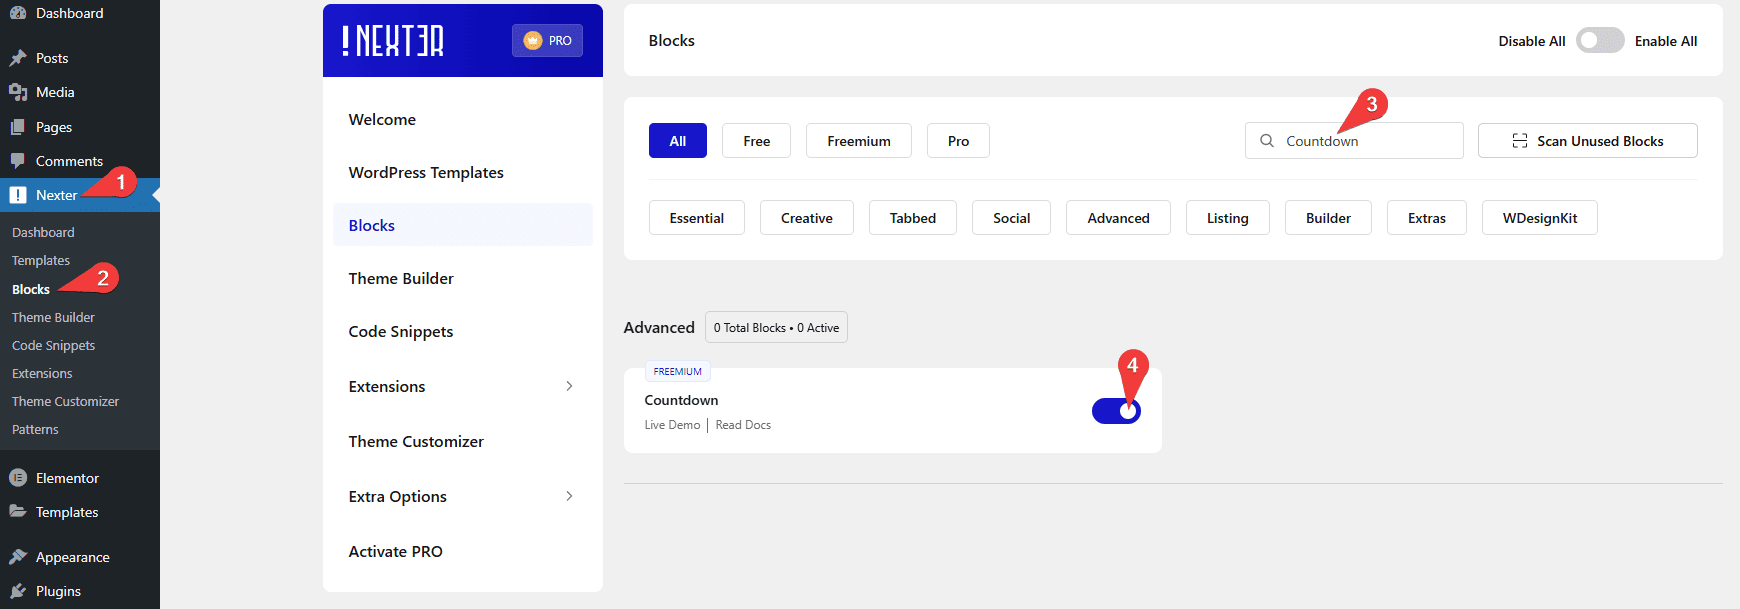
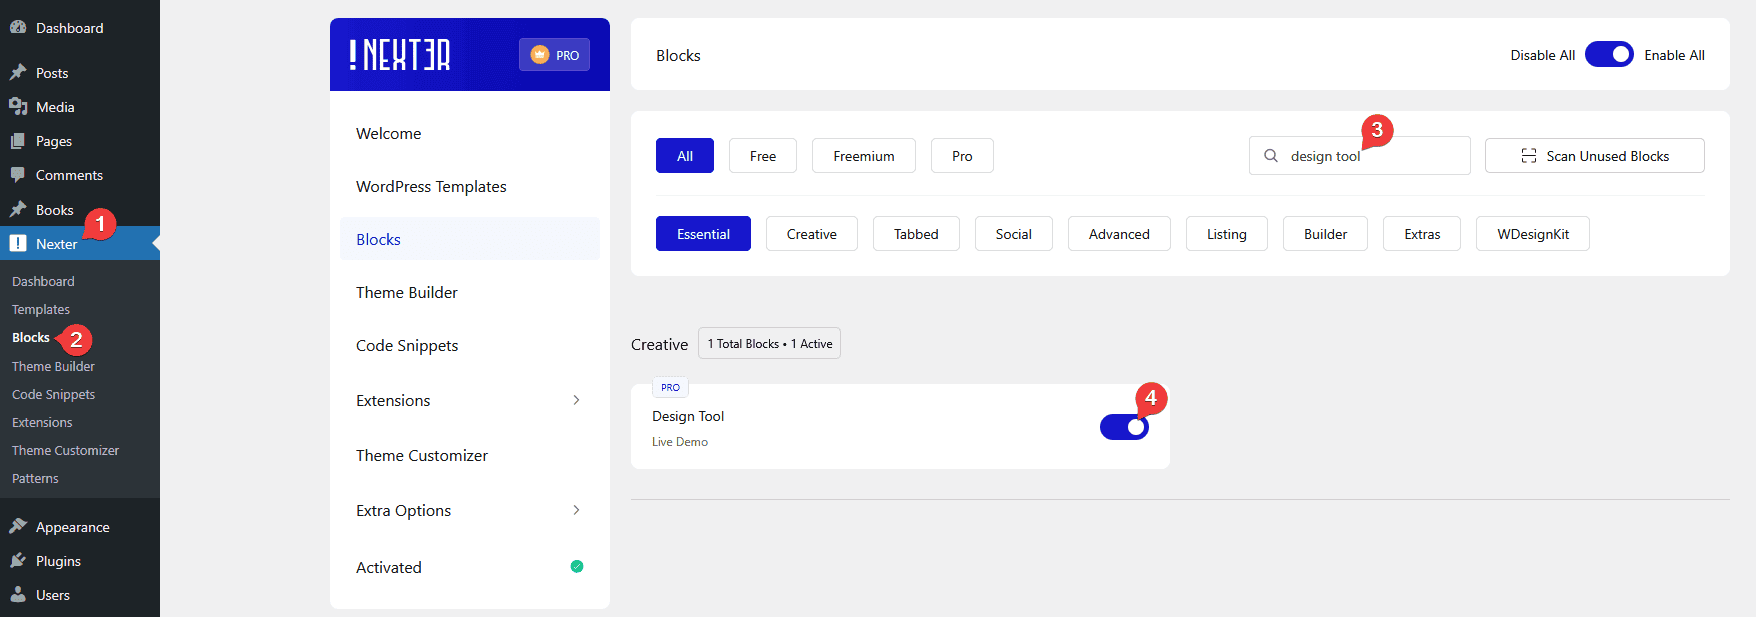
- Make sure the Design Tool block is activated, to verify this visit Nexter → Blocks → and Search for Design Tool and activate.
Go to
- Nexter → Blocks
- Search the block nameandturn on the toggle.
Key Features
- Add grid guide – You can easily add a grid guide inside the WordPress editor and front end for a pixel-perfect conversion.
- Custom grid – You can easily customize the grid layout as per your requirements.
How to Use the Design Tool Block in WordPress?
To use the Design Tool block, add the block to the page then follow the steps –
1. In the Design Tool Option dropdown, you’ll have Grid System selected.
2. Then, from the Grid System section, you’ll have to select the grid system. Here you’ll find two options –
- Default – This will add a grid layout guide based on the Bootstrap grid layout units.
- Custom – With this option, you can add a custom grid layout guide.
Let’s select Custom here.
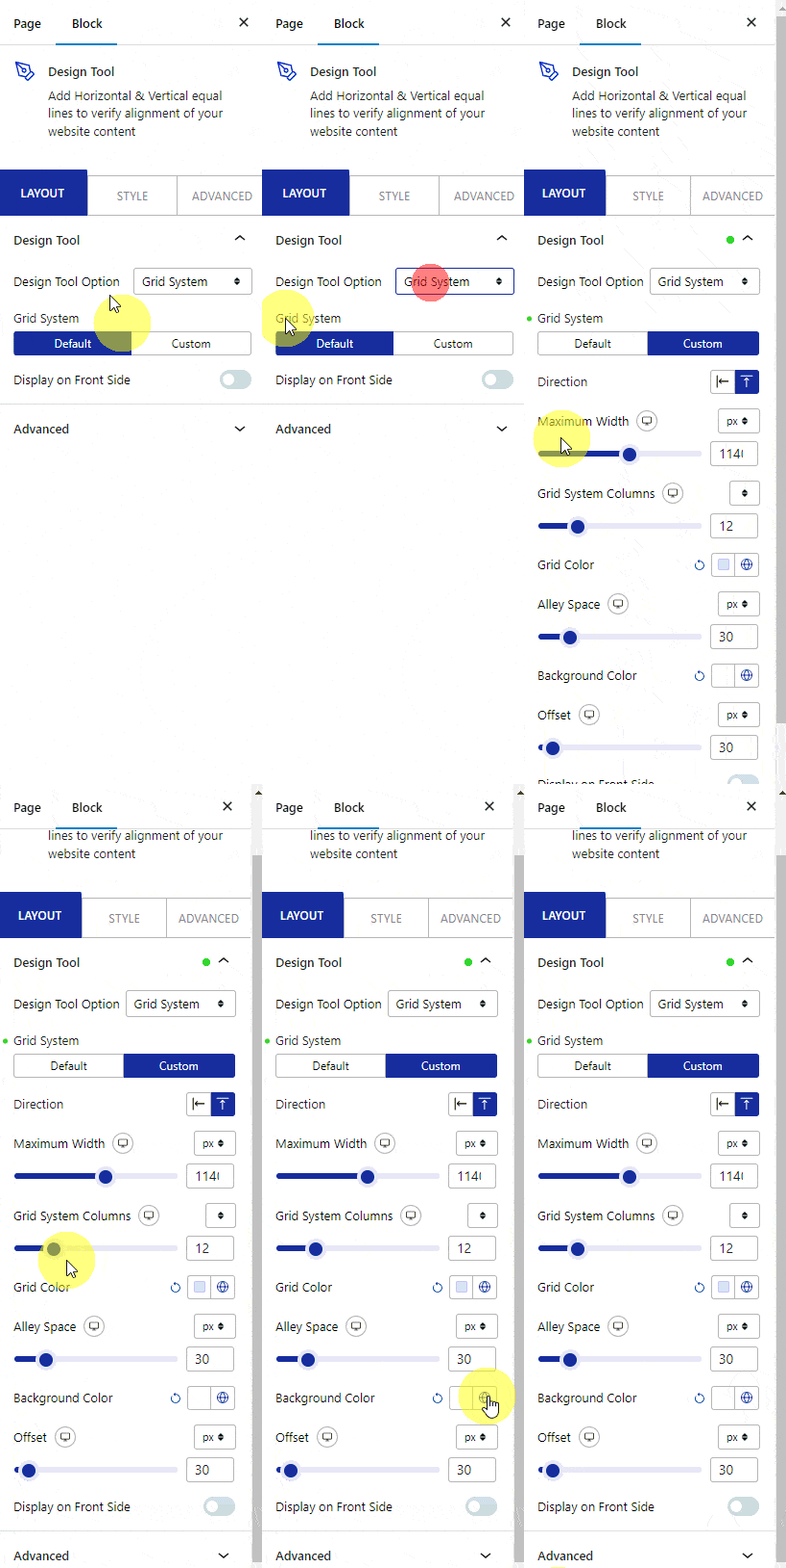
Then from the Direction section, you have to select the grid layout direction. Here you’ll see two options –
- Left to Right – To add a vertical grid layout guide.
- Top to Bottom – To add a horizontal grid layout guide.
In the Maximum Width field, you can set a custom width for the grid layout.
Then, in the Grid System Columns field, you can set the number of columns for different devices.
You can change the grid column’s color from the Grid Color section.
From the Alley Space section, you can customize the gap between the columns.
Then, from the Background Color section, you can change the column gap background color.
From the Offset field, you can add an offset value to the grid layout guide from left and right.
Then by enabling the Display on Front Side toggle, you can show the grid guide in the front end as well.
