Planning to host Google fonts locally on your site? You’re at the right place!
You’ve thrown everything possible at your website to make sure that it looks stunning, but one aspect can be all too easily overlooked – the fonts.
It’s so often the case that people play safe by using the standard system or default fonts, known as web-safe fonts.
There are some good reasons for this, but today, over 50 million websites are using Google Fonts, which may be fantastic, but what many people haven’t realized is that there’s a problem.
Google Fonts are stored remotely, and this could be a problem.
In this article, we’ll look at why, walk you through three ways to host your Google fonts locally and help get your website looking sharper, responding more quickly, and being more reliable.
Let’s dive in!
What are Google Fonts?
For many years, web developers didn’t really think much about fonts. Standard fonts tended to be used simply because they were already installed on pretty much every computer anyway, and so they just worked.
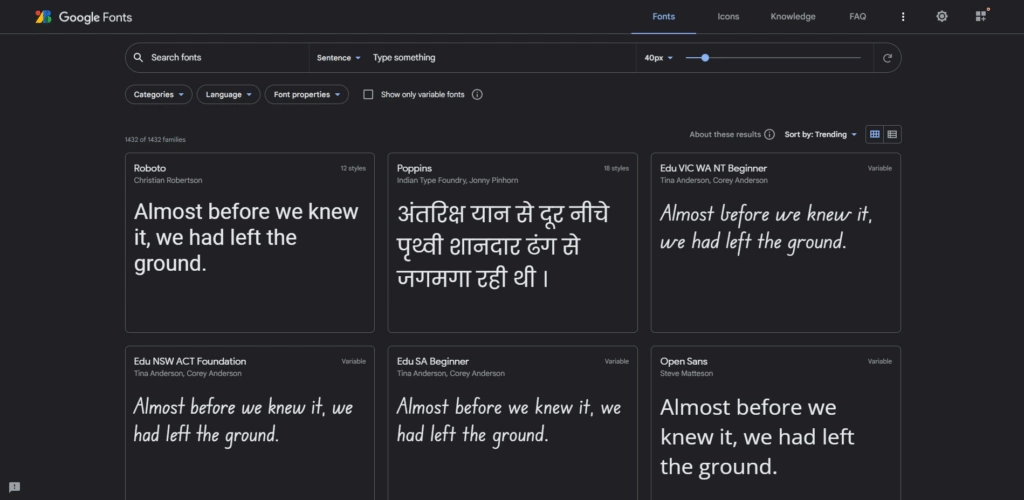
But the problem was that these became limited. Dull. Repetitive. People wanted to stand out a little, be more creative, and show a little more individuality. This is when web fonts became a thing.
A web font is a font style that may not necessarily be installed on the user’s computer but is downloaded as simply another asset bundled up with the web page.
So, with a little CSS, the web page would download the web font and display the text exactly how the developer wanted. In the same way, images, audio, videos, and JavaScript files would be downloaded from the server and then used by the browser to recreate the web page as it should appear.
But where would all these web fonts come from? At first, they were often normal fonts installed on a computer that was converted into a format that could be rendered in a web page, often sourced from multiple places and hosted locally by the developer.
And then, in 2010, Google stepped into the picture. They had an idea that would help to make the web both faster and prettier, using new ideas such as cross-site caching and clever compression techniques.
Suddenly, it was easy to make your website look beautiful, individual, and readable using any of the (now) 915 different fonts stored on Google’s servers.
So, with a few lines of CSS, it is now possible to choose one of many fonts available in the Google Fonts collection and set it as part of the style sheet used by your website to render text.
There’s no need to download anything, upload anything, or do much more than add a line or two of CSS to your style sheet. For example, the following code sets the font style of the text on your web page to Oswald.
<link rel="stylesheet" href="https://fonts.googleapis.com/css?family=Oswald">
<style>
body {
  font-family: "Oswald", sans-serif'
}
</style>
When the page is loaded, the browser follows the link to Google’s server, finds the right font, downloads it, and then uses it to render the text on the page. All in less time than it takes for a squirrel to sneeze.
Is It Legal To Self Host Google Fonts?
Yes, it is absolutely 100% legal, and in fact, Google specifically mentions (and even recommends) to use self hosted Google fonts.
On the official Google Fonts FAQ page, they say that “Google Fonts are open source and are without cost.”
They mention that “…you can use them commercially, and even include them within a product that is sold commercially. Usage and redistribution conditions are specified in the license. The most common license is the SIL Open Font License.”
This license is defined as providing “…a free, libre and open source license specifically designed for fonts and related software.”
So you are perfectly legal, safe, and in good company as a growing number of major brands are now self-hosting their fonts, and for several very good reasons (which we’ll cover in this article).
Isn’t Google CDN faster than loading them locally from my server?
Almost certainly, no. Because when you use a CDN – any CDN – no matter how good their tech is, you can’t bypass the fact that additional HTTP requests will have to be made by the server, with extra DNS Lookups, SSL handshakes, and so forth. All of which will add time to your page’s loading speed.
With a good web hosting service running HTTP/2 you will outperform the CDN every time when fetching fonts from within your own site’s directory.
Why Should I Be Using Google Fonts (If I’m Not Already)
Firstly, if you’re still using web-safe fonts, then the chances are your website is screaming out with all the individuality and uniqueness of vanilla. It may be a good move to consider one of the 650,000 different web-safe fonts currently available. That’s surely enough to make your site have the extra spark.
But of all the web-safe fonts available, Google ranks the most popular, and with good reason. They’re high quality, delivered fast, and have a proven record of reliability.
Don’t forget that while a font may look quirky and original, it must also be readable – and that goes for any size screen or device.
When you add the necessary CSS to pull one of the Google fonts over to your site, you’re very quickly and easily making a change that’s quick and reliable.
This begs the question, why are so many people starting to get a little twitchy about Google fonts and even starting to host them locally? What’s the problem?
What’s The Problem With Using Google Fonts (Using Google’s CDN)
So if Google developed its web-safe font system so that it would be faster, why would this be a problem for developers today?
The answer is that it’s not. Not always, at least. But that it can be, and that’s something you need to be aware of.
There are a few issues to be aware of. It’s surprising how rarely you see people talking about these despite their importance. Essentially, the problem with using Google Fonts is fourfold:
HTTP Requests
Whenever you call a Google font through your CSS, your browser sends an HTTP request to the link in the code. But that’s not where the font is.
That’s just the location where the information can be found that allows Google to determine the best local server to use and the most appropriate compression format to use. Then a second HTTP request is made for the actual font, and then it’s delivered to the browser.
If you only use one single font style, then this does mean adding two HTTP requests, but often you’ll want to include multiple sizes, bold, italic, and perhaps more than one font.
This can very quickly increase the number of HTTP requests being sent, and this can negatively affect your site’s performance and ranking.
You will find people dismissing this, but that’s because they confuse the size of the data with the number of requests. Yes, the font files are small and won’t really slow things down at all. But it’s the sheer number of HTTP requests to watch out for.
Third-Party Reliance
You have to rely on a third party. Yes, it’s Google, and therefore, fairly reliable, but even the biggest services have sometimes gone down.
And if your website is requesting the fonts from Google’s delivery network, and there’s a problem with that network, your website will potentially come off looking dreadful and poorly designed – or even hard to read.
Relying on a third party is never ideal, no matter how big the company is.
Tracking & Data Protection Compliance
You’re certainly already aware of the need to be completely transparent about using visitors’ data, including cookies and tracking. But did you know that if you integrate Google Fonts into your site’s code, triggering HTTP requests to Google’s CDN (Content Delivery Network), potentially identifiable data is sent to Google and used by them?
This is so they can determine the best server to deliver the fonts from and the correct compression format. But technically, this means that you need to alert your visitor to this use of their data and ask for their permission. But how do you do that without loading the fonts first?
It’s a bizarre legal knot, where you need to load your website using standard, non-Google fonts first, ask your visitors for permission to let Google access their data, and only then load up the correct CSS style sheet and display the text using the preferred font.
Really, you’re much better off avoiding that potential legal liability and bypassing the third party again.
Better Control Over Caching
One of the ways in which Google’s technology is designed to speed up the loading of web fonts is through caching. Essentially, what happens is that if a user visits site A, which happens to use a specific Google Font, then that font information is cached on the user’s computer for 24 hours. If the user happens to either visit the same site again within that 24 hours or even visit another website that happens to use the same font, then the cached version is served, helping to reduce loading times.
The problem, of course, is that if a website change is made in that period, it may not be picked up, and by using a third-party cache, it is possible that site errors might creep in, suggesting things like a missing cache validator.
By hosting fonts on your server, your site cannot rely on Google’s 24-hour cache. You can choose your cache terms, expiry times, and working methods. You’re not then linking your cache with other websites and relying on Google’s cache for your own site’s appearance.
Why Should I Consider Hosting My Google Fonts Locally?
By cutting out the third party or middleman, you gain full control over your site’s assets and help reduce the number of HTTP requests quite significantly. You also improve your site’s reliability, as well as ensure data protection compliance.
It only takes a few minutes to switch from sourcing your fonts through Google’s CDN to hosting them yourself and benefitting from many gains. And if you don’t currently use Google Fonts but are considering it, this is an ideal solution, too.
But you don’t even have to take our word that hosting Google Fonts locally is a better idea. Google themselves recommends it and even has resources that show how to benefit from self-hosting web fonts.
What Are The Best Ways Of Using Google Fonts Locally?
There are three main ways to switch from using Google’s CDN to hosting local Google fonts on your server.
We’ll tackle them according to our recommendation, starting with the absolute best option, then our second choice, and lastly, an option you can consider if, for some reason, neither of the first two work for you.
We’ll include all instructions and links so you can get started with any of these methods right away.
Choose A Compliant Theme
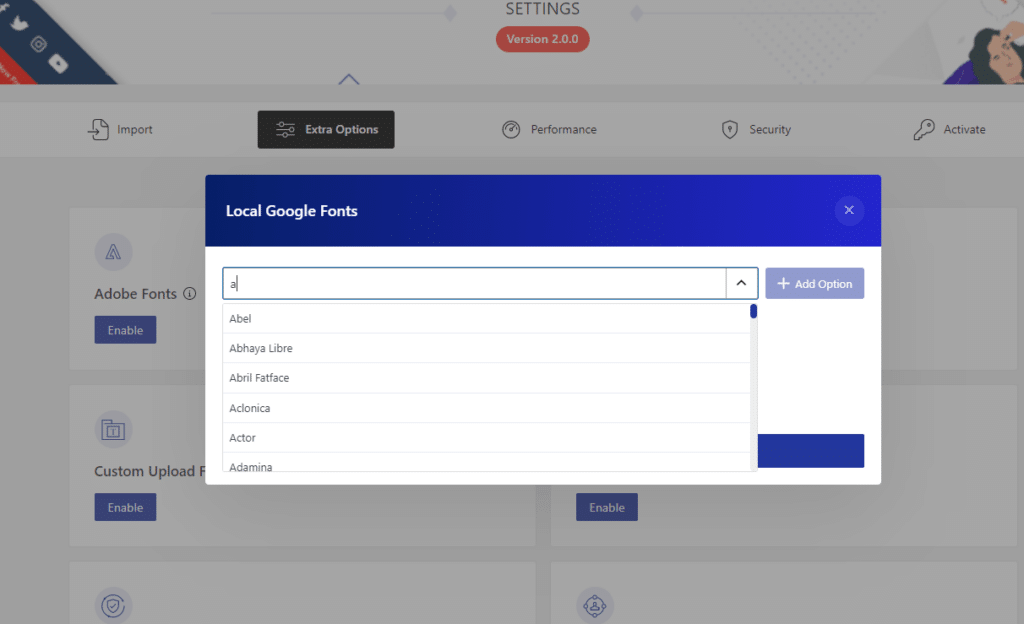
This option is definitely our favorite and comes with a raft of other huge benefits that will really help improve your site’s security and performance. There are a number of WordPress themes available that offer the option to have Google Fonts embedded by default, and this means that you don’t have to think about configuring your fonts or content delivery network at all once the theme is set up.
One of the very best examples of this is the Nexter WP theme. An annual license for this costs just $14 per month, with a lifetime license starting at $109. You can see a full list of the pricing plans available here.

If you do have this theme installed, then you need to head over to the theme customization page and go to the General section. You’ll then find an option labeled ‘Performance’, and here you can see the option to ‘Load Google Fonts Locally’. It’s also a good idea to switch the ‘Preload Local Fonts’ option on as well and then click the ‘Flush Local Font Files’ button so that you’re starting fresh.
The theme will now automatically fetch all of the Google Fonts used across your WP site, save them in a folder within your WP installation, and load them up from the local location instead.
Use A Plugin
While this method is not 100% effective, it gets pretty close. Close enough to make a difference to your website, certainly, cutting down on HTTP requests and your site’s reliance on third-party networks and caches. It will also help to make sure your website is GDPR compliant.
The plugin we recommend is OMGF – Optimize My Google Fonts, and it is free to use. Go to your WordPress dashboard, head to Plugins > Add New, and search for OMFG. Install it and activate it, and you’re ready to start.
Once you have the plugin, you’ll see a new item on the left-hand side of your dashboard called ‘Optimize Google Fonts’. Selecting this opens a whole page of settings – but don’t worry, we’ll walk you through exactly what we advise doing.
On the Settings Page, you’ll notice four tabs – ‘Optimize Fonts’, ‘Detection Settings’, ‘Advanced Settings’, and ‘Help’.
We’ll begin with the first tap, ‘Optimize Fonts’. At the top, you’ll see a radio toggle for two alternatives – Manual and Automatic. If you choose ‘Manual’, then further down the page, you’ll see the URL that will be scanned.
It’s important to be aware that the plugin will only scan this one URL – and if that’s a specific page, then only that page will be scanned. This means that any fonts on that page will be optimized, but if different fonts are used on other pages, they won’t be optimized.
For this reason, and to keep it simple, we recommend switching the option at the top from ‘Manual’ to ‘Automatic’. By doing this, the plugin will scan the whole site and attempt to optimize all fonts used across all pages. After selecting this option, click the ‘Save’ button at the bottom.
Next, head to the second tab, ‘Detection Settings’. Here, you’ll find a ‘Google Fonts Processing’ menu. Make sure this is set to ‘Replace’. The alternative option is ‘Remove’, which will cause any detected Google Font to be removed and replaced with a standard system font.
This isn’t what we want, so by choosing ‘Replace’, we are telling the plugin to replace Google CDN-hosted fonts with locally hosted Google Fonts. If you have had to change this option, remember to click the ‘Save’ button at the bottom.
In the third tab, ‘Advanced Settings’, there’s really no need to change anything. This confirms the folder for storing the Google fonts on your local server. By default, this folder will be called ‘omfg’ and stored in your ‘uploads’ folder.
And that’s all there is to it. Next time your page is loaded, the plugin will attempt to replace all Google fonts stored on third-party servers with copies of those fonts now stored on your server. This should immediately help to reduce HTTP requests and page loading times, as well as overcome caching errors and the dreaded data protection compliance. Easy!
The only thing we will say on this is that we’ve found the plugin doesn’t always cache every font. The reason we suspect this is that the plugin isn’t updated too regularly, and while it works fine, some newer fonts may not be in its database.
For now, this isn’t a major problem, but fairly soon, we suspect we’ll see an increasing number of sites using Variable Fonts. These fonts include all variants such as bold weights, italics, and such so that if you use a font and occasionally use a bold word or italic font, you don’t end up making six HTTP requests, two each for three different fonts. Instead, you make two requests for a single compressed font file, which includes the standard font, bold, extra bold, italic, and so on.
This should help to decrease HTTP requests and load times in the future, but we suspect that unless the OMGF plugin gets an update, it may miss these variant font files, unfortunately.
Download And Host Fonts Using CSS (More Complicated)
One of the best methods is to download Google fonts locally, as it doesn’t restrict you to any specific theme, requires no plugins, and gives you 100% control over everything. It is a little more involved but shouldn’t be too difficult for anyone to follow through, and unless you are planning to rebrand your website and make complete changes to fonts regularly, it’s probably something you only ever need to do once.
First, you’ll need to identify the fonts you’re already using. If you’re not currently using any or want to change them, then head over to the Google Fonts website here and search for the fonts you do want.
The next step will vary depending on the font you have chosen. We must convert the font from its current format to a web-safe format without relying on third parties.
There are two possible online tools, and we’d recommend trying them in this order. If the first one doesn’t work for you, then try the second. The first one is easier to use but doesn’t include all the latest fonts. The second one is more up-to-date but a little fiddlier to use.
The first option is to use Web Fonts Helper. This is a great tool and very popular, but it is 4 years since it was last updated, so it’s uncertain whether it will include newer fonts. But for most of the currently popular font families, it works fine.
Now you’ve identified the font name you wish to use, type it in the search box at the top left corner. If it’s found, then you’ll be able to click it in the drop-down search list. (If it isn’t found, skip to the second tool we’ll try.)
If your font is found, you’ll see a page that shows all of the different variations of that font, including different weights, as well as bold and italic. Click the checkboxes for those styles you want to be able to use (regular is checked by default).
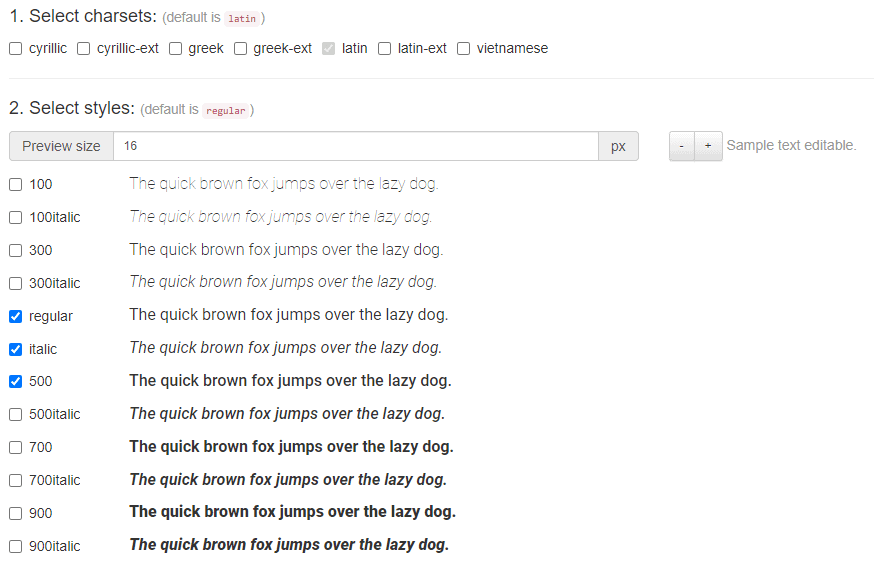
Once you’ve done this, scroll down, and you’ll find pre-written CSS code ready. You do have a choice of CSS code, though.
By default, it’s the code needed to provide the best support for older browsers, but if you prefer, you can click the option for ‘Modern Browsers’ instead. This will provide better support for currently popular browsers.
Once you’ve made this choice, you’ll see the CSS code you need. You can copy and paste this directly into the stylesheet file of your WordPress theme. You may also go to Appearance > Customizer and paste the code in the ‘Additional CSS’ box on the left.
The next thing to do is to go back to the Web Fonts Helper page and click the button under the heading ‘Download files’. This file includes all your chosen font styles in a format that can be used safely on your website.
Unzip the downloaded file, and upload the fonts to your ‘fonts’ folder at the top of your WordPress installation.
If you want to place your fonts folder elsewhere, be aware that you’ll need to edit the CSS code you copied to change the folder location.

If the Web Font Helper didn’t have the font you wanted, then the second tool to use is Web Font Loader.
This works in a very similar way. To begin with, you’ll need to search for the font name you’re after, and the search box is again in the top left corner. Once you’ve found it, you’ll see there’s no option to select only the font styles you want. Not to worry, though – we can deal with this later. The next step is to click the ‘Download’ button at the top right corner.

Once you download the zip file, extract it, and you’ll find all font variations inside separate folders. All you need to do here is to go through the folders, pick out the fonts you want, and then upload those to your fonts folder in your WordPress installation.
You may wonder at first about where to get the CSS code from, as there’s none on the website. However, looking inside the zipped folder you just downloaded, you’ll see a CSS file with the same name as the font. If you open this (in Notepad or something similar), you’ll see it includes the CSS code for every font variation.
Copy and paste those you need into your theme’s stylesheet or in the ‘Additional CSS’ box of your theme’s Customizer screen.
Once you’ve done this, your website will no longer send HTTP requests to Google, instead loading up the fonts directly from your server.
You should find that not only does this help slightly increase your site’s loading speed, but perhaps more importantly, you are no longer reliant on third-party services for your site’s performance, and you also no longer need to worry about Data Protection issues!
Other Things To Consider
While we certainly do believe that it is preferable to host Google fonts locally on your server, it’s also a good idea to limit the number of different fonts you’re using across your website. The more fonts you use, the more font files need to be loaded, and this can end up causing issues.
If you’re using one font just for your brand name, consider changing this to a compressed GIF or PNG image, which won’t require an entire font face to be loaded just for that word.
You may also find your WordPress theme has a Typography page in the Customizer. It will be a good idea to go through this and check whether it is force-loading Google fonts for you. If so, remove these and choose standard fonts instead. Your own custom CSS will still override this, but it will stop the theme from making unnecessary HTTP requests to Google for fonts that you’re already hosting locally.
Stay updated with Helpful WordPress Tips, Insider Insights, and Exclusive Updates – Subscribe now to keep up with Everything Happening on WordPress!
Wrapping Up
While hosting Google fonts locally will make a very marginal improvement in your site’s loading speed, this isn’t the primary reason we feel it’s a good idea and something we encourage. The more important benefits include not being reliant on third parties for your own website’s performance and appearance. This includes Google’s CDN, as well as their forced cache settings, which can occasionally cause a problem.
There’s also the legal issue, which seems to force web developers to overlook the legal requirements to display the page asking visitors if it’s okay to have already collected and transmitted their data!
All in all, it’s not a difficult thing to do, and once complete, you’ll very likely never have to bother with it again. A few minutes today can help improve your website significantly.
Further Read: Want to upload fonts on your site in 5 minutes? Check this step-by-step guide on Uploading Custom Fonts on WordPress for Free.


