








Skip to content

How to Connect Mailchimp to a WordPress Form?

Key Takeaways

  • Form block in Nexter Blocks Pro adds each form submission to a Mailchimp audience, and the form sends the visitor’s email plus the first Name Field as FNAME.
  • Mailchimp setup needs Pro, the Form block enabled under Nexter > Blocks, a Mailchimp API key, and an Audience ID before the connection works.
  • Mailchimp submissions are added as subscribed immediately, with no double opt-in, and the API key must include its data centre suffix such as -us21.
Table of Contents

Sending sign-ups straight to Mailchimp saves you exporting and importing contacts by hand.

The Form block in Nexter Blocks Pro adds every visitor who submits your form to a Mailchimp audience.

For every Form setting in one place, see the Form block guide.

Before You Start

  • Edition: Pro — The Mailchimp action needs Nexter Blocks Pro.
  • Block to enable: Form, switched on under Nexter > Blocks in your WordPress dashboard.
  • A Mailchimp API key: create one in your Mailchimp account. See Mailchimp’s guide About API keys.
  • Your Audience ID: see Find your audience ID.

Learn via Video Tutorial

Youtube video

Steps

  1. Add the Form block to your page, click Design from Scratch and choose Simple Contact Form or Newsletter Form.
  1. Select the Form block (not a field inside it). In Action After Submit, open Options and choose Mailchimp. You can keep Email selected as well.
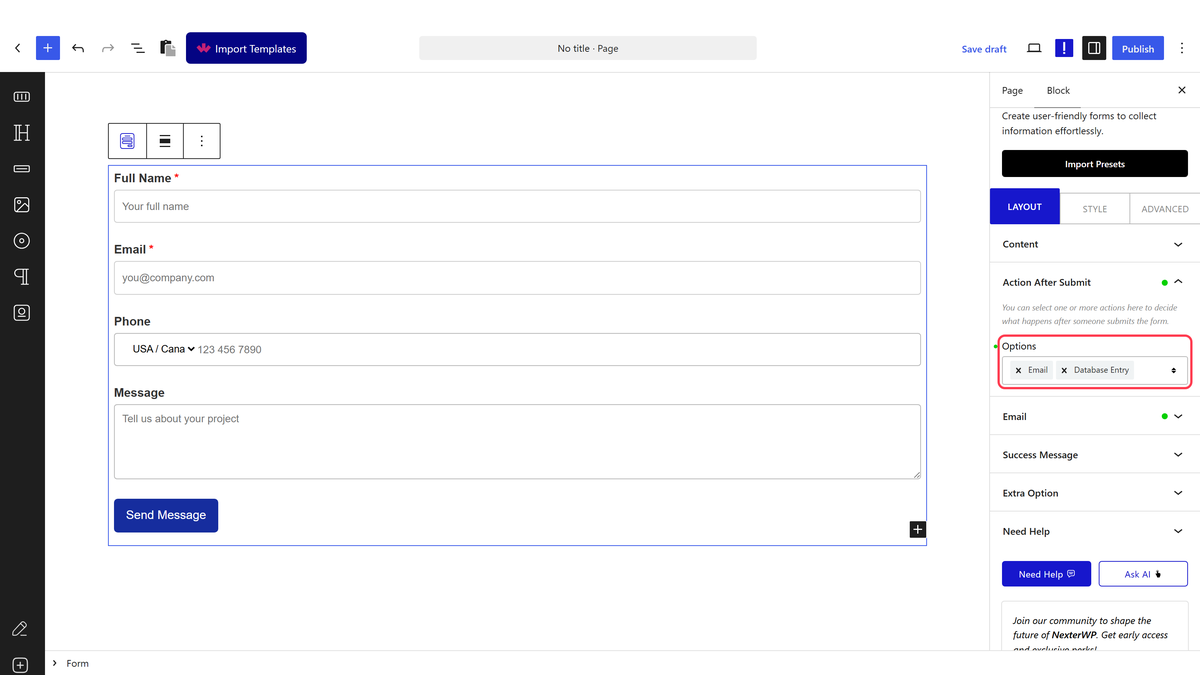
The Action After Submit panel with Options
  1. Open the Mailchimp panel that appears and paste your key into API Key and your ID into Audience ID.
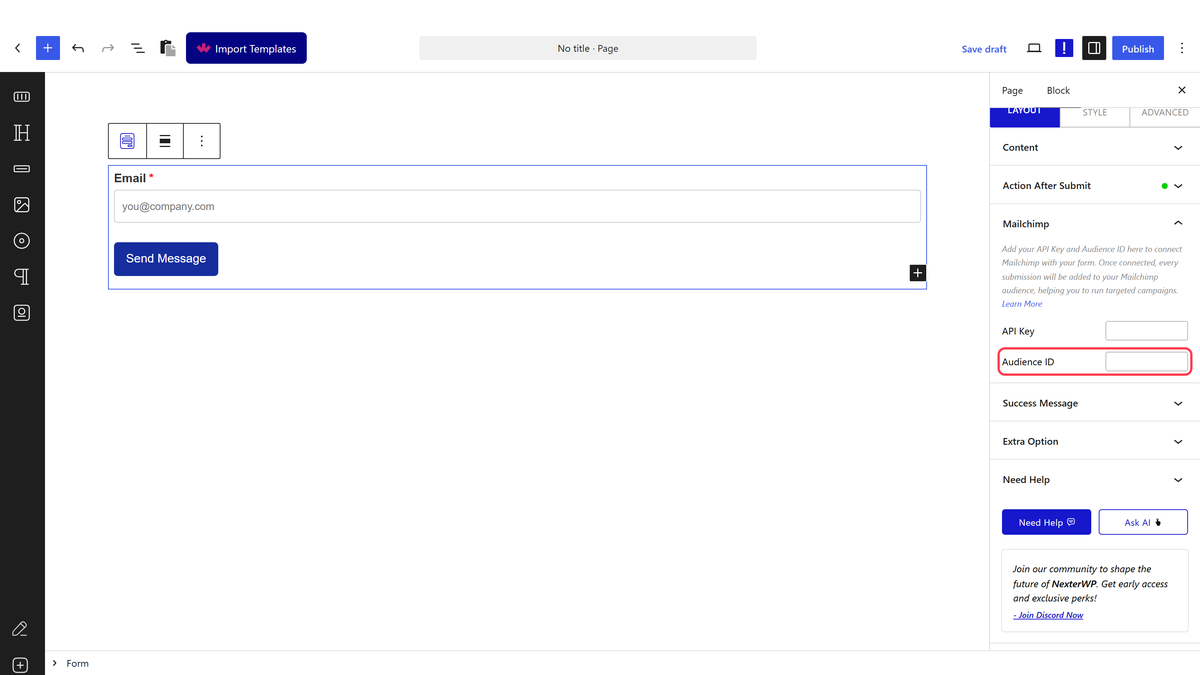
The Mailchimp panel with API Key and Audience ID
  1. Save the page, then submit the form once on the front end to test the connection.

How It Behaves

  • Each submission adds the email address to your audience as subscribed, with the name in the FNAME field.
  • The form sends the visitor’s email and name (the first Name Field). Other fields are not sent to this service.
  • The visitor sees your success message, or goes to your Redirect link if you added one.

Limitations

  • Pro only.
  • Contacts are added as subscribed straight away. There is no double opt-in step from the form.
  • The API key must end with its data centre, for example -us21. If it does not, nothing is sent to Mailchimp but the visitor still sees the success message.

Troubleshooting

Submissions do not appear in Mailchimp

Copy the whole API key including the part after the dash, check the Audience ID, and make sure the form has an Email Address field.

I want to keep a copy of every submission

Also choose Database Entry. See how to save form submissions.

Related Docs

Share your Thoughts

Still in Doubt? Let’s Assist You

Have Feedback or Questions?

Join our WordPress Community on Facebook!

Related Frequently Asked Questions

What do I need before connecting Mailchimp to a WordPress form?

Mailchimp sign-up syncing in Nexter Blocks Pro depends on three things: the Form block must be enabled under Nexter > Blocks, you need a Mailchimp API key, and you need your Audience ID. The page also notes that the API key has to include the data centre suffix, like -us21. If that suffix is missing, Mailchimp will not receive the submission even though the visitor still sees the success message.

Why are my WordPress form submissions not showing up in Mailchimp?

The most common failure points are an incomplete API key, the wrong Audience ID, or a missing Email Address field on the form. The key has to be copied in full, including the part after the dash, because Mailchimp needs the data centre suffix. Nexter Blocks Pro also sends only the email and first Name Field value, so if the form is missing email data, nothing gets added to the audience.

Can I keep saving form submissions in WordPress while sending them to Mailchimp?

Database Entry is the extra setting to use when you want both outcomes. Mailchimp handles the audience sync, while Database Entry keeps a copy of every submission inside WordPress. That matters if you want a local record for review or backup instead of relying only on Mailchimp. The page links this workflow to Save form submissions in WordPress.

Does this Mailchimp form setup send all form fields to Mailchimp?

Only two pieces of data go across: the visitor’s email and the first Name Field value. Those land in Mailchimp as subscribed contacts, with the name stored in FNAME. Other fields stay out of Mailchimp, so this setup is best for simple signup forms rather than forms that depend on lots of custom data.

Is double opt-in available when sending WordPress form signups to Mailchimp?

The flow described here adds contacts as subscribed straight away, so there is no double opt-in step from the form itself. That makes signup faster, but it also means you should treat this as an immediate audience add rather than a confirmation-based process. If you need a slower approval flow, this tutorial does not add one.

What is the easiest way to build a newsletter signup form for Mailchimp in Nexter Blocks?

The quickest path is to add the Form block, then choose Design from Scratch and pick either Simple Contact Form or Newsletter Form. Nexter Blocks Pro provides that form workflow and then lets you send submissions to a Mailchimp audience through Action After Submit. For layout ideas, Add a newsletter form and Form block guide are the related references.

Last reviewed: September 14, 2026

Related Docs