Choosing the right fonts for your website can be a daunting task. Fonts can make or break a user’s experience, so it’s important to choose wisely. Adobe Typekit fonts are a great option for a professional aesthetic and maximum compatibility. If you’re using WordPress, you may wonder how to connect Adobe fonts directly to your website. Fortunately, it’s not as challenging as it may seem.
With the Nexter Extension (free) plugin, you can easily connect your Adobe Typekit project with your WordPress website.
Note: Adobe fonts and Typekit are same.
How to add Adobe Fonts with the Nexter Extension?
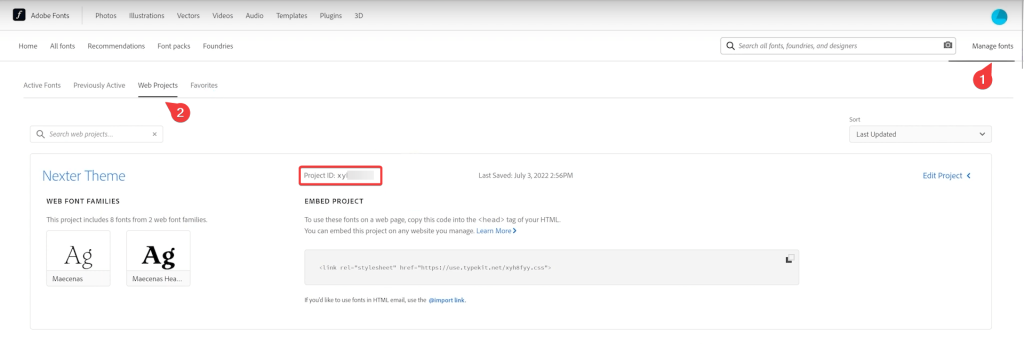
First, you have to get your Adobe Typekit project id. Learn more about the process.
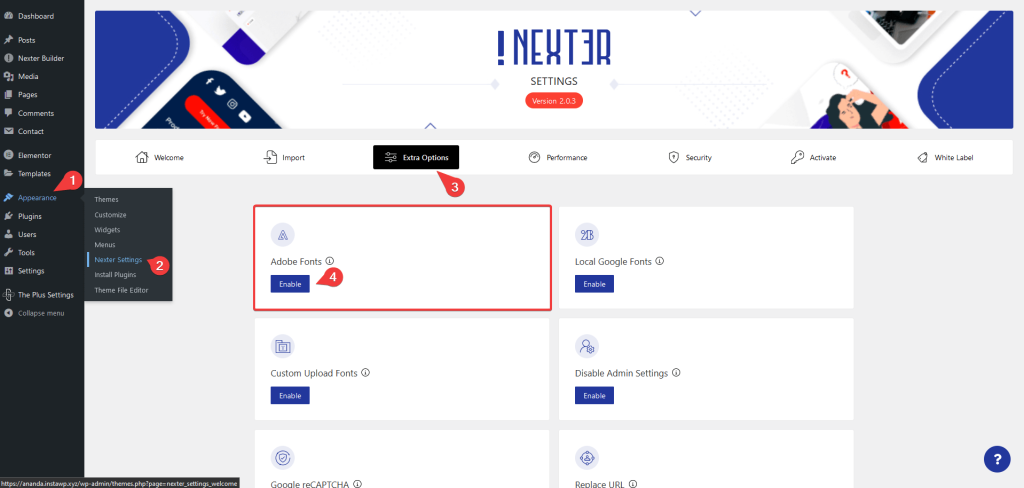
Once you have your project id, head to your WordPress dashboard and go to Appearance > Nexter Settings > Extra Options.
Then go to the Adobe Fonts section and click on the Enable button.
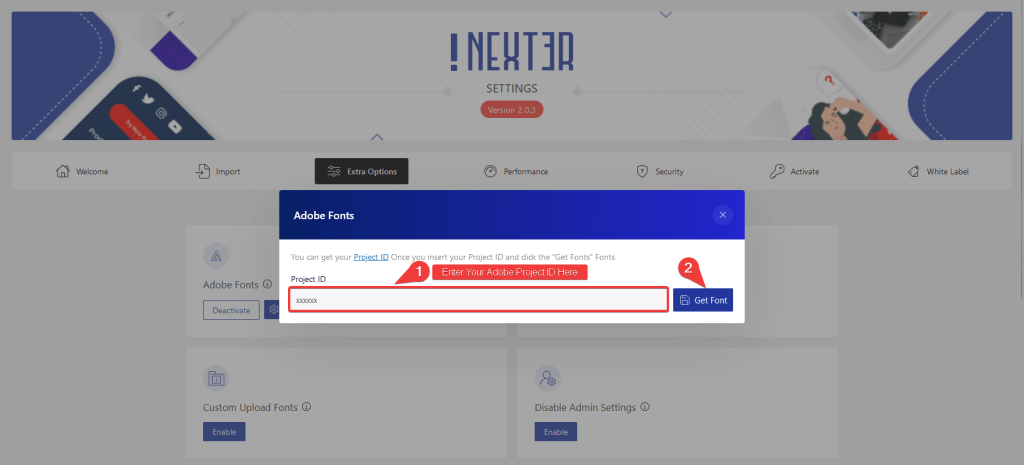
On clicking the Enable button, it will show a Gear icon (⚙) click on that.
It will open the Adobe Fonts popup, here you have to enter your Project ID and click on the Get Font button.
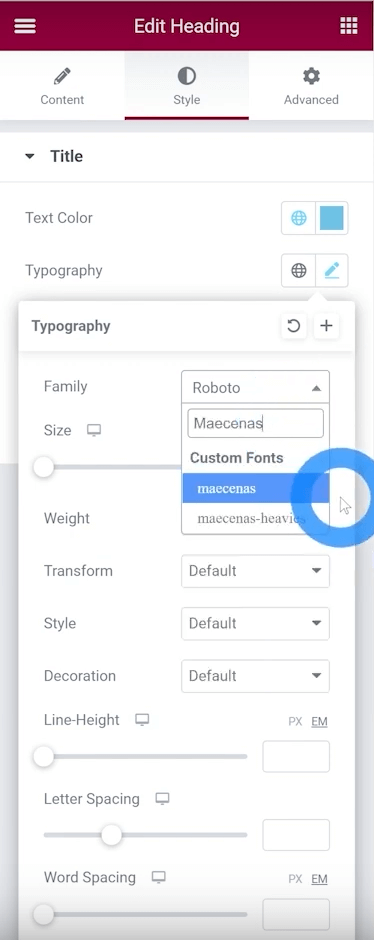
It will show all the fonts you have in your project.
You can access all the fonts from the Nexter theme customizer settings and if you are using Elementor you will get all the fonts in the typography section.
Is Adobe Fonts Service Free to Use in WordPress website?
In order to use Adobe Fonts in your WordPress website you need to have an active paid Adobe Creative Cloud subscription. With you subscription you can use Adobe Fonts for free in your website.
How to get Adobe Fonts Project ID?
In order to get your Adobe Fonts project id follow the steps –
1. Click on this link and login to your Adobe account.
2. Once you’re logged click on Web Projects.
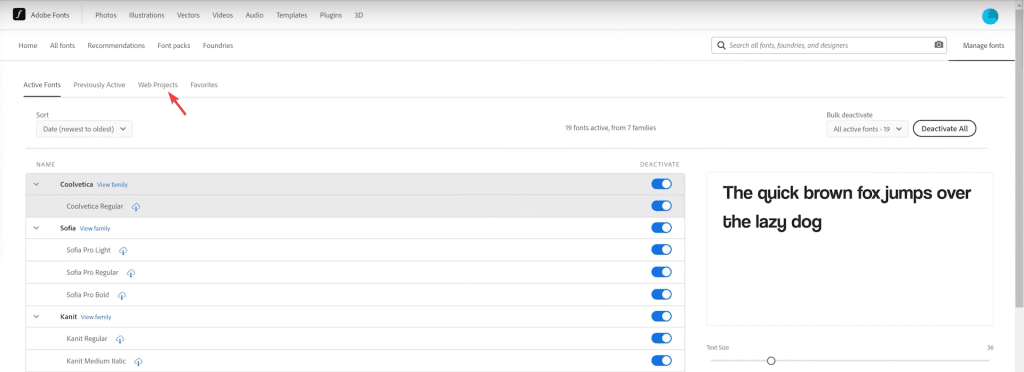
3. On the next screen if you have created a project you will get your project id, but if you haven’t created any project you’ll see a Learn More button click on it.
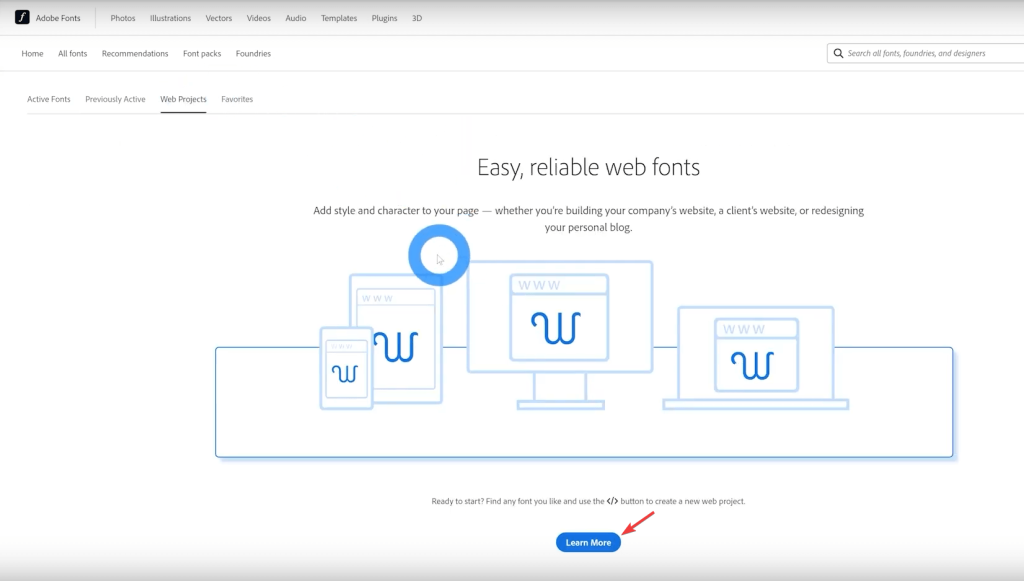
4. Now you’ll see a list of fonts, choose the font you want to add to your project and click on View Family button.
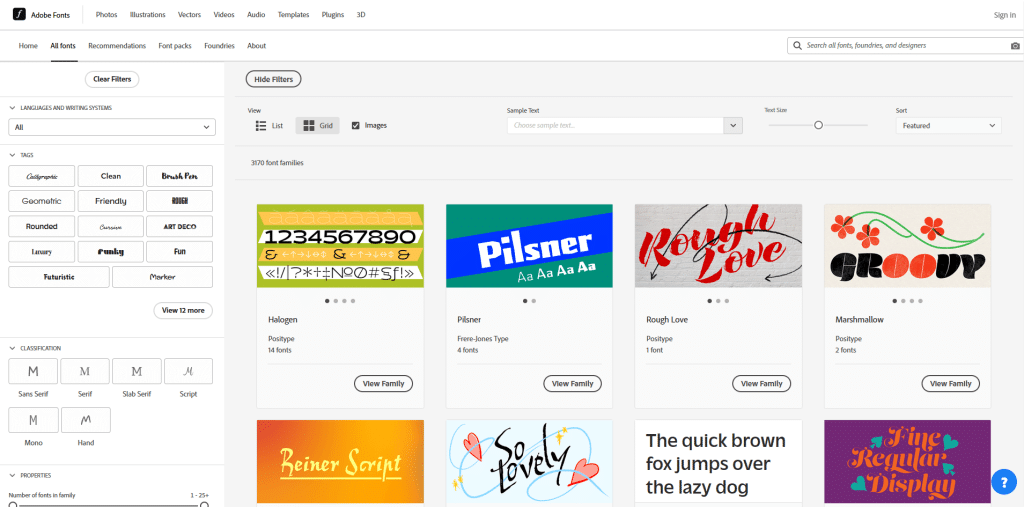
5. Now you’ll see the preview of the font and to add the font to your project click on the Add to Web Project button.
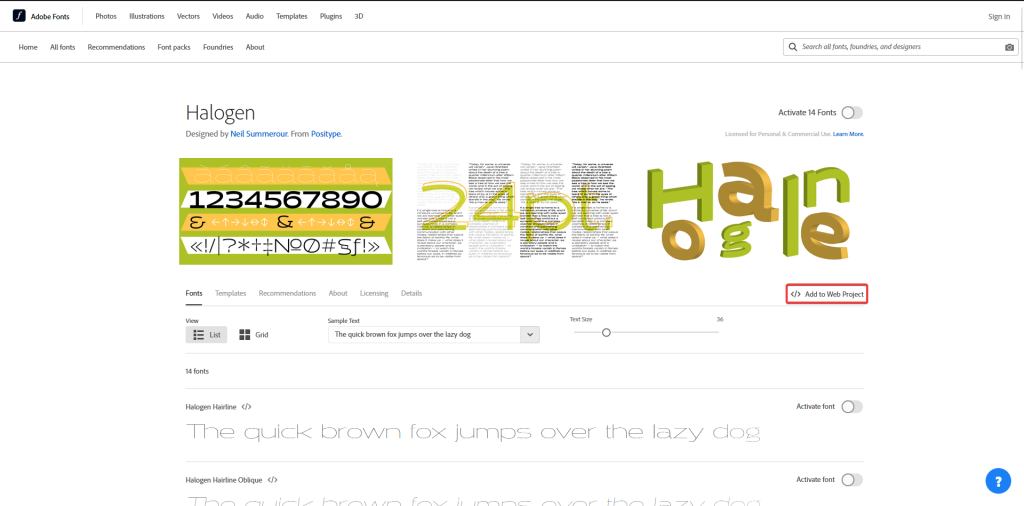
6. It will open a popup where you have give a project name.
7. Now to get the project id click on Manage fonts > Web Projects you will get your project id.
