












A pricing table has one job: help someone compare your plans and click the right one. When it works, a visitor scans three columns and decides in seconds. When it does not, they hesitate, scroll past, and leave without choosing anything.
Here is the catch. WordPress has no built-in pricing table. The block editor gives you paragraphs, buttons, and columns, but nothing purpose-built to show plans side by side with prices, feature lists, and a highlighted “most popular” option.
So you really have two choices: hand-build a table from core blocks, or add a dedicated pricing table block. This guide covers both, then walks through the step-by-step way to build a clean, responsive, multi-column pricing table using the Pricing Table block from Nexter Blocks, with no page builder required.
What a Pricing Table Is (and When You Need One)
A pricing table displays your product or service plans in a clean, side-by-side layout. Each column usually shows the plan name, the price, a list of features, and a call-to-action button that sends the visitor to sign up or buy. The point is comparison: people decide faster when the differences between plans sit right next to each other.
You need a pricing table any time you sell more than one option. That covers SaaS products, membership sites, service packages, and online stores built with WordPress ecommerce plugins. If a visitor has to read three separate pages to understand your tiers, you are losing sales to friction.

The Two Ways to Add a Pricing Table in WordPress
Both methods work. The right one depends on how much control you want and how much time you want to spend styling.
Option 1: Build It With Core Gutenberg Blocks
You can assemble a basic table using the Columns block, a Heading for each plan name, a List for the features, and a Buttons block for the CTA. It is free and uses nothing but core WordPress.
The trade-off is the finishing work. Core blocks give you no “previous price” strikethrough, no ribbon to mark a featured plan, no show-more toggle for long feature lists, and no hover effect to draw the eye. You also style each column by hand and test the mobile stacking yourself. For a simple two-tier table that is fine. For anything you want to convert, it gets tedious fast.
Option 2: Use a Dedicated Pricing Table Block (the Easy Way)
A dedicated block gives you a purpose-built pricing card with all the conversion pieces already there. The Nexter Blocks Pricing Table block is one of the most flexible options for the native Gutenberg editor, and it needs no coding and no external page builder.
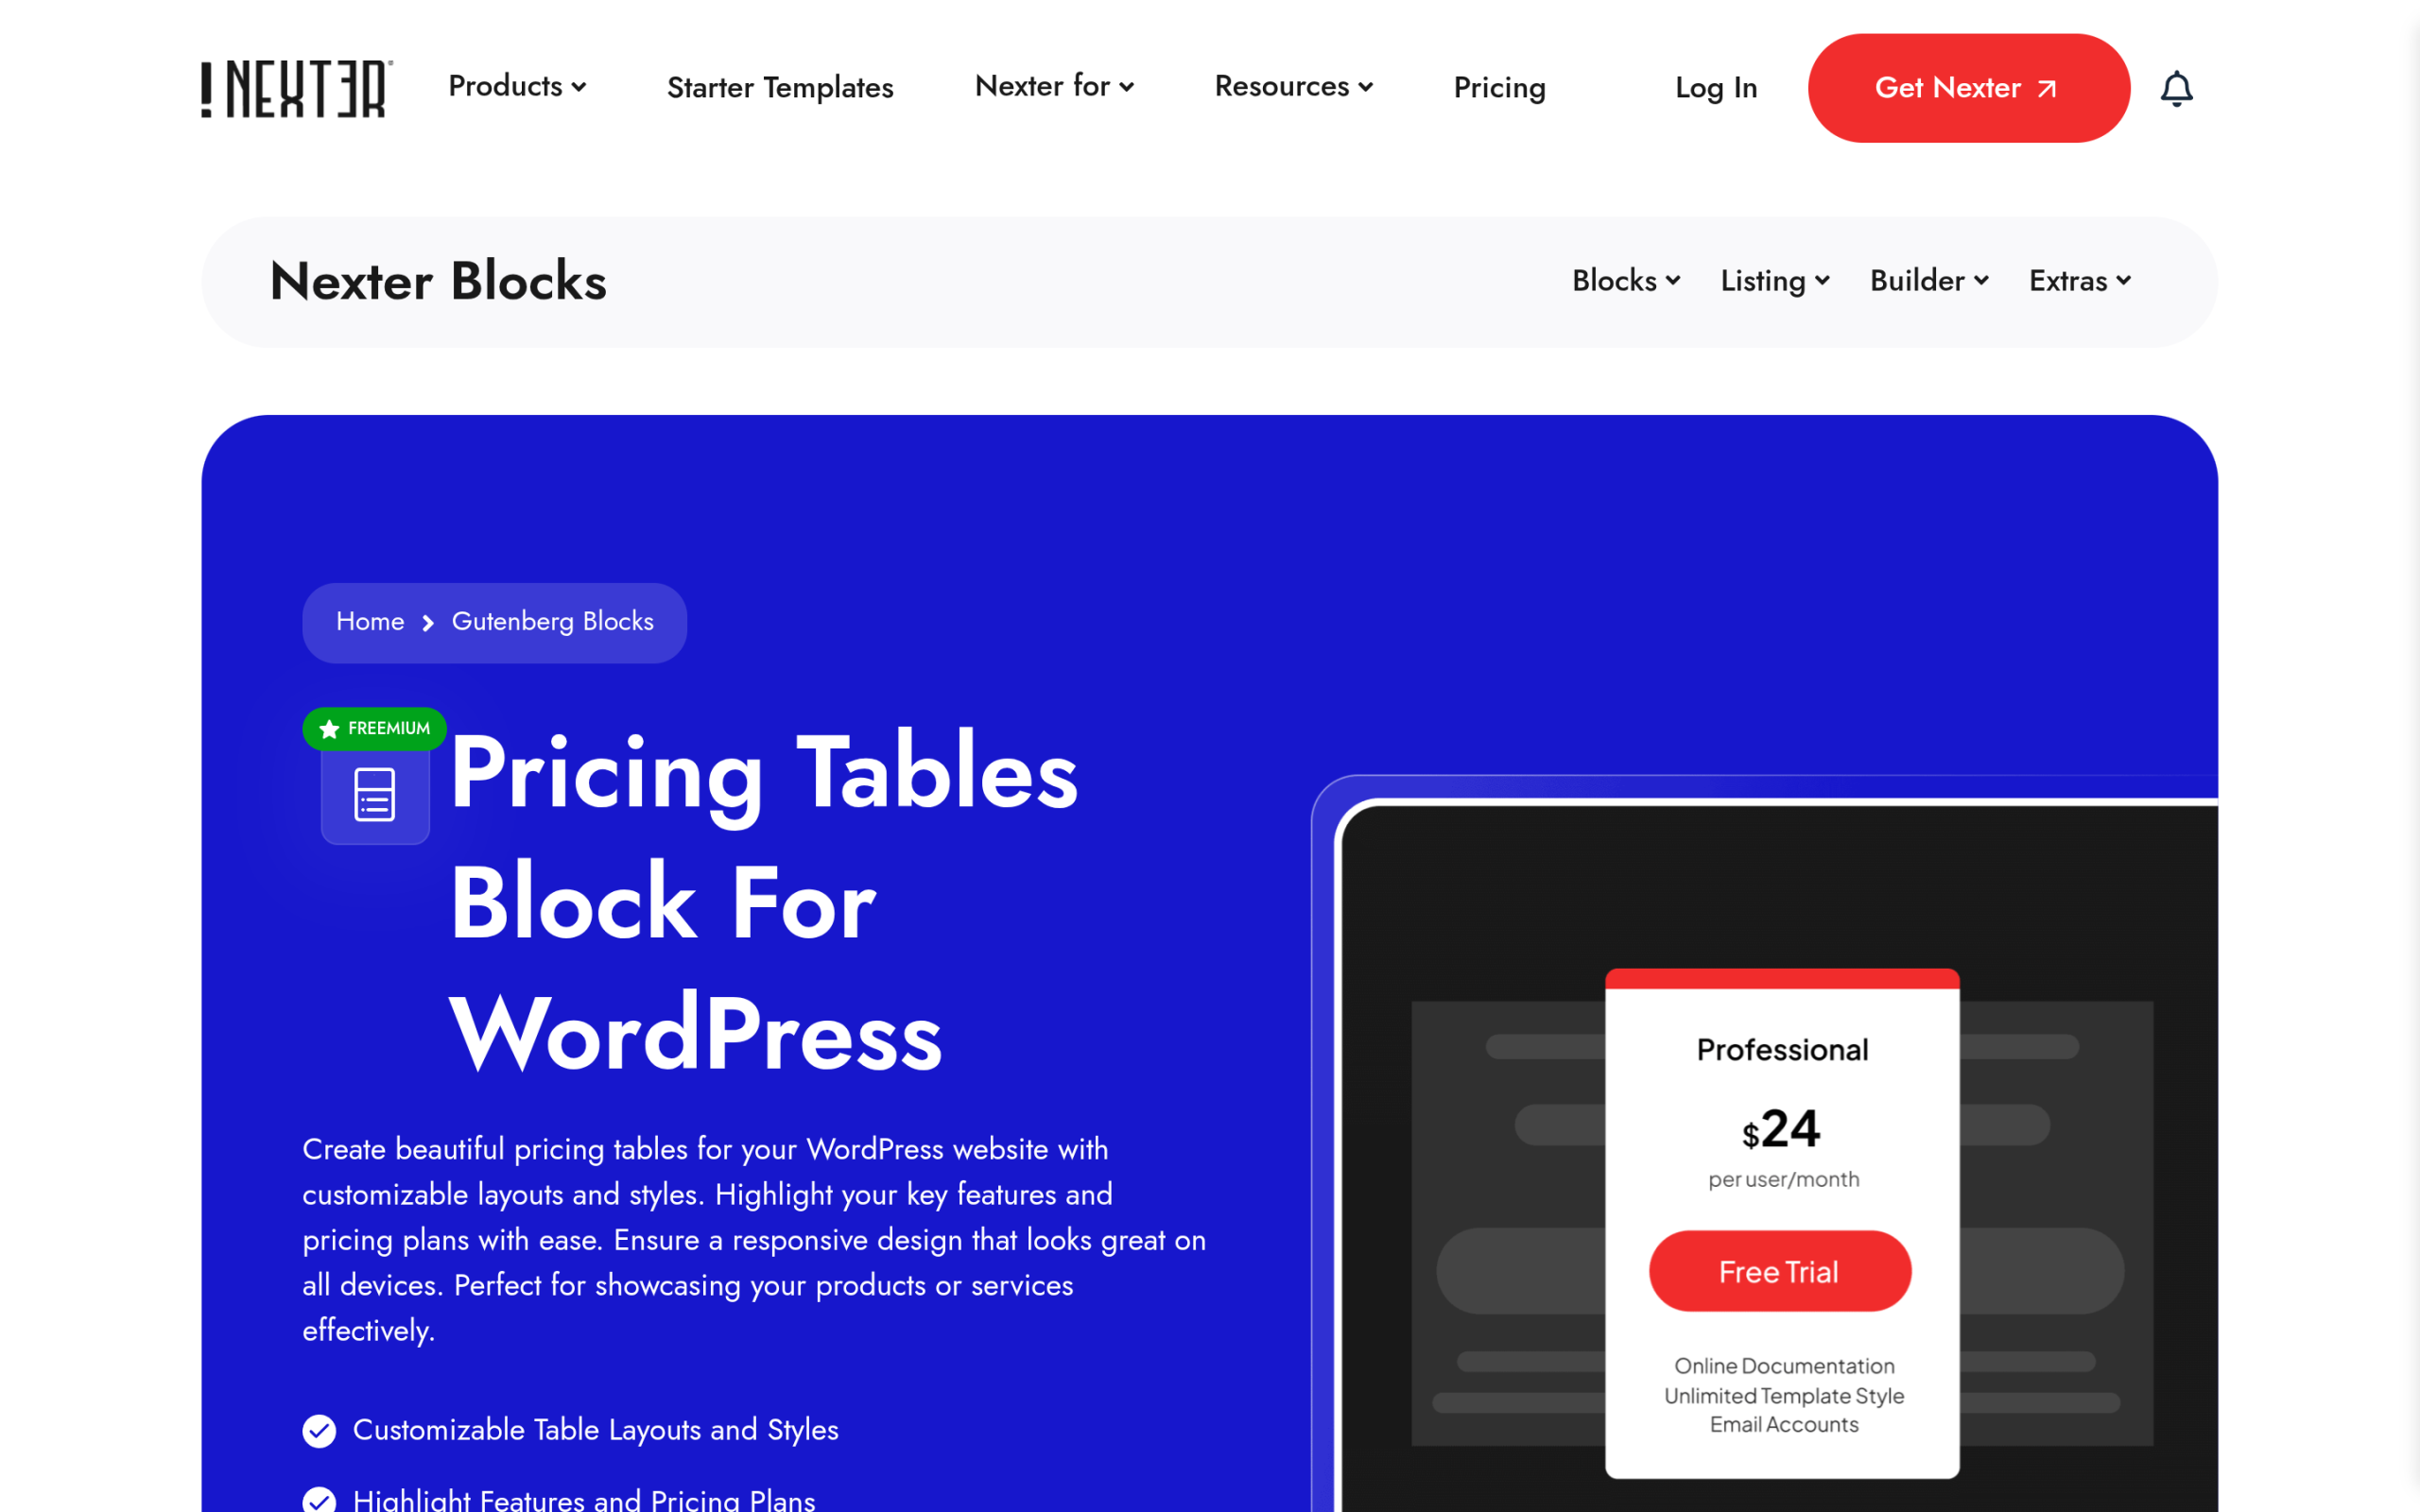
With the free version you get predesigned layouts, a title and price area, feature lists, and CTA buttons. The Pro upgrade adds tooltips and a zoom scale effect on hover. Across free and Pro, the block supports:
- Predesigned layouts and block presets for a fast start
- A previous-price field to show a slashed-out discount
- A ribbon tag to mark a “Popular” or “Recommended” plan
- A “Show More” option to keep long feature lists tidy
- Tooltips for extra detail on a feature (Pro)
- A zoom scale effect on hover to highlight one plan (Pro)
- Responsive behaviour that stacks columns on mobile by default
Also Read: Best WordPress pricing table plugins if you want to compare a few tools before committing to one.
How to Add a Pricing Table in WordPress With Nexter Blocks (Step by Step)
This is the full process, from installing the plugin to a finished multi-column table. It all happens inside the standard Gutenberg editor.
Step 1: Install and Enable the Pricing Table Block
From your dashboard go to Plugins > Add New and search for Nexter Blocks. Install and activate it. Then open Nexter Blocks > Blocks from the admin menu, find Pricing Table, toggle it on, and click Save. That makes the block available in your editor.
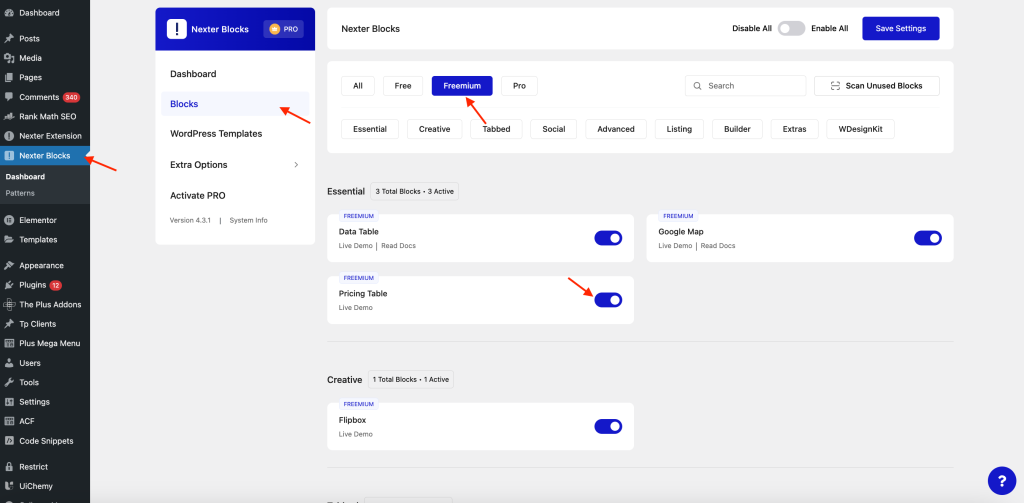
Step 2: Add and Configure the Block
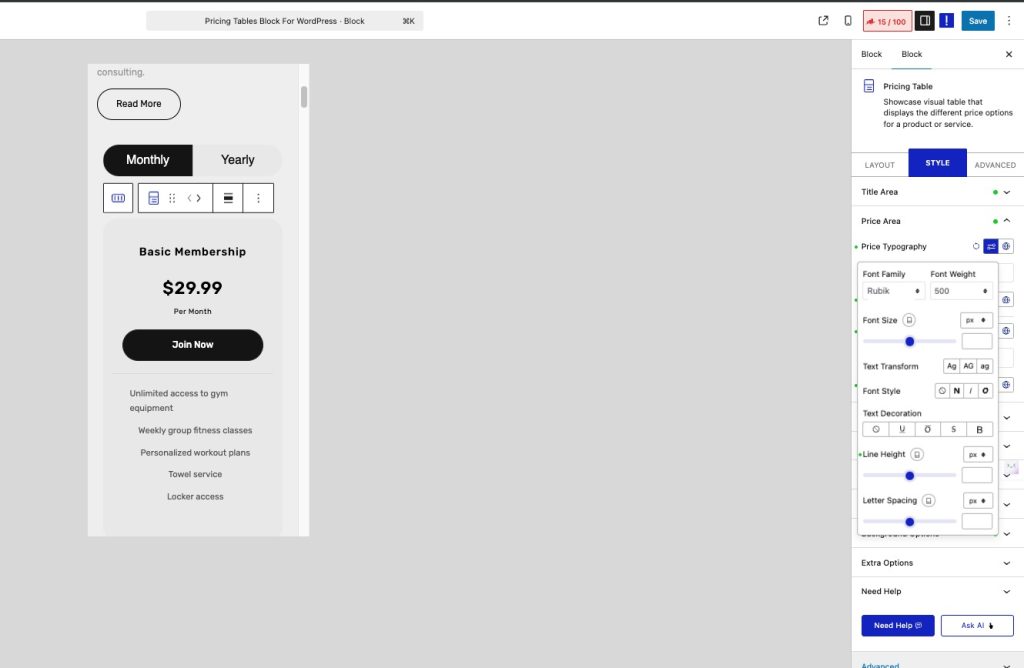
Open the page or post you want to edit, click the “+” icon, search for Pricing Table, and insert the Nexter Pricing Table block. The settings sit in three tabs: Layout, Style, and Advanced. Start in Layout, where you set the plan title and subtitle, the price area (a prefix like a currency symbol, the main price, and a postfix such as “per month”), and the optional previous price for discounts.

Step 3: Build the Multi-Column Layout
One block gives you one pricing card. To compare plans side by side, add a core Columns block first and choose a three-column layout, which works well for Basic, Standard, and Premium tiers. Inside each column, insert a separate Pricing Table block and configure it the same way you did in Step 2, with its own title, price, features, and button link.

Step 4: Style It and Highlight a Plan
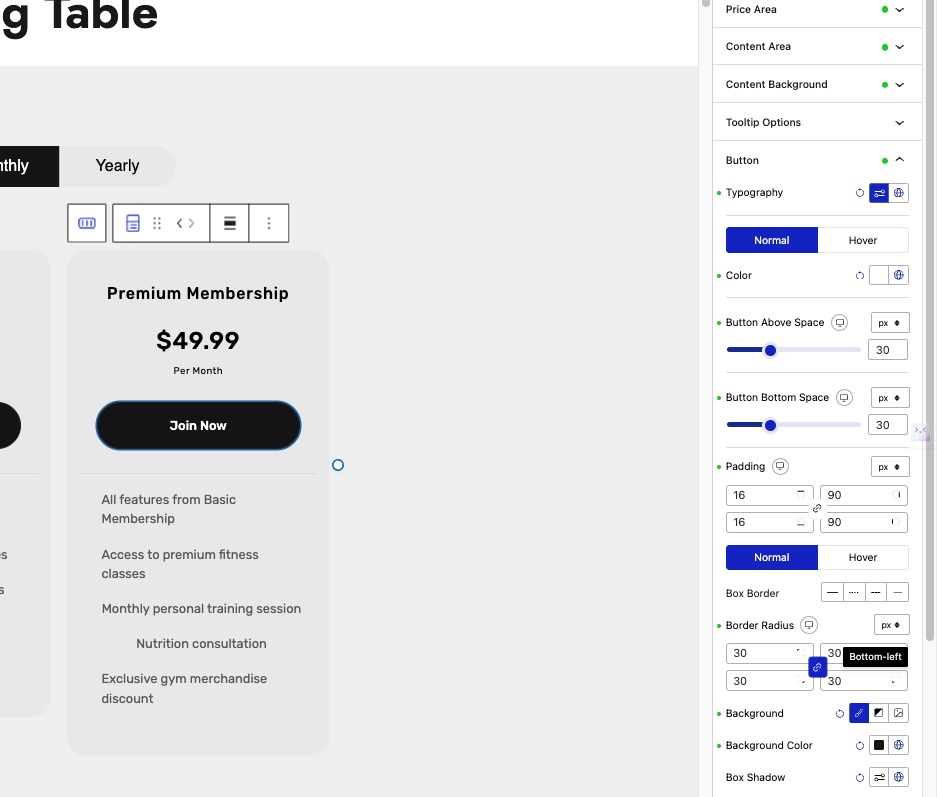
Now polish the table. Turn on the button and set its text and link, add a short call-to-action note under it, and apply a ribbon such as “Recommended” to the plan you want people to pick. On Pro you can add a zoom scale effect so the featured column lifts slightly on hover. Preview the page on desktop, tablet, and mobile before you publish, and the layout adapts automatically on any modern responsive theme.
Also Read: How to create a landing page in WordPress, since pricing tables usually live on a sales or landing page.
Design and Conversion Best Practices for WordPress Pricing Tables
A table that looks tidy but does not guide the eye leaves money on the table. A few habits make a real difference to conversions.
Make It Responsive and Mobile-Friendly
Always check how the table looks on a phone. Three columns should stack into a single readable list rather than shrink into unreadable text. The best WordPress pricing table plugins, Nexter Blocks among them, handle this stacking for you without custom media queries.
Use One Clear Call to Action Per Plan
Every column should end with a single, obvious button. Use direct text like “Start Free Trial” or “Buy Now” rather than a vague “Learn More”, and keep the button style consistent with your brand. One strong action per card beats three competing links.
Highlight a Single Recommended Plan
Do not leave the choice fully open. Mark one plan as the recommended option with a ribbon, a contrasting colour, or a subtle scale effect. A gentle nudge toward the plan you most want people to choose lifts conversions and makes the decision feel easier.
Tip: If your pricing sits behind a login or gates premium content, pair your table with WordPress content protection plugins to manage who sees what.
Wrapping Up
You can add a pricing table in WordPress two ways: hand-build one from core Columns and Buttons, or use a dedicated block that already includes ribbons, discounts, and responsive stacking. For most sites the dedicated block wins on time and polish.
The Nexter Blocks plugin makes that route simple, and beyond pricing tables it adds 90+ Gutenberg blocks for building the rest of your site without slowing it down. Set your plans up once, mark the plan you want people to pick, and let the table do the selling.
Suggested Reading
- Best WordPress Pricing Table Plugins
- Best WordPress Ecommerce Plugins
- Best WordPress Data Table Plugins
- Best SEO-Friendly WordPress Themes
- How to Create a Landing Page in WordPress
Stay updated with Helpful WordPress Tips, Insider Insights, and Exclusive Updates – Subscribe now to keep up with Everything Happening on WordPress!
FAQ on Adding a Pricing Table in WordPress
Which plugin is best for pricing tables?
Nexter Blocks is a powerful option for creating a WordPress pricing table. It offers pre-built layouts, detailed customization, mobile responsiveness, and clean design, all from the Gutenberg editor. You don’t need Elementor or any third-party page builder to use it effectively.
Are there free pricing table plugins?
You can create a full-featured WordPress pricing list using the free version of Nexter Blocks. It supports essential elements like price, title, features, and buttons. The Pro upgrade adds advanced design options like ribbons, stylish lists, tooltips, and hover effects.
How to create a pricing table with toggle?
Nexter Blocks includes a “Show More” toggle for content. This lets you initially display a limited number of features and reveal the rest on click. It’s useful when you want a compact layout without removing key details from the pricing table.
Can I use templates for pricing tables?
Nexter Blocks offers multiple pre-designed pricing table templates. You can choose a layout that matches your branding, then modify titles, icons, content, pricing, and call-to-action buttons. This helps you set up your table quickly without starting from scratch.
How to customize pricing tables?
You can fully customize pricing tables in Nexter Blocks. Change font styles, background colors, spacing, button designs, and icons directly in the Style tab. You can also apply ribbons and scale effects, or use custom CSS for finer visual adjustments.
How to add pricing tables in Elementor?
If you’re using Elementor, The Plus Addons for Elementor, best WordPress widget plugins provides a robust pricing table widget. It supports toggle features, multi-column layouts, ribbons, icons, and detailed styling controls, similar to what Nexter Blocks offers for Gutenberg-based WordPress websites.
How to make pricing tables responsive?
Nexter Blocks creates responsive pricing tables by default. The columns automatically stack on smaller screens, maintaining readability across all devices. You don’t need extra configuration or custom media queries, everything adjusts based on screen size automatically.
Can pricing tables include buttons?
Yes, Nexter Blocks lets you add fully customizable buttons within each pricing column. You can set button text, add links, choose from multiple styles, and even insert icons. These buttons help guide users directly to sign-up, checkout, or learn more pages
How to display pricing tables in PDF?
You can use your browser’s PDF feature or a compatible plugin to export your pricing tables. This method preserves the table’s layout and style. For more structured data formats, you might also explore WordPress data table plugins that support export features, sorting, and advanced layouts.
