


Scroll animations in WordPress turn static pages into layered, engaging experiences. Elements fade in, slide up, or zoom into view as visitors scroll, creating a sense of motion that reduces bounce rates and keeps users reading further down the page.
Built on CSS and the browser’s Intersection Observer API, modern scroll effects add visual depth without touching your Core Web Vitals scores. CSS-triggered entrance animations on fixed-size elements produce zero Cumulative Layout Shift, the metric Google weights most heavily in its ranking signals. Pages with well-placed scroll animations see lower bounce rates and higher time on page because motion gives the eye a reason to keep reading.
This guide covers three methods to add scroll animation in WordPress. Method 1 uses Nexter Blocks, a Gutenberg block plugin by POSIMYTH Innovations, with a visual control panel and no code required. Method 2 applies built-in scroll animation settings from Divi and Elementor Pro. Method 3 adds smooth anchor scrolling site-wide with a single CSS line. If you are new to WordPress customization, Nexter for Beginners covers the foundational settings you will need before starting. Each method works on WordPress 6.5 or later and takes under 30 minutes to set up. This guide was last tested on WordPress 6.9.4.
What Are Scroll Animations in WordPress?
Example of on-scroll animations created using Nexter Blocks
Also Read: how to add smooth scroll in WordPress so your scroll animations feel natural.
Scroll animations in WordPress are CSS-powered effects that trigger when a specific element enters the viewport as a user scrolls. Rather than displaying everything at once, animated blocks reveal themselves progressively, adding depth and motion to an otherwise static layout.
Also Read: how to add a parallax effect in WordPress for more depth.
These effects range from a subtle fade-in on a paragraph to a full parallax movement on a hero section. The browser’s Intersection Observer API handles the trigger logic, watching each element and firing the animation class when the element crosses the visible threshold. This approach runs off the main thread, so the browser can process scroll events without blocking layout or paint operations, keeping your Lighthouse score intact.
Benefits of Adding Scroll Animations
Here is how scroll animations improve the WordPress browsing experience:
- Increased user engagement: Motion captures attention and keeps visitors scrolling. Content that reveals progressively feels more intentional, helping reduce bounce rate and increase the time spent on each page.
- More polished visual design: Subtle entrance animations give pages a professional, modern appearance that builds credibility on first impression without requiring a design overhaul.
- Better content storytelling: Scroll-triggered reveals guide visitors through your message at a deliberate pace, letting you control what the reader focuses on at each point.
- Mobile-ready by default: CSS-based scroll animations work across all modern mobile browsers. Nexter Blocks lets you configure timing and direction separately per breakpoint, so effects feel natural on every screen size.
- Zero Core Web Vitals impact: CSS entrance animations triggered via the Intersection Observer API produce zero Cumulative Layout Shift when the animated element has a defined size before the animation fires. Animate only
transformandopacityproperties to keep GPU usage low and avoid triggering layout reflows on every frame.
Bring your WordPress headlines to life with motion. Learn How to Add Text Animation in WordPress using a plugin.
How to Add Scroll Animations in WordPress
Three methods cover the most common WordPress setups. Choose based on your page builder, theme, and how much per-block control you need over each animation.
Method 1: Using a WordPress Scroll Animation Plugin (Nexter Blocks)
The most flexible way to add scroll animations in WordPress is through a dedicated block plugin. For Gutenberg users, Nexter Blocks is the recommended option.
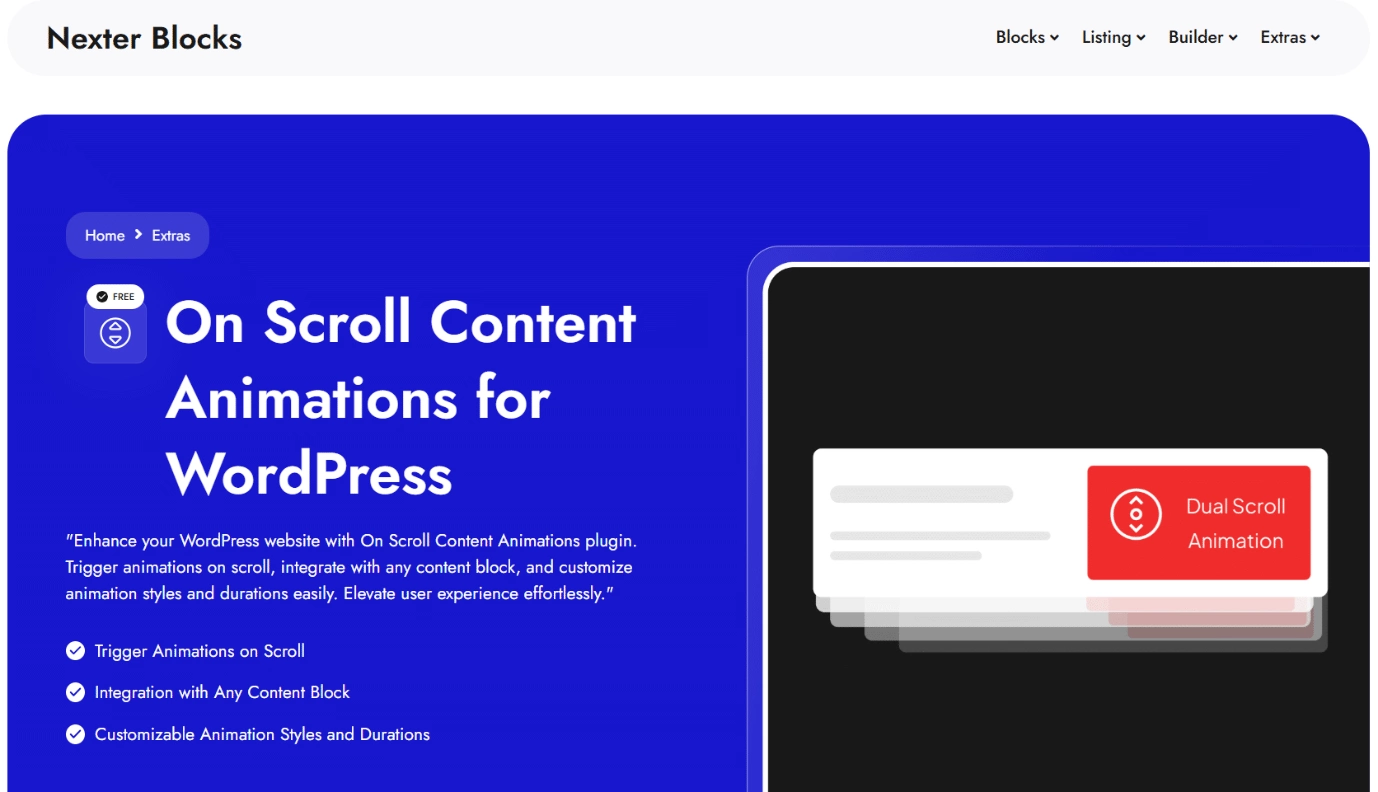
Nexter Blocks includes 90+ Gutenberg blocks, each with built-in scroll animation support. The On Scroll Content Animations feature lets you apply entrance and exit animations to any block, control timing and easing from a visual panel, and build smooth transitions without writing any code. You can also pair it with the Heading Animation block for text-specific motion effects that go beyond simple fade-ins.
Here is how to add scroll animations with Nexter Blocks:
Step 1: Activate Nexter Blocks
Go to Plugins > Add New Plugin in your WordPress dashboard. Search for Nexter Blocks, then install and activate it. A free version is available directly from WordPress.org with no account required. Nexter Blocks 4.7.x is fully compatible with WordPress 6.9.4.

On Scroll Content Animations is a Pro feature. It activates on every Nexter Blocks element once a Pro plan is active, with no additional plugin required.
Step 2: Enable on-scroll animation on a block
Add any Nexter Blocks element to your page and select it. In the Block Settings panel on the right, navigate to Advanced tab > On Scroll Animation.
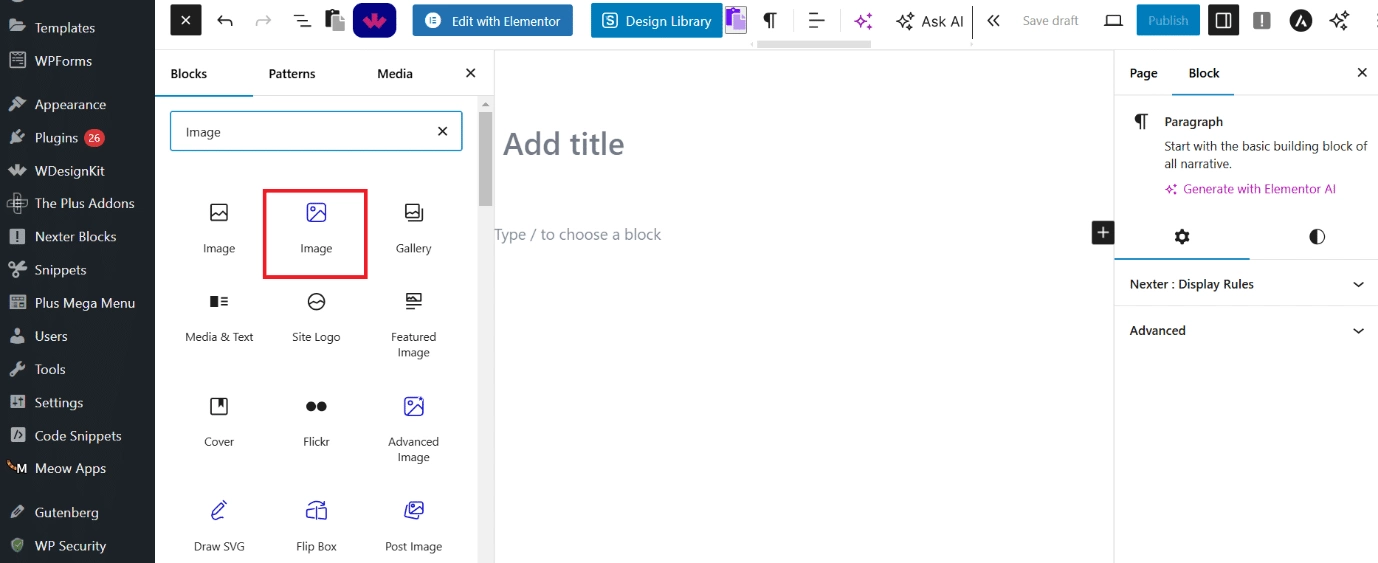
In the Block Settings panel on the right, go to Advanced tab > On Scroll Animation.

Configure an entrance animation under the In tab. Set an exit animation under the Out tab if you want the element to animate as it leaves the viewport.
Step 3: Customize the animation
Use the animation style dropdown to select how the element enters the screen. The Direction setting controls which axis the animation plays on, and you can configure it separately for desktop, tablet, and mobile breakpoints.
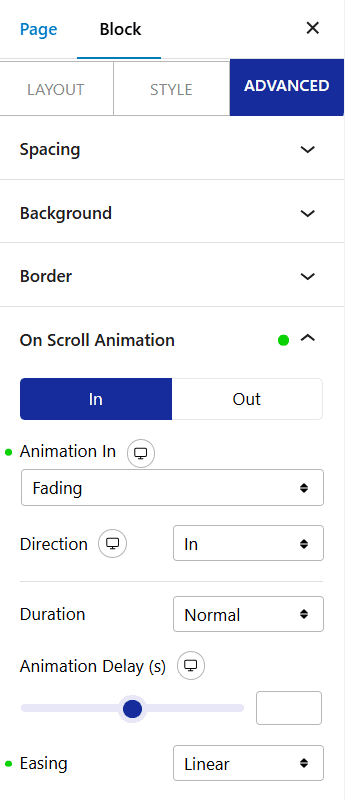
Set the Duration to control how long the animation runs. Add an Animation Delay to create staggered reveals when multiple elements appear on the same page. Choose an Easing curve to fine-tune the motion feel, then click Publish to see the scroll animation live on your site.
Performance tip: Keep your animation duration between 300ms and 700ms. Animations shorter than 300ms feel abrupt and are easy to miss on first scroll. Animations longer than 700ms slow the perceived page speed for users who scroll quickly past the element. For staggered lists, a 100ms delay between each item creates a clean cascade effect without stretching the overall sequence.
Method 2: Using Page Builder or Theme Scroll Animation Settings
Several WordPress themes and page builders include scroll animation controls natively, letting you add effects directly from the builder interface without a separate plugin.
Divi: Open any page in the Divi Visual Builder, select the element you want to animate, click Advanced in the settings panel, find Scroll Effects, and enable your preferred motion settings. Preview in the builder, then save and publish the page.
Elementor Pro: Select any widget or section in the Elementor editor, go to Advanced > Motion Effects, and enable Scrolling Effects. You can apply vertical scroll, horizontal scroll, transparency, blur, rotation, and scale effects tied to scroll position, all without writing code. For a wider animation library in Elementor, The Plus Addons for Elementor adds On Scroll Animation Content controls and Magic Scroll effects across its 120+ widget library.
Most free WordPress themes do not include native scroll animation settings. If your theme lacks this feature, Method 1 using Nexter Blocks adds scroll animations to any Gutenberg block on any theme.
Method 3: Adding CSS Smooth Scroll Animation to WordPress
For users comfortable with a small amount of code, a CSS snippet enables smooth scroll behavior site-wide. This method is most useful for pages that use anchor tag navigation, where clicking an in-page link jumps to a specific section.
Without smooth scroll, clicking an anchor link causes an abrupt jump to the target section. Here is how to make it smooth:
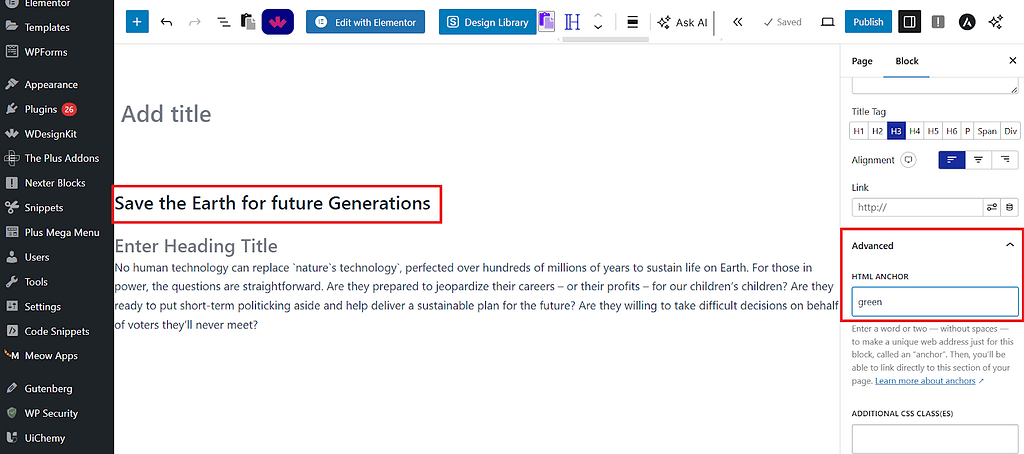
Step 1: Set up anchor tags
Select the heading or section block you want users to jump to. In the Block Settings panel, go to Advanced and fill in the HTML Anchor field with a short, descriptive identifier.
Step 2: Create the anchor link
Select the text you want users to click and add a link. In the link field, type a hashtag followed by your anchor identifier, for example: #section-name. Publish the page.
Step 3: Add smooth scrolling with CSS
Go to Appearance > Customize > Additional CSS in your WordPress dashboard and paste this snippet:
html {
  scroll-behavior: smooth;
}
Save the changes. Clicking any anchor link on your site now scrolls smoothly to the target section instead of jumping abruptly.
Compatibility note: If your theme uses a JavaScript-based scroll handler, scroll-behavior: smooth can conflict with it and cause stuttering or double-scroll on anchor clicks. Test this snippet on a staging site before adding it to production. If you observe a conflict, check whether your theme or page builder offers a built-in smooth scroll toggle and use that instead of the CSS approach.
Organize your blog page scroll for a seamless user experience. Pagination vs Infinite Scroll: Which One to Use for Blog Posts?
Scroll Animation Best Practices for WordPress Sites
The most effective scroll animations support the content rather than compete with it. Here are three well-known sites using scroll effects to serve a clear narrative purpose, followed by best practices you can apply to your own WordPress site:
1. Apple iPhone
Apple’s iPhone page uses parallax and fade-in animations to reveal product features as users scroll. Text and images enter the viewport exactly as the reader reaches each product point, creating a guided, story-driven experience that keeps visitors engaged from top to bottom.
2. Kubrick Life
The Kubrick Life site uses horizontal scrolling and scroll-triggered image transitions to walk visitors through Stanley Kubrick’s career timeline. The animations feel cinematic and intentional, turning a static archive into an immersive, interactive exploration.
3. NASAProspect
NASA’s Prospect project uses scroll-triggered 3D animations to simulate space exploration, letting users interact with spacecraft models as they scroll. It shows how complex animations can serve a clear narrative purpose without overwhelming the experience.
Apply these best practices when adding scroll animations to your WordPress site:
- Prioritize performance: Use CSS-based animations and the Intersection Observer API instead of heavy JavaScript libraries. After adding effects, run a PageSpeed Insights test to confirm your Core Web Vitals scores stay intact. Nexter Blocks uses the Intersection Observer API by default, so you stay within safe performance boundaries automatically.
- Keep it selective: Apply motion to key elements only, such as section headers, feature callouts, or CTAs. Animating every block dilutes the effect and creates visual noise that works against the user experience.
- Animate transform and opacity only: Animating properties like
width,height,top, orlefttriggers a layout recalculation on every animation frame, which can drop below 60fps on lower-end devices. Stick totransformandopacity, which the GPU composites without touching the layout engine. - Respect reduced motion preferences: Some visitors disable motion for medical or sensory reasons. Honor the
prefers-reduced-motionCSS media query in your styles so animations do not interfere with accessibility needs. - Test on real devices: Scroll animations can behave differently on low-end hardware. Test on physical mobile devices before publishing to catch timing or rendering issues that browser simulators may not show.
Making Scroll Animations Accessible
Users who experience vestibular disorders, motion sensitivity, or photosensitivity can configure their operating system to request reduced motion. WordPress animations should respect this setting automatically. Add the following CSS to your theme’s Additional CSS or via the Nexter Extension Code Snippets Manager (Pro) to disable animations for users who have enabled reduced motion in their OS settings:
@media (prefers-reduced-motion: reduce) {
  *,
  *::before,
  *::after {
    animation-duration: 0.01ms !important;
    animation-iteration-count: 1 !important;
    transition-duration: 0.01ms !important;
    scroll-behavior: auto !important;
  }
}
This snippet keeps your animated design intact for the majority of visitors while presenting a fully visible, static layout to those who have requested reduced motion. To verify it works, open Chrome DevTools, go to Rendering, and enable “Emulate CSS media feature prefers-reduced-motion” before testing each animated section.
Take your animations further with JSON-powered motion graphics. Know What is JSON Lottie Animation and How to Use It.
Which WordPress Scroll Animation Method Is Right for You?
The best choice depends on your page builder, theme, and how much per-block control you need over each animation:
| Method | Best For | Skill Level | Plugin Required |
|---|---|---|---|
| Method 1: Plugin (Nexter Blocks) | Any WordPress site, any Gutenberg block | Beginner | Yes (free tier available) |
| Method 2: Page builder or theme settings | Divi or Elementor Pro users | Beginner | No (if already using Divi or Elementor Pro) |
| Method 3: Custom CSS | Smooth anchor link navigation only | Basic CSS | No |
For most WordPress sites, Method 1 delivers the widest range of animation types with per-block control over timing, direction, easing, and device breakpoints. Method 3 is the right choice for smooth anchor navigation only. Method 2 is the fastest route if you already build with Divi or Elementor Pro and want animations without adding another plugin. If you need ready-made animated page designs to get started quickly, WDesignKit offers 1,000+ starter templates for Gutenberg, Elementor, and Bricks.
Stay updated with Helpful WordPress Tips, Insider Insights, and Exclusive Updates – Subscribe now to keep up with Everything Happening on WordPress!
Wrapping Up
Scroll animations in WordPress improve engagement, visual design, and how visitors experience your content. A block plugin gives the most per-block control without any code, built-in builder settings are the fastest route for Divi and Elementor Pro users, and a CSS snippet handles smooth anchor navigation in under a minute. For all three methods, animate only transform and opacity properties and add the prefers-reduced-motion media query to keep your site fast and accessible.
Nexter Blocks gives you 90+ Gutenberg blocks with built-in On Scroll Content Animations on every block. Control entrance effects, exit animations, direction, duration, delay, and easing from one panel in the block editor, with no additional plugins needed. Plans start at $39/year for a single site, and a free version is available on WordPress.org. See full Nexter pricing.
For Elementor-based sites, The Plus Addons for Elementor includes scroll effect controls across its 120+ widget library.
Get Exclusive WordPress Tips, Tricks and Resources Delivered Straight to Your Inbox!
Subscribe to stay updated with everything happening on WordPress.